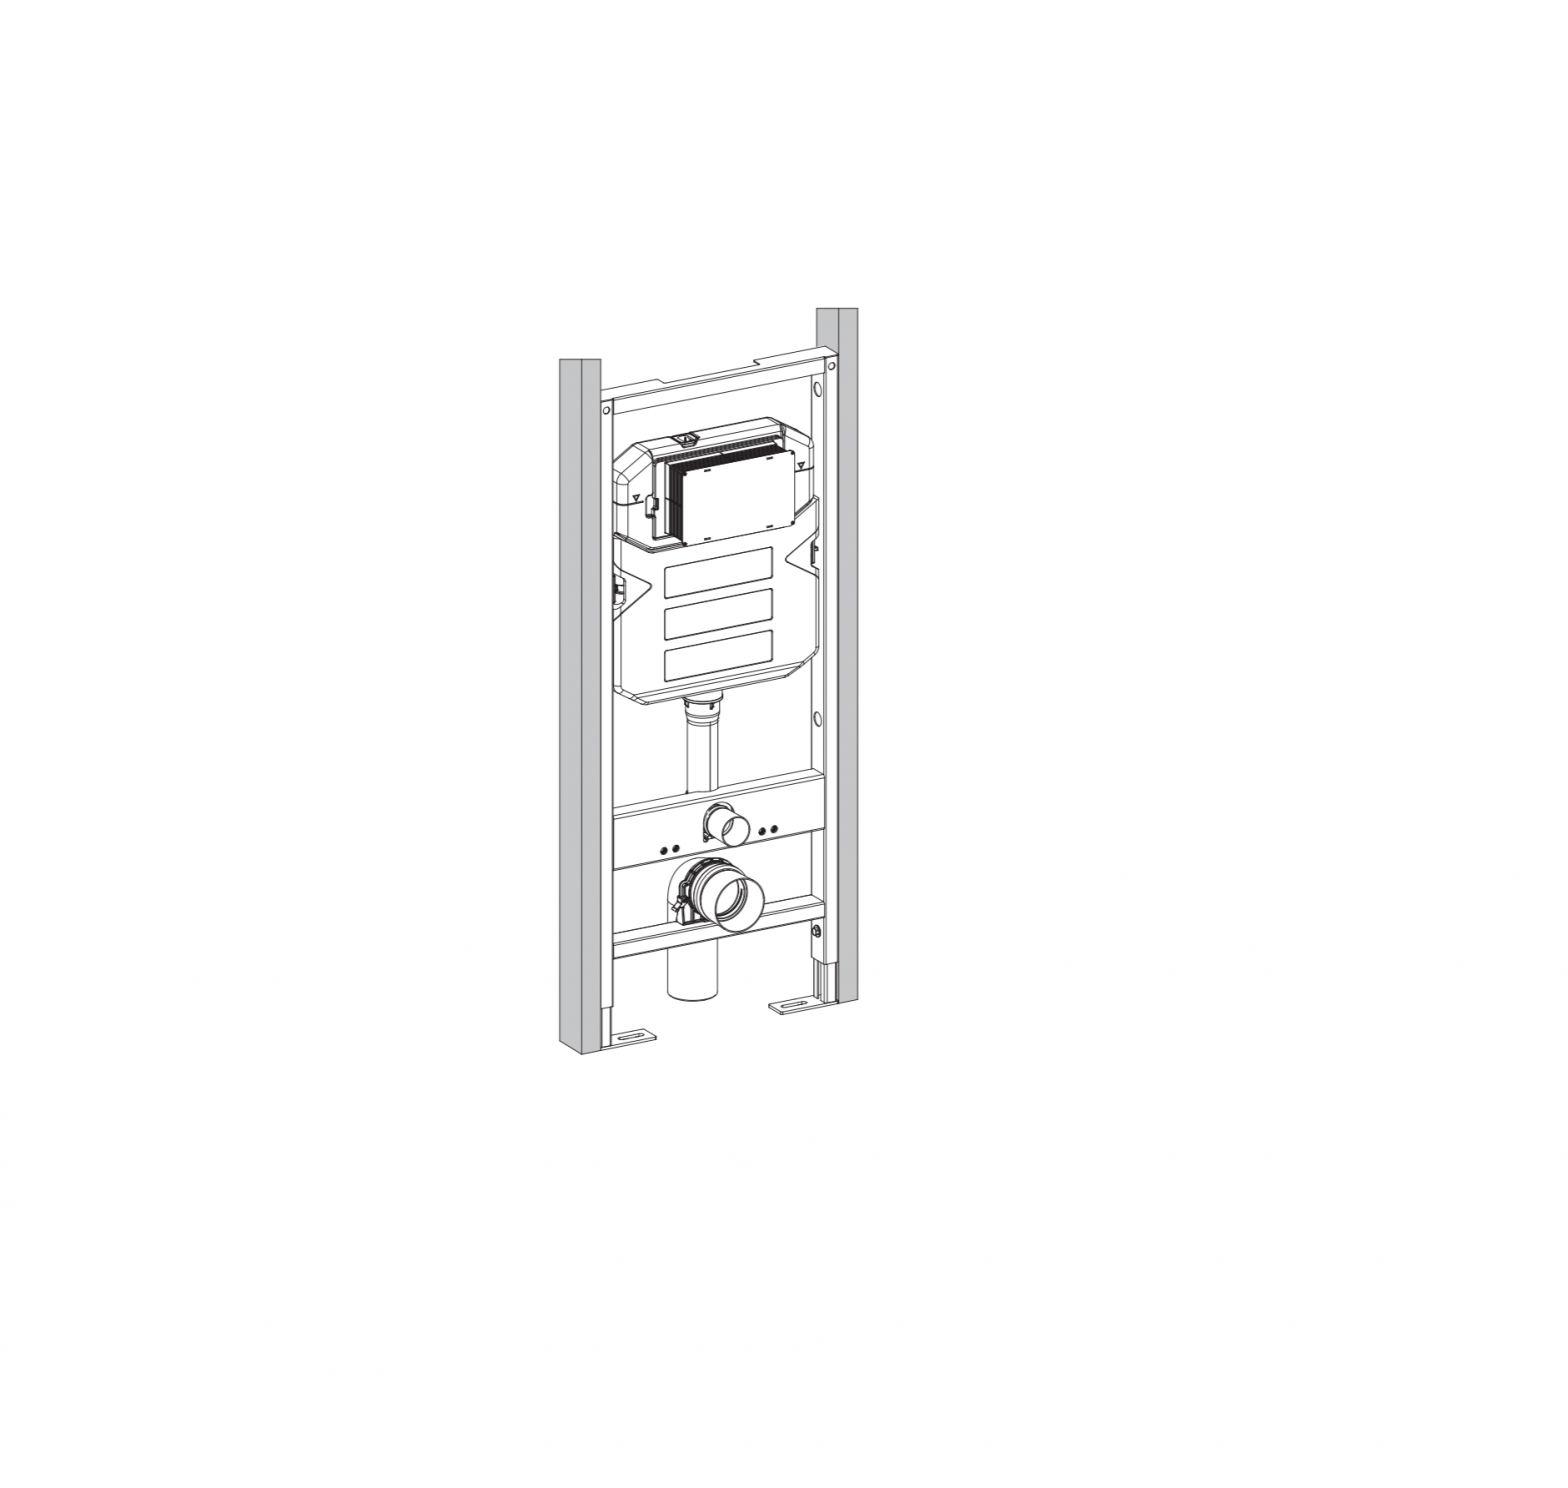
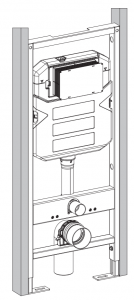
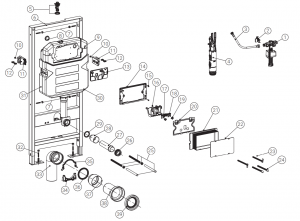
Swiss Madison SM-WC426 Wall Hung Carrier System
PRIOR TO INSTALLATION
- Inspect carrier to ensure no damages have occurred while in shipping.
- Observe all plumbing and building codes in accordance with your state and local requirements.
- All dimensions are nominal! Be sure to measure your toilet prior to installation.
- The step-by-step guidelines in the installation instructions are a general reference. Should there be any discrepancies, Swiss Madison cannot be held liable. It is recommended to install all Swiss Madison products by hiring a licensed professional.
- Read installation and maintenance instructions thoroughly before installing. Be sure to use proper tools and always wear proper personal safety accessories for your protection.
- Be sure to properly bleed all air from the piping system, trapped air can cause damage to the flushing system and toilet bowl.
- Additional floor and wall preparations may be necessary to avoid damage to the product· Swiss Madison recommends using a cement board or tile backer board for the wallboard backing, avoid gypsum board as it may compromise the load strength of the toilet installation.
If you have any questions or concerns please contact us:1-434-623-4766[email protected]
SUGGESTED TOOLS & MATERIALS
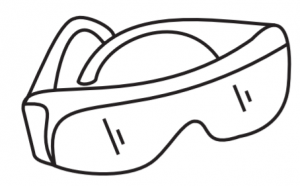
Safety Glasses |
Plumbers Grease |
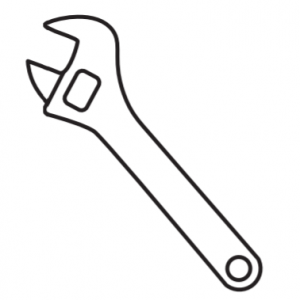
Wrench |

Hacksaw |
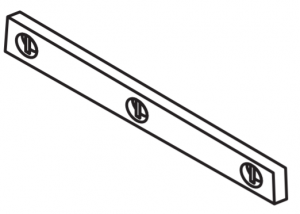
Level |
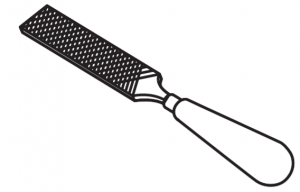
Flat File |

Tape Measure |
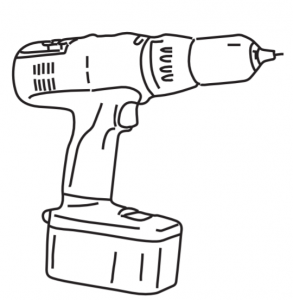
Drill |
NSTALLATION INSTRUCTIONS
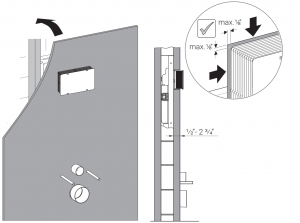
Attach Legs
- Attach legs to framing.
- Adjust bowl height as desired.
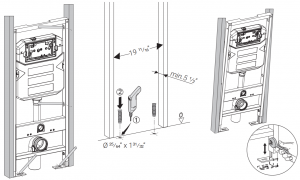
Fasten Mounts
- After adjusting bowl height, fasten four mounts (A).
- Screw carrier to wood framing flush across the front. NOTE: It is recommended to use 2 1/2” screws and 1 1/4” fender washers (4 of each total).
- Ensure frame is flush and level before fastening

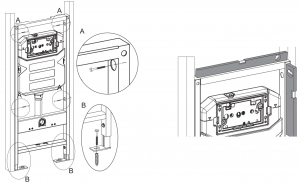
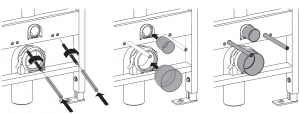
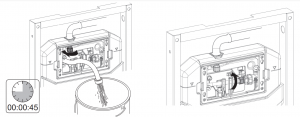
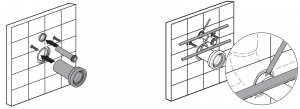
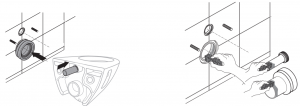
Connect Discharge Pipe
- Find the center of the discharge pipe before fastening. Drill a 3 5/8” hole through framing for later installation.
- Once discharge hole is drilled through framing, connect bracket as shown.
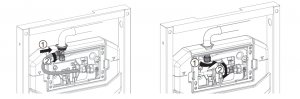
Fasten Mounts
- Tie your mechanical coupling into your existing sanitary line using a 4×3” or 3×3” depending on your installation.
- Thread in threaded bolts, be sure the slotted end is to the outside for later adjustments. Place plastic sleeves over the end of the bolts to protect during installation.
- Place dust covers as shown below.
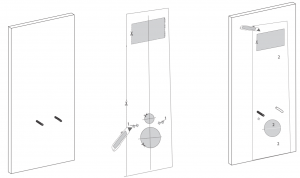
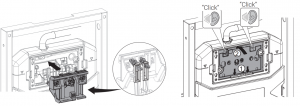
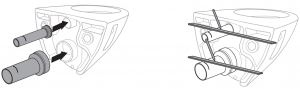
Cut Drywall
- Install dry wall over carrier system in intended location.
- Find included cutout template. Cut out the small marked holes (1) to align cutout with the threaded bolts.
- Align template up on your wall so the threaded bolts fit through the precut holes.NOTE: Ensure cutout is plumb.
- Cut around the marked lines (2) to reveal the pipe/actuator locations behind the drywall.
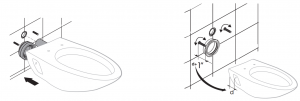
Remove Actuator Cover
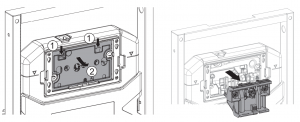
Tighten Water Connection
- Hold shutoff valve stationary while tightening your water connection.
- Install the locking nut as shown below.
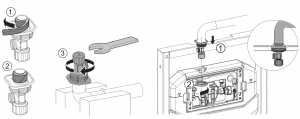
Flush Debris
- Once the water connection is made to the water shutoff valve, undo the other side of the hose.
- Turn on the valve to flush out any debris before re-installing to the actuator.
Reconnect Waterline and Actuator
- Once flushed, reconnect the waterline and actuator.
Secure Roughing Box
- Ensure roughing box is secure to keep any debris from entering the tank.
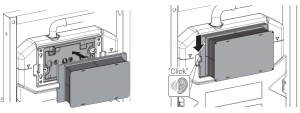
Install Wall Materials
- Trim roughing box after installing wall materials.
Toilet Installation
Fit Pipes
- Install pipes and make sure they are thoroughly inserted.
- With a ruler, mark a line on the pipe where it meets the finished wall.
- Remove from wall and install pipes in the back of the toilet and make sure they are thoroughly inserted.
- With a ruler, mark a line on the pipe where it meets the back of the bowl.
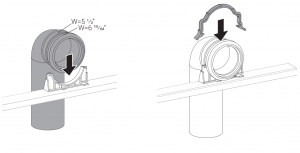
Cut Pipes
- Measure the distance between both marked lines on pipe.
- Cut pipes as shown below.
- After cutting, take a file and remove all burrs. Try and bevel pipe edge.
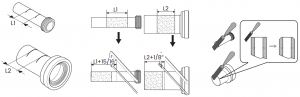
Mount Bow
- With grease sponge, thoroughly lubricate all ends.
- Before mounting, measure thickness of china and mounting hardware to get approximate depth of threaded rods.
- Use slotted end of thread bolt to adjust in or out. Do not damage the thread.
- Install with mounting hardware and ensure toilet bowl is level.

ONE YEAR LIMITED WARRANTY
Swiss Madison® products are made with quality materials and excellent craftsmanship to provide our customers with beautiful, durable, long-lasting products. Should there be any defects in materials or craftsmanship under regular use that are discovered within the first year of installation, Swiss Madison® will provide replacement parts at no charge, or at its discretion, replace any product or part of the product that is deemed defective, under normal installation, use, service or maintenance. This warranty applies only to the original purchaser. Proof of purchase will be required in the instance of a claim.
Swiss Madison® recommends all installations of Swiss Madison® products to be conducted by a licensed, professional plumber or contractor. Swiss Madison® will not be held responsible for any damage or product failure due to improper installation, misuse, or failure to utilize a licensed professional for installation. Swiss Madison® is not responsible for any installation or removal costs.
This One Year Limited Warranty Will Be Voided If:
- The installation recommendations were not followed by the installer
- The product has been moved from its initial place of installation
- The product has in any way been modified from its packaged state
- The product has been subjected to improper maintenance, abuse, misuse, excessive use of chemicals, accidents, or other damages, etc.
Swiss Madison® makes no implication that its products comply with any local building or plumbing codes. It is the consumer’s responsibility and obligation to determine local code compliance prior to and during installation. This warranty extends only to the original purchaser and first consumer.
Swiss Madison® is not responsible for any special, incidental or consequential damages associated with the installation, replacement, return or use of the original purchaser’s product. This includes, but is not limited to: freight costs, labor, travel time, lost profit, home damages and other contingent liabilities and costs (including, without limitation, costs associated with ‘professionals’ or ‘experts’, investigations, audits, analyses, attorneys and any other professional/hired services).
The Swiss Madison® warranty is a comprehensive and explicit limit of liability. All items not disclosed within the warranty are not addressable within the responsibility of Swiss Madison®. Certain states have variances regarding implied warranties; in those situations, we remain fully compliant.
If you have any questions or concerns, please contact us directly at 1-434-MADISON (623-4766)
![]() WARNING: Contents of your order may contain sharp and possibly other harmful pieces and may cause hazard to children and adults. Swiss Madison® is not responsible in any way for personal damages.
WARNING: Contents of your order may contain sharp and possibly other harmful pieces and may cause hazard to children and adults. Swiss Madison® is not responsible in any way for personal damages.

References
[xyz-ips snippet=”download-snippet”]