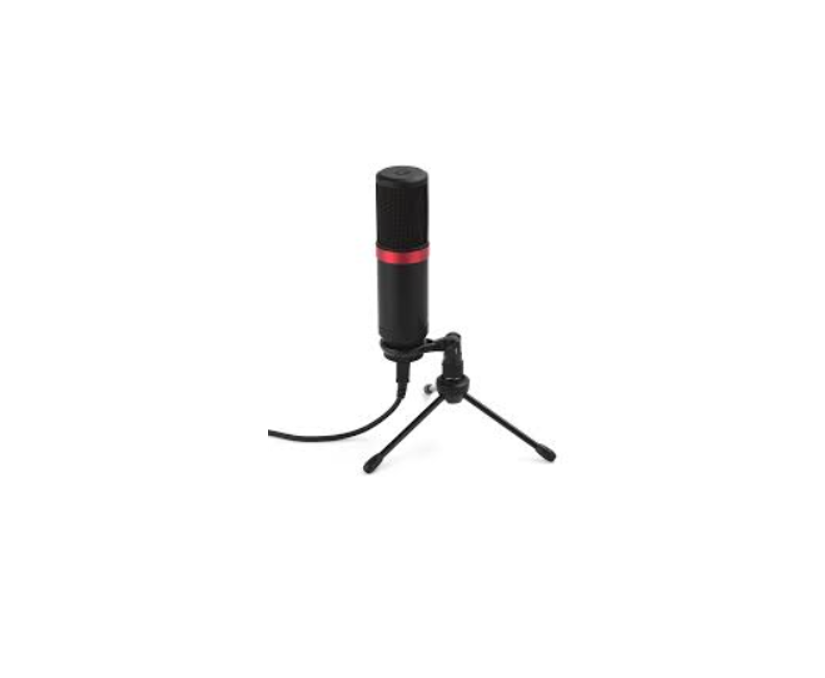
SYDNEY Stadium Microphone User Guide

Preliminary setup with Mac OS X
- Plug the free end of the provided USB cable into the USB port on your computer. Your computer will automatically recognize the USB device.
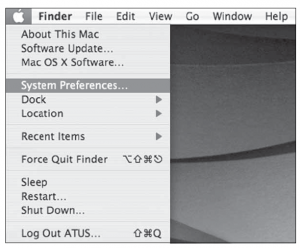
- To select the SYDNEY as your audio input, first open your System PreferencesNOTE: Many recording software programs are available online. Audacity is widely used free software for recording and editing sounds. It is availableonline at http://sourceforge.net
Preliminary setup with Mac OS X
- Next, click Sound to display the Sound Preference panel
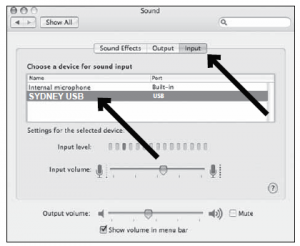
- Click the input tab and select the SYDNEY USB as the device for sound input.Your preferences are now set to use the SYDNEY on your Mac with GarageBand or another recording program of your choice.
 NOTE: Many recording software programs are available online. Audacity is widely used free software for recording and editing sounds. It is availableonline at http://sourceforge.net
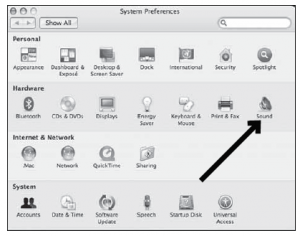
 Your preferences are now set to use the SYDNEY on your Mac with GarageBand or another recording program of your choice.
Preliminary setup with Windows XP
- Plug the free end of the provided USB cable into the USB port on your computer. Your computer will automatically recognize the USB device.
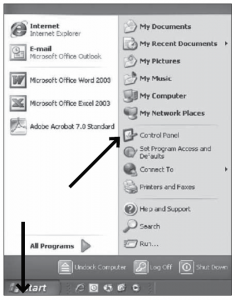
- To select the SYDNEY USB as your default recording device, begin at your START menu.
- Select Control Panel.
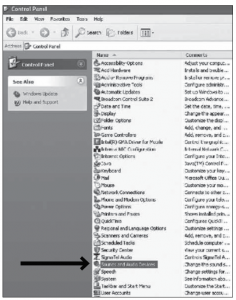
- Select Sounds and Audio Devices.
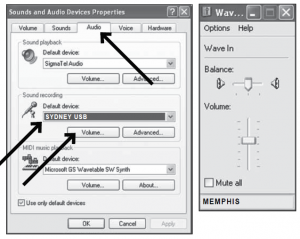
- Select the Audio tab, and choose SYDNEY USB as the default device.
- Adjust computer volume by clicking on the Volume button beneath Sound recording Default device.
- Through the Wave In window, you can set the computer volume or mute the microphone.
- Your preferences are now set to use the SYDNEY with Windows XP with the recording program of your choice.
Preliminary setup with Windows Vista
- Plug the free end of the USB cable into the USB port on your computer. Your computer will automatically recognize the USB device.
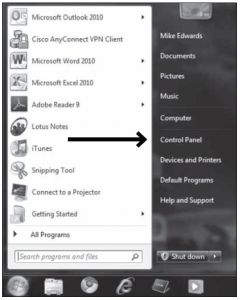
- To select the SYDNEY USB as your default recording device, begin at your START menu. Select Control Panel
- Select (double-click) Sound
- Select the Recording tab. Make sure that the SYDNEY USB microphone is set as the default recording device. (You should see a green check markbeside the USB microphone icon.)

Preliminary setup with Windows 7/10
- Plug the free end of the USB cable into the USB port on your computer. Your computer will automatically recognize the USB device.
- START menu > Control Panel > Sound To select the SYDNEY USB as your default recording device, begin at your START menu. Select Control Panel
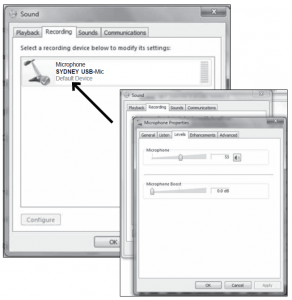
- Select Sound
- The following screen will pop up
- Select the Recording tab, and choose SYDNEY USB as the default device.
- Double click on the SYDNEY USB icon to open the Microphone Properties window. Select the levels tab to adjust microphone level (loudness). You mayneed to come back to this window to readjust the level after you begin recording.


Your preferences are now set to use the SYDNEY with Windows 7/10 with the recording program of your choice.
Additional Information
Muting output
To activate mute output press the mute button on top of the microphone. This will illuminate when active. Press again to deactivate. Setting your software levelsCorrect adjustment of microphone level is important for optimum performance. Ideally, the microphone level should be as high as possible without overloading the input of your computer. If you hear distortion, or if your recording program shows levels that are consistently overloaded (at peak levels), turn the microphone volume (or level) down, either through your control panel (or system preferences) settings, or through your recording software. If your recording program shows insufficient level, you can increase the microphone gain either from the control panel (or system preferences) settings or through your recording program. Positioning your microphone It is important to position the microphone directly in line (on axis) with the person speaking/singing or instrument (or other sound source) to achieve the best frequency response of the microphone. This requires the user to speak into the microphone with the STADIUM logo positioned towards the mouth. As this microphone is directional. The distance from the mouth should be about 1 inch, or 10 – 40mm for optimal recording. For use in speaking/singingapplications, the ideal placement for the microphone is directly in front of the person speaking/singing The same placement is optimal when miking an instrument such as an acoustic guitar, drums or piano. Experiment with different mic placements to find the best sound for your particular setup.
Specifications
Power supply: Computer USB powerDirection: CardioidFrequency range: 30-18.000HzMax SPL: 94dBSampling rate: 16 bit, 48kHzSensitivity: -36dB +/- 2dB(0dB=1V/Pa at 1KHz)S/N Ratio: 74dBMic Gain: −16dB (45dB Max)Power Output: USB Powered, 100 mA
Features:
- High sensitivity, low noise and wide dynamic range
- Cardioid pickup to reduce unwanted noise
- Durable metal body and mesh grill
- Powered by USB type B cable
- Mute button
- Windows and Mac compatible, no drivers needed
System Requirements:
Macintosh: Mac OS X; USB 1.0 or 2.0; 64 MB RAM (minimum); Windows: XP/Vista/Windows 7; USB 1.0 or 2.0; 64 MB RAM (minimum)† Specifications are subject to change without notice.
Inclusions:
1 x USB Microphone1 x Tripod folding desk stand1 x USB cable length: 1.8M1 x Microphone sock
Technical Assistance:
If you need assistance setting up or using your Stadium product now or in the future, call Stadium support AustraliaTEL: 03 – 8587 8898 FAX: 03 – 8587 8866 Mon-Fri 9am – 5pm AESTThis manual is considered correct at time of printing but is subject to change.For latest manuals and updates refer to the website.Copyright © 2017 by TDJ Australia
Scan QR code for more products in the STADIUM range
 stadiumsound.com.au
Read More About This Manual & Download PDF:
References
[xyz-ips snippet=”download-snippet”]