Sygonix SY-RS-200 Smart Wi-Fi Socket

Introduction
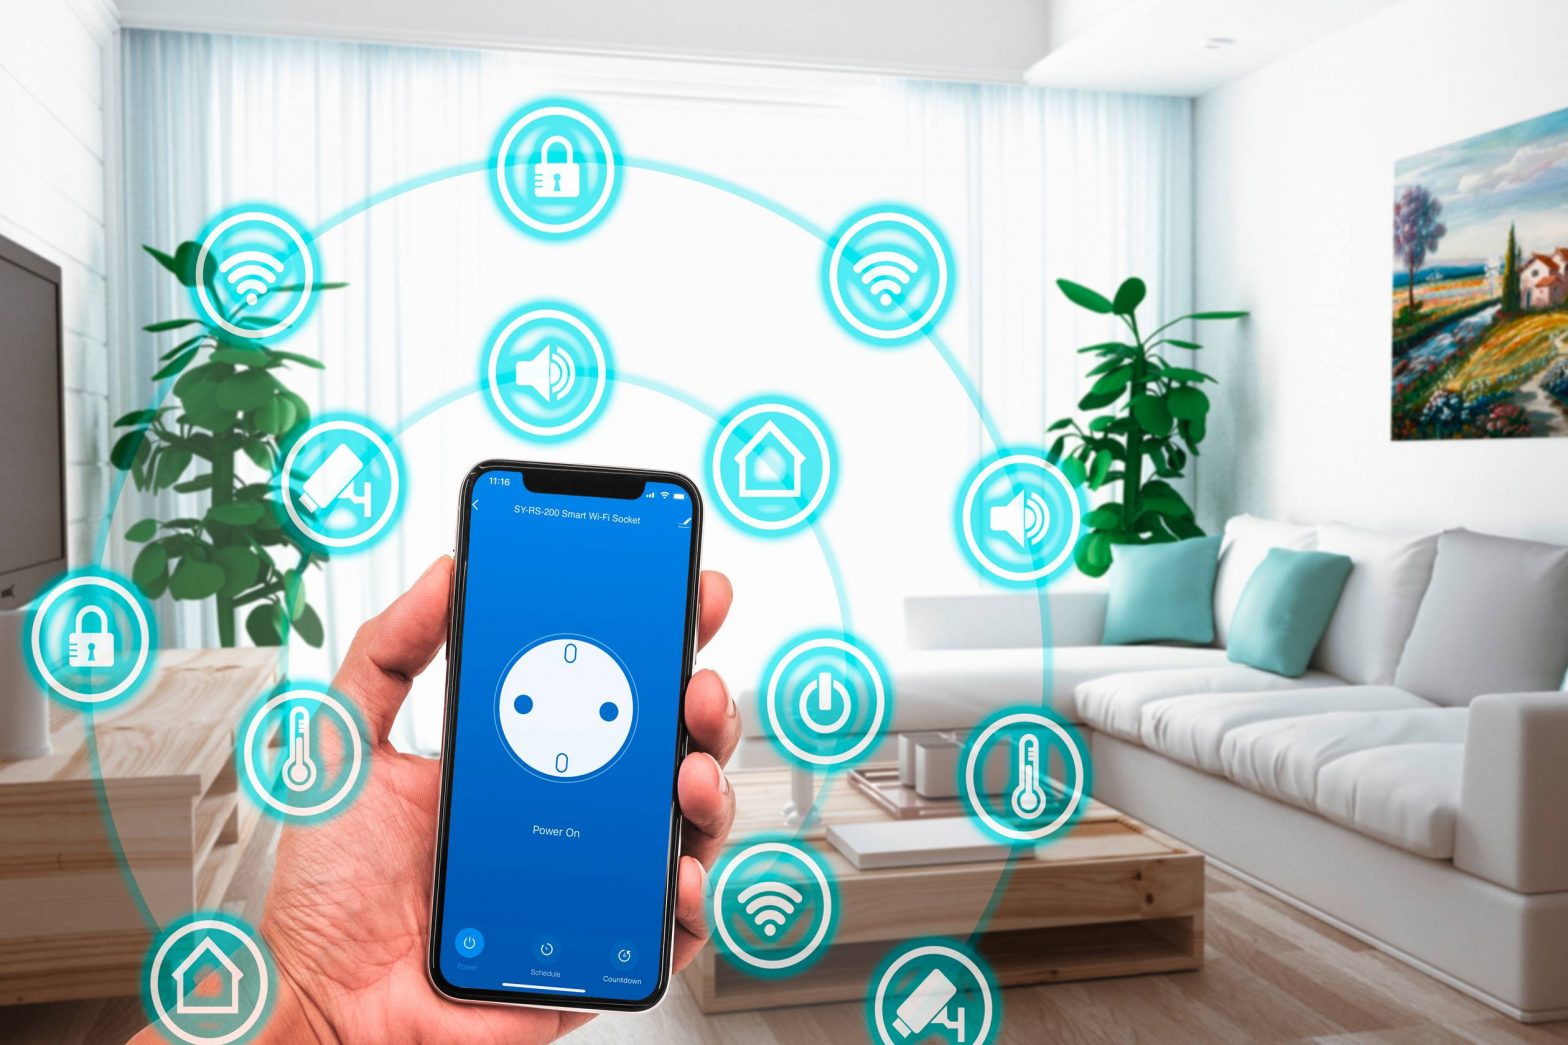
The connected device works through a Wi-Fi network together with the “Smart Life – Smart Living” app. This mobile app allows you to control, manage, and receive alerts on devices connected to your network.
Conrad Connect
Your product is compatible with the Conrad Connect IoT platform and is powered by Tuya. Device integration with Conrad Connect requires a Conrad Connect Account. You can set up an account at the following URL: www.conradconnect.com
Legal Notice
This is a publication by Conrad Electronic SE, Klaus-Conrad-Str. 1, D-92240 Hirschau (www.conrad.com).All rights including translation reserved. Reproduction by any method, e.g. photocopy, microfilming, or the capture in electronic data processing systems require the prior written approval by the editor. Reprinting, also in part, is prohibited. This publication represents the technical status at the time of printing.Copyright 2020 by Conrad Electronic SE.
Requirements
SecurityIt is strongly recommended that you set up your Wi-Fi Router/Wi-Fi Access Point (AP) to use the most secure encryption option it supports.
App to Device Connection
- To add a new device to the app, the mobile device that runs the app and the smart device must be connected to the same Wi-Fi network.
- You can control the smart device through the app via Wi-Fi or using mobile device data.
- Remind yourself of the possible dangers the device you intend to connect can pose to your environment.
- Read the instruction manual that came with the product you are going to connect to the smart device to find out if it is suitable to be operated without attendance.
- If it is not, then do not use it in conjuction with timer and schedules.
- A heater can cause fire if left unattended!
- A kettle that contains no water may cause fire!
- A coffee maker may overheat if not turned off on time and cause fire!
Mobile App
Please note that the following instructions may change for future app versions.
Getting StartedFirst time users should follow these steps:
- Download and Install the App.
- Create a User Account.
- Log In.
- Add Device.
Download and Install the App
Apps are available for Android and iOS mobile devices.Visit the respective app store and search for “Smart Life – Smart Living”, or scan the QR code shown here.
Make sure your mobile device satisfies the minimum requirements as outlined on the app store download page.
User Account
Your account settings are stored in the cloud.
Create a User Account
A user account is required for you to operate the device.
- Select Register to create an account.
- Log In.
- You will then be taken to the “Home Page”.
Home Page
The home page lists all devices that are under your account’s control. When you log in for the first time, the device list will be blank.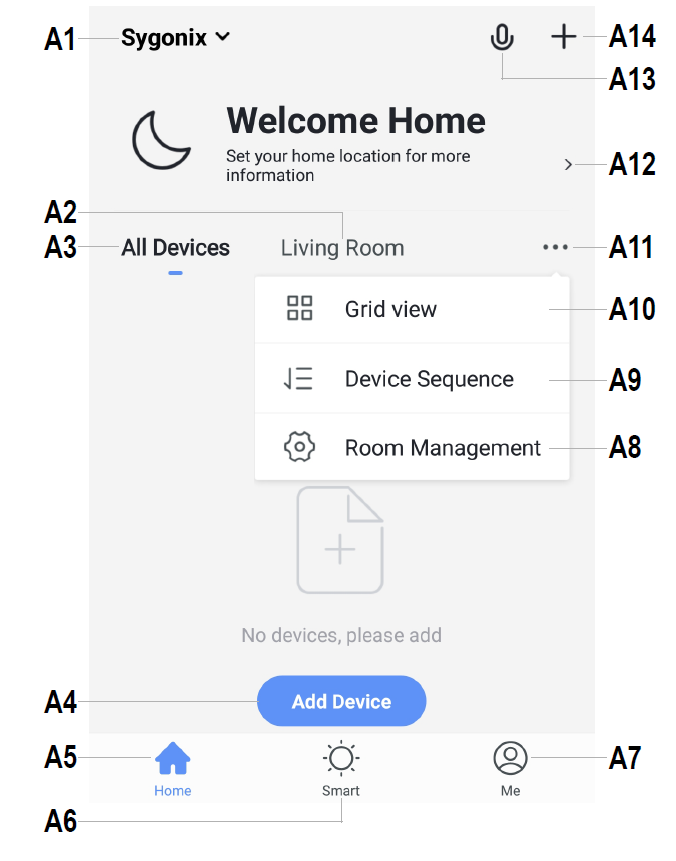
- A1 Access to “Home Management” settings, where you can name a home, set the home location on a map, and assign/add new devices to each room.
- A2 Enter a room to view or add devices.
- A3 View all devices at once.
- A4 Adds a new device; identical with A14
- A5 Return to “Home Page” view
- A6 Access “Tap-to-Run” and “Automation”.
- A7 Access your profile and settings.
- A8 Manage your rooms and assigned devices.
- A9 Remove one or all devices.
- A10 Switch between list and grid view,
- A11 Access submenus, see items A8, A9 and A10
- A12 Displays location information such as current temperature, humidity, air pressure and wind speed.
- A13 Voice control.
- A14 Adds a new device; identical with A4
Add Device
Familiarize yourself with the product before setting it up. Refer to the product operating instructions for further information.
- Connect your mobile device to a Wi-Fi network.
- Add a device by selecting Add Device or the icon.
- Select Electrician → Socket (Wi-Fi).
- Follow the onscreen instructions to complete the setup process.
Overview
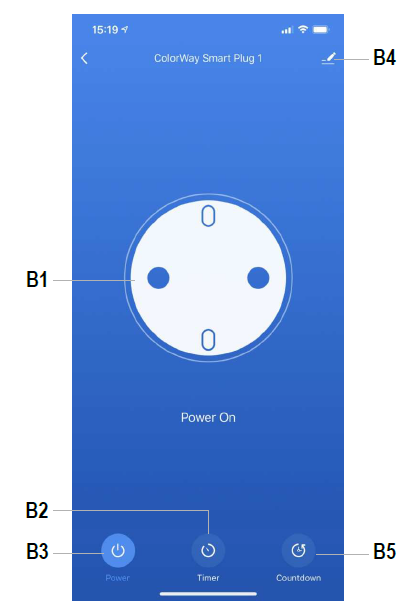
- B1 Socket On/Off
- B2 Timer
- B3 Socket On/Off
- B4 Settings
- B5 Countdown
Settings
Change Device Name
- From the “overview” screen select … > .
- Enter a new device name.
Connect with Amazon Alexa or Google Assistant
- From the “overview”
- Select an option under “Third-party- Control”.
- Follow the onscreen instructions to complete the setup process.
Device SharingTo share access to a device e.g. with a family member:
- From the “Overview” screen select > Share Device.
- Follow the onscreen instructions
Troubleshooting
App cannot connect to deviceThis may be due to a weak Wi-Fi signal or an interrupted connection.
- Check that your internet connection is working correctly. Check cables, routers and connections. Restart network devices if necessary.
- Check that the device is within range of your Wi-Fi access point. Use of other 2.4 GHz products e.g. wireless networks and microwave ovens may cause interference.
- You may need to set up a wireless repeater to improve the connection.
- If the device is battery powered, it may need to have the batteries replaced.
Resetting the deviceResetting a device may help resolve erratic behavior such as connection problems.
- Insert the included reset pin into the reset hole.
- Press down until you feel a “click” then hold 4-5 seconds until you hear an audio prompt.
- If needed, repeat steps to “Add device”.

References
[xyz-ips snippet=”download-snippet”]