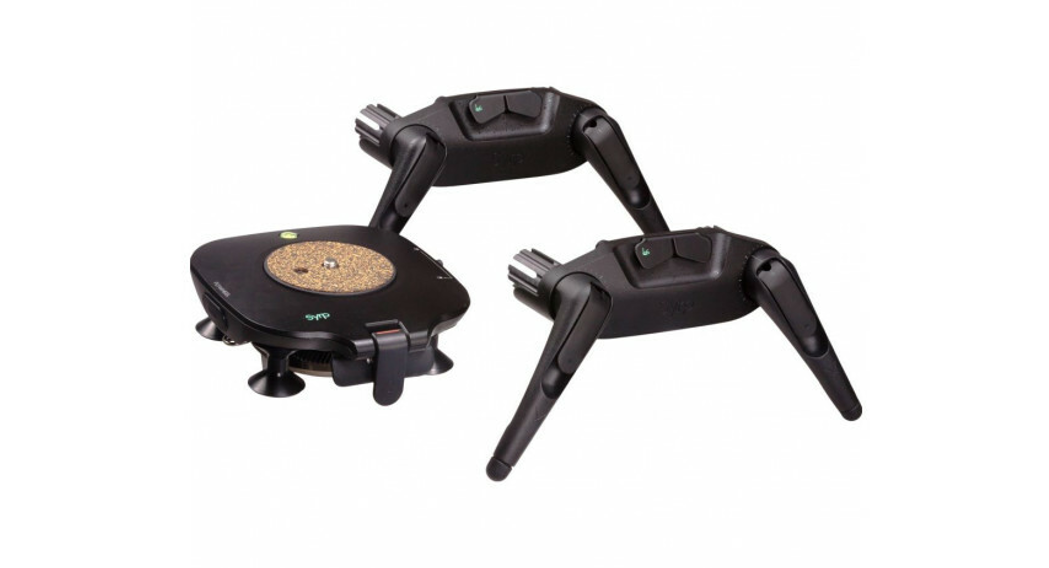
Setup Guide
Before you start filming, there are a few simple stepsto follow to ensure your Magic Carpet PRO is assembled correctly and you’re sliding smoothly.This guide will walk you through the correct MagicCarpet Pro set up, as well as some helpful tips.Additional resources can be found atsupport.syrp.co.nz
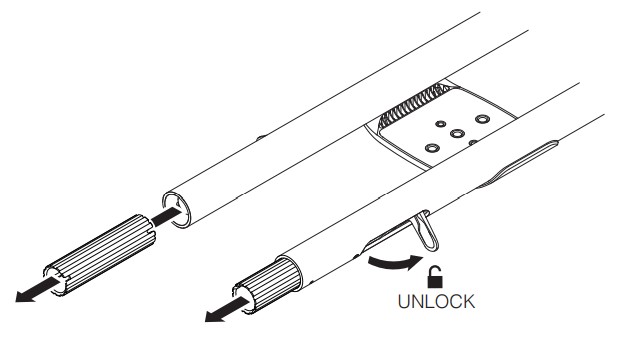
Remove Track Joiners
Lift open both Track Locks and pull out the Track Joiners.The Track Joiners are only required when joining multiple tracks together.
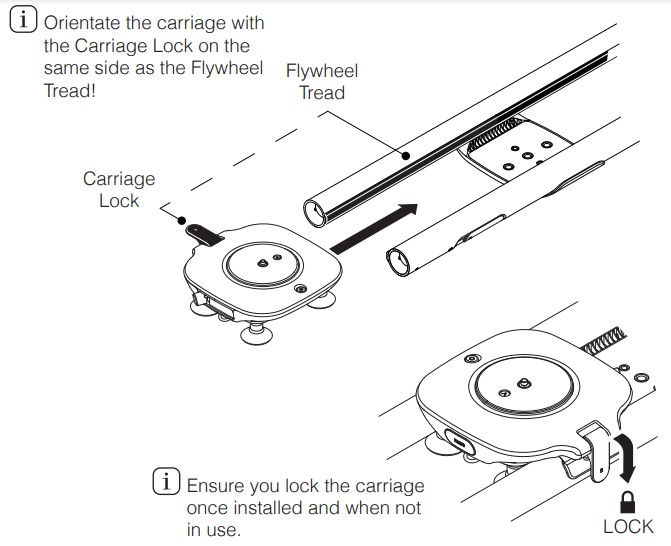
Install the Carriage
Slide the Carriage onto the Track Rails.
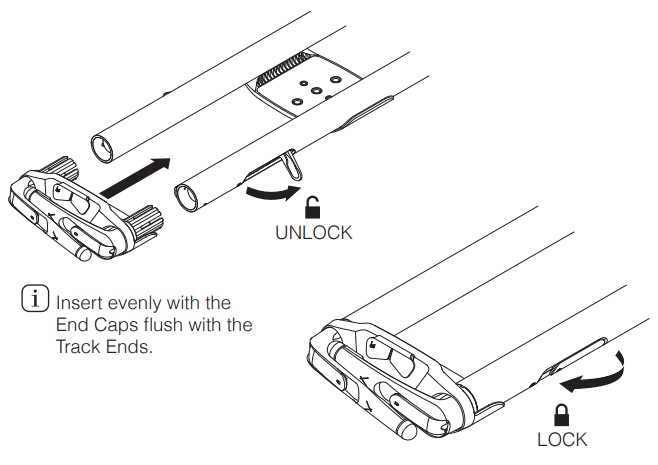
Install the End Caps
Unlock both the Track Locks and insert the End Caps. Close the Track Locks securing the End Caps in place.
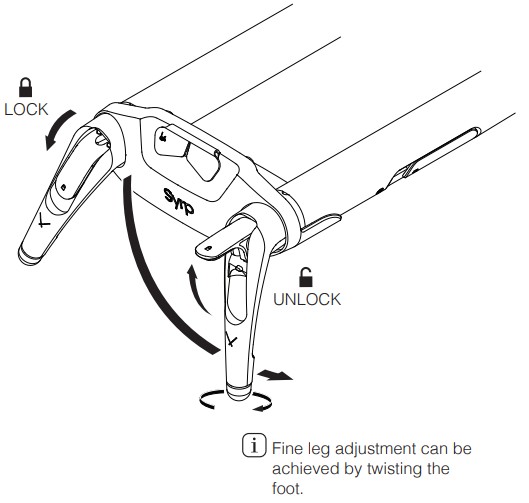
Adjust the Legs
Lift open the Leg Locks to release the legs and set the leg angle.
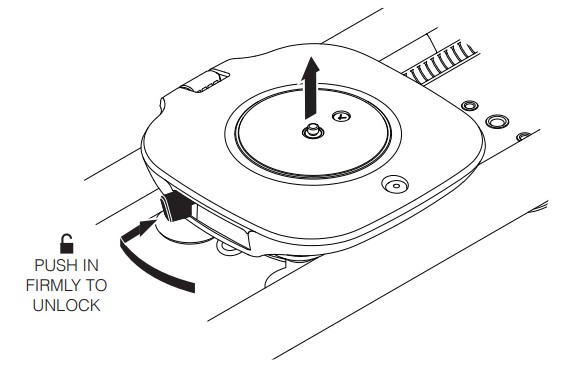
Remove the Quick Release Plate
Slide the Quick Release Lock to unlock and push in while pulling the Plate up to remove.
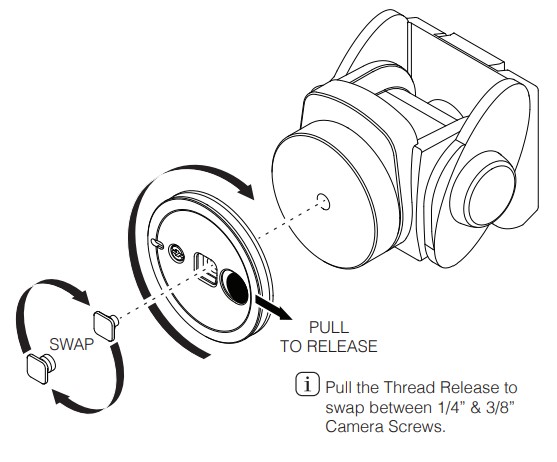
Fasten Quick Release Plate
Screw the Quick Release Plate to your video head.
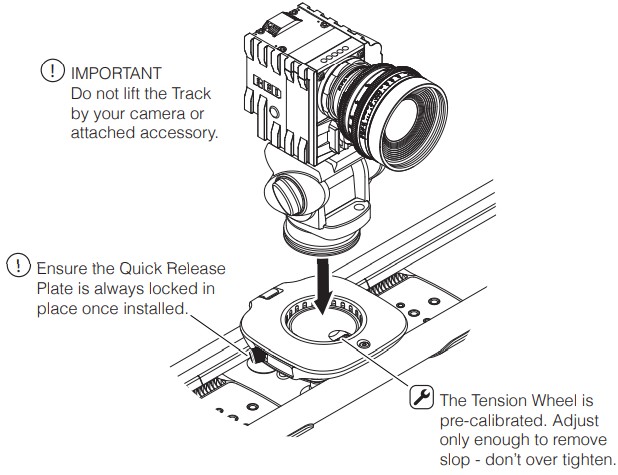
Mount Camera
Push the Quick Release Plate down into the carriage. You will hear a click when it’s flush and engaged. Slide the Quick Release Lock to lock.
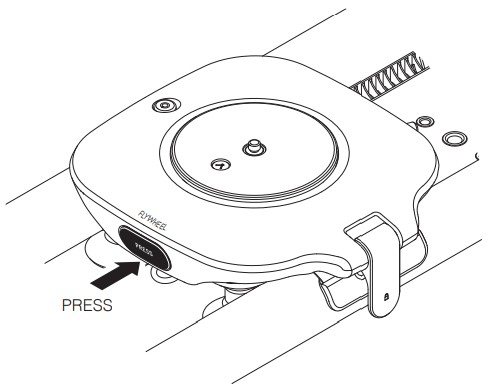
Engage Flywheel
Press the Flywheel button in to engage or release the Flywheel.
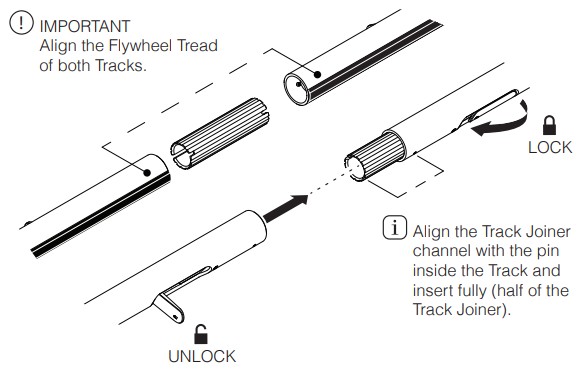
Extend Track Length (optional)
Lift open the Track Locks and insert the Track Joiners. Close the Track Locks.Open the Track Locks on the additional Track and insert over the Joiners. Close the Track Locks.
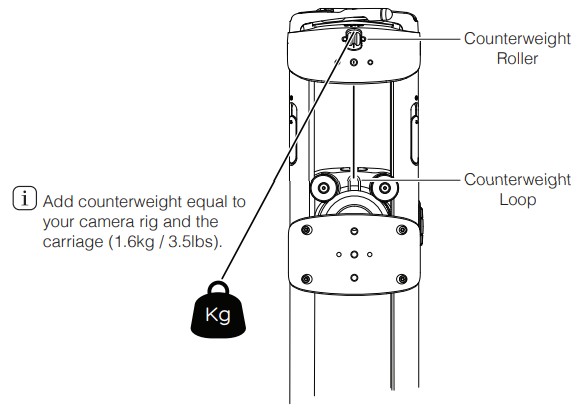
Counter Weight Camera (optional)
Tie a counterweight rope to the Counterweight Loop and thread it over the green Counterweight Roller. Tie the end to a counterweight.
CARE AND MAINTENANCE
![]() To maintain optimal smooth movement regularly wipe the Carriage Wheels and Track clean with a soft cloth to remove dirt.
To maintain optimal smooth movement regularly wipe the Carriage Wheels and Track clean with a soft cloth to remove dirt.
![]()
![]()
![]()
WARNINGS![]()
![]()
![]()
![]()
![]()
![]()
![]()
![]()
![]()
![]()
![]()
![]()
References
[xyz-ips snippet=”download-snippet”]

