
![]()
MOUNTING INSTRUCTIONS
ABSORBER RECTAGON
These instructions are for the following products: Rectagon
TIP:Prior to installation, it is imperative to check the load capacity and the condition of the wall.
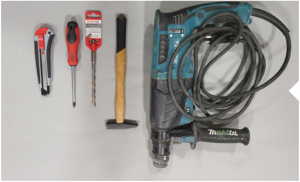
TOOLS
The following tools are needed for installation of the absorber:• Cutter • Drilling machine • Screwdriver• Hammer • Drill attachments
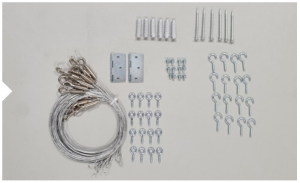
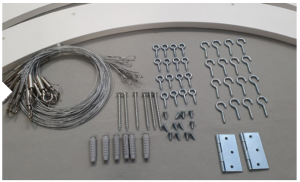
MOUNTING ACCESSORIES
The following mounting accessories are included for installation of the absorber:• 1 × four-piece mounting ring • 2 × hinge• 6 × dowel • 12 × screw M4×10• 6 × screw M4×40 • 16 × screw hook• 8 × foam plate • 16 × screw-in eyelet• 16 × adjustable wire rope

UNBOXING
Open the package carefully! Inserting sharp objects into the package can damage the absorber. Avoid using long, sharp tools for opening the package!
REMOVE PRODUCTS FROM PACKAGING
Carefully remove the products from the package and read the mounting instructions carefully. Remove the four-piece mounting ring, the mounting accessories and the foam plates.
ASSEMBLING MOUNTING RING
Assemble first two parts of the mounting ring using the foldable hinge and six screws M4×10.Assemble in the same way the other two parts of the mounting ring.
DETERMINE POSITION
Place the assembled two-piece mounting ring to the required position and mark the two drilling holes of the first part of the mounting ring.Drill the holes.
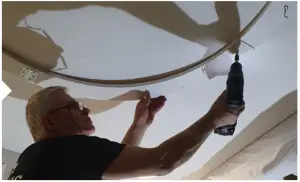
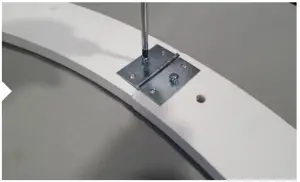
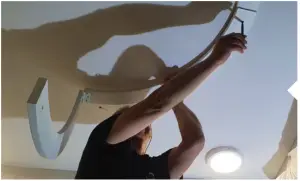
INSERT DOWELS + FASTEN MOUNTING RING
Insert the dowels into the drilled holes and fasten the first part of the mounting ring to the ceiling with two screws M4×40. Fasten the second part of the mounting ring in the same way.
Make sure that the included screws are suitable for the condition of the ceiling.
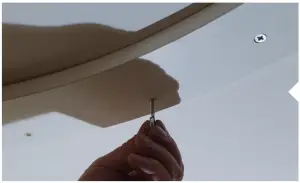
FIX SCREW HOOKS
Screw the 16 screw hooks in the plastic threads of the mounting ring.
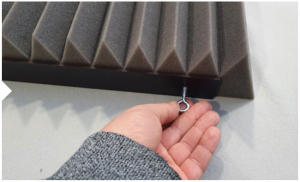
FIX SCREW-IN EYELETS
Screw the screw-in eyelets in the pre-drilled threads of the foam plates (2 eyelets for each plate).
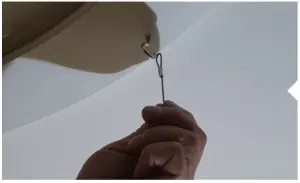
FIX WIRE ROPES TO MOUNTING RING
Insert the eyelets of the adjustable wire ropes into the screw hooks.

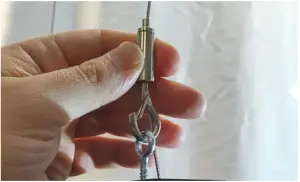
FIX FOAM PLATES TO WIRE ROPES
Insert the hooks of the adjustable wire ropes into the screw-in eyelets of the foam plates.
ADJUSTING HEIGHT
Adjust the height of the foam plates as you wish.
Fix the excess wire rope using cable straps.

ASSEMBLE FOAM PLATES
Press the individual foam plates against one another for assembling them with the integrated magnets.
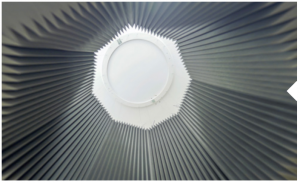
USING ABSORBER
Now you can use the absorber.
![]() Find more solutions for your room on our website:www.takustik.com
Find more solutions for your room on our website:www.takustik.com
![]() Share your installation with us on Instagram:www.takustik.com/instagram
Share your installation with us on Instagram:www.takustik.com/instagram
![]() Find more installation guides on YouTube:www.takustik.com/youtube
Find more installation guides on YouTube:www.takustik.com/youtube
This product is intended to be used to optimise the room acoustics. Any other use or use under other operating conditions is considered to be improper and may result in personal injury or property damage. No liability will be assumed for damages resulting from improper use.
![]() Ensure that plastic bags, packaging, etc. are disposed of properly and are not within reach of babies and young children. Choking hazard!
Ensure that plastic bags, packaging, etc. are disposed of properly and are not within reach of babies and young children. Choking hazard!
 For the transport and protective packaging, environmentally friendly materials have been chosen that can be supplied to normal recycling. Ensure that plastic bags, packaging, etc. are properly disposed of. Do not just dispose of these materials with your normal household waste, but make sure that they are collected for recycling.Please follow the notes and markings on the packaging.
Thomann GmbH · Hans-Thomann-Straße 1 · 96138 Burgebrach · Germany · www.thomann.de
DocID: 512683_19.03.2021
References
[xyz-ips snippet=”download-snippet”]