![]() User ManualStud Finder
User ManualStud Finder
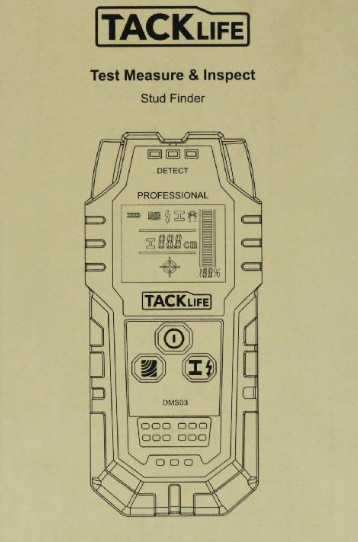 Model : DMS03
Product Accessories
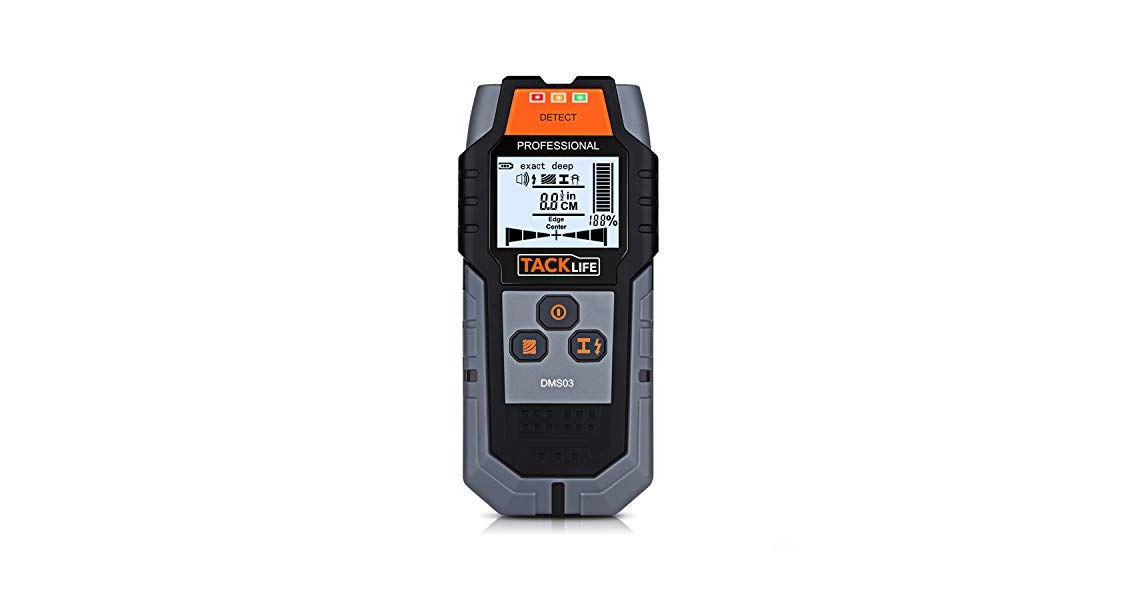
 1 x TACKLIFE DMS03 stud finder1 x Packing Bag1 x User Manual1 x 9V Battery1 x Warranty Card• Reminder: Please check whether the accessories are complete when you receive the product. If you lack accessories, please contact our customer service [email protected].
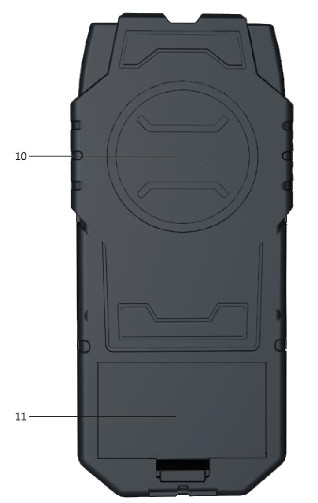
Battery installation
Please refer to picture to install the positive and negative poles of the battery. When you need to remove the battery, gently pull the auxiliary strap to quickly remove the battery.After the battery is installed, put the extra auxiliary belt – back into the battery compartment as shown in the figure, and then close the battery cover.
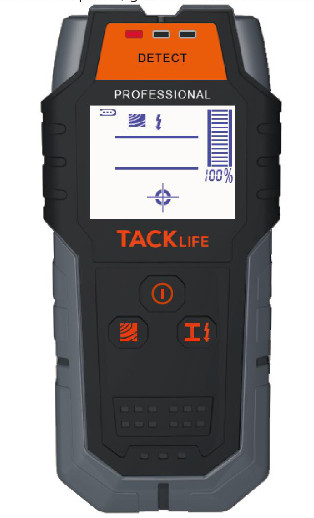
Boot page
Short press the button to turn on, and it will enter the metal detection mode.
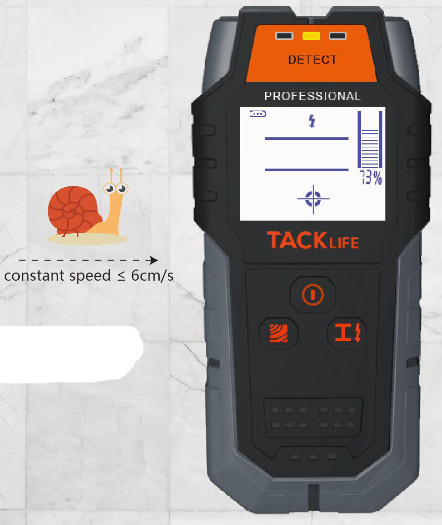
Metal detection: Ferrous metal detection
The maximum detection depth of ferrous metals is 100mm.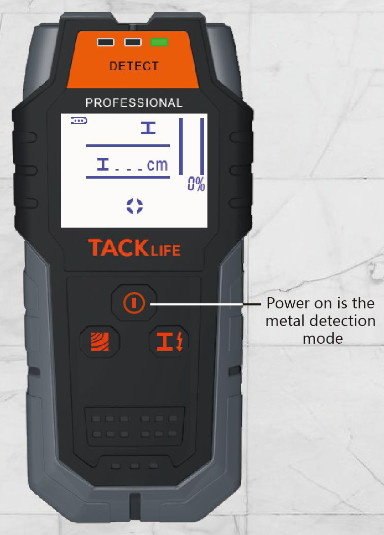 After the product is turned on, it can be detected after being calibrated the wall.
When the object is a standard steel-reinforced copper pipe with a diameter of 18 mm, the depth accuracy is the best.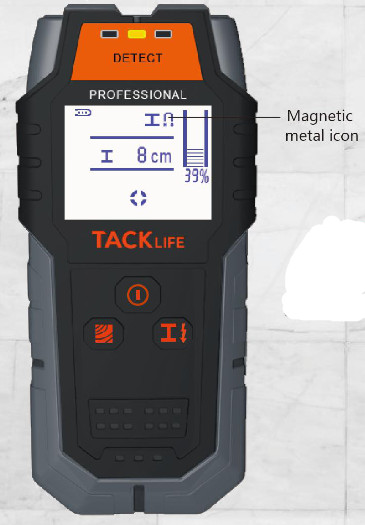 Fe-containing metal detected nearby. When an object is detected, the yellow or red indicator lights up.
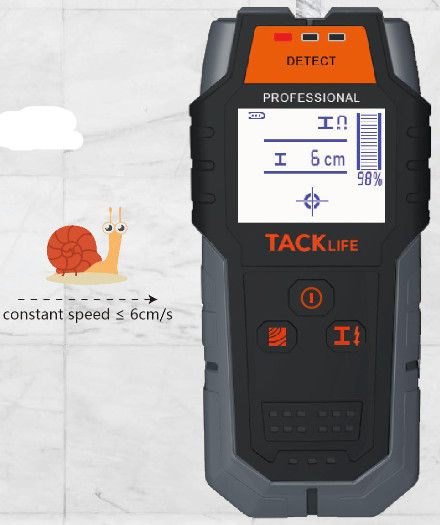 Detect center
When the detector displays a magnetic metal symbol, it means the current measured object is generally steel.
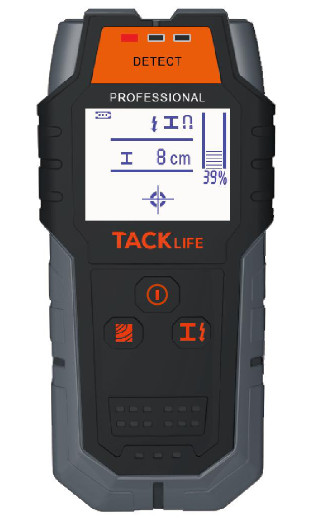
Metal detection: non-magnetic metal
The maximum detection depth of soldering iron metal is 80mm. The detection method is the same as that of ferrous metals.
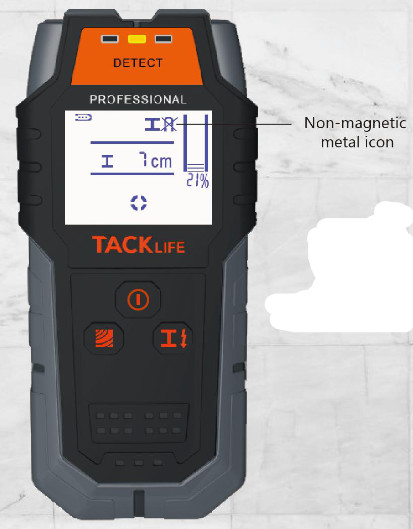 When the detector does not display a magnetic or non-magnetic metal symbol, it means that the current measured object is generally an alloy.
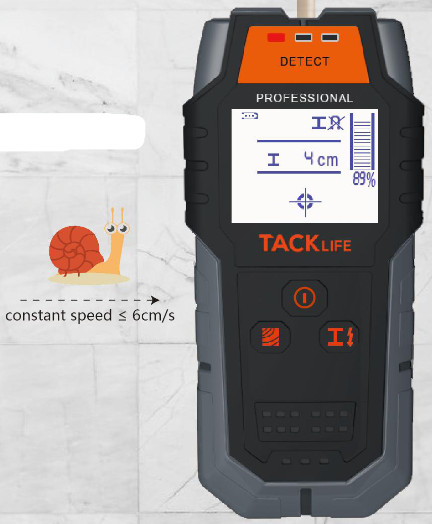
When the center is detected, the buzzer will sound. When the detector displays a non-magnetic metal symbol, it means that the current measured object is generally a wire or copper tube.
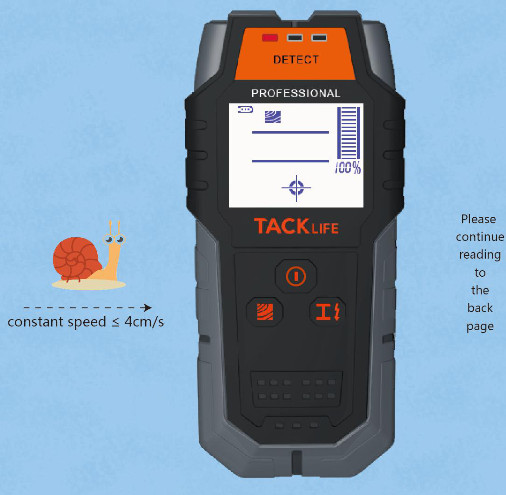
Wood stud detection
Wood Stud detection is suitable for detection on gypsum boards.
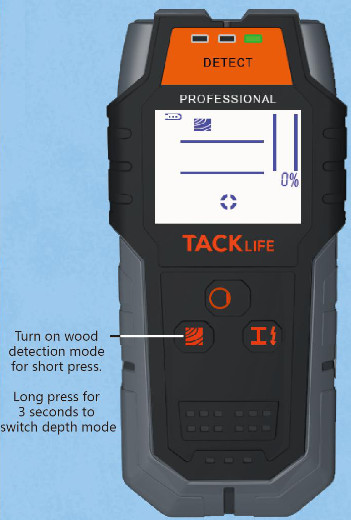
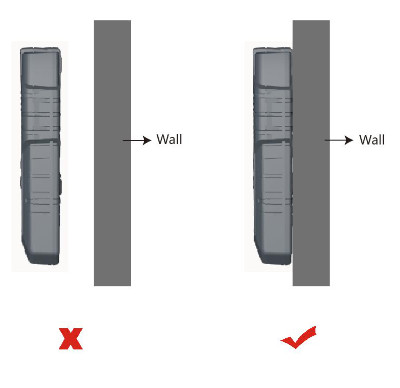
Detection needs to be lightly close to the wall and always in contact with the wall. Long press for 3 seconds to switch depth mode, the green light flashes, and beep sounds.

When an object is detected, the yellow or red indicator lights up. The edge of the object is detected, the percentage will gradually increase.

The center point of the object is detected.
Alternating current symbol
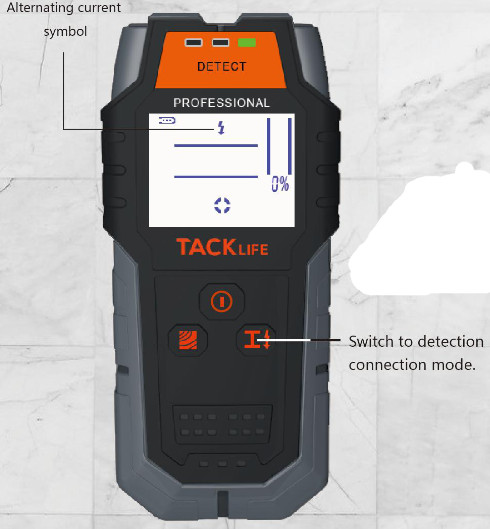
When a wire is detected, an alternating current symbol will appear.
 Detect center
When the AC power symbol of the detector flashes, it means there is AC power nearby.
When AC power is detected with other objects
When detecting metal or wood and AC power is detected at the same time, the AC power symbol will be displayed. The red light flashes to give an alarm and emits a rapid tone.
When AC power is detected with other objects Live cables can be detected in both metal mode and foreign object mode (≥4mm²).
Warning: If the will contains wires, please pay attention to safety. Turn off power, gas, and water before drilling.
When AC power is detected with wood stud
Detect Wire mode
The maximum detection depth of a live cable is 50mm; if the cable not charged, the detection depth will be reduced. conditions affecting measurement depth:

Terms and Conditions
This detector can detect metals (rebars, copper pipes) and cables hidden in walls, ceiling and floors; Ensure that there is no moisture in the detection area before starting up.Working humidity range:0-85% RH for ferrous metals,0-60% RH for foreign object mode,0-30% RH for alternating current mode.
Conditions method
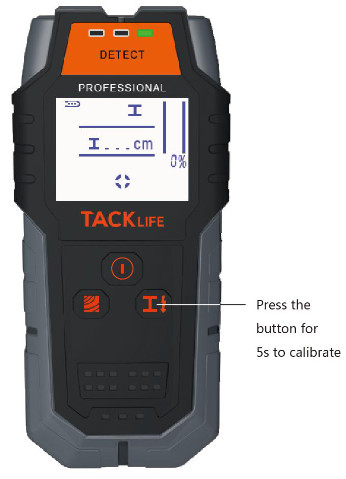
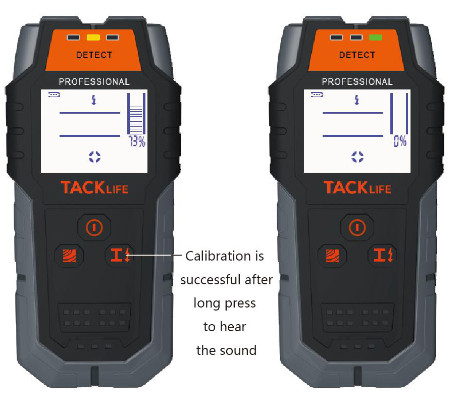
Metal mode calibration:At the current position (either or the wall or in the air), press and hold the metal button for 5 seconds, and the green light will turn on again to indicate a successful calibration.
Cable mode calibration:If there is an alarm sound in every corner of the room, this is due to high humidity or strong static electricity on the wall. At the current position (either on the wall or in the air), long press the button to calibrate, the green light will turn on again, and the signal strength percentage will display 0% Release the button to continue detection.
Wood mode calibration:Attach it to the wall to ensure that there is no object in the wall for calibration (when there is no object, the display percentage shows 0% and there is no AC icon). Long press the wood mode button for 2s, the green light will light up again and a beep will sound, release the button to continue detection.
Component Description

- Red: The center of the sensor was located
- Yellow: Getting closer to the target
- Green: The detector has calibrated automatically and get read
- Central location
- Battery Indicator
- LCD Screen
- Power ON/OFF
- Wood Studs Button(exact/deep Mode)
- Detect Wire/Metal Button
- Detection area
- Battery compartment•Repeated detection many times to improve accuracy When the product is not in use, the battery must be removed from the instrument. If it is left for a long time, the battery will corrode or discharge automatically.
|
Parameter |
|
|
Maximum detection depth |
|
| Ferrous metals | 100mm |
| Non-ferrous metals (copper) | 80mm |
| Copper wire (≥mm²) | 50mm |
| Foreign body mode (wood detection) | Exatt20mm/Deep 38mm |
| Automatic shutdown time | 5Mins |
|
Working humidity range: |
|
| Metal pattern | 0-85% RH |
| Foreign body mode | 0-60% RH |
| AC mode | 0-30%11H |
| Range of working temperature | -10*—+50° |
| Storage temperature range | -200-4-70° |
| Battery | 1 x 9V Battery |
| usage time | 6Hrs |
| Dimensions | 147*68*27mm |
Maintenance, Service, Cleaning
Use a dry and soft cloth to wipe off the dirt on it Do not use detergent or other solutions. Do not stick labels or metal nameplates on the detection areas on the front and back sides of the instrument. Use the enclosed packaging to store and carry the instrument
Disposal of waste
The damaged detector, product accessories, and packaging must be recycled and used in a manner that meets environmental requirements The right to modify is reserved.
[xyz-ips snippet=”download-snippet”]