TBK Automatic Mini Laser Screen
Separator Owner's Manual
Thank you for using our product. In order for you to use this new product safely, please read the instruction book carefully before using it. Please keep this manual for future use, please do not try to disassemble or modify the machine at will!
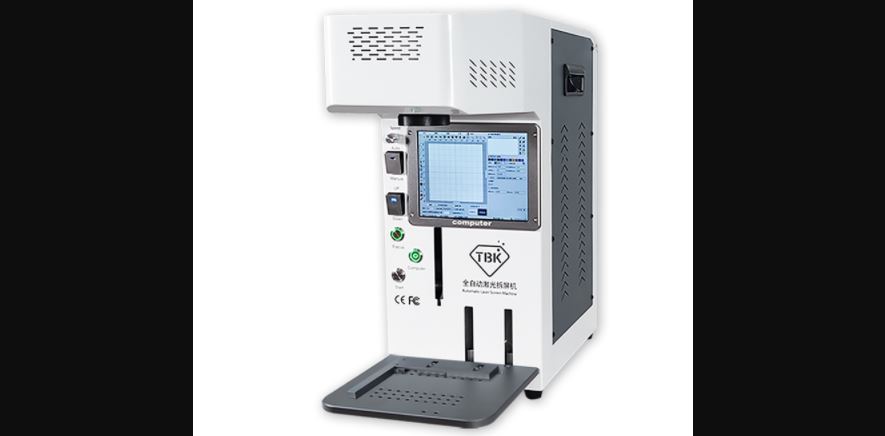
PRODUCT SCHEMATIC
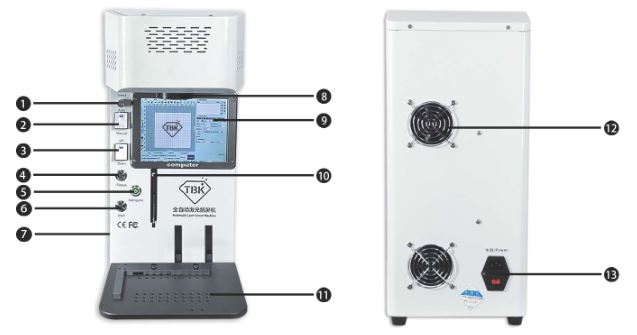
- Manual speed regulation
- Auto focus switch
- Switch lifts
- Auto focus button
- Computer switch
- Start
- USB interface
- High speed galvanometer
- HD display screen
- Focal lebgth pin
- Workbench
- Heat sink
- Power cord interface
PRODUCT PARAMETERS

Product model : TBK-958BBrands: TBKOperating Voltage : 110~ 220VProduct power : S00WLaser power : GWLaser marking accuracy : ~ 0.00lmmLaser speed : ~ l0000mm /scooling method : Built-in cold airLaser wavelength : 1064nmProduct Size : 24*54*55cmscreen size : 20*15cmPackage Size : 33*66.5*64cmNet weight of product : 25kgGross Weight : 34kgRepeated precis ion : ~ 0.00lmmMarking depth : 0.015-0.SmmDimensions location : 175mm*175mmWidth of the line : 0.05- 0.lmm
RANDOM GIFT ACCESSORIES
wireless keyboard X 1wireless mouse X 1Metal business card X 1Allen wrench set of 9 X 1Laser machine power cord X 1
PRODUCT DESCRIPTION
TBK-958B mini laser screen breaker marking machine: built-in high-definition integrated computer, imported sensor auto-focus, mobile phone wireless control, marking object maximum height 65mm, built-in accurate mobile phone drawing, imported high-precision calibrator accurate calibration, equipped with wireless Keyboard and mouse, laser head fixed and reliable, focus on the workbench, left and right on the machine are equipped with maintenance removal openings, one-button start, simple operation, small size and light weight, overseas first choice, new intelligence, concentrated essence!
STEPS: Please read the following steps carefully before use, and follow the operation steps in detail!
REMOVE THE PHONE:
- Plug in the power cord and turn on the power switch;
- Remove the lens cap of the high-speed galvo mirror;
- Turn on the computer switch (Computer key);
- Click on the document and select the corresponding drawing;
- Place the mobile phone along the fixed fixture;
- Start the focus key Focus, after the focus is completed;
- Adjust the parameters, marking speed: 500-1000, power: 95, adjust according to mobile phone;
- Click red light Fl or keyboard Fl and check if the red light coincides with the marking position of the mobile phone;
- Start the marking button to start marking; remove the phone after the marking is finished, and you can disassemble the machine.
LASER MACHINE-PRINTED PHOTOS:
Method 1 (U-disk import photos)
- Import photos to U disk, the pictures should be clear, and the memory should not be larger than 1 M;
- Click “Document Management”, find the picture to be imported, and click “Import”. After the import is successful, close the page;
- Fix the object to be marked (the marking position is kept at a horizontal plane), activate the focus key Focus, and after the focusingis completed;
- Find “Photos” in the vertical tool bar, select the photo you just imported, and click Open;
- Reduce the photo appropriately, center it, then tum on the red light indicator to confirm that the red light is fully displayed , and then stop the red light;
- Start adjusting the marking parameters, marking speed: 300 ~ 500, power: 95;
- Check “Reverse”, select “Marking Mode”, and select “Dot and Grayscale”;
- Check “Bidirectional Scan” Check “Dot Mode” and change the value to 0.1;
- After the parameter change is completed, click the mark directly.
Method two (mobile phone wireless control transmission picture):
- Login the administrator mode, the password is 111111, click “settings”, click “network communication”;
- Tick “AP hotspot mode”, you can set the hotspot name and password by yourself, and the password can be set to 8 digits;
- Click “Open Hotspot” and take out your phone to connect the WIFI you just set;
- Open the browser and enter 192.168.43.1, it will automatically jump to the control page;
- Scroll down to the picture transmission, click “Select Picture”, after the selection is completed, click “Upload Picture”;
- Start the focus key Focus, focus is completed, find “Photo” in the vertical tool bar;
- Reduce the photo appropriately, center it, then turn on the red light indicator, make sure the red light is fully displayed,and then stop the red light;
- Start adjusting the marking parameters, marking speed: 300 ~ 500, power: 95;
- Check “Reverse”, select “Marking Mode”, and select “Dot and Gray”;
- Check “Bidirectional Scan” Check “Dot Mode” and change the value to 0.1;
- After the parameter change is completed, click the mark directly.
LASER MACHINE TYPE:
- require marking fixed object {held in a position marking level), the Focus Focus key start, after completion of focus;
- Click the vertical tool bar ‘T’, enter the text you want to type, and click “OK” after the input is completed;
- Next, adjust the size of the text, drag the small dots around it, the arrow zooms in, and then adjust the position of the font;
- Click “F” on the right side of the screen, check Enable, select the filling method, bow shape, and the filling is completed;
- Turn on the red light indicator, confirm that the red light is completely displayed, and then stop the red light;
- Adjust the power to 90 and the marking speed to 1000. After the parameters are changed, click the marking directly.
LASER MACHINE HIT VECTOR FILE:
(The vector file import method is the same as the picture import method, refer to 2 ways to import pictures)
- require marking fixed object {held in a position marking level), the Focus Focus key start, after completion of focus;
- Click the vector file in the vertical toolbar;
- Find the imported vector file, open it, adjust it to a suitable size, and click Auto Center;
- Click “F” on the right side of the screen, check Enable, select the filling method, bow shape, and the filling is completed;
- Turn on the red light indicator, confirm that the red light is completely displayed, and then stop the red light;
- Adjust the power to 90 and the marking speed to 1000. After the parameters are changed, click the marking directly.
LASER MACHINE FUNCTION AND USE
WIRELESS PHONE CONTROL:
- Login administrator mode, the password is 111111;
- Click “Settings” and click “Network Communication”;
- Check the AP hotspot mode, you can set the hotspot name and password by yourself, and the password can be set to 8 digits;
- Click to open the hotspot, take out the mobile phone and connect the WIFI just set;
- Open the browser and enter 192.168.43.1, it will automatically jump to the control page;
- Can modify the marking parameters, transfer pictures, vector files, modify text and other functions, all can be controlled on the phone!
AUTO FOCUS:First adjust to Auto {auto mode), then press the focus button FOCUS to complete the auto focus.
BUILT-IN PHONE DRAWINGS:File-open-drawing
INSTALLING AN AUTOMATIC CENTERING FIXTURE:
- Place the automatic centering fixture horizontally on the laser machine lifting platform;
- Prepare a glass back case for Apple iPhone;
- Find the drawing of the corresponding mobile phone model in the laser machine, center the drawing;
- Place the mobile phone back case on the automatic centering fixture, and click the center button to center the fixture;
- Click the laser autofocus button to autofocus;
- Select the red light alignment of the drawing, move the centering fixture, so that the red light and the mobile phone’s back cover completely overlap, (the interior of the drawing does not overlap with the mobile phone, dissolve the drawing group first, select the part to be changed, check the selection processing, red light Position, use the arrow keys to move the red light to make them coincide) Fix the fixture;
- Select all drawings, groups, fill drawings, and save drawings.
LOGIN SETTINGS:
Before the machine leaves the factory, the engineer has set up the automatic login engineer mode;Engineer: The user uses the laser machine for marking, and cannot be changed .Password: 000000Administrator: The user uses the laser to mark and can change any settingPassword: 111111
SOFTWARE DETAILED TUTORIAL:Settings- Help- help explain
LASER MACHINE PRECAUTIONS
- Before using the laser machine for the first time, please check the label on the back of the machine: AC11 0Vor AC110-220V, please use the voltage of 11 0V for AC110V, please use the voltage of 220V for AC110-220V, please strictly observe the regulations!
- Please remove the lens protective cap before use, and close it after use to avoid dust, keep the mirror surface clean and avoid affecting the light output!
- The use of the laser screen remover should be kept ventilated, the temperature should not exceed 35 degrees, and the laser should not work continuously for more than two hours, to avoid the laser temperature being too high, the circuit is automatically protected, and the light cannot be emitted normally!
- Do not look at the white light directly with your eyes during use of the machine, to avoid causing eye damage!
- When the machine fails, do not dismantle it without permission. Contact the after-sale service as soon as possible and perform maintenance under the after-sale guidance!
- Do not violent collision during laser machine transportation! Damage to accessories!
COMMON PROBLEMS AND SOLUTIONS
- Laser machine does not emit light, leak light, etc.Solution:
- Check if the power supply is normal, 11 0V or 220V.
- Corresponding to whether the voltage of the machine.
- Replace laser parts or power supply.
- The computer does not boot properly and the following problems occur;
- a. Enter loading page or enter repair page.
- b. Computer indicator blinks and cannot boot normally.
- c. Computer splash screen.
- d. The display is off.Solution:
- Check if the power cord is loose.
- Whether the computer indicator is blue.
- Replace the display or computer.
- The board has the following problems:
- a. Board driver is missing, software cannot be found.
- b. Board parameters are missing.
- c. The customer deletes the parameter software by mistake and cannot run.Solution:
- Check if the board is on normally.
- Whether the board signal cable is loose.
- Reseat the signal cable.
- Replace the board.
- The focal length becomes larger or smaller; the spindle screw deforms; the machine runs abnormally;Solution:
- Adjust the focus lever screw length; replace the spindle screw; spray lubricant.
- Focusing cannot be completed normally, the focus lever cannot pop up or return, and the focus lever cannot complete automatic alignment; Customer changes computer system and deletes computer backup data;Solution:
- please contact customer service.
- Without opening the galvanometer cover; red light deviation;Solution:
- Open the cover; adjust the red light offset position in the software so that the red light and the laser coincide.
- Fixed strips are offset; automatic fixtures cannot be synchronized; laser lens is not clean and lighting is uneven;Solution:
- Refix the fixture; replace the fixture; wipe the lens with the lens and a dust-free cloth .


[xyz-ips snippet=”download-snippet”]