Refrigerator Disassembly
![]()
Disassembly Guide
Guidelines
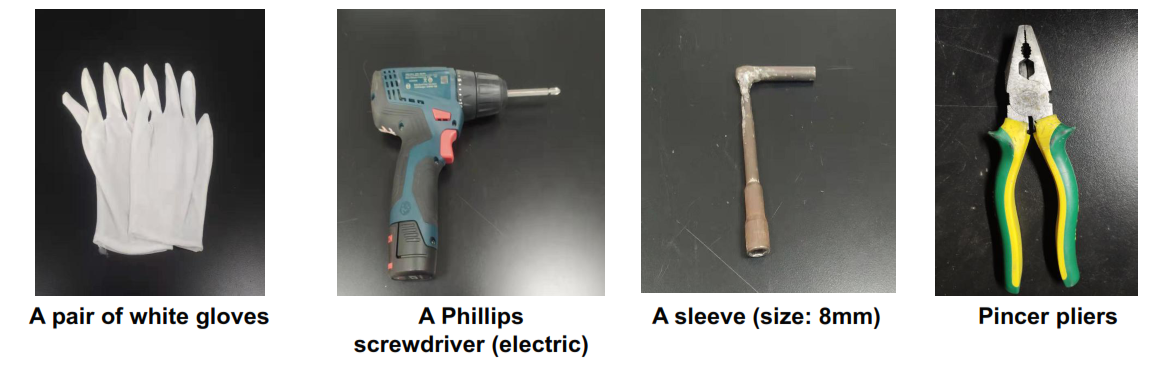
Required tools:1. A pair of white gloves2. A Phillips screwdriver3. A sleeve (size: 8mm)4. Pincer pliers
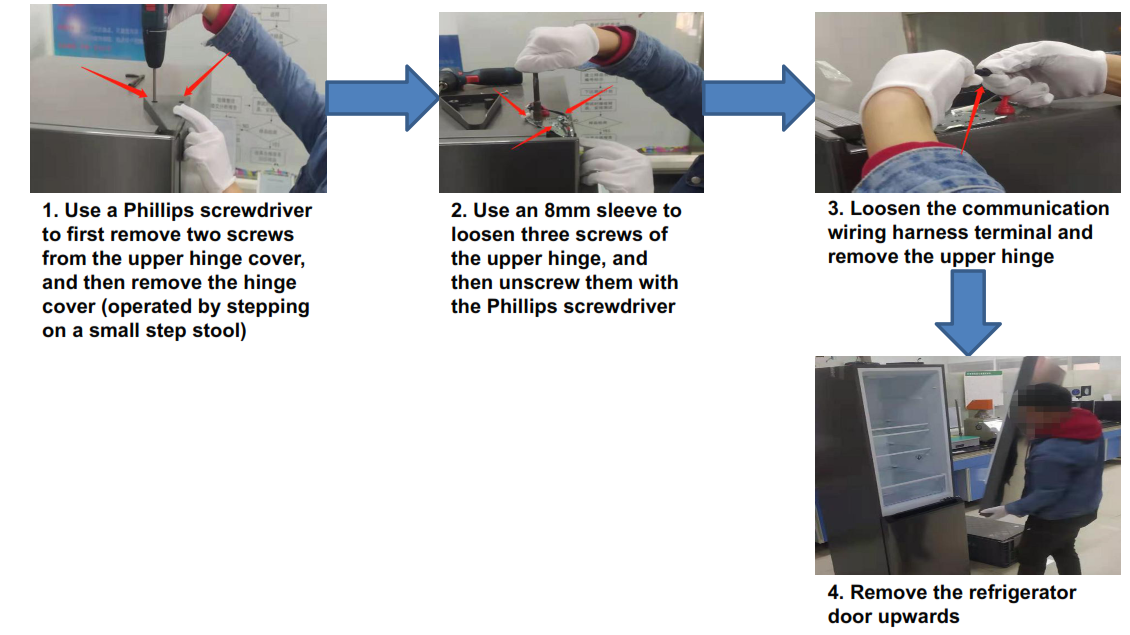
Disassembly guidelines for refrigerator chamber door
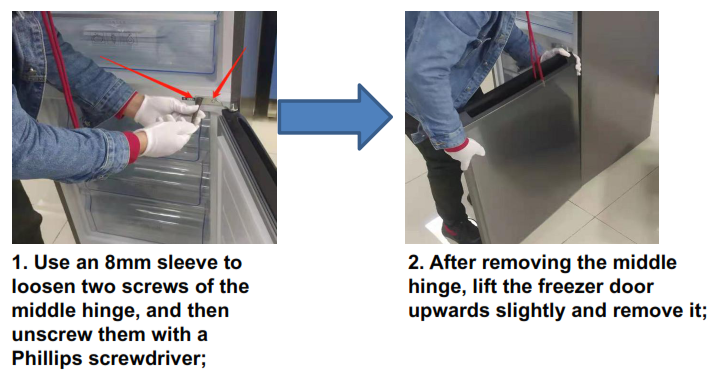
Disassembly guidelines for freezer door
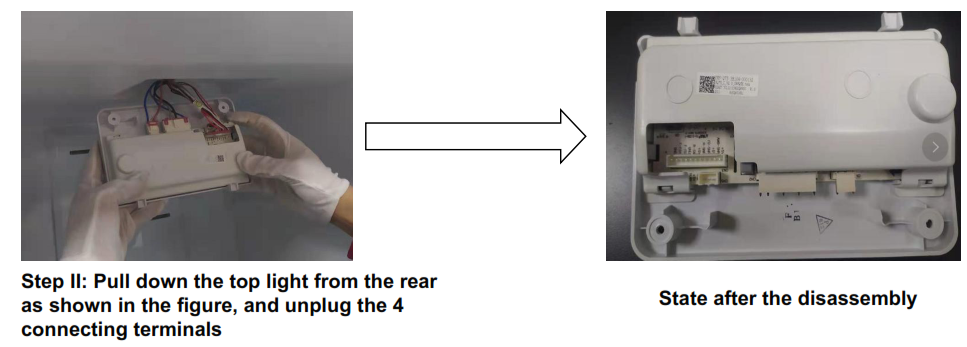
Disassembly of the top light
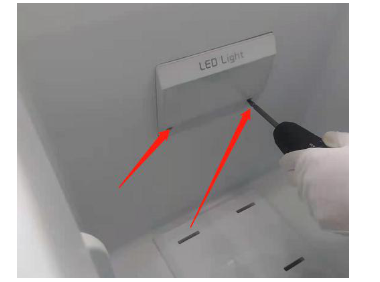
Step I: Remove the 2 screws at the rear of the assembly
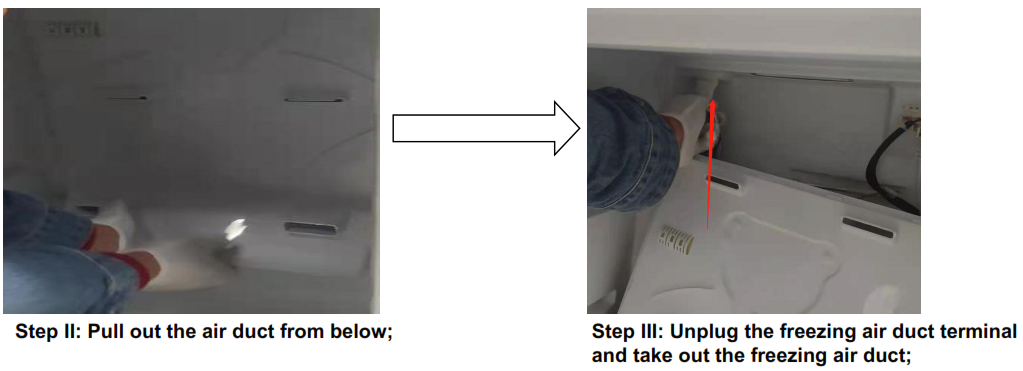
Disassembly of Refrigerating Chamber air duct assembly
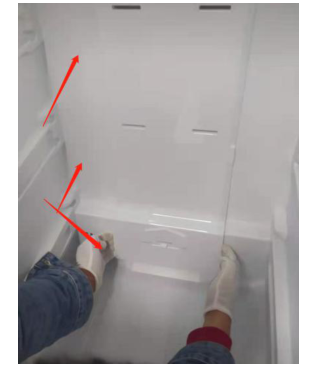
Step I: Disassemble the refrigerating air duct assembly from the top down
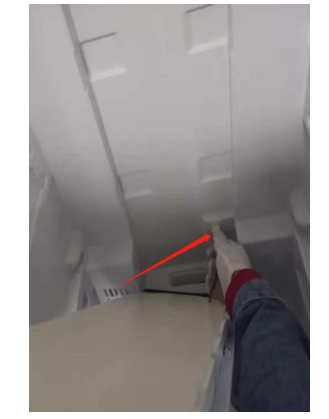
Step II: Disassemble the refrigerating air duct assembly from the refrigerator, as shown in the diagram, and unplug the connecting terminals
Disassembly of freezing air duct component
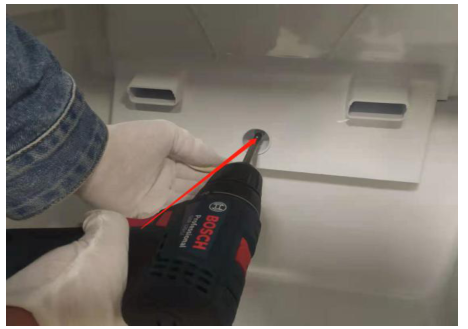
Step I: Use a screwdriver to remove the fixing screws of the freezing air duct;
Disassembly of freezing evaporator
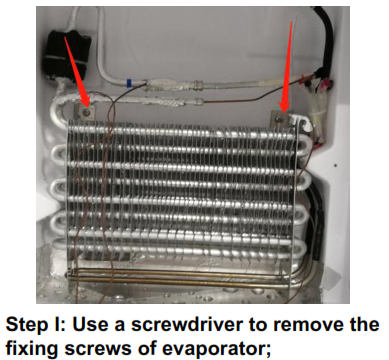
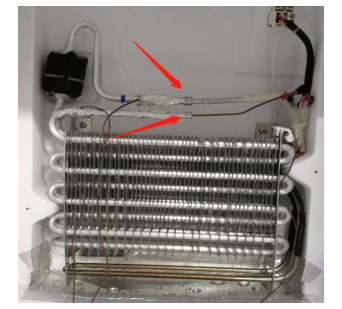
Step II: Use pincer pliers to cut off the evaporator tube and remove the evaporator;
Disassembly of compressor chamber
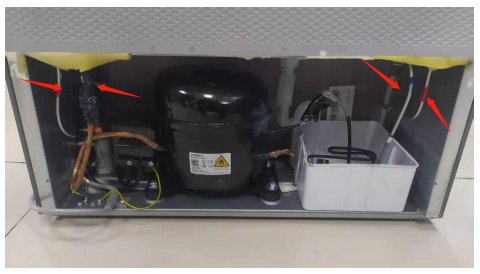
Step I: Use pincer pliers to cut off all the high and low pressure pipelines of the compressor chamber;
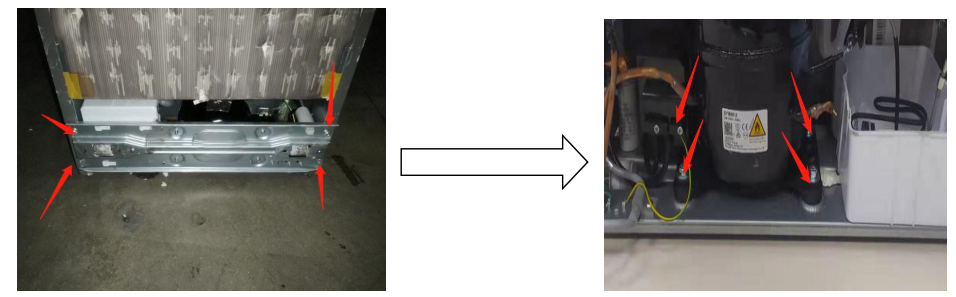
Step II: Use an 8mm sleeve and a Phillips screwdriver to loosen four fixing screws on the bottom of the compressor, and then remove the compressor floor;Step III: Use an 8mm sleeve and a Phillips screwdriver to remove fixing screws on the bottom of the compressor, and finally remove the compressor;
[xyz-ips snippet=”download-snippet”]