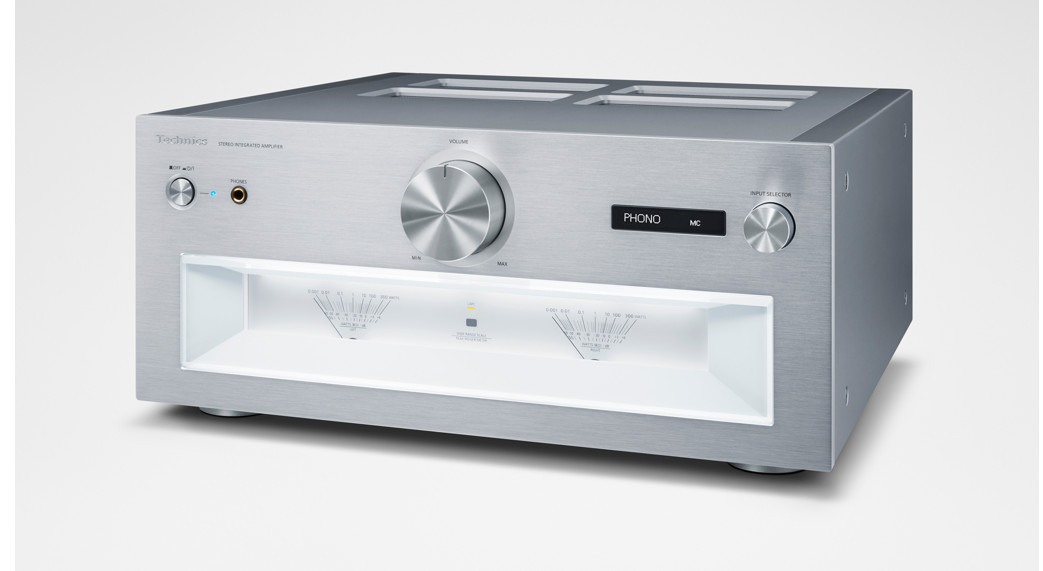
Stereo Integrated Amplifier SU-R1000
SU-R1000
Stereo Integrated Amplifier Stereo-VollverstärkerAmplificateur Stéréo Intégré Amplificatore stereo integrato Geïntegreerde Stereo Versterker Amplificador Estéreo Integrado Integrerad StereoförstärkareIntegreret stereoforstærker Integroitu stereovahvistinZintegrowany wzmacniacz stereo
Operating Instructions Bedienungsanleitung Mode d’emploi Istruzioni per l’uso Gebruiksaanwijzing Instrucciones de funcionamiento Bruksanvisning Betjeningsvejledning Käyttöohjeet Instrukcja obslugi
Music is borderless and timeless, touching people’s hearts across cultures and generations. Each day the discovery of a truly emotive experience from an unencountered sound awaits. Let us take you on your journey to rediscover music.02
Delivering the Ultimate Emotive Musical Experience to AllAt Technics we understand that the listening experience is not purely about technology but the magical and emotional relationship between people and music. We want people to experience music as it was originally intended and enable them to feel the emotional impact that enthuses and delights them. Through delivering this experience we want to support the development and enjoyment of the world’s many musical cultures. This is our philosophy. With a combination of our love of music and the vast highend audio experience of the Technics team, we stand committed to building a brand that provides the ultimate emotive musical experience by music lovers, for music lovers. DirectorMichiko Ogawa03
Thank you for purchasing this product. Please read these instructions carefully before using this product, and save this manual for future use. · About descriptions in these operating instructions– Pages to be referred to are indicated as ” “. – The illustrations shown may differ from your unit.For the United Kingdom and Ireland customerSales and Support Information Customer Communications Centre · For customers within the UK: 0333 222 8777 · For customers within Ireland: 01 447 5229 · MondayFriday 9:00 am 5:00 pm, (Excluding public holidays). · For further support on your product, please visit our website: www.technics.com/uk/
FeaturesHigh-Quality Audio Technologies Employed integrated amplifierThe JENO Engine transmits and processes audio signals in full digital and with minimal jitter from the input stage to the power stage. GaN-FET Driver for the linear speaker drive with highspeed lossless switching, and ADCT (Active Distortion Cancelling Technology) cancels the noise precisely are implemented to achieve the energetic dynamic sound with the superior drive function. The low-noise and clear sound can be provided by the various technologies such as LAPC that conducts speaker load adaptive phase calibration for ideal gain and phase characteristics of any type of connected speakers.Low-noise power supply with high responsive ability to the audio signal“Advanced Speed Silent Power Supply” is embedded for high-speed lossless switching and noise reduction. The unique power supply function can supply the stable power with the lowest noise by the high speed switching feature for the better resolution of audio signal in full digital amplifier. And this unit improves the potential of JENO Engine for the better playback.04 (04)
The unique digital technology“Intelligent PHONO EQ” improvesthe potential for playback ofrecords.“Accurate EQ Curve” which has a hybrid component for analogue and digital circuits enables the equaliser process with high-precise and S/N. And this unit supports the various equaliser curve other than RIAA for accurate playback. “Crosstalk Canceller” function which measures the crosstalk and optimises it with DSP, and “PHONO Response Optimiser” function reduces the resonances on the cartridge are implemented to reproduce the audio signal from the record groove.
Table of contents
Safety precautions Control reference guide Connections Operations Settings Troubleshooting Others
06 08
Please carefully read the “Safety precautions” of this manual before use.This unit, Remote control
12
Speaker connection, AC mains lead connection
13
Playing back connected devices
20
Other settings
25
Before requesting service, read the troubleshooting.
28
Specifications, etc.
English
AccessoriesAC mains lead (2) Except for SwitzerlandK2CM3YY00041For Switzerland K2CS3YY00033Remote control (1) N2QAYA000224Batteries for remote control (2)Calibration record (1) TSPX101&DOLEUDWLRQ5HFRUG· Product numbers provided in these operating instructions are correct as of October 2020.· These may be subject to change. · Do not use AC mains lead and calibration recordwith other equipment.
Disposal of Old Equipment and Batteries Only for European Union and countries with recycling systemsThese symbols on the products, packaging, and/or accompanying documents mean that used electrical and electronic products and batteries must not be mixed with general household waste. For proper treatment, recovery and recycling of old products and used batteries, please take them to applicable collection points in accordance with your national legislation. By disposing of them correctly, you will help to save valuable resources and prevent any potential negative effects on human health and the environment. For more information about collection and recycling, please contact your local municipality. Penalties may be applicable for incorrect disposal of this waste, in accordance with national legislation.Note for the battery symbol (bottom symbol): This symbol might be used in combination with a chemical symbol. In this case it complies with the requirement set by the Directive for the chemical involved.(05) 05
Safety precautions
Warning Unit · To reduce the risk of fire, electric shock orproduct damage, – Do not expose this unit to rain, moisture,dripping or splashing. – Do not place objects filled with liquids, suchas vases, on this unit. – Use only the recommended accessories. – Do not remove covers. – Do not repair this unit by yourself. Referservicing to qualified service personnel. – Do not let metal objects fall inside this unit. – Do not place heavy items on this unit.AC mains lead · To reduce the risk of fire, electric shock orproduct damage, – Ensure that the power supply voltagecorresponds to the voltage printed on this unit. – Insert the mains plug fully into the socket outlet. – Do not pull, bend, or place heavy items on the lead. – Do not handle the plug with wet hands. – Hold onto the mains plug body when disconnecting the plug. – Do not use a damaged mains plug or socket outlet. · The mains plug is the disconnecting device. Install this unit so that the mains plug can be unplugged from the socket outlet immediately. · Ensure the earth pin on the mains plug is securely connected to prevent electrical shock. – An apparatus with CLASS I construction shall be connected to a mains socket outlet with a protective earth connection.06 (06)
CautionUnit · Do not place sources of naked flames, such aslighted candles, on this unit. · This unit may receive radio interference causedby mobile telephones during use. If such interference occurs, please increase separation between this unit and the mobile telephone. · This unit is intended for use in moderate and tropical climates. · Do not put any objects on this unit. This unit becomes hot while it is on. · Do not touch the top surface of this unit. This unit becomes hot while it is on.Placement · Place this unit on an even surface. · To reduce the risk of fire, electric shock orproduct damage, – Do not install or place this unit in a bookcase,built-in cabinet or in another confined space. Ensure this unit is well ventilated. – Do not obstruct this unit’s ventilation openings with newspapers, tablecloths, curtains, and similar items. – Do not expose this unit to direct sunlight, high temperatures, high humidity, and excessive vibration. · Ensure that the placement location is sturdy enough to accommodate the weight of this unit ( 28). · Do not lift or carry this unit by holding the knobs. Doing so may cause this unit to fall, resulting in personal injury or malfunction of this unit.Battery · Danger of explosion if battery is incorrectlyreplaced. Replace only with the type recommended by the manufacturer. · Mishandling of batteries can cause electrolyte leakage and may cause a fire. – Remove the battery if you do not intend touse the remote control for a long period of time. Store in a cool, dark place. – Do not heat or expose to flame. – Do not leave the battery(ies) in a car exposed to direct sunlight for a long period of time with doors and windows closed. – Do not take apart or short circuit. – Do not recharge alkaline or manganese batteries. – Do not use batteries if the covering has been peeled off. – Do not mix old and new batteries or different types at the same time.
English
· When disposing of the batteries, please contact your local authorities or dealer and ask for the correct method of disposal.· Avoid the use in the following conditions – High or low extreme temperatures during use, storage or transportation. – Replacement of a battery with an incorrect type. – Disposal of a battery into fire or a hot oven, or mechanically crushing or cutting of a battery, that can result in an explosion. – Extremely high temperature and/or extremely low air pressure that can result in an explosion or the leakage of flammable liquid or gas.InstallationUnit Turn off all equipment before connection and read the appropriate operating instructions. · For the dimensions of this unit ( 28) · Refer to the following figure for the dimensionsof this unit’s legs.Front
A
A: 340 mm
B: 313 mm
B
Calibration record· Though the record may be warped depending on the storage environment or usage due to its characteristics, this record is designed to be played back for “Cartridge Optimiser” even if there is a trivial warp.· Stand this record as straight up for storage. Stacking the records in piles or inclining the record for storage may cause the warp on the record.
For the United Kingdom and Ireland customer
Caution for AC Mains Lead
(For the AC mains plug of three pins)
For your safety, please read the following text carefully.
This appliance is supplied with a moulded three pin mains plug for your safety and convenience.
A 10-ampere fuse is fitted in this plug.
Should the fuse need to be replaced please ensure that the replacement fuse has a rating of 10-ampere and that it is approved by ASTA or BSI to BS1362.
Check for the ASTA mark on the body of the fuse.
or the BSI mark
If the plug contains a removable fuse cover you must ensure that it is refitted when the fuse is replaced.
If you lose the fuse cover the plug must not be used until a replacement cover is obtained.
A replacement fuse cover can be purchased from your local dealer.
Before use
Remove the connector cover. How to replace the fuse
The location of the fuse differ according to the type of AC mains plug (figures A and B). Confirm the AC mains plug fitted and follow the instructions below.
Illustrations may differ from actual AC mains plug.
1. Open the fuse cover with a screwdriver.
Figure A
Figure B
Fuse cover
2. Replace the fuse and close or attach the fuse cover.
Figure A
Figure B
Fuse (10 ampere)
Fuse (10 ampere)
Safety precautions (07) 07
Control reference guideThis unit
01 Standby/on button (
)
[
] (off): The unit is off.
[
] (on): The unit is on.
· The unit is still using a small amount of power in off mode. Off mode uses less power.
02 Power indicator · Blue: The unit is on. · Off: The unit is off.
03 Headphones jack· When a plug is connected, the speakers and REC OUT/PRE OUT terminals do not output sound. ( 19)· Sound is not output from headphones jack while “MAIN IN” is selected as input source of this unit. ( 18)· Excessive sound pressure from earphones and headphones can cause hearing loss.· Listening at full volume for long periods may damage the user’s ears.
04 Volume knob · — dB (min), -88.0 dB to 0 dB (max)
05 Display · Information such as input source, etc. is displayed. ( 26) · The input source blinks on the display before starting up this unit after turning on. (No sound outputs while blinking.)06 Input selector knob · Turn this knob clockwise or anticlockwise to switch the input source.07 Peak power meter · Display the output level. 100 % is the rated output ( 28). · Peak power meter does not work while the light is turned off by pressing [DIMMER], connecting the headphones, etc.08 LAPC indicator ( 22)09 Remote control signal sensor · Reception distance: Within approx. 7 m directly in front · Reception angle: Approx. 30° left and right
08 (08)
English
10 Speaker output terminals ( 12)11 Analogue audio input terminals (REC IN) ( 15, 19)12 Analogue audio output terminals (REC OUT) ( 19)13 Analogue audio output terminals (PRE OUT) ( 19)14 Analogue audio input terminals (MAIN IN) ( 18)15 Analogue audio input terminals (LINE XLR BALANCED/LINE1/LINE2) ( 15)16 Analogue audio input terminals (PHONO XLR BALANCED/PHONO) / PHONO EARTH terminal ( 16) · PHONO EARTH terminal is for connecting the ground wire of a turntable. · Please use the cable less than 3 m. · Keep the PHONO short pins out of reach of children to prevent swallowing.
17 USB-B terminals (PC1/PC2) ( 14)18 USB-A terminal (UPDATE) ( DC 5 V 500 mA) ( 23)19 System terminal (CONTROL) ( 24)20 Optical digital input terminals (OPT1/OPT2) ( 13)21 Coaxial digital input terminals (COAX1/COAX2) ( 13)22 Product identification marking · The model number is indicated.23 AC IN terminal ( ) ( 12)Control reference guide (09) 09
Control reference guideRemote control
Using the remote control2 1R03/LR03, AAA (Alkaline or manganese batteries)Note · Insert the battery so the terminals ( and )match those in the remote control. · Point it at the remote control signal sensor onthis unit. ( 08) · Keep the batteries out of reach of children toprevent swallowing.10 (10)
01 [ ]: Standby/on button · Press to switch the unit from on to standby mode or vice versa. In standby mode, the unit is still consuming a small amount of power.02 Switch the input source ( 13, 14, 15, 16, 19)
03 [MENU]: Enter menu ( 13, 14, 15, 16, 18)04 [ ], [ ], [ ], [ ]/[OK]: Selection/OK05 [SETUP]: Enter setup menu ( 20)06 [BASS]/[MID]/[TREBLE]: Adjust the tonal range (BASS/MID/TREBLE). · Press [ ], [ ] to adjust the tone.07 [DIRECT]: Turn on/off Direct mode08 [LAPC]: Measure the output signal of the amplifier when speakers are connected, and correct its output ( 22)09 [DIMMER]: Adjust the brightness of the peak power meter light, display, etc. · When the display is turned off, it will light up for a few seconds only when you operate this unit. Before the display turns off, “Display Off” will be displayed for a few seconds. · Press repeatedly to switch the brightness. · Peak power meter does not work while the light is turned off.10 [INFO]: View content information · Press this button to display sampling frequency and other information. (The information varies depending on the input source.)11 [RETURN]: Return to the previous display12 [MUTE]: Mute the sound · Press [MUTE] again to cancel. “MUTE” is also cancelled when you adjust the volume with this unit or when you turn the unit to standby.13 [CURVE]: Enable the PHONO equaliser curve.14 [+VOL-]: Adjust the volume · Volume range: — dB (min), -88.0 dB to 0 dB (max)Buttons that work for Technics devicessupporting system control function The remote control of this unit also works for Technics devices supporting system control function (Network Audio Player, Compact Disc Player, etc.). For information on the operations of the devices, please also refer to their operating instructions.01 Numeric buttons, etc. 02 Playback control buttons
Remote control modeWhen other equipment responds to the supplied remote control, change the remote control mode. · The factory default is “Mode 1”. 1 Press [SETUP]. 2 Press [ ], [ ] repeatedly to select“Remote Control” and then press [OK]. · The current remote control mode of this unitis displayed for a few seconds. 3 When “Set Mode 1/2” is displayed,change the remote control mode of the remote control. To set “Mode 1”:Press and hold [OK] and [1] for at least 4 seconds. To set “Mode 2”: Press and hold [OK] and [2] for at least 4 seconds. 4 Point the remote control at this unit, and press and hold [OK] for at least 4 seconds. · When the remote control mode is changed, the new mode will appear on the display for a few seconds.When “Remote 1” or “Remote 2” isdisplayed When “Remote 1” or “Remote 2” is displayed, the remote control modes of this unit and remote control are different. Perform step 3 above.Control reference guide (11) 11
English
ConnectionsSpeakers/AC mains lead· Use only the supplied AC mains lead. · Insert the plugs of the cables to be connected all the way in. · Do not bend cables at sharp angles. · To optimise the audio output, you can measure the amplifier output signal and correct itsoutput when it is connected to the speakers. ( 22)
Speaker connection
· Though the spade plug (A: 16 mm or less, B: 8 mm or more) can be connected, some plug may not be connected depending on the shape of plug.AB
Speaker cables (not supplied)Speakers1 Turn the knobs to loosen them, and insert the core wires into the holes.2 Tighten the knobs.Note · When the connections are completed, pull thespeaker cables lightly to check that they are connected firmly. · Be careful not to cross (short-circuit) or reverse the polarity of the speaker wires as doing so may damage the amplifier.DO NOT
AC mains lead connectionConnect only after all other connections are completed.
To a household mains socket
AC mains lead (supplied)
Insert the AC mains lead up to a point just before the round hole.Note· This unit consumes a small amount of AC power ( 28) even when the unit is in standby mode. Remove the plug from the main electrical outlet if you will not be using the unit for an extended period of time. Place the unit so the plug can be easily removed.
· Wire the polarity (+/-) of the terminals correctly. Not doing so may adversely affect stereo effects or cause malfunction.· For details, refer to the operating instructions of the speakers.12 (12)
OperationsUsing digital audio output deviceYou can connect the CD player, etc. with coaxial digital cable (not supplied)/optical digital audio cable (not supplied) to this unit and play back music.
Coaxial digital cable (not supplied)
Optical digital audio cable (not supplied)
CD player, etc.
Using coaxial digital cable
1 Disconnect the AC mains lead.
2 Connect this unit and a CD player, etc.
3 Connect the AC mains lead to this unit. ( 12)
4 Press the unit on/off button to the
[
] position.
5 Press [COAX] to select “COAX1″/”COAX2”.
· You can also select the input source by turning the input selector knob on the unit.
6 Start playback on the connected device.
Note· The digital audio input terminals of this unit can only detect the following linear PCM signals. For details, refer to the operating instructions of the connected device. – Sampling frequency: Coaxial digital input 32/44.1/48/88.2/96/176.4/192 kHz
English
Optical digital input 32/44.1/48/88.2/96 kHz– Number of quantisation bits: 16/24 bit
Using optical digital audio cable
1 Disconnect the AC mains lead.
2 Connect this unit and a CD player, etc.
3 Connect the AC mains lead to this unit. ( 12)
4 Press the unit on/off button to the
[
] position.
5 Press [OPT] to select “OPT1″/”OPT2”.
· You can also select the input source by turning the input selector knob on the unit.
6 Start playback on the connected device.
Adjusting the delay time of the soundSet to “Low Latency” to adjust the delay time of the sound while “LAPC” is set to “On”. 1 Press [MENU]. 2 Press [OK]. 3 Press [ ], [ ] to select “Normal”/”LowLatency” and then press [OK].· Depending on the track, it may not be effective even when setting.
MQA® decodingAn MQA file or stream can be decoded to deliver the sound like the original master recording. ( 20)
Connections / Operations (13) 13
OperationsUsing PC, etc.
You can connect the PC, etc. or another device with USB 2.0 cable (not supplied) to this unit and play back music.
USB 2.0 cable (not supplied)PC, etc.Audio device with USB output terminal such as ST-G30, etc.PreparationConnecting to a PC · Before connecting to a PC, follow the stepsbelow. · Refer to the following for the recommend OSversions for your PC (as of October 2020): – Windows 8, Windows 8.1, Windows 10 – OS X 10.7, 10.8, 10.9, 10.10, 10.11,macOS 10.12, 10.13, 10.14, 10.15Download and install the dedicated USB driver to the PC. (Only for Windows OS) · Download and install the driver from thewebsite below. www.technics.com/support/ Download and install the dedicated app “Technics Audio Player” (free of charge) on your PC. · Download and install the app from the website below. www.technics.com/support/
1 Disconnect the AC mains lead.
2 Connect this unit and a PC, etc.
3 Connect the AC mains lead to this unit. ( 12)
4 Press the unit on/off button to the
[
] position.
5 Press [PC] to select “PC1″/”PC2”.
· You can also select the input source by turning the input selector knob on the unit.
6 Start playback using the dedicated app “Technics Audio Player” on the connected PC.
Note· When connecting an audio device with USB output terminal such as ST-G30, etc., refer to the operating instructions of the connected device.· About supported format, refer to “Format support”. ( 28)
Adjusting the delay time of the soundSet to “Low Latency” to adjust the delay time of the sound while “LAPC” is set to “On”. 1 Press [MENU]. 2 Press [OK]. 3 Press [ ], [ ] to select “Normal”/”LowLatency” and then press [OK].· Depending on the track, it may not be effective even when setting.
MQA decodingAn MQA file or stream can be decoded to deliver the sound like the original master recording. ( 20)
14 (14)
Using analogue audio output device
Analogue audio cable (not supplied)*
English
Blu-ray Disc player, etc.
*: The illustration shows the example whenconnecting with analogue audio cable. You can also connect the device with XLR cable.
You can connect the Blu-ray Disc player, etc. with analogue audio cable (not supplied) to this unit and play back music.
1 Disconnect the AC mains lead.
2 Connect this unit and a Blu-ray Disc player, etc.
3 Connect the AC mains lead to this unit. ( 12)
4 Press the unit on/off button to the
[
] position.
5 Press [LINE-XLR] or [LINE] to select “LINE XLR”/”LINE1″/”LINE2”.
· You can also select the input source by turning the input selector knob on the unit.
6 Start playback on the connected device.
When the recorder is connected tothis unitWhen connecting a recording equipment to this unit, use the analogue audio cable (not supplied) and connect REC IN terminal with the audio output terminals of the connected equipment, connect REC OUT terminals with the audio input terminals of the connected equipment. ( 19) · Press [REC IN] to switch the input source to“REC IN”.
Minimising sound distortionIf sound distortion occurs when using the analogue audio input terminals, setting the attenuator to “On” may improve the sound quality. · The factory default is “Off”.1 Press [MENU]. 2 Press [ ], [ ] repeatedly to select“Attenuator” and then press [OK]. 3 Press [ ], [ ] to select “On” and thenpress [OK].Reducing low frequency noiseReduces the low frequency noise caused by the warpage of record. · The factory default is “Off”. 1 Press [MENU]. 2 Press [ ], [ ] repeatedly to select“Subsonic Filter” and then press [OK]. 3 Press [ ], [ ] to select “On” and thenpress [OK].
Operations (15) 15
OperationsUsing turntable
PHONO cable (not supplied)*PHONO earth lead (not supplied)
Turntable*: The illustration shows the example whenconnecting with PHONO cable. You can also connect the device with PHONO-XLR cable.
1 Disconnect the AC mains lead.
2 Connect this unit and a turntable.
· Remove the PHONO short pins when connecting to the analogue audio input terminals (PHONO).· PHONO terminals for connecting the turntable supports MM/MC type cartridge. (PHONO XLR terminals only supports MC type cartridge.)
3 Connect the AC mains lead to this unit. ( 12)
4 Press the unit on/off button to the
[
] position.
5 Press [PHONO-XLR] or [PHONO] to select “PHONO XLR”/”PHONO”.
· You can also select the input source by turning the input selector knob on the unit.
6 Start playback on the connected turntable.
· When connecting a turntable with a built-in PHONO equaliser, use the analogue audio cable to connect to the analogue audio input terminals (LINE1 or LINE2) of this unit. ( 15)· When connecting a turntable with a PHONO earth lead, connect the PHONO earth lead to the PHONO EARTH terminal of this unit.
16 (16)
Selecting the cartridge typeSelect the settings (MM/MC) to fit the cartridge type of the connected turntable. 1 Press [MENU]. 2 Press [ ], [ ] repeatedly to select“MM/MC” and then press [OK]. 3 Press [ ], [ ] to select “MM”/”MC”and then press [OK]. · Not available when “PHONO XLR” is selected asinput source. (The setting is fixed to “MC”.) · When “MM/MC” is adjusted, “CartridgeOptimiser” is fixed to “Off”. Set “Cartridge Optimiser” again or select the registered data correspond with “MM/MC”. ( 17)Adjusting the audio input levelIf sound distortion occurs or the input level is low when using the analogue audio input terminals, adjusting the gain may improve the sound quality. 1 Press [MENU]. 2 Press [ ], [ ] to select “Gain” andthen press [OK]. 3 Press [ ], [ ] to adjust and then press[OK]. · When “Gain” is adjusted, “Cartridge Optimiser”is fixed to “Off”. Set “Cartridge Optimiser” again or select the registered data correspond with “Gain”. ( 17)Optimising the character of cartridgeThis unit measures and optimises the crosstalk and frequency characteristics of cartridge by playing the supplied calibration record on the connected turntable. · Depending on the “Cartridge Optimiser”setting, “REC OUT” turns to “Off” and the sound does not output from the analogue output terminals (REC OUT).Preparation· Connect the PHONO earth lead of the turntable to the PHONO EARTH terminal of this unit.· Set “MM/MC” of this unit in accordance with the cartridge type of the turntable.· Set “Gain” of this unit in accordance with the cartridge of connected turntable.
1 Press [MENU].2 Press [ ], [ ] repeatedly to select “Cartridge Optimiser” and then press [OK].3 Press [ ], [ ] to select “Measurement Start” and then press [OK].· “Prepare Calibration Record” is displayed.4 Start playback the calibration record on the connected turntable and then press [OK].· Play the outer track first on the calibration record which has 2 tracks on both sides (approx. 3 minutes). Play another track if the optmisation does not start properly.· The speakers output a test tone. · Measurement starts for the data of“Crosstalk Canceller” and “Response Optimisation”.5 After displaying “Lift up the tone arm”, stop the playback of calibration record and press [OK].· The measured data processing starts (approx. 10 minutes).6 After displaying “Completed”, press [OK].7 After displaying “Register 1 – 3”, press [OK] and then [ ], [ ] to select the data to store.· The optimised data can be stored up to 3 type. The data is overwritten when selecting the already registered data.8 Press [OK].· “Registered” is displayed.9 (When naming the data) After displaying “Rename?”, press [OK].· When the name is not edited, press [ ] to exit. The measurement completes and the optimised data is registered.10 Press [ ], [ ], [ ], [ ] to enter the name and then press [OK] to exit the setting.· The edited name is stored, the measurement completes and the optimised data is registered.“Crosstalk Canceller”/“Response Optimisation”Press [MENU]. Press [ ], [ ] to select “Cartridge Optimiser” and then press [OK]. Press [ ], [ ] to select the registered data and then press [ ].
Press [ ], [ ] to select “Crosstalk Canceller”/”Response Optimisation” and then press [OK]. Press [ ], [ ] to select “On”/”Off” and then press [OK]. · “Crosstalk Canceller”: Reduces the crosstalk occurs on the cartridge. · “Response Optimisation”: Optimises the resonance occurs on the cartridge and cable, also adjusts the right and left balance.Call up the registered settingPress [MENU]. Press [ ], [ ] to select “Cartridge Optimiser” and then press [OK]. Press [ ], [ ] to select the registered data and then press [OK].Edit the namePress [MENU]. Press [ ], [ ] to select “Cartridge Optimiser” and then press [OK]. Press [ ], [ ] to select the registered data, then press and hold [OK]. Press [ ], [ ], [ ], [ ] to enter the name and then press [OK]. · Only ASCII characters can be used. · “A” can be added when you press the [ ] at the time of the last letter is selected. · Press [CLEAR] to delete a letter.Switching the PHONO equaliser curveYou can switch the equaliser curve of this unit. This unit supports the simulated equaliser curve before unifying to RIAA. · The factory default is “RIAA”. 1 Press [MENU]. 2 Press [ ], [ ] repeatedly to select “EQCURVE” and then press [OK]. 3 Press [ ], [ ] to select the equalisersetting and then press [OK]. · You can also switch the equaliser curve bypressing [CURVE].Reducing low frequency noiseReduces the low frequency noise caused by the warpage of record. ( 15)Operations (17) 17
English
OperationsUsing this unit as power amplifier
You can connect the AV receiver, control amplifier, etc. with analogue audio cable (not supplied) to this unit and use this unit as power amplifier.
Set the volume of the AV receiver, control amplifier, etc. to minimum before connecting. While using this unit as power amplifier, the volume adjustment with this unit is disabled. Adjust the volume little by little with the connected device. Do not input the audio signal from REC OUT/PRE OUT terminals to the MAIN IN terminals of this unit. Doing so may cause malfunction.
Analogue audio cable (not supplied)
13&065
AV receiver, control amplifier, etc.
1 Disconnect the AC mains lead.
2 Connect this unit and AV receiver, control amplifier, etc. after minimising the volume of the device.
3 Connect the AC mains lead to this unit. ( 12)
4 Press the unit on/off button to the
[
] position.
5 Press [SETUP].
6 Press [ ], [ ] repeatedly to select “MAIN IN” and then press [OK].
7 Press [ ], [ ] to select “On” and press [OK].
8 Confirm the displayed message and press [OK].9 Press [ ], [ ] to select “Yes” and then press [OK].10 Start playback on the connected device.Note · It is not possible to adjust the volume with thisunit. · Sound is not output from headphones jack andREC OUT/PRE OUT terminals.Minimising sound distortionIf sound distortion occurs, setting the attenuator to “On” may improve the sound quality. · The factory default is “Off”.1 Press [MENU]. 2 Press [OK]. 3 Press [ ], [ ] to select “On” and thenpress [OK].
18 (18)
Using analogue audio input device
Do not input the audio signal from REC OUT/PRE OUT terminals to the analogue audio input terminals of this unit. Doing so may cause malfunction.Connecting a power amplifier, subwoofer, etc.You can connect the power amplifier, subwoofer, etc. with analogue audio cable (not supplied) to output the analogue audio signals.
Connecting a recording equipmentWhen connecting a recording equipment to this unit, use the analogue audio cable (not supplied) and connect REC IN terminal with the audio output terminals of the connected equipment, connect REC OUT terminals with the audio input terminals of the connected equipment. · Press [REC IN] to switch the input source to“REC IN”.
English
Analogue audio cable (not supplied)
“6%*0*/
Power amplifier, Subwoofer, etc.
1 Disconnect the AC mains lead.
2 Connect this unit and a power amplifier, subwoofer, etc.
3 Connect the AC mains lead to this unit. ( 12)
4 Press the unit on/off button to the
[
] position.
Note· For details, refer to the operating instructions of the connected device.· The audio signal output from the power amplifier, subwoofer, etc. connected to PRE OUT terminals can be enable/disable. ( 21)
Analogue audio cable (not supplied)“6%*0065
Recording input terminals(REC IN, AUX IN)
Recording equipment
1 Disconnect the AC mains lead.
2 Connect this unit and a recording equipment.
3 Connect the AC mains lead to this unit. ( 12)
4 Press the unit on/off button to the
[
] position.
Note· The choppy audio occurs in output audio signal when switching the input source.· The audio signal output from recording equipment connected to REC OUT terminals can be enable/disable. ( 21)
Operations (19) 19
SettingsSound adjustment, Other settingsThe sound effects and other settings can be set up.1 Press [SETUP]. 2 Press [ ], [ ] repeatedly to select the menu and then press [OK]. 3 Press [ ], [ ], [ ], [ ] to select a desired item or value, and press [OK].
Adjusting BASS/MID/TREBLE “Tone Control”The tone can be adjusted by pressing [BASS]/ [MID]/[TREBLE]. · The tone adjustment is enabled by pressing[BASS]/[MID]/[TREBLE] and “Tone Control” is set to “On”. · Each level can be adjusted between “-10” and “+10”. · While connecting Technics device supporting system control function (Network Audio Player, etc.) to this unit, sound setting on the connected device may have a priority over this unit. Adjust the sound with the connected device. · Not available when using this unit as power amplifier ( 18). Adjust the sound with the AV receiver, control amplifier, etc. · Set “Tone Control” to “Off” to cancel the adjustment of “BASS”, “MID” and “TREBLE”.Adjusting balance of speakers “Balance L/R”Adjusts the balance of the output from left and right speakers. · Each level can be adjusted between 18 dB (L)and 18 dB (R). · The audio output from the connectedheadphones and PRE OUT terminals are also adjusted. · While using this unit as power amplifier ( 18), this setting is disabled. Adjust the setting with the connected device.20 (20)
Adjusting the volume attenuator “VOLUME Attenuator”Set to “On (-20dB)” for the attenuator to ease the volume adjustment at a low volume. · The factory default is “Off”. · “ATT” is displayed after setting. · Not available when using this unit as poweramplifier ( 18). Adjust the sound with the AV receiver, control amplifier, etc.MQA decoding “MQA Decoding”This unit includes the MQA (Master Quality Authenticated) technology, which enables playback of MQA audio files and streams, delivering the sound like the original master recording. The built-in MQA decoder will restore the highresolution signal heard in the studio and confirm it, using the authentication signature. Visit www.mqa.co.uk/customer/mqacd for more information. To deliver the sound like the original master recording, MQA decoding function needs to be set to “On”. · “MQA”, “MQA Studio”, etc. are displayed whileplaying back the MQA audio files and streams.Selecting the speaker terminals to output “SPEAKERS”Select the speaker terminals from which audio will be output. · The factory default is “A”.
English
Enabling the audio output “PRE OUT”Enables/Disables the audio output from PRE OUT terminals. · The factory default is “On”.Enabling the audio output “REC OUT”Enables/Disables the audio output from REC OUT terminals. · When “LAPC” or “Response Optimisation” is setto “On”, “REC OUT” may be set to “Off”. · The factory default is “On”.Auto off function “Auto Off”This unit is designed to conserve its power consumption and save energy. The unit has been left unused for about 20 minutes and will enter standby mode within a minute. Press any button to cancel it. · The factory default is “On”. To disable thisfunction, select “Off”. · “Auto Off” is displayed 3 minutes before thisunit is turned off. Note · The setting is stored even if the power is turned off and on.
Adjusting the dimmer level “Auto DIMMER”The unit has been left unused for about 20 minutes and will temporarily adjust the brightness of peak power meter light, power indicator, LAPC indicator, etc. · The factory default is “On”. · “Auto Off” function has a priority while “AutoOff” is set to “On”.Checking the model name “Model No.”The model name is displayed.Checking the firmware version “F/W Version”The version of the installed firmware is displayed.
Settings (21) 21
SettingsUsing output correction function (LAPC)You can make the optimum adjustment according to your own speakers.
Measuring the output signal of the amplifier and correcting its output (LAPC)Preparation· Disconnect the headphones.
Test tone emitted during measurementTo ensure the measurement accuracy, the speakers output a test tone at regular intervals. (For approximately 3 minutes)It is not possible to change the volume of the audio being output while the measurement is in progress.
1 Press the unit on/off button to the
[
] position.
2 Press and hold [LAPC] until “Please Wait” is displayed.
“LAPC Measuring” is displayed and this unit will start measuring the output signal of the amplifier. Check that a test tone is output from both the left and right speakers.When the measurement is complete, amplifier output correction will be automatically turned on.· If you connect headphones during amplifier signal measurement or amplifier output correction, it will be cancelled.
Note· The output correction function can be set for “A”, “B”, or “A+B” of “SPEAKERS”. (The output correction function is not available when setting to “Off”.)· The amplifier signal measurement is cancelled in the following condition. – Pressing [MUTE]/[LAPC] – Switching the input source
Turning on/off the output correctionfunction Press [LAPC] to select “On”/”Off”. · LAPC indicator lights and “LAPC : On” isdisplayed while the output correction function is in progress.Note· Measurement is not available for the audio output signal from REC OUT/PRE OUT terminals of this unit. ( 19)· Depending on the type of the connected speakers, the effect of the output correction function may be minimal.· The corrected output remains in effect until you measure the output signal again. When you use other speakers, redo the measurement.· When “REC OUT” is set to “On”, “LAPC” may be disabled.Direct modeThis enables faithful and high quality reproduction of original sound and cancels the tone control setting. · The factory default is “Off”. Press [DIRECT] to select “On”/”Off”. · Set to “On” to enable the mode. · When pressing [BASS]/[MID]/[TREBLE], thedirect mode is cancelled and “Tone Control” is set to “On” ( 20)
22 (22)
English
Firmware updates “F/W Update”Occasionally, Panasonic may release updated firmware for this unit that may add or improve the way a feature operates. These updates are available free of charge. · For the update information, refer to thefollowing website. www.technics.com/support/firmware/Downloading takes approx. 3 minutes. Do not disconnect the AC mains lead or turn this unit to standby while updating. Do not disconnect the USB flash memory while updating. · The progress is displayed as “Updating %”while updating. (” ” stands for a number.)Note· During the update process, no other operations can be performed.· If there are no updates, “Firmware is Up To Date” is displayed. (No need to update it.)· Updating the firmware may reset the settings of this unit.
Firmware updatesPreparation· Download the latest firmware on the USB flash memory. For details, refer to the following website. www.technics.com/support/firmware/1 Connect the USB flash memory with new firmware.
USB device
2 Press [SETUP].
3 Press [ ], [ ] repeatedly to select “F/W Update” and then press [OK].
4 Press [ ], [ ] to select “Yes” and then press [OK].
· The progress is displayed as “Updating %” while updating. (” ” stands for a number.)· When the update has finished successfully, “Success” is displayed.
5 Press the unit on/off button to the
[
] position and press again to the
[
] position.
Note
· Downloading may take longer depending on the USB flash memory.· Use a USB flash memory with FAT16 or FAT32 format.· UPDATE terminal is used only for firmware updating. Do not connect any USB device other than the USB flash memory for firmware updating.· No USB device can be charged from the UPDATE terminal of this unit.
Settings (23) 23
SettingsSystem control connection
You can operate this unit and Technics devices supporting system control function (Network Audio Player, Compact Disc Player, etc.) simultaneously with ease on the remote control.For details, refer to the operating instructions of each device.
Coaxial digital cable (not supplied)*
System connection cable
$0″9*”-065
$0/530-
Network Audio Player, etc.*: The illustration shows the example whenconnecting with coax digital cable. Connect the device with proper cable/terminal supporting the device.
Using system connection cable and audio cable
1 Disconnect the AC mains lead.
2 Connect this unit and Technics device supporting system control function (Network Audio Player, etc.).
· Use both of the system connection cable and the audio cables when connecting this unit and the device.· Use the system connection cable supplied with the connected device.
3 Connect the AC mains lead to this unit. ( 12)
4 Press the unit on/off button to the
[
] position.
5 Press [SETUP].
24 (24)
6 Press [ ], [ ] repeatedly to select “System Control” and then press [OK].7 Press [ ], [ ] to select the input source for the device which is connected at step 2, and press [OK]. · Select “Off” to disable the system control function.Note· When using this unit as power amplifier ( 18), the system control function for the Technics device connected to the MAIN IN terminals is disabled.Switching this unit and the connected device· If you point the remote control at this unit and press [ ] when this unit and the connected device are in standby mode, this unit and the device of the selected input source which is set with “System Control” will be turned on simultaneously.· If you point the remote control at this unit and press [ ] when this unit and the connected device are turned on, this unit and the connected device will enter standby mode.Switching this unit’s input source automaticallyWhen you perform an operation such as playback on the connected device, the input source of this unit will be automatically switched to the source which is set with “System Control”.
Troubleshooting
Before requesting service, make the following checks. If you are uncertain about some of the check points, or if the solutions indicated in the following guide do not resolve the issue, then consult your dealer for instructions.
Heat buildup of this unitThis unit becomes warm while in use. This is not a malfunction.Do you have the latest firmware installed?Panasonic is constantly improving the unit’s firmware to ensure that our customers are enjoying the latest technology. ( 23)To restore all settings to the factory defaultsWhen the following situations occur, reset the memory: · There is no response when buttons are pressed. · You want to clear and reset the memorycontents. 1 Press [SETUP]. 2 Press [ ], [ ] repeatedly to select“Initialization” and then press [OK]. · A confirmation screen appears. Select “Yes”in the following steps to restore all the settings to defaults. 3 Press [ ], [ ] to select “Yes” and then press [OK]. 4 Press [ ], [ ] to select “Yes” and then press [OK] again.
General
English
The unit does not work. Operations are not done properly.
· One of the unit’s safety devices may have been activated.
Press the unit on/off button to the [
]
position.
· If the unit does not switch to standby, disconnect the AC mains lead, wait for at least 3 minutes, then reconnect it.
Press the unit on/off button to the [
]
position. If the unit still cannot be operated,
consult the dealer.
A “humming” sound can be heard during
playback.
· An AC mains lead of another device or fluorescent light is near the cables. Turn off other appliances, or keep them away from the cables of this unit.· A strong magnetic field near a TV or other device may adversely affect the audio quality. Keep this unit away from such a location.· The speakers may output noise when a device nearby is emitting powerful radio waves, such as when a mobile phone is on a call.No sound.
· Check the volume of this unit and the connected device.· Check connections to speakers and other equipment.· Connect speakers and measure the output signal of the amplifier. ( 22)· Check the impedance of the connected speakers.· Check to see if the correct input source is selected.· Insert the plugs of the cables to be connected all the way in.· Confirm the sound output setting. (Sound is not output from the speakers connected to the speaker output terminals of this unit while “PRE OUT” is set to “Off”.) ( 19)· Sound is not output from headphones jack and REC OUT/PRE OUT terminals.· Playback of multi-channel content is not supported.· The digital audio input terminals of this unit can only detect linear PCM signals. For details, refer to the operating instructions of the device.
Settings / Troubleshooting (25) 25
Troubleshooting
Sound is distorted. · Setting “Attenuator”/”Gain” to “On” accordingto the analogue audio input may minimise the sound distortion. ( 15, 16, 18) The unit turns to standby mode automatically. · Is the auto off function turned on? ( 21) · This unit incorporates a protection circuit to prevent damage caused by heat buildup. When you use this unit at a high volume level for a long period of time, it may turn off automatically. Wait for this unit to cool down before turning on this unit again. (For approximately 3 minutes) The settings are reset to the factory defaults. · Updating the firmware may reset the settings. The peak power meter does not operate. · In the following cases, this meter does not operate: – When the headphones are connected. – When the peak power meter light is turnedoff by pressing [DIMMER]. – When this unit is muted by pressing [MUTE]. – When “SPEAKERS” is set to “Off” ( 19) Display turns dim. · Press [DIMMER] to adjust the dimmer level. · Check the setting of “Auto DIMMER”. ( 21) The system control function is not working. · Use the system connection cable supplied with the connected device. · Connect the system connection cable to the system terminals (CONTROL). ( 24) · Check the connection of system connection cable, audio cable and the input source which is set with “System Control”. ( 24) · Connect Technics device supporting system control function (Network Audio Player, Compact Disc Player, etc.) to this unit. For details, refer to the following website. www.technics.com/support/PCThe PC does not recognise this unit. · Check your operating environment. ( 14) · Restart the PC, turn this unit to standby and on,and then reconnect the USB cable. · Use another USB port of the connected PC. · Install the dedicated USB driver if using a PCwith Windows. ( 14)26 (26)
Remote controlThe remote control does not work properly. · The batteries are depleted or insertedincorrectly. ( 10) · To avoid interference, please do not put anyobjects in front of signal sensor. ( 08) · If the remote control mode of the remotecontrol differs from that of this unit, match the mode of the remote control to the mode of this unit. ( 11)Unit care· Pull out the AC mains lead from the outlet before maintenance. Clean this unit with a soft cloth.· When dirt is heavy, wring a wet cloth tightly to wipe the dirt, and then wipe it with a soft cloth.· Do not use solvents including benzine, thinner, alcohol, kitchen detergent, a chemical wiper, etc. This might cause the exterior case to be deformed or the coating to come off.To dispose or transfer this unit· This unit may contain private information. Before disposing of or transferring this unit, perform the following to delete the data, including personal or secret information.· “To restore all settings to the factory defaults” ( 25)MessagesATTENTION : MAX Output Setting · While using this unit as power amplifier, thevolume adjustment with this unit is disabled. · Adjust the volume little by little with theconnected device. ( 18) AUTO OFF · The unit has been left unused for about20 minutes and will shut down within a minute. Press any button to cancel it. ( 21) Connect USB Device · The firmware download has failed. · Download the latest firmware on the USB flash memory and try again. ( 23)
Disconnect PHONES· When the headphones are connected, measuring the output signal of the amplifier (LAPC) will not start.· Disconnect the headphones. · If you connect headphones during amplifiersignal measurement or amplifier output correction, it will be cancelled. ( 22)“F ” (” ” stands for a number.)· An abnormality has occurred. (If this unit detects an abnormality, the protection circuit is activated, and the power may be turned off automatically.) – Is the volume extremely high? Or is this unit placed in an extremely hot place? Wait a few seconds and then turn the unit on again. (The protection circuit will be deactivated.)Load Fail· The firmware cannot be found on the USB flash memory.· Download the latest firmware on the USB flash memory and try again. ( 23)Measurement Fail· The measurement or processing of “Cartridge Optimiser” fails. Make the following checks.“High Level”:The output signal is so noisy or the output signal level of turntable is too high. Remove the dust from the record. Confirm the setting of “Gain” and adjust the input level of this unit ( 16).Check if “MM/MC” setting of this unit matches the cartridge type of the turntable or not ( 16).“Low Level”:The record is not played back, or the output signal level of turntable is too low. Confirm the turntable is connected correctly and the record is played back properly ( 16).Confirm the setting of “Gain” and adjust the input level of this unit ( 16).Check if “MM/MC” setting of this unit matches the cartridge type of the turntable or not ( 16).“Low Quality”:The output signal of turntable is so noisy. Remove the dust from the record. Or play another track. If the problem still persists, consult your dealer.“Speed Mismatch”:Rotation per minute (RPM) is incorrect. Adjust the rotation of turntable and play back in correct RPM.“System Error”:It may be system error. Consult your dealer.
No Device · USB flash memory with new firmware is notconnected. Connect the USB flash memory with new firmware. ( 23) Not Measured · Measuring the output signal for the output correction function (LAPC) has not been done yet. · Measure the output signal. ( 22) Not Valid · The function you have tried to use is not available with the current settings. Check the steps and settings. · The current input source is different from the one in “Cartridge Optimiser” setting. Switch the input source correctly. ( 16) · [MUTE] is not valid while the measurement of “Cartridge Optimiser”. Adjust the volume. PHONES Connected · The headphones are connected. · Sound is not output from headphones jack and speaker output terminals when the headphones are connected and “MAIN IN” is selected as input source of this unit. ( 18) “Remote ” (” ” stands for a number.) · The remote control and this unit are using different modes. Change the mode on the remote control. ( 11) Unlocked · “COAX1”, “COAX2”, “OPT1”, “OPT2”, “PC1” or “PC2” is selected, but no device is connected. Check the connection with the device. ( 13, 14) · The sampling frequency components, etc. of the audio signals are not input correctly. – About supported format, refer to “Formatsupport”. ( 28) USB Over Current USB device is drawing too much power. · Disconnect the USB device and connect itagain. ( 23) · Turn the unit to standby and on again. VOLUME OK (” ” stands for a number.) · When the input source is switched from “MAININ”, the volume level after switching the input source is displayed. · Confirm and adjust the volume before pressing [OK].Troubleshooting (27) 27
English
OthersSpecifications
GENERAL
Power supply
AC 220 V to 240 V, 50/60 Hz
Power consumption
220 W
Power consumption in standby mode
Approx. 0.3 W
Dimensions (W×H×D)
430 mm × 191 mm × 459 mm
Mass
Approx. 22.8 kg
Operating temperature range
0 °C to 40 °C
Operating humidity 35 % to 80 % RH
range
(no condensation)
AMPLIFIER SECTION
Output power
150 W + 150 W (1 kHz, T.H.D. 0.5 %, 8 , 20 kHz LPF) 300 W + 300 W (1 kHz, T.H.D. 0.5 %, 4 , 20 kHz LPF)
Load impedance 4 – 16
Frequency response
PHONO (MM)
20 Hz to 20 kHz(RIAA DEVIATION ±1 dB, 8 )
LINE
5 Hz to 80 kHz (-3 dB, 8 )
DIGITAL IN
5 Hz to 80 kHz (-3 dB, 8 )
Input sensitivity/ Input impedance
PHONO (MM)
2.5 mV / 47 k
PHONO (MC)
300 mV / 100 k
LINE
200 mV / 22 k
TERMINALS SECTION
Headphones Jack
Stereo, 6.3 mm 0.75 mW, 32
PC
REAR USB Type B Connector ×2
Analogue input
LINE ×2
Pin jack
LINE XLR BALANCED
3-pin XLR
PHONO (MM/MC)
Pin jack
PHONO XLR BALANCED (MC)
3-pin XLR
MAIN IN
Pin jack
REC IN
Pin jack
Digital input
Optical digital input ×2
Optical terminal
Coaxial digital input ×2
Pin jack
Format support LPCM
Analogue output
REC OUT
Pin jack
PRE OUT
Pin jack
System port
System control 3.5 mm, Jack
FORMAT SECTIONUSB-B
USB Standard DSD control mode
USB 2.0 High-speed USB Audio Class 2.0, Asynchronous modeASIO Native mode, DoP mode
Format supportThis unit supports the following formats. · Playback of all formats supported by this unit is not guaranteed. · Playback of a format not supported by this unit may cause choppy audio or noise. In such cases, check tosee if this unit supports the format. · File information (sampling frequency, etc.) shown by this unit and playback software may differ from eachother.28 (28)
English
PC (USB-B)*
File format
Sampling frequency
PCM DSD
32/44.1/48/88.2/96/176.4/192/352.8/384 kHz2.8 MHz/5.6 MHz/11.2 MHz/22.4 MHz (ASIO Native mode only)
MQA decorder The MQA decoding function is available for the digital input
Bit rate / Number of quantisation bits16/24/32 bit
*: If you download and install the dedicated app, you can play back files in wide-ranging formats. ( 14)For details, refer to the operating instructions of the app.
Note· Specifications are subject to change without notice. · Mass and dimensions are approximate.
Windows is a trademark or a registered trademark of Microsoft Corporation in the United States and other countries.Mac and OS X are trademarks of Apple Inc., registered in the U.S. and other countries. macOS is a trademark of Apple Inc.“DSD” is a registered trademark.MQA and the Sound Wave Device are registered trade marks of MQA Limited © 2016The Clear BSD License Copyright (c) 2015, Freescale Semiconductor, Inc. Copyright 2016-2017 NXP All rights reserved. Redistribution and use in source and binary forms, with or without modification, are permitted (subject to the limitations in the disclaimer below) provided that the following conditions are met: · Redistributions of source code must retain the above copyright notice, this list of conditions and thefollowing disclaimer. · Redistributions in binary form must reproduce the above copyright notice, this list of conditions and thefollowing disclaimer in the documentation and/or other materials provided with the distribution. · Neither the name of the copyright holder nor the names of its contributors may be used to endorse orpromote products derived from this software without specific prior written permission.NO EXPRESS OR IMPLIED LICENSES TO ANY PARTY’S PATENT RIGHTS ARE GRANTED BY THIS LICENSE. THIS SOFTWARE IS PROVIDED BY THE COPYRIGHT HOLDERS AND CONTRIBUTORS “AS IS” AND ANY EXPRESS OR IMPLIED WARRANTIES, INCLUDING, BUT NOT LIMITED TO, THE IMPLIED WARRANTIES OF MERCHANTABILITY AND FITNESS FOR A PARTICULAR PURPOSE ARE DISCLAIMED. IN NO EVENT SHALL THE COPYRIGHT HOLDER OR CONTRIBUTORS BE LIABLE FOR ANY DIRECT, INDIRECT, INCIDENTAL, SPECIAL, EXEMPLARY, OR CONSEQUENTIAL DAMAGES (INCLUDING, BUT NOT LIMITED TO, PROCUREMENT OF SUBSTITUTE GOODS OR SERVICES; LOSS OF USE, DATA, OR PROFITS; OR BUSINESS INTERRUPTION) HOWEVER CAUSED AND ON ANY THEORY OF LIABILITY, WHETHER IN CONTRACT, STRICT LIABILITY, OR TORT (INCLUDING NEGLIGENCE OR OTHERWISE) ARISING IN ANY WAY OUT OF THE USE OF THIS SOFTWARE, EVEN IF ADVISED OF THE POSSIBILITY OF SUCH DAMAGE.
Others (29) 29
Wir möchten Ihnen dafür danken, dass Sie sich für dieses Gerät entschieden haben. Bitte lesen Sie diese Anleitung vor der Inbetriebnahme dieses Produkts aufmerksam durch, und bewahren Sie dieses Handbuch für spätere Bezugnahme griffbereit auf.· Hinweise zu Beschreibungen in dieser Bedienungsanleitung – Seitenverweise werden dargestellt als ” “. – Die gezeigten Abbildungen können sich von Ihrem Gerät unterscheiden.
MerkmaleIntegrierter Verstärker mit hochwertigen Audio-TechnologienDie JENO Engine überträgt und verarbeitet volldigitale Audiosignale mit minimalem Jitter von der Eingangs- bis zur Leistungsstufe. GaN-FET-Treiber zur linearen Ansteuerung der Lautsprecher mit verlustfreiem, schnellem Schalten und ADCT (Active Distortion Cancelling Technology) zur präzisen Unterdrückung von Verzerrungen sorgen für einen kraftvollen, dynamischen Klang mit überlegener Ansteuerung. Der rauscharme und klare Klang wird durch verschiedene Technologien erreicht, wie z. B. durch LAPC, das mit einer Last-adaptiven Phasen-Kalibrierung die Phasen- und Impedanzeigenschaften der angeschlossenen Lautsprecher misst und entsprechend optimiert.Rauscharme Stromversorgung mit hoher Reaktionsfähigkeit auf das AudiosignalFür ein verlustfreies Schalten mit hoher Geschwindigkeit und Rauschreduzierung ist ein Netzteil mit “Advanced Speed Silent Power Supply” integriert. Das einzigartige Netzteil stellt dank der Hochgeschwindigkeits-Schaltfunktion eine stabilisierte Versorgung mit geringstem Rauschen bereit, die für eine bessere Auflösung des Audiosignals im volldigitalen Verstärker sorgt. Und dieses Gerät verbessert das Potential der JENO Engine für eine bessere Wiedergabe.04 (30)
Die einzigartige digitale Technologie“Intelligentes PHONO-EQ”verbessert die Wiedergabe vonSchallplatten.Die “Accurate EQ Curve” mit einer HybridKomponente für analoge und digitale Schaltungen ermöglicht eine Entzerrung mit hoher Präzision und großem Signal-/ Rauschabstand. Und dieses Gerät unterstützt außer RIAA verschiedene andere Entzerrungskurven für eine präzise Wiedergabe. Die “Crosstalk Canceller”-Funktion, die das Übersprechen misst und mit DSP optimiert, und die “PHONO Response Optimiser”-Funktion, die die Resonanzen auf dem Tonabnehmer reduziert, sind implementiert, um das Audiosignal aus der Plattenrille wiederzugeben.
Inhaltsverzeichnis
Sicherheitsvorkehrungen
06
Benutzung der Bedienelemente 08
Anschlüsse
12
Bedienung
13
Einstellungen
20
Fehlerbehebung
25
Sonstige
28
Lesen Sie vor der Verwendung die “Sicherheitsvorkehrungen” in diesem Handbuch sorgfältig durch. Dieses Gerät, FernbedienungLautsprecherverbindung, NetzkabelverbindungWiedergabe über angeschlossene GeräteSonstige Einstellungen Bevor Sie den Kundendienst anfordern, lesen Sie die Fehlerbehebung. Technische Daten usw.
ZubehörNetzkabel (2) Außer für die SchweizK2CM3YY00041Für die Schweiz K2CS3YY00033Fernbedienung (1) N2QAYA000224Batterien für Fernbedienung (2)Kalibrierungsschallplatte (1) TSPX101&DOLEUDWLRQ5HFRUG· Produktnummern, die Sie in dieser Bedienungsanleitung finden, entsprechen dem Stand Oktober 2020.· Änderungen vorbehalten. · Verwenden Sie das Netzkabel und dieKalibrierungsschallplatte nicht mit anderen Geräten.
Entsorgung von Altgeräten und Batterien Nur für die Europäische Union und Länder mit RecyclingsystemenDieses Symbol, auf den Produkten, der Verpackung und/oder den Begleitdokumenten, bedeutet, dass gebrauchte elektrische und elektronische Produkte sowie Batterien nicht in den allgemeinen Hausmüll gegeben werden dürfen. Bitte führen Sie alte Produkte und verbrauchte Batterien zur Behandlung, Aufarbeitung bzw. zum Recycling gemäß den gesetzlichen Bestimmungen den zuständigen Sammelpunkten zu. Indem Sie diese Produkte und Batterien ordnungsgemäß entsorgen, helfen Sie dabei, wertvolle Ressourcen zu schützen und eventuelle negative Auswirkungen auf die menschliche Gesundheit und die Umwelt zu vermeiden. Für mehr Informationen zu Sammlung und Recycling, wenden Sie sich bitte an Ihren örtlichen Abfallentsorgungsdienstleister. Gemäß Landesvorschriften können wegen nicht ordnungsgemäßer Entsorgung dieses Abfalls Strafgelder verhängt werden.Hinweis für das Batteriesymbol (Symbol unten): Dieses Symbol kann in Kombination mit einem chemischen Symbol abgebildet sein. In diesem Fall erfolgt dieses auf Grund der Anforderungen derjenigen Richtlinien, die für die betreffende Chemikalie erlassen wurden.(31) 05
Deutsch
Sicherheitsvorkehrungen
WarnungGerät· Zur Reduzierung der Gefahr von Brand, elektrischem Schlag und Beschädigung: – Setzen Sie dieses Gerät weder Regen noch Feuchtigkeit, Tropfen oder Spritzern aus. – Stellen Sie keine mit Flüssigkeiten gefüllten Gefäße, wie Vasen, auf dieses Gerät. – Ausschließlich das empfohlene Zubehör verwenden. – Entfernen Sie die Abdeckungen nicht. – Reparieren Sie dieses Gerät nicht selbst. Wenden Sie sich zur Wartung an qualifiziertes Kundendienstpersonal. – Lassen Sie keine Gegenstände aus Metall in dieses Gerät fallen. – Stellen Sie keine schweren Gegenstände auf dieses Gerät.Netzkabel· Zur Reduzierung der Gefahr von Brand, elektrischem Schlag und Beschädigung: – Gewährleisten Sie, dass die Spannung der Stromversorgung dem auf diesem Gerät angegebenen Wert entspricht. – Stecken Sie den Netzstecker vollständig in die Steckdose ein. – Ziehen Sie nicht an der Leitung, knicken Sie sie nicht und stellen Sie keine schweren Gegenstände darauf. – Fassen Sie den Stecker nicht mit nassen Händen an. – Fassen Sie den Stecker beim Herausziehen an seinem Korpus an. – Verwenden Sie keinen Netzstecker und keine Steckdose, die beschädigt sind.· Der Netzstecker ist das trennende Gerät. Installieren Sie dieses Gerät so, dass der Netzstecker sofort aus der Steckdose gezogen werden kann.· Stellen Sie sicher, dass der Erdungsstift sicher mit dem Netzstecker verbunden ist, um einen elektrischen Schlag zu vermeiden. – Ein Gerät mit CLASS I-Konstruktion wird an eine Netzsteckdose mit Schutzleiteranschluss angeschlossen.
AchtungGerät· Stellen Sie keine Quellen offener Flammen, z. B. brennende Kerzen, auf das Gerät.· Dieses Gerät kann beim Betrieb Hochfrequenzstörungen auffangen, die durch die Benutzung von Mobiltelefonen verursacht werden. Sollte eine solche Störung festgestellt werden, sollte das Handy in größerer Entfernung zu diesem Gerät betrieben werden.· Dieses Gerät ist für den Betrieb in Ländern mit moderatem und tropischem Klima bestimmt.· Legen Sie keine Gegenstände auf dieses Gerät. Dieses Gerät wird heiß, wenn es an ist.· Berühren Sie nicht die Oberseite dieses Geräts. Dieses Gerät wird heiß, wenn es eingeschaltet ist.Aufstellung· Stellen Sie dieses Gerät auf eine ebene Oberfläche.· Zur Reduzierung der Gefahr von Brand, elektrischem Schlag und Beschädigung: – Installieren oder positionieren Sie dieses Gerät nicht in einem Bücherregal, Einbauschrank oder einem sonstigen engen Raum. Stellen Sie eine gute Belüftung des Geräts sicher. – Achten Sie darauf, die Entlüftungsschlitze des Geräts nicht durch Gegenstände aus Papier oder Stoff zu blockieren, z. B. Zeitungen, Tischdecken und Vorhänge. – Setzen Sie dieses Gerät keinem direkten Sonnenlicht, hohen Temperaturen, starker Feuchtigkeit und übermäßigen Erschütterungen aus.· Stellen Sie sicher, dass der Aufstellungsort stabil genug ist, um das Gewicht dieses Geräts zu tragen ( 28).· Heben oder tragen Sie dieses Gerät nicht, indem Sie es an den Knöpfen halten. Das Gerät könnte herunterfallen und einen Personenschaden oder eine Fehlfunktion dieses Geräts verursachen.
06 (32)
Deutsch
Batterie· Explosionsgefahr bei falschem Ersetzen der Batterie. Ersetzen Sie die Batterie nur durch den vom Hersteller empfohlenen Typ.· Die Fehlerhafte Verwendung der Batterien kann zu einem Auslaufen von Elektrolyt und einem Brand führen. – Entfernen Sie die Batterien, wenn Sie die Fernbedienung über längere Zeit nicht benutzen. Bewahren Sie sie an einem kühlen, dunklen Ort auf. – Setzen Sie sie niemals starker Hitze oder offenem Feuer aus. – Lassen Sie die Batterie(n) nie längere Zeit in einem Auto mit geschlossenen Türen und Fenstern zurück, das direkter Sonneneinstrahlung ausgesetzt ist. – Nehmen Sie die Batterien nicht auseinander, und schließen Sie sie nicht kurz. – Laden Sie Alkali- oder Manganbatterien nicht wieder auf. – Verwenden Sie keine Batterien mit teilweise abgelöstem Mantel. – Verwenden Sie keine alten und neuen Batterien oder verschiedene Typen gleichzeitig.· Wenden Sie sich zur Entsorgung der Batterien an die lokalen Behörden oder erfragen Sie die richtige Vorgehensweise zur Entsorgung.· Nicht unter folgenden Bedingungen verwenden – Extrem hohe oder niedrige Temperaturen bei Gebrauch, Lagerung oder Transport. – Ersetzen des Akkus durch einen nicht korrekten Typ. – Entsorgung von Batterien im Feuer oder in einem heißen Ofen oder mechanisches Quetschen oder Zerschneiden von Batterien, da dies zu einer Explosion führen kann. – Extrem hohe Temperatur und/oder extrem niedriger Luftdruck, da dies zu einer Explosion oder zum Austreten entzündlicher Flüssigkeiten oder Gase führen kann.
InstallationGerät Schalten Sie das gesamte Gerät vor dem Anschließen aus und lesen Sie die entsprechende Betriebsanleitung. · Für die Abmessungen dieses Geräts ( 28) · Die Abmessungen der Gerätefüße entnehmenSie bitte der folgenden Abbildung.Vorderseite
A
A: 340 mm
B: 313 mm
B
Kalibrierungsschallplatte· Obwohl sich die Schallplatte aufgrund ihrer Eigenschaften je nach Aufbewahrungsumgebung oder Gebrauch verzogen haben kann, ist sie zur Wiedergabe für die “Cartridge Optimiser” vorgesehen, selbst wenn es sich um einen leichte Verzug handelt.· Stellen Sie diese Schallplatte zur Aufbewahrung aufrecht hin. Das Stapeln oder Schrägstellen der Schallplatte bei der Aufbewahrung kann dazu führen, dass sich die Schallplatte verzieht.
Sicherheitsvorkehrungen (33) 07
Benutzung der BedienelementeDieses Gerät
01 Standby-/Ein-Taste (
)
[
] (Aus): Das Gerät ist aus.
[
] (Ein): Das Gerät ist ein.
· Das Gerät verbraucht im ausgeschalteten Zustand immer noch eine geringe Menge Strom. Der Aus-Modus verbraucht weniger Strom.
02 Leistungsanzeige · Blau: Das Gerät ist an. · Aus: Das Gerät ist aus.
03 Kopfhörerbuchse· Wenn ein Stecker eingesetzt ist, geben die Lautsprecher und REC OUT/PRE OUTAnschlüsse keinen Sound aus. ( 19)· Wenn “MAIN IN” als Eingangsquelle dieses Geräts ausgewählt ist, wird kein Sound über die Kopfhörerbuchse ausgegeben. ( 18)· Zu hohe Lautstärke von Ohr- oder Kopfhörern kann zu Gehörverlust führen.· Das Hören bei voller Lautstärke und über einen längeren Zeitraum kann das Gehör des Benutzers zerstören.
04 Lautstärkeregler · — dB (min), -88,0 dB bis 0 dB (max.)
05 Display · Informationen wie Eingangsquelle usw. werden angezeigt. ( 26) · Die Eingangsquelle blinkt auf der Anzeige, bevor das Gerät nach dem Einschalten in Betrieb genommen wird. (Während des Blinkens wird kein Ton ausgegeben.)06 Eingangswahlschalter · Drehen Sie diesen Knopf im Uhrzeigersinn oder gegen den Uhrzeigersinn, um die Eingabequelle umzuschalten.07 Spitzenleistungsmesser · Anzeige des Ausgangspegels. 100 % ist die Nennausgangsleistung. ( 28) · Der Spitzenleistungsmesser funktioniert nicht, wenn das Licht ausgeschaltet ist, z. B. durch Drücken von [DIMMER], Anschließen des Kopfhörers usw.08 LAPC-Anzeige ( 22)09 Fernbedienungs-Signalsensor · Empfangsabstand: Max. 7 m direkt von der Vorderseite · Empfangswinkel: Ca. 30° links und rechts
08 (34)
Deutsch
10 Lautsprecher-Ausgangsanschlüsse ( 12)11 Analoge Audioeingangsanschlüsse (REC IN) ( 15, 19)12 Analoge Audioausgangsanschlüsse (REC OUT) ( 19)13 Analoge Audioausgangsanschlüsse (PRE OUT) ( 19)14 Analoge Audioeingangsanschlüsse (MAIN IN) ( 18)15 Analoge Audioeingangsanschlüsse (LINE XLR BALANCED/LINE1/LINE2) ( 15)16 Analoge Audioeingangsanschlüsse (PHONO XLR BALANCED/PHONO) / PHONO EARTH-Anschluss ( 16) · PHONO EARTH dient zum Anschluss des Erdungskabels eines Plattenspielers. · Verwenden Sie ein Kabel unter 3 m Länge. · Bewahren Sie die PHONO Kurzschlussstecker außerhalb der Reichweite von Kindern auf, um ein Verschlucken zu verhindern.
17 USB-B-Anschlüsse (PC1/PC2) ( 14)18 USB-A-Anschluss (UPDATE) ( DC 5 V 500 mA) ( 23)19 Systemanschluss (CONTROL) ( 24)20 Optische digitale Eingangsanschlüsse (OPT1/OPT2) ( 13)21 Koaxiale digitale Eingangsanschlüsse (COAX1/COAX2) ( 13)22 Produktkennzeichnung · Es wird die Modellnummer angegeben.23 Netzkabel-Anschluss ( ) ( 12)
Benutzung der Bedienelemente (35) 09
Benutzung der BedienelementeFernbedienung
Verwendung der Fernbedienung
2
1
R03/LR03, AAA (Alkali- oder Manganbatterien)Hinweis · Legen Sie die Batterie so ein, dass die Pole( und ) mit denen in der Fernbedienung übereinstimmen. · Richten Sie die Fernbedienung auf den Fernbedienungs-Signalsensor an diesem Gerät. ( 08) · Bewahren Sie die Batterien außerhalb der Reichweite von Kindern auf, um ein Verschlucken zu verhindern.10 (36)
01 [ ]: Standby-/Ein-Taste · Drücken Sie diese Taste, um vom StandbyModus auf “ein” zu wechseln oder umgekehrt. Auch im Standby-Modus verbraucht das Gerät Energie.02 Umschalten der Eingangsquelle ( 13, 14, 15, 16, 19)
Deutsch
03 [MENU]: Öffnen des Menüs ( 13, 14, 15, 16, 18)04 [ ], [ ], [ ], [ ]/[OK]: Auswahl/OK05 [SETUP]: Öffnen des Einrichtungsmenüs ( 20)06 [BASS]/[MID]/[TREBLE]: Einstellen des Tonbereichs (BASS/MID/TREBLE). · Drücken Sie [ ], [ ], um den Ton einzustellen.07 [DIRECT]: Ein-/Ausschalten des Direktmodus08 [LAPC]: Messen des Verstärkerausgangssignals, wenn Lautsprecher angeschlossen sind, und Korrigieren des Ausgangs ( 22)09 [DIMMER]: Einstellen der Leuchte für den Spitzenleistungsmesser, der Anzeige usw. · Wenn das Display ausgeschaltet ist, leuchtet es nur dann einige Sekunden lang auf, wenn Sie dieses Gerät bedienen. Bevor das Display ausschaltet, wird “Display Off” einige Sekunden lang angezeigt. · Drücken Sie die Taste mehrfach, um die Helligkeit anzupassen. · Der Spitzenleistungsmesser funktioniert nicht, wenn das Licht ausgeschaltet ist.10 [INFO]: Informationen anzeigen · Drücken Sie diese Taste, um die Abtastfrequenz und andere Informationen anzuzeigen. (Die Information variiert je nach Eingangsquelle.)11 [RETURN]: Rückkehr zur vorherigen Anzeige12 [MUTE]: Stummschalten des Tons · Drücken Sie erneut [MUTE], um abzubrechen. “MUTE” wird auch durch Anpassen der Lautstärke durch dieses Gerät oder durch Versetzen des Geräts in den Standby-Modus abgebrochen.13 [CURVE]: Aktivieren der PHONOEntzerrungskurve.14 [+VOL-]: Anpassen der Lautstärke · Lautstärkebereich: — dB (min), -88,0 dB bis 0 dB (max.)
Tasten für die Systemsteuerfunktion fürTechnics-Geräte Die Fernbedienung für dieses Gerät kann auch für die Systemsteuerfunktion für TechnicsGeräte (Netzwerk-Audio-Player, CD-Player usw.) verwendet werden. Informationen zur Bedienung der Geräte finden Sie auch in deren Bedienungsanleitungen.01 Zifferntasten usw. 02 Wiedergabe-FunktionstastenFernbedienungsmodusWenn ein anderes Gerät auf die mitgelieferte Fernbedienung reagiert, ändern Sie den Fernbedienungsmodus. · Die Werkseinstellung lautet “Mode 1”. 1 Drücken Sie [SETUP]. 2 Drücken Sie [ ], [ ] wiederholt, um“Remote Control” auszuwählen, und drücken Sie danach [OK]. · Der aktuelle Fernbedienungsmodus diesesGeräts wird einige Sekunden lang angezeigt. 3 Wenn “Set Mode 1/2” angezeigt wird,ändern Sie den Fernbedienungsmodus der Fernbedienung. Um “Mode 1” einzustellen:Halten Sie [OK] und [1] mindestens 4 Sekunden lang gedrückt. Um “Mode 2” einzustellen: Halten Sie [OK] und [2] mindestens 4 Sekunden lang gedrückt. 4 Zeigen Sie mit der Fernbedienung auf dieses Gerät und halten Sie [OK] mindestens 4 Sekunden lang gedrückt. · Wenn der Fernbedienungsmodus geändert wird, wird der neue Modus einige Sekunden lang auf dem Display angezeigt.Wenn “Remote 1” oder “Remote 2”angezeigt wird Wenn “Remote 1” oder “Remote 2” angezeigt wird, verwenden dieses Gerät und die Fernbedienung unterschiedliche Modi. Führen Sie Schritt 3 oben durch.
Benutzung der Bedienelemente (37) 11
AnschlüsseLautsprecher/Netzkabel
· Verwenden Sie ausschließlich das mitgelieferte Netzkabel. · Stecken Sie die Stecker der zu verbindenden Kabel vollständig ein. · Knicken Sie Kabel nicht in spitzen Winkeln. · Wenn der Verstärker an die Lautsprecher angeschlossen ist, können Sie sein Ausgangssignalmessen und korrigieren, um die Audioausgabe zu optimieren. ( 22)
Lautsprecheranschluss
· Obwohl der Flachstecker (A: 16 mm oder weniger, B: 8 mm oder mehr) angeschlossen werden kann, lassen sich je nach Form des Steckers einige Stecker nicht anschließen.AB
Lautsprecherkabel (nicht mitgeliefert)Lautsprecher1 Drehen Sie die Knöpfe, um sie zu lösen, und führen Sie die Kerndrähte in die Löcher ein.2 Ziehen Sie die Knöpfe fest.Hinweis · Wenn die Verbindungen hergestellt wurden,ziehen Sie leicht an den Lautsprecherkabeln, um sicherzustellen, dass diese fest verbunden sind. · Achten Sie darauf, die Polarität der Lautsprecherdrähte nicht zu überkreuzen (Kurzschluss) oder umzukehren, da dies zur Beschädigung des Verstärkers führen kann.FALSCH
NetzkabelanschlussErst anschließen, wenn alle anderen Kabel bereits angeschlossen sind.
An eine Netzsteckdose
Netzkabel (mitgeliefert)
Führen Sie das Netzkabel bis zu einem Punkt unmittelbar vor der runden Öffnung ein.Hinweis· Dieses Gerät verbraucht kleine Mengen an Wechselstrom ( 28), auch wenn es sich im Standby-Modus befindet. Ziehen Sie den Stecker aus der Steckdose, wenn das Gerät über einen längeren Zeitraum nicht verwendet wird. Positionieren Sie das Gerät so, dass der Stecker leicht gezogen werden kann.
· Verdrahten Sie die Polarität (+/-) der Anschlüsse richtig. Andernfalls können die Stereo-Effekte beeinträchtigt werden oder es kann zu Fehlfunktionen kommen.· Detaillierte Informationen finden Sie in der Bedienungsanleitung der Lautsprecher.12 (38)
BedienungVerwendung eines digitalen Audio-Ausgangsgeräts
Sie können den CD-Player usw. mit einem Koaxial-Digitalkabel (nicht mitgeliefert) bzw. einem Lichtwellenleiter-Digitalkabel (nicht mitgeliefert) an dieses Gerät anschließen und so Musik wiedergeben.
Koaxial-Digitalkabel (nicht mitgeliefert)
LichtwellenleiterDigitalkabel (nicht mitgeliefert)
CD-Player, usw.
Verwendung eines koaxialen Digitalkabels
1 Ziehen Sie das Netzkabel.
2 Verbinden Sie dieses Gerät und einen CD-Player usw.
3 Schließen Sie das Netzkabel an dieses Gerät an. ( 12)
4 Drücken Sie die Ein/Aus-Taste des
Geräts in die Position [
].
5 Drücken Sie [COAX] zur Auswahl von “COAX1″/”COAX2”.
· Sie können die Eingangsquelle auch durch Drehen des Eingangswahlschalters am Gerät wählen.
6 Starten Sie die Wiedergabe auf dem angeschlossenen Gerät.
Hinweis· Die digitalen Audio-Eingangsanschlüsse an diesem Gerät können nur die folgenden linearen PCMSignale erkennen. Weitere Details finden Sie in der Bedienungsanleitung des angeschlossenen Geräts. – Abtastrate: Koaxialer digitaler Eingang 32/44,1/48/88,2/96/176,4/192 kHz
Deutsch
Optischer digitaler Eingang 32/44,1/48/88,2/96 kHz– Anzahl der Quantisierungsbits: 16/24 Bit
Verwendung eines LichtwellenleiterDigitalkabels
1 Ziehen Sie das Netzkabel.
2 Verbinden Sie dieses Gerät und einen CD-Player usw.
3 Schließen Sie das Netzkabel an dieses Gerät an. ( 12)
4 Drücken Sie die Ein/Aus-Taste des
Geräts in die Position [
].
5 Drücken Sie [OPT] zur Auswahl von “OPT1″/”OPT2”.
· Sie können die Eingangsquelle auch durch Drehen des Eingangswahlschalters am Gerät wählen.
6 Starten Sie die Wiedergabe auf dem angeschlossenen Gerät.
Einstellung der Verzögerungszeit fürden TonStellen Sie “Low Latency” ein, um die Verzögerungszeit des Tons anzupassen, wenn “LAPC” auf “On” eingestellt ist. 1 Drücken Sie [MENU]. 2 Drücken Sie [OK]. 3 Drücken Sie [ ], [ ], um“Normal”/”Low Latency” auszuwählen, und drücken Sie danach [OK].· Je nach Track kann es sein, dass sie auch bei der Einstellung nicht wirksam ist.
MQA®-DekodierungMQA-Dateien oder -Streams können dekodiert werden, um die Qualität der Master-Aufnahme zu liefern. ( 20)
Anschlüsse / Bedienung (39) 13
BedienungVerwendung des PC usw.
Sie können den PC usw. mit einem USB-2.0-Kabel (nicht mitgeliefert) an dieses Gerät anschließen und so Musik wiedergeben.
USB 2.0-Kabel (nicht mitgeliefert)PC usw.Audiogerät mit USBAusgangsanschluss, z. B. ST-G30.VorbereitungVerbindung mit einem PC · Bevor Sie eine Verbindung zu einem PCherstellen, folgen Sie den Schritten unten. · Empfohlene Betriebssystem-Versionen für IhrenPC finden Sie hier (Stand: Oktober 2020): – Windows 8, Windows 8.1, Windows 10 – OS X 10.7, 10.8, 10.9, 10.10, 10.11,macOS 10.12, 10.13, 10.14, 10.15Laden Sie den speziellen USB-Treiber auf den PC herunter und installieren Sie ihn. (Nur bei einem Windows-Betriebssystem) · Laden Sie den Treiber von der folgendenWebsite herunter und installieren Sie ihn. www.technics.com/support/ Laden Sie die spezielle App “Technics Audio Player” (kostenlos) auf den PC herunter und installieren Sie sie. · Laden Sie die App von der folgenden Website herunter und installieren Sie diese. www.technics.com/support/1 Ziehen Sie das Netzkabel. 2 Verbinden Sie dieses Gerät und einenPC usw. 3 Schließen Sie das Netzkabel an diesesGerät an. ( 12) 14 (40)
4 Drücken Sie die Ein/Aus-Taste des
Geräts in die Position [
].
5 Drücken Sie [PC] zur Auswahl von “PC1″/”PC2”.
· Sie können die Eingangsquelle auch durch Drehen des Eingangswahlschalters am Gerät wählen.
6 Starten Sie die Wiedergabe auf dem angeschlossenen PC mit der dafür vorgesehenen App “Technics Audio Player”.
Hinweis· Beim Anschluss eines Audiogeräts mit USB-Ausgangsanschluss, z. B. ST-G30 usw., entnehmen Sie weitere Details der Bedienungsanleitung des angeschlossenen Geräts.· Informationen zum unterstützten Format finden Sie unter “Formatunterstützung”. ( 28)
Einstellung der Verzögerungszeit fürden TonStellen Sie “Low Latency” ein, um die Verzögerungszeit des Tons anzupassen, wenn “LAPC” auf “On” eingestellt ist. 1 Drücken Sie [MENU]. 2 Drücken Sie [OK]. 3 Drücken Sie [ ], [ ], um“Normal”/”Low Latency” auszuwählen, und drücken Sie danach [OK].· Je nach Track kann es sein, dass sie auch bei der Einstellung nicht wirksam ist.
MQA-DekodierungMQA-Dateien oder -Streams können dekodiert werden, um die Qualität der Master-Aufnahme zu liefern. ( 20)
Verwendung eines analogen Audio-Ausgangsgeräts
Analoges Audiokabel (nicht mitgeliefert)*
Blu-ray Disc-Player, usw.
*: Die Abbildung zeigt ein Anschlussbeispiel miteinem analogen Audiokabel. Sie können das Gerät auch mit dem XLR-Kabel anschließen.
Sie können den Blu-ray Disc-Player usw. mit einem analogen Audiokabel (nicht mitgeliefert) an dieses Gerät anschließen und so Musik wiedergeben.
1 Ziehen Sie das Netzkabel.
2 Verbinden Sie dieses Gerät und einen Blu-ray Disc-Player usw.
3 Schließen Sie das Netzkabel an dieses Gerät an. ( 12)
4 Drücken Sie die Ein/Aus-Taste des
Geräts in die Position [
].
5 Drücken Sie [LINE-XLR] oder [LINE] zur Auswahl von “LINE XLR”/”LINE1″/”LINE2”.
· Sie können die Eingangsquelle auch durch Drehen des Eingangswahlschalters am Gerät wählen.
6 Starten Sie die Wiedergabe auf dem angeschlossenen Gerät.
Wenn der Rekorder an dieses Gerätangeschlossen istWenn Sie ein Aufnahmegerät an dieses Gerät anschließen, verwenden Sie das analoge Audiokabel (nicht mitgeliefert) und verbinden Sie den Anschluss REC IN mit den Audioausgangsanschlüssen des angeschlossenen Geräts, den Anschluss REC OUT mit den Audioeingangsanschlüssen des angeschlossenen Geräts. ( 19) · Drücken Sie [REC IN], um die Eingangsquelle auf“REC IN” umzuschalten.
Klangverzerrungen minimierenWenn bei Verwendung der analogen Audioeingangsanschlüsse Klangverzerrungen auftreten, kann die Einstellung des Dämpfungselements auf “On” die Klangqualität verbessern. · Die Werkseinstellung lautet “Off”.1 Drücken Sie [MENU]. 2 Drücken Sie [ ], [ ] wiederholt,um “Attenuator” auszuwählen, und drücken Sie danach [OK]. 3 Drücken Sie [ ], [ ] zur Auswahl von “On” und drücken Sie danach [OK].Verringerung von niederfrequentem RauschenVerringert niederfrequentes Rauschen bei verzogenen Schallplatten. · Die Werkseinstellung lautet “Off”. 1 Drücken Sie [MENU]. 2 Drücken Sie [ ], [ ] wiederholt, um“Subsonic Filter” auszuwählen, und drücken Sie danach [OK]. 3 Drücken Sie [ ], [ ] zur Auswahl von “On” und drücken Sie danach [OK].Bedienung (41) 15
Deutsch
BedienungVerwendung des Plattenspielers
PHONO-Kabel (nicht mitgeliefert)*PHONO-Masseleitung (nicht mitgeliefert)
Plattenspieler*: Die Abbildung zeigt ein Anschlussbeispiel miteinem PHONO-Kabel. Sie können das Gerät auch mit dem PHONO-XLR-Kabel anschließen.
1 Ziehen Sie das Netzkabel.
2 Verbinden Sie dieses Gerät und einen Plattenspieler.
· Entfernen Sie die PHONO Kurzschlussstecker, wenn Sie ein Gerät an die Audioeingangsanschlüsse (PHONO) anschließen.· Die PHONO-Anschlüsse des Plattenspielers unterstützen Tonabnehmersysteme des Typs MM/MC. (PHONO XLR-Anschlüsse unterstützen nur Tonabnehmersysteme des Typs MC.)
3 Schließen Sie das Netzkabel an dieses Gerät an. ( 12)
4 Drücken Sie die Ein/Aus-Taste des
Geräts in die Position [
].
5 Drücken Sie [PHONO-XLR] oder [PHONO] zur Auswahl von “PHONO XLR”/”PHONO”.
· Sie können die Eingangsquelle auch durch Drehen des Eingangswahlschalters am Gerät wählen.
6 Starten Sie die Wiedergabe auf dem angeschlossenen Plattenspieler.
· Wenn Sie einen Plattenspieler mit eingebautem PHONO-Entzerrer anschließen, verwenden Sie das analoge Audiokabel zum Anschluss an die analogen Audioeingangsanschlüsse (LINE1 oder LINE2) dieses Geräts. ( 15)· Zum Anschluss eines Plattenspielers mit PHONO-Masseleitung verbinden Sie die PHONO-Masseleitung mit dem PHONO EARTHAnschluss dieses Geräts.
16 (42)
Auswählen des TonabnehmersystemsWählen Sie die Einstellungen (MM/MC) passend zum Tonabnehmersystem des angeschlossenen Plattenspielers. 1 Drücken Sie [MENU]. 2 Drücken Sie [ ], [ ] wiederholt, um “MM/MC”auszuwählen, und drücken Sie danach [OK]. 3 Drücken Sie [ ], [ ], um “MM”/”MC”auszuwählen, und drücken Sie danach [OK].· Nicht verfügbar, wenn “PHONO XLR” als Eingangsquelle ausgewählt ist. (Die Einstellung ist auf “MC” festgelegt.)· Bei der Einstellung von “MM/MC” ist “Cartridge Optimiser” fest auf “Off” eingestellt. Stellen Sie “Cartridge Optimiser” erneut ein oder wählen Sie die entsprechenden gespeicherten Daten mit “MM/MC” aus. ( 17)Einstellen des AudioeingangspegelsWenn bei der Verwendung der analogen Audioeingangsanschlüsse Tonverzerrungen auftreten oder der Eingangspegel zu niedrig ist, kann eine Anpassung der Verstärkung die Tonqualität verbessern. 1 Drücken Sie [MENU]. 2 Drücken Sie [ ], [ ] um “Gain”auszuwählen, und drücken Sie danach [OK]. 3 Drücken Sie [ ], [ ] zum Einstellenund drücken Sie danach [OK].· Bei der Einstellung von “Gain” ist “Cartridge Optimiser” fest auf “Off” eingestellt. Stellen Sie “Cartridge Optimiser” erneut ein oder wählen Sie die entsprechenden gespeicherten Daten mit “Gain” aus. ( 17)Optimierung der Tonabnehmersystem-KennlinieDieses Gerät misst und optimiert Übersprechen und Frequenzgang des Tonabnehmersystems, indem die mitgelieferte Kalibrierungsschallplatte auf dem angeschlossenen Plattenspieler abgespielt wird. · Abhängig von der “Cartridge Optimiser”-Einstellungwechselt “REC OUT” zu “Off” und der Ton wird nicht über die analogen Ausgangsanschlüsse (REC OUT) ausgegeben.Vorbereitung· Schließen Sie die PHONO-Erdungsleitung vom Plattenspieler an den Anschluss PHONO EARTH dieses Geräts an.· Stellen Sie “MM/MC” an diesem Gerät entsprechend des Tonabnehmersystems im Plattenspieler ein.· Stellen Sie “Gain” an diesem Gerät entsprechend des Tonabnehmersystems im angeschlossenen Plattenspieler ein.
1 Drücken Sie [MENU].2 Drücken Sie [ ], [ ] wiederholt, um “Cartridge Optimiser” auszuwählen, und drücken Sie danach [OK].3 Drücken Sie [ ], [ ] um “Measurement Start” auszuwählen, und drücken Sie danach [OK].· “Prepare Calibration Record” wird angezeigt.4 Starten Sie die Wiedergabe der Kalibrierungsschallplatte auf dem angeschlossenen Plattenspieler und drücken Sie dann [OK].· Spielen Sie zuerst den äußeren Track auf der Kalibrieraufnahme ab, die 2 Tracks auf beiden Seiten hat (ca. 3 Minuten). Spielen Sie einen anderen Track ab, wenn die Optimierung nicht ordnungsgemäß startet.· Die Lautsprecher geben einen Testton aus. · Die Messung von Daten für “Crosstalk Canceller”und “Response Optimisation” beginnt.5 Wenn “Lift up the tone arm” angezeigt wird, stoppen Sie die Wiedergabe der Kalibrierungsschallplatte und drücken Sie [OK].· Die Verarbeitung der gemessenen Daten beginnt (ca. 10 Minuten).6 Wenn “Completed” angezeigt wird, drücken Sie [OK].7 Wenn “Register 1 – 3” angezeigt wird, drücken Sie [OK] und danach [ ], [ ], um die zu speichernden Daten auszuwählen.· Die optimierten Daten können für bis zu 3 Typen gespeichert werden. Bei Auswahl von bereits gespeicherten Daten werden diese überschrieben.8 Drücken Sie [OK].· “Registered” wird angezeigt.9 (Bei der Benennung der Daten) Wenn “Rename?” angezeigt wird, drücken Sie [OK].· Wenn der Name nicht bearbeitet wird, drücken Sie zum Beenden [ ]. Die Messung wird abgeschlossen und die optimierten Daten werden gespeichert.10 Drücken Sie [ ], [ ], [ ], [ ], um den Namen einzugeben, und drücken Sie danach [OK], um die Einstellung zu beenden.· Der bearbeitete Name wird gespeichert, die Messung abgeschlossen und die optimierten Daten werden gespeichert.“Crosstalk Canceller”/”Response Optimisation”Drücken Sie [MENU]. Drücken Sie [ ], [ ] um “Cartridge Optimiser” auszuwählen, und drücken Sie danach [OK]. Drücken Sie [ ], [ ] um die gespeicherten Daten auszuwählen, und drücken Sie danach [ ]. Drücken Sie [ ], [ ], um “Crosstalk Canceller”/”Response Optimisation” auszuwählen, und drücken Sie danach [OK].
Drücken Sie [ ], [ ], um “On”/”Off” auszuwählen, und drücken Sie danach [OK]. · “Crosstalk Canceller”: Reduziert des Übersprechen des Tonabnehmersystems. · “Response Optimisation”: Optimiert die auf Tonabnehmersystem und Kabel auftretenden Resonanzen, stellt auch die Balance rechts/links ein.Aufrufen der gespeicherten EinstellungDrücken Sie [MENU]. Drücken Sie [ ], [ ] um “Cartridge Optimiser” auszuwählen, und drücken Sie danach [OK]. Drücken Sie [ ], [ ] um die gespeicherten Daten auszuwählen, und drücken Sie danach [OK].Bearbeiten des NamensDrücken Sie [MENU]. Drücken Sie [ ], [ ] um “Cartridge Optimiser” auszuwählen, und drücken Sie danach [OK]. Drücken Sie [ ], [ ], um die gespeicherten Daten auszuwählen, und drücken und halten Sie danach [OK] gedrückt. Drücken Sie [ ], [ ], [ ], [ ], um den Namen einzugeben, und drücken Sie danach [OK]. · Es können nur ASCII-Zeichen verwendet werden. · “A” kann hinzugefügt werden, indem [ ] gedrückt wird, sobald der letzte Buchstabe ausgewählt wurde. · Drücken Sie zum Löschen eines Buchstabens [CLEAR].Umschalten der PHONOEntzerrungskurveSie können die Entzerrungskurve dieses Geräts umschalten. Dieses Gerät unterstützt eine simulierte Entzerrungskurve vor der Vereinheitlichung auf RIAA. · Die Werkseinstellung lautet “RIAA”. 1 Drücken Sie [MENU]. 2 Drücken Sie [ ], [ ] wiederholt,um “EQ CURVE” auszuwählen, und drücken Sie danach [OK]. 3 Drücken Sie [ ], [ ] um die Entzerrungseinstellung auszuwählen, und drücken Sie danach [OK]. · Sie können die Entzerrungskurve auch umschalten, indem Sie [CURVE] drücken.Verringerung von niederfrequentem RauschenVerringert niederfrequentes Rauschen bei verzogenen Schallplatten. ( 15)Bedienung (43) 17
Deutsch
BedienungVerwendung dieses Geräts als Endstufe
Sie können den AV-Empfänger, Regelverstärker usw. mit einem analogen Audiokabel (nicht mitgeliefert) an dieses Gerät anschließen und dieses Gerät als Endstufe verwenden.
Stellen Sie die Lautstärke des AV-Empfängers, Regelverstärkers usw. auf ein Minimum, bevor Sie sie anschließen. Während der Verwendung dieses Geräts als Endstufe ist die Lautstärkeregelung mit diesem Gerät deaktiviert. Verstellen Sie die Lautstärke nach und nach mit dem angeschlossenen Gerät. Leiten Sie das Audiosignal der REC OUT/ PRE OUT-Anschlüsse nicht in die MAIN INAnschlüsse des Geräts. Dies könnte eine Störung zur Folge haben.
7 Drücken Sie [ ], [ ], um “On” auszuwählen, und drücken Sie danach [OK].8 Bestätigen Sie die angezeigte Meldung und drücken Sie [OK].9 Drücken Sie [ ], [ ] zur Auswahl von “Yes” und drücken Sie danach [OK].10 Starten Sie die Wiedergabe auf dem angeschlossenen Gerät.Hinweis· Die Lautstärke kann nicht mithilfe dieses Geräts verstellt werden.· Es wird kein Sound über die Kopfhörerbuchse und die REC OUT/PRE OUT-Anschlüsse ausgegeben.
Analoges Audiokabel (nicht mitgeliefert)
13&065
AV-Empfänger, Regelverstärker usw.
1 Ziehen Sie das Netzkabel.
2 Stellen Sie die Verbindung zwischen diesem Gerät und dem AV-Empfänger, Regelverstärker usw. erst her, nachdem Sie die Lautstärke des Geräts verringert haben.
3 Schließen Sie das Netzkabel an dieses Gerät an. ( 12)
4 Drücken Sie die Ein/Aus-Taste des
Geräts in die Position [
].
5 Drücken Sie [SETUP].
6 Drücken Sie [ ], [ ] wiederholt, um “MAIN IN” auszuwählen, und drücken Sie danach [OK].
18 (44)
Klangverzerrungen minimierenWenn Tonverzerrungen auftreten, kann die Einstellung des Dämpfungselements auf “On” die Tonqualität verbessern. · Die Werkseinstellung lautet “Off”.1 Drücken Sie [MENU]. 2 Drücken Sie [OK]. 3 Drücken Sie [ ], [ ] zur Auswahl von“On” und drücken Sie danach [OK].
Verwendung eines analogen Audio-Eingangsgeräts
Leiten Sie das Audiosignal der REC OUT/ PRE OUT-Anschlüsse nicht in die analogen Audioeingang-Anschlüsse des Geräts. Dies könnte eine Störung zur Folge haben.Anschließen einer Endstufe, eines Subwoofers usw.Sie können eine Endstufe, einen Subwoofers usw. mit einem analogen Audiokabel (nicht mitgeliefert) anschließen, um die analogen Audiosignale auszugeben.
Anschließen eines AufnahmegerätsWenn Sie ein Aufnahmegerät an dieses Gerät anschließen, verwenden Sie das analoge Audiokabel (nicht mitgeliefert) und verbinden Sie den Anschluss REC IN mit den Audioausgangsanschlüssen des angeschlossenen Geräts, den Anschluss REC OUT mit den Audioeingangsanschlüssen des angeschlossenen Geräts. · Drücken Sie [REC IN], um die Eingangsquelle auf“REC IN” umzuschalten.
Deutsch
Analoges Audiokabel (nicht mitgeliefert)
“6%*0*/
Endstufe, Subwoofer usw.
1 Ziehen Sie das Netzkabel.
2 Verbinden Sie dieses Gerät und eine Endstufe, einen Subwoofer usw.
3 Schließen Sie das Netzkabel an dieses Gerät an. ( 12)
4 Drücken Sie die Ein/Aus-Taste des
Geräts in die Position [
].
Hinweis· Weitere Details finden Sie in der Bedienungsanleitung des angeschlossenen Geräts.· Die Audiosignalausgabe von Endstufen, Subwoofern usw., die an PRE OUT-Anschlüsse angeschlossen sind, kann aktiviert/deaktiviert werden. ( 21)
Analoges Audiokabel (nicht mitgeliefert)“6%*0065
AufnahmeEingangsanschlüsse(REC IN, AUX IN)
Aufnahmegerät
1 Ziehen Sie das Netzkabel.
2 Verbinden Sie dieses Gerät und ein Aufnahmegerät.
3 Schließen Sie das Netzkabel an dieses Gerät an. ( 12)
4 Drücken Sie die Ein/Aus-Taste des
Geräts in die Position [
].
Hinweis· Beim Wechsel der Eingangsquelle kann es zu abgehacktem Audio im Ausgangs-Audiosignal kommen.· Die Audiosignalausgabe von Aufnahmegeräten, die an REC OUT-Anschlüsse angeschlossen sind, kann aktiviert/deaktiviert werden. ( 21)Bedienung (45) 19
EinstellungenKlangeinstellung, Sonstige EinstellungenDie Klangeffekte und anderen Einstellungen können konfiguriert werden.
1 Drücken Sie [SETUP].2 Drücken Sie [ ], [ ] wiederholt, um das Menü auszuwählen, und drücken Sie danach [OK].3 Drücken Sie [ ], [ ], [ ], [ ], um das gewünschte Element oder den Wert auszuwählen, und drücken Sie [OK].
Einstellung von BASS/MID/TREBLE“Tone Control”Der Ton kann durch Drücken von [BASS]/[MID]/ [TREBLE] eingestellt werden. · Die Toneinstellung wird durch Drücken von[BASS]/[MID]/[TREBLE] aktiviert, und “Tone Control” wird auf “On” gesetzt. · Jeder Pegel kann zwischen “-10” und “+10” eingestellt werden. · Beim Verbinden der Systemsteuerfunktion für Technics-Geräte (Netzwerk-Audio-Player usw.) mit diesem Gerät hat die Sound-Einstellung auf dem verbundenen Gerät möglicherweise Priorität vor diesem Gerät. Verstellen Sie den Sound mit dem angeschlossenen Gerät. · Nicht verfügbar, wenn Sie dieses Gerät als Endstufe verwenden ( 18). Verstellen Sie den Sound mit dem AV-Empfänger, Regelverstärker usw. · Stellen Sie “Tone Control” auf “Off” ein, um die Einstellung von “BASS”, “MID” und “TREBLE” abzubrechen.Einstellen der Balance derLautsprecher“Balance L/R”Stellt die Balance der Ausgabe von linken und rechten Lautsprechern ein. · Der Pegel kann jeweils zwischen 18 dB (L) und18 dB (R) eingestellt werden. · Die Audioausgabe über die angeschlossenenKopfhörern und PRE OUT-Anschlüsse wird ebenfalls eingestellt. · Bei Verwendung dieses Geräts als Endstufe ( 18) ist diese Einstellung deaktiviert. Passen Sie die Einstellung bei angeschlossenem Gerät an.
Einstellung des LautstärkeDämpfungselements “VOLUME Attenuator”Stellen Sie das Dämpfungselement auf “On (-20dB)”, damit es die Lautstärkeanpassung bei geringer Lautstärke abgleicht. · Die Werkseinstellung lautet “Off”. · “ATT” wird nach der Einstellung angezeigt. · Nicht verfügbar, wenn Sie dieses Gerät alsEndstufe verwenden ( 18). Verstellen Sie den Sound mit dem AV-Empfänger, Regelverstärker usw.MQA-Dekodierung “MQA Decoding”Dieses Gerät ist mit der MQA-Technologie (Master Quality Authenticated) ausgestattet, welche die Wiedergabe von MQA-Audiodateien und -Streams mit dem Sound wie bei der originalen Masteraufnahme ermöglicht. Der integrierte MQA-Dekoder stellt das im Studio hörbare hochauflösende Signal wieder her und bestätigt es mit Hilfe der Authentifizierungssignatur. Auf www.mqa.co.uk/customer/mqacd finden Sie weitere Informationen hierzu. Um die Wiedergabe mit dem Sound wie bei der originalen Masteraufnahme zu ermöglichen, muss die MQA-Dekodierfunktion auf “On” eingestellt werden. · Bei der Wiedergabe von MQA-Audiodateienund -Streams werden “MQA”, “MQA Studio” usw. angezeigt.
20 (46)
Auswählen der Lautsprecheranschlüsse zur Ausgabe “SPEAKERS”Wählen Sie die Lautsprecheranschlüsse, über die der Ton ausgegeben werden soll. · Die Werkseinstellung lautet “A”.Aktivieren des Audioausgangs “PRE OUT”Aktiviert/deaktiviert die Audioausgabe über die PRE OUT-Anschlüsse. · Die Werkseinstellung lautet “On”.Aktivieren des Audioausgangs “REC OUT”Aktiviert/deaktiviert die Audioausgabe über die REC OUT-Anschlüsse. · Wenn “LAPC” oder “Response Optimisation”auf “On” gesetzt ist, kann “REC OUT” auf “Off” gesetzt werden. · Die Werkseinstellung lautet “On”.
Auto-Aus-Funktion “Auto Off”Dieses Gerät ist darauf ausgelegt, den Stromverbrauch zu reduzieren und Energie einzusparen. Das Gerät wurde ca. 20 Minuten lang nicht betrieben und wechselt in einer Minute in den Standby-Modus. Drücken Sie zum Abbrechen eine beliebige Taste. · Die Werkseinstellung lautet “On”. Um dieseFunktion zu deaktivieren, wählen Sie “Off”. · “Auto Off” wird 3 Minuten vor demAusschalten des Geräts angezeigt. Hinweis · Die Einstellung wird gespeichert, auch wenn das Gerät aus- und eingeschaltet wird.Einstellung des Dimmerpegels “Auto DIMMER”Das Gerät wurde ca. 20 Minuten lang nicht betrieben und stellt die Helligkeit der Beleuchtung von Spitzenleistungsmesser, Leistungsanzeige, LAPC-Anzeige usw. vorübergehend ein. · Die Werkseinstellung lautet “On”. · Die Funktion “Auto Off” hat Priorität, wenn“Auto Off” auf “On” eingestellt ist.Überprüfen der Modellbezeichnung “Model No.”Die Bezeichnung des Modells wird angezeigt.Überprüfen der Firmware-Version “F/W Version”Die Version der installierten Firmware wird angezeigt.Einstellungen (47) 21
Deutsch
EinstellungenVerwendung der Ausgangskorrekturfunktion (LAPC)Sie können die Einstellungen anhand Ihrer eigenen Lautsprecher optimieren.
Ausgangssignal des Verstärkers messen und Ausgabe korrigieren (LAPC)Vorbereitung· Lösen Sie die Kopfhörer.
Während der Messung ausgegebener TesttonUm die Messgenauigkeit zu gewährleisten, geben die Lautsprecher in regelmäßigen Abständen einen Testton aus (Für ca. 3 Minuten).Die Ausgabelautstärke kann nicht geändert werden, während die Messung durchgeführt wird.
1 Drücken Sie die Ein/Aus-Taste des
Geräts in die Position [
].
2 Halten Sie [LAPC] gedrückt, bis “Please Wait” angezeigt wird.
“LAPC Measuring” wird angezeigt und dieses Gerät misst das Ausgangssignal des Verstärkers. Stellen Sie sicher, dass der linke sowie der rechte Lautsprecher einen Testton ausgeben.Wenn die Messung abgeschlossen wurde, wird die Verstärkerausgabe-Korrektur automatisch eingeschaltet.· Wenn Sie während der Messung des Verstärkersignals oder der Korrektur der Verstärkerausgabe einen Kopfhörer anschließen, wird der Vorgang abgebrochen.
Hinweis· Die Ausgangskorrekturfunktion kann auf “A”, “B” oder “A+B” für “SPEAKERS” eingestellt werden. (Die Ausgangskorrekturfunktion ist bei Einstellung auf “Off” nicht verfügbar.)· Die Messung des Verstärkersignals wird unter jeder der folgenden Bedingungen abgebrochen. – Drücken von [MUTE]/[LAPC] – Umschalten der Eingangsquelle
Ein-/Ausschalten der Ausgangskorrektur-Funktion Drücken Sie [LAPC] zur Auswahl von “On”/”Off”. · Die Betriebsanzeigen LAPC und“LAPC : On” leuchten, während die Ausgangskorrekturfunktion aktiv ist.Hinweis· Es ist keine Messung verfügbar für das AudioAusgangssignal der REC OUT/PRE OUTAnschlüsse dieses Geräts. ( 19)· Je nach Typ der angeschlossenen Lautsprecher kann die Auswirkung der AusgabekorrekturFunktion minimal sein.· Die korrigierte Ausgabe bleibt bestehen, bis Sie das Ausgangssignal erneut messen. Wiederholen Sie die Messung, wenn Sie andere Lautsprecher anschließen.· Wenn “REC OUT” auf “On” eingestellt ist, kann “LAPC” deaktiviert werden.Direct ModusDies ermöglicht eine klangtreue und hochwertige Wiedergabe des Originaltons und hebt die Tonregeleinstellung auf. · Die Werkseinstellung lautet “Off”. Drücken Sie [DIRECT] zur Auswahl von “On”/”Off”. · Stellen Sie “On” ein, um den Modus zuaktivieren. · Wenn Sie [BASS]/[MID]/[TREBLE] drücken,wird der Direct Modus aufgehoben und “Tone Control” wird auf “On” gesetzt. ( 20)
22 (48)
Firmware-Updates“F/W Update”Panasonic kann gelegentlich eine aktualisierte Firmware für dieses Gerät ausgeben, die neue Funktionen hinzufügen oder die Weise, in der eine Funktion arbeitet, verbessern könnte. Diese Aktualisierungen stehen kostenlos zur Verfügung. · Informationen über die Aktualisierung findenSie auf der folgenden Website. www.technics.com/support/firmware/Das Herunterladen dauert ca. 3 Minuten. Ziehen Sie während der Aktualisierung nicht das Netzkabel und versetzen Sie das Gerät nicht in den Standby-Modus. Trennen Sie den USB-Flash-Speicher während der Aktualisierung nicht vom Gerät. · Der Vorgang wird als “Updating %”angezeigt, während die Aktualisierung erfolgt. (” ” steht für eine Zahl.)Hinweis· Während des Update-Prozesses können keine anderen Vorgänge ausgeführt werden.· Wenn keine Updates zur Verfügung stehen, wird “Firmware is Up To Date” angezeigt. (Muss nicht aktualisiert werden.)· Die Einstellungen können durch eine Aktualisierung der Firmware dieses Geräts zurückgesetzt werden.
Firmware-UpdatesVorbereitung· Laden Sie die neueste Version der Firmware herunter und speichern Sie sie auf dem USBFlash-Speicher. Weitere Details finden Sie auf der folgenden Website. www.technics.com/support/firmware/1 Verbinden Sie den USB-Flash-Speicher mit der neuen Firmware.
Deutsch
USB-Gerät
2 Drücken Sie [SETUP].
3 Drücken Sie [ ], [ ] wiederholt, um “F/W Update” auszuwählen, und drücken Sie danach [OK].
4 Drücken Sie [ ], [ ] zur Auswahl von “Yes” und drücken Sie danach [OK].
· Der Vorgang wird als “Updating %” angezeigt, während die Aktualisierung erfolgt. (” ” steht für eine Zahl.)· Nachdem das Update erfolgreich beendet wurde, wird “Success” angezeigt.
5 Drücken Sie die Ein/Aus-Taste des
Geräts in die Position [
] und
drücken Sie erneut in die Position
[
].
Hinweis
· Das Herunterladen könnte je nach USB-FlashSpeicher länger dauern.· Verwenden Sie einen USB-Flash-Speicher mit FAT16- oder FAT32-Format.· Der UPDATE-Anschluss dient nur für FirmwareAktualisierungen. Schließen Sie für die Aktualisierung der Firmware keine anderen USB-Geräte als USB-Flash-Speicher an.· Über den UPDATE-Anschluss dieses Geräts können keine USB-Geräte aufgeladen werden.
Einstellungen (49) 23
EinstellungenSystemsteuerverbindungSie können dieses Gerät und die Systemsteuerfunktion für Technics-Geräte (NetzwerkAudio-Player, CD-Player usw.) gleichzeitig mit der Fernbedienung bedienen. Weitere Details finden Sie in der Bedienungsanleitung jedes Geräts.
Koaxial-Digitalkabe (nicht mitgeliefert)*
Systemverbindungskabel
$0″9*”-065
$0/530-
Netzwerk-Audio-Player usw.*: Die Abbildung zeigt die Verbindung mit einemKoaxial-Digitalkabel als Beispiel. Verwenden Sie das/den zum Gerät passende/n Kabel/ Anschluss.Verwendung des Systemverbindungs- und Audiokabels1 Ziehen Sie das Netzkabel. 2 Verbinden Sie dieses Gerät mit derSystemsteuerfunktion für TechnicsGeräte (Netzwerk-Audio-Player usw.). · Verwenden Sie das Systemverbindungskabelund das Audiokabel, wenn Sie die Geräte verbinden. · Verwenden Sie das Systemverbindungskabel, das mit dem angeschlossenen Gerät mitgeliefert wurde. 3 Schließen Sie das Netzkabel an dieses Gerät an. ( 12)24 (50)
4 Drücken Sie die Ein/Aus-Taste des
Geräts in die Position [
].
5 Drücken Sie [SETUP].
6 Drücken Sie [ ], [ ] wiederholt, um “System Control” auszuwählen, und drücken Sie danach [OK].
7 Drücken Sie [ ], [ ], um die Eingangsquelle für das in Schritt 2 angeschlossene Gerät zu wählen, und drücken Sie danach [OK].
· Wählen Sie “Off”, um die Systemsteuerfunktion zu deaktivieren.
Hinweis
· Bei Verwendung dieses Geräts als Endstufe ( 18) wird die Systemsteuerungsfunktion für das an die MAIN IN-Anschlüsse angeschlossene Technics-Gerät deaktiviert.
Einschalten dieses und desangeschlossenen Geräts· Wenn Sie die Fernbedienung auf dieses Gerät richten und die Taste [ ] drücken, wenn sich dieses und das angeschlossene Gerät im Standby-Modus befinden, werden dieses Gerät und das auf “System Control” gestellte Gerät an der ausgewählten Eingangsquelle gleichzeitig eingeschaltet.· Wenn Sie die Fernbedienung auf dieses Gerät richten und die Taste [ ] drücken, wenn dieses und das angeschlossene Gerät eingeschaltet sind, wechseln dieses Gerät und das angeschlossene Gerät in den Standby-Modus.
Automatisches Wechseln der Eingangsquelle für dieses GerätWenn Sie eine Aktion, z. B. Wiedergabe, auf dem angeschlossenen Gerät ausführen, wechselt die Eingangsquelle dieses Geräts automatisch zu der Quelle, die mit der “System Control” eingestellt wird.
Fehlerbehebung
Vor dem Kundendienstruf kontrollieren Sie Folgendes. Wenn Sie bei einigen Kontrollpunkten Zweifel haben oder die in Ihrer Betriebsanleitung aufgeführten Angaben Ihr Problem nicht lösen können, wenden Sie sich an Ihren Händler.
Wärmeentwicklung dieses GerätsDieses Gerät wird während der Verwendung warm. Es handelt sich hierbei nicht um eine Fehlfunktion.Haben Sie die neueste Firmware installiert?Panasonic verbessert ständig die Firmware des Geräts, um zu gewährleisten, dass unsere Kunden in den Genuss der modernsten Technologie kommen. ( 23)Rücksetzen aller Einstellungen auf die werksseitigen StandardeinstellungenSetzen Sie den Speicher in den folgenden Fällen zurück: · Bei Drücken der Tasten erfolgt keine Reaktion. · Sie möchten den Speicherinhalt löschen undzurücksetzen. 1 Drücken Sie [SETUP]. 2 Drücken Sie [ ], [ ] wiederholt, um“Initialization” auszuwählen, und drücken Sie danach [OK]. · Ein Bestätigungsbildschirm erscheint. WählenSie “Yes” in den folgenden Schritten, um alle Einstellungen auf die Standardwerte zurückzusetzen. 3 Drücken Sie [ ], [ ], um “Yes” auszuwählen, und drücken Sie danach [OK]. 4 Drücken Sie [ ], [ ], um “Yes” auszuwählen, und drücken Sie danach erneut [OK].
Allgemeines
Das Gerät funktioniert nicht. Das Gerät wurde nicht ordnungsgemäß bedient.
· Evtl. wurde eine der Sicherheitsvorrichtungen des Geräts aktiviert.
Drücken Sie die Ein/Aus-Taste des Geräts in
die Position [
].
· Wenn das Gerät nicht zum Standby-Modus wechselt, ziehen Sie das Netzkabel, warten Sie mindestens 3 Minuten und schließen Sie es dann erneut an.
Drücken Sie die Ein/Aus-Taste des Geräts in
die Position [
]. Wenn das Gerät immer
noch nicht betrieben werden kann, wenden
Sie sich an einen Fachhändler.
Während der Wiedergabe ist ein
“Brummton” zu hören.
Deutsch
· Ein Netzkabel eines anderen Elektrogeräts oder eine Leuchtstoffröhre befindet sich in der Nähe der Kabel. Schalten Sie andere Elektrogeräte aus und halten Sie sie von den Kabeln dieses Geräts fern.· Ein starkes Magnetfeld in der Nähe eines TV-Geräts oder eines anderen Geräts kann die Audioqualität beeinträchtigen. Halten Sie dieses Gerät von solchen Orten fern.· Die Lautsprecher können Rauschen ausgeben, wenn ein Gerät in der Nähe starke Radiowellen ausgibt. Beispielsweise, wenn auf einem Mobiltelefon ein Anruf aktiv ist.Kein Ton.
· Überprüfen Sie die Lautstärke dieses und des angeschlossenen Geräts.· Überprüfen Sie die Anschlüsse der Lautsprecher und anderen Geräte.· Schließen Sie die Lautsprecher an und messen Sie das Ausgangssignal des Verstärkers. ( 22)· Überprüfen Sie die Impedanz der angeschlossenen Lautsprecher.· Überprüfen Sie, ob die korrekte Eingabequelle ausgewählt ist.· Setzen Sie die Stecker der zu verbindenden Kabel vollständig ein.· Bestätigen Sie die Einstellung der Sound-Ausgabe. (Wenn “PRE OUT” auf “Off” gestellt ist, wird kein Sound über die Lautsprecher an den LautsprecherAusgangsanschlüssen dieses Geräts ausgegeben.) ( 19)· Es wird kein Sound über die Kopfhörerbuchse und die REC OUT/PRE OUT-Anschlüsse ausgegeben.· Die Wiedergabe von Mehrkanal-Inhalten wird nicht unterstützt.· Die digitalen Audio-Eingangsanschlüsse an diesem Gerät können nur lineare PCM-Signale erkennen. Weitere Details finden Sie in der Bedienungsanleitung des Geräts.
Einstellungen / Fehlerbehebung (51) 25
Fehlerbehebung
Der Klang ist verzerrt. · Wenn Sie “Attenuator”/”Gain” auf “On” stellen,kann dies je nach dem analogen Audioeingang die Verzerrung minimieren. ( 15, 16, 18) Das Gerät wechselt automatisch in den Standby-Modus. · Ist die Auto-Aus-Funktion aktiviert? ( 21) · Dieses Gerät ist mit einer Schutzschaltung ausgestattet, um Schäden durch Hitzebildung vorzubeugen. Bei langer Verwendung des Geräts mit hoher Lautstärke schaltet es sich möglicherweise automatisch aus. Warten Sie, bis sich das Gerät abgekühlt hat, bevor Sie es erneut einschalten. (Für ca. 3 Minuten) Die Einstellungen werden auf die werksseitigen Standardeinstellungen zurückgesetzt. · Die Einstellungen können durch eine Aktualisierung der Firmware zurückgesetzt werden. Der Spitzenleistungsmesser funktioniert nicht. · In den folgenden Fällen funktioniert dieser Messer nicht: – Wenn die Kopfhörer angeschlossen sind. – Wenn das Spitzenleistungsmesser-Licht durchDrücken von [DIMMER] ausgeschaltet wird. – Wenn dieses Gerät durch Drücken von[MUTE] stummgeschaltet wurde. – Wenn “SPEAKERS” auf “Off” ( 19)eingestellt ist. Die Anzeige wird gedimmt. · Drücken Sie [DIMMER], um den Dimmerpegel einzustellen. · Überprüfen Sie die Einstellung von “Auto DIMMER”. ( 21) Die Systemsteuerfunktion funktioniert nicht. · Verwenden Sie das Systemverbindungskabel, das mitdem angeschlossenen Gerät mitgeliefert wurde. · Verbinden Sie das Systemverbindungskabel mitden Systemanschlüssen (CONTROL). ( 24) · Überprüfen Sie die Verbindung desSystemverbindungskabels, Audiokabels und der Eingangsquelle, die mit “System Control” eingestellt wird. ( 24) · Verbinden Sie die Systemsteuerfunktion für Technics-Geräte (Netzwerk-Audio-Player, CDPlayer usw.) mit diesem Gerät. Weitere Details finden Sie auf der folgenden Website. www.technics.com/support/PCDer PC erkennt dieses Gerät nicht. · Überprüfen Sie Ihre Betriebsumgebung. ( 14) · Starten Sie den PC neu, versetzen Sie diesesGerät in den Standby-Modus und schalten Sie es ein, dann stecken Sie das USB-Kabel wieder ein. · Verwenden Sie einen anderen USB-Anschluss am verbundenen PC. · Installieren Sie den speziellen USB-Treiber, wenn Sie einen PC mit Windows verwenden. ( 14)26 (52)
FernbedienungDie Fernbedienung funktioniert nicht richtig. · Die Batterien sind leer oder falsch eingesteckt. ( 10) · Um Interferenzen zu vermeiden, stellen Siekeine Objekte vor den Signalsensor. ( 08) · Wenn sich der Fernbedienungsmodus derFernbedienung von dem des Geräts unterscheidet, passen Sie den Modus der Fernbedienung an den Modus dieses Geräts an. ( 11)Gerätepflege· Stecken Sie vor der Wartung das Netzkabel aus der Netzsteckdose aus. Reinigen Sie dieses Gerät mit einem weichen Tuch.· Wenn der Schmutz hartnäckig ist, wringen Sie ein nasses Tuch gründlich aus, um den Schmutz abzuwischen, und trocknen Sie es mit einem weichen Tuch ab.· Verwenden Sie keine Lösungsmittel wie Benzin, Verdünner, Alkohol, Haushaltsreiniger, einen chemischen Wischer usw. Diese könnten dazu führen, dass sich das äußere Gehäuse verformt oder die Beschichtung abblättert.Entsorgung oder Weitergabe dieses Geräts· Dieses Gerät kann private Angaben enthalten. Führen Sie vor der Entsorgung oder Weitergabe des Geräts Folgendes durch, um die Daten, einschließlich persönlicher und geheimer Angaben, zu löschen.· “Rücksetzen aller Einstellungen auf die werksseitigen Standardeinstellungen” ( 25)MeldungenATTENTION : MAX Output Setting · Während der Verwendung dieses Geräts als Endstufe istdie Lautstärkeregelung mit diesem Gerät deaktiviert. · Verstellen Sie die Lautstärke nach und nach mitdem angeschlossenen Gerät. ( 18) AUTO OFF · Das Gerät war seit 20 Minuten außerBetrieb und wird sich innerhalb einer Minute abschalten. Drücken Sie zum Abbrechen eine beliebige Taste. ( 21) Connect USB Device · Der Firmware-Download ist fehlgeschlagen. · Laden Sie die neueste Version der Firmware herunter, speichern Sie sie auf dem USB-FlashSpeicher und versuchen Sie es erneut. ( 23)
Disconnect PHONES· Wenn ein Kopfhörer angeschlossen ist, wird die Messung des Verstärker-Ausgangssignals (LAPC) nicht gestartet.· Lösen Sie die Kopfhörer. · Wenn Sie während der Messung des Verstärkersignalsoder der Korrektur der Verstärkerausgabe einen Kopfhörer anschließen, wird der Vorgang abgebrochen. ( 22)“F ” (” ” steht für eine Zahl.)· Es ist eine Anomalie aufgetreten. (Wenn dieses Gerät eine Anomalie erkennt, wird die Schutzschaltung aktiviert und die Stromversorgung kann automatisch ausgeschaltet werden.) – Ist die Lautstärke extrem hoch? Oder befindet sich dieses Gerät an einem besonders warmen Ort? Warten Sie einige Sekunden und schalten Sie das Gerät wieder ein. (Die Schutzschaltung wird deaktiviert.)Load Fail· Die Firmware kann auf dem USB-Flash-Speicher nicht gefunden werden.· Laden Sie die neueste Version der Firmware herunter, speichern Sie sie auf dem USB-FlashSpeicher und versuchen Sie es erneut. ( 23)Measurement Fail· Die Messung oder Verarbeitung von “Cartridge Optimiser” schlägt fehl. Führen Sie die folgenden Überprüfungen durch.“High Level”:Das Ausgangssignal ist zu verrauscht oder der Ausgangssignalpegel des Plattenspielers ist zu hoch. Entfernen Sie den Staub von der Platte. Bestätigen Sie die Einstellung von “Gain” und stellen Sie den Eingangspegel dieses Geräts ein ( 16).Prüfen Sie, ob die Einstellung “MM/MC” dieses Geräts mit dem Tonabnehmersystem-Typ des Plattenspielers übereinstimmt ( 16).“Low Level”:Die Schallplatte wird nicht wiedergegeben, oder der Ausgangssignalpegel des Plattenspielers ist zu niedrig. Vergewissern Sie sich, dass der Plattenspieler korrekt angeschlossen ist und die Aufnahme ordnungsgemäß wiedergegeben wird ( 16).Bestätigen Sie die Einstellung von “Gain” und stellen Sie den Eingangspegel dieses Geräts ein ( 16).Prüfen Sie, ob die Einstellung “MM/MC” dieses Geräts mit dem Tonabnehmersystem-Typ des Plattenspielers übereinstimmt ( 16).“Low Quality”:Das Ausgangssignal des Plattenspielers ist zu verrauscht. Entfernen Sie den Staub von der Platte. Oder spielen Sie einen anderen Track ab. Falls sich die Störung nicht beseitigen lässt, wenden Sie sich an Ihren Händler.“Speed Mismatch”:Die Umdrehungsgeschwindigkeit (RPM) ist falsch. Stellen Sie den Plattenspieler auf die korrekte Umdrehungsgeschwindigkeit für die Schallplatte ein und geben Sie den Titel wieder.
“System Error”: Möglicherweise liegt ein Systemfehler vor. Wenden Sie sich an Ihren Händler.No Device · USB-Flash-Speicher mit neuer Firmware ist nichtangeschlossen. Verbinden Sie den USB-Flash-Speicher mit der neuen Firmware. ( 23)Not Measured · Die Messung des Ausgangssignals für dieAusgangskorrekturfunktion (LAPC) wurde noch nicht durchgeführt. · Messen Sie das Ausgangssignal. ( 22)Not Valid · Die Funktion, die Sie verwenden möchten, ist mitden derzeitigen Einstellungen nicht verfügbar. Überprüfen Sie die Schritte und Einstellungen. · Die aktuelle Eingangsquelle stimmt nicht mit der in der “Cartridge Optimiser”-Einstellung überein. Schalten Sie die Eingangsquelle korrekt um. ( 16) · [MUTE] ist während der Messung von “Cartridge Optimiser” ungültig. Stellen Sie die Lautstärke ein.PHONES Connected · Die Kopfhörer sind angeschlossen. · Der Sound wird nicht über die Kopfhörerbuchse unddie Lautsprecher-Ausgangsanschlüsse ausgegeben, wenn der Kopfhörer angeschlossen und “MAIN IN” als Eingangsquelle dieses Geräts ausgewählt ist. ( 18)“Remote ” (” ” steht für eine Zahl.) · Die Fernbedienung und das Gerät verwendenunterschiedliche Modi. Ändern Sie den Modus an der Fernbedienung. ( 11)Unlocked · “COAX1”, “COAX2”, “OPT1”, “OPT2”, “PC1”oder “PC2” ist ausgewählt, aber es ist kein Gerät angeschlossen. Überprüfen Sie die Verbindung mit dem Gerät. ( 13, 14) · Die Abtastratenkomponenten, usw. der Audiosignale werden nicht korrekt eingegeben. – Informationen zum unterstützten Formatfinden Sie unter “Formatunterstützung”. ( 28)USB Over Current Das USB-Gerät nimmt zu viel Strom auf. · Trennen Sie das USB-Gerät und schließen Sie eswieder an. ( 23) · Versetzen Sie das Gerät in den Standby-Modusund schalten Sie es dann wieder ein.VOLUME OK (” ” steht für eine Zahl.) · Wenn die Eingangsquelle von “MAIN IN”umgeschaltet wird, wird die Lautstärke nach dem Umschalten der Eingangsquelle angezeigt. · Bestätigen und verstellen Sie die Lautstärke, bevor Sie [OK] drücken.Fehlerbehebung (53) 27
Deutsch
SonstigeTechnische Daten
ALLGEMEIN
Spannungsversorgung
220 V bis 240 V Wechselstrom, 50/60 Hz
Stromverbrauch
220 W
Stromverbrauch im Standby-Modus
Ca. 0,3 W
Abmessungen (B×H×T)
430 mm × 191 mm × 459 mm
Gewicht
Ca. 22,8 kg
Betriebstemperaturbereich 0 °C bis 40 °C
Betriebsfeuchtigkeitsbereich
35 % bis 80 % Rel. Feuchte(keine Kondensbildung)
ABSCHNITT VERSTÄRKER
Ausgangsleistung
150 W + 150 W (1 kHz, T.H.D. 0,5 %, 8 , 20 kHz LPF) 300 W + 300 W (1 kHz, T.H.D. 0,5 %, 4 , 20 kHz LPF)
Lastimpedanz
4 bis 16
Frequenzantwort
PHONO (MM)LINEDIGITAL IN Eingangsempfindlichkeit/ EingangsimpedanzPHONO (MM) PHONO (MC) LINE
20 Hz bis 20 kHz (RIAA-ABWEICHUNG ±1 dB, 8 ) 5 Hz bis 80 kHz (-3 dB, 8 ) 5 Hz bis 80 kHz (-3 dB, 8 )2,5 mV / 47 k 300 mV / 100 k 200 mV / 22 k
ABSCHNITT ANSCHLÜSSE
Kopfhöreranschluss
Stereo, 6,3 mm 0,75 mW, 32
PC
USB-Anschluss Typ B HINTEN x2
Analogeingang
LINE ×2
Klinkenbuchse
LINE XLR BALANCED
3 Pin XLR
PHONO (MM/MC)
Klinkenbuchse
PHONO XLR BALANCED (MC)
3 Pin XLR
MAIN IN
Klinkenbuchse
REC IN
Klinkenbuchse
Digitaler Eingang
Optischer digitaler Eingang x2
Optischer Anschluss
Koaxialer digitaler Eingang x2
Klinkenbuchse
Formatunterstützung LPCM
Analogausgang
REC OUT
Klinkenbuchse
PRE OUT
Klinkenbuchse
Systemanschluss
Systemsteuerung 3,5 mm, Buchse
ABSCHNITT FORMATUSB-B
USB-Standard DSD-Steuermodus
USB 2.0 High-speed USB-Audio-Klasse 2.0, AsynchronmodusNativer ASIO-Modus, DoP-Modus
FormatunterstützungDieses Gerät unterstützt die folgenden Formate. · Die Wiedergabe aller Formate, die von diesem Gerät unterstützt werden, kann nicht garantiert werden. · Die Wiedergabe eines Formats, das von diesem Gerät nicht unterstützt wird, kann zu abgehacktem Audiooder zu Rauschen führen. Überprüfen Sie in solchen Fällen, ob dieses Gerät das Format unterstützt. · Die von diesem Gerät und von der Wiedergabe-Software angezeigten Dateiinformationen (Abtastfrequenz,usw.) können sich voneinander unterscheiden.28 (54)
Deutsch
PC (USB-B)*
Dateiformat
Abtastrate
PCM DSD
32/44,1/48/88,2/96/176,4/192/352,8/384 kHz2,8 MHz/5,6 MHz/11,2 MHz/22,4 MHz (nur im nativen ASIO-Modus)
MQA-Dekoder Die MQA-Dekodierungsfunktion ist für den digitalen Eingang verfügbar
Bitrate / Anzahl der Quantisierungsbits16/24/32 Bit
*: Wenn Sie die spezielle App herunterladen und installieren, können Sie Dateien in vielen verschiedenenFormaten wiedergeben. ( 14) Detaillierte Informationen finden Sie in der Bedienungsanleitung der App.
Hinweis· Die technischen Daten können ohne Benachrichtigung geändert werden. · Gewicht und Maße sind ungefähre Werte.
Windows ist eine eingetragene Marke von Microsoft Corporation in den USA und anderen Ländern.Mac und OS X sind Marken von Apple Inc., die in den USA und in anderen Ländern eingetragen sind. macOS ist eine Marke von Apple Inc.“DSD” ist eine eingetragene Marke.MQA und das Sound Wave Device sind eingetragene Marken von MQA Limited © 2016The Clear BSD License Copyright (c) 2015, Freescale Semiconductor, Inc. Copyright 2016-2017 NXP All rights reserved. Redistribution and use in source and binary forms, with or without modification, are permitted (subject to the limitations in the disclaimer below) provided that the following conditions are met: · Redistributions of source code must retain the above copyright notice, this list of conditions and thefollowing disclaimer. · Redistributions in binary form must reproduce the above copyright notice, this list of conditions and thefollowing disclaimer in the documentation and/or other materials provided with the distribution. · Neither the name of the copyright holder nor the names of its contributors may be used to endorse orpromote products derived from this software without specific prior written permission.NO EXPRESS OR IMPLIED LICENSES TO ANY PARTY’S PATENT RIGHTS ARE GRANTED BY THIS LICENSE. THIS SOFTWARE IS PROVIDED BY THE COPYRIGHT HOLDERS AND CONTRIBUTORS “AS IS” AND ANY EXPRESS OR IMPLIED WARRANTIES, INCLUDING, BUT NOT LIMITED TO, THE IMPLIED WARRANTIES OF MERCHANTABILITY AND FITNESS FOR A PARTICULAR PURPOSE ARE DISCLAIMED. IN NO EVENT SHALL THE COPYRIGHT HOLDER OR CONTRIBUTORS BE LIABLE FOR ANY DIRECT, INDIRECT, INCIDENTAL, SPECIAL, EXEMPLARY, OR CONSEQUENTIAL DAMAGES (INCLUDING, BUT NOT LIMITED TO, PROCUREMENT OF SUBSTITUTE GOODS OR SERVICES; LOSS OF USE, DATA, OR PROFITS; OR BUSINESS INTERRUPTION) HOWEVER CAUSED AND ON ANY THEORY OF LIABILITY, WHETHER IN CONTRACT, STRICT LIABILITY, OR TORT (INCLUDING NEGLIGENCE OR OTHERWISE) ARISING IN ANY WAY OUT OF THE USE OF THIS SOFTWARE, EVEN IF ADVISED OF THE POSSIBILITY OF SUCH DAMAGE.
Sonstige (55) 29
Merci d’avoir porté votre choix sur cet appareil. Veuillez lire attentivement les présentes instructions avant d’utiliser ce produit, et conserver ce manuel pour utilisation ultérieure.· A propos des descriptions dans ce mode d’emploi – Les pages à consulter sont désignées par le signe ” “. – Les illustrations montrées peuvent être différentes de votre appareil.
CaractéristiquesTechnologies audio de haute qualité Amplificateur intégré utiliséLe moteur JENO transmet et traite les signaux audio totalement en numérique et avec une instabilité minimale, depuis l’étage d’entrée jusqu’à l’étage de puissance. La commande GaN-FET pour l’entraînement linéaire des hautparleurs avec commutation sans perte à grande vitesse et la technologie ADCT (Active Distortion Cancelling Technology) qui annule le bruit avec précision sont mis en oeuvre pour obtenir un son dynamique et vivant grâce à la fonction d’entraînement supérieure. Un son clair et peu bruyant peut être fourni par les différentes technologies telles que le LAPC, qui effectue un étalonnage de la phase adaptative de la charge des haut-parleurs pour assurer des caractéristiques idéales de gain et de phase de tout type de haut-parleurs connectés.Alimentation électrique à faible bruit avec une grande capacité de réponse au signal audioLa technologie “Advanced Speed Silent Power Supply” est intégrée pour une commutation sans perte à grande vitesse et une réduction du bruit. La fonction unique d’alimentation électrique peut fournir une puissance stable avec un bruit minimal grâce à la fonction de commutation à grande vitesse pour une meilleure résolution du signal audio dans un amplificateur entièrement numérique. Et cet appareil améliore le potentiel du moteur JENO pour une meilleure lecture.04 (56)
La technologie numérique unique“Intelligent PHONO EQ” améliore lepotentiel de lecture des disques.“Accurate EQ Curve” , qui comporte une composante hybride pour les circuits analogiques et numériques, permet le processus d’égalisation avec une grande précision et un rapport S/B. Et cet appareil prend en charge les différentes courbes d’égalisation autres que la RIAA pour une lecture précise. La fonction “Crosstalk Canceller”, qui mesure la diaphonie et l’optimise avec le DSP, et la fonction “PHONO Response Optimiser”, qui réduit les résonances sur la cartouche, sont mises en oeuvre pour reproduire le signal audio du sillon d’enregistrement.
Table des matières
Consignes de sécurité
06
Guide de référence de la commande 08
Connexions
12
Commandes
13
Paramètres
20
Guide de dépannage
25
Autres
28
Veuillez lire attentivement les “Consignes de sécurité” de ce manuel avant utilisation.Cet appareil, TélécommandeConnexion de l’enceinte, connexion du câble d’alimentation secteurLecture d’appareils connectésAutres paramètresAvant de faire appel à l’assistance, lisez la section Dépannage.Caractéristiques, etc.
AccessoiresCordon d’alimentation secteur (2) Sauf pour la SuisseK2CM3YY00041Pour la Suisse K2CS3YY00033Télécommande (1) N2QAYA000224Piles pour la télécommande (2)Disque d’étalonnage (1) TSPX101&DOLEUDWLRQ5HFRUG· Les numéros de produit fournis dans ce mode d’emploi sont exacts dès octobre 2020.· Sous réserve de modifications. · N’utilisez pas de cordon d’alimentation secteur et ledisque d’étalonnage avec d’autres appareils.
L’élimination des équipements et des batteries usagés Applicable uniquement dans les pays membres de l’Union européenne et les pays disposant de systèmes de recyclage.Apposé sur le produit lui-même, sur son emballage, ou figurant dans la documentation qui l’accompagne, ce pictogramme indique que les piles, appareils électriques et électroniques usagés, doivent être séparées des ordures ménagères. Afin de permettre le traitement, la valorisation et le recyclage adéquats des piles et des appareils usagés, veuillez les porter à l’un des points de collecte prévus, conformément à la législation nationale en vigueur. En les éliminant conformément à la réglementation en vigueur, vous contribuez à éviter le gaspillage de ressources précieuses ainsi qu’à protéger la santé humaine et l’environnement. Pour de plus amples renseignements sur la collecte et le recyclage, veuillez vous renseigner auprès des collectivités locales. Le non-respect de la réglementation relative à l’élimination des déchets est passible d’une peine d’amende.Note relative au pictogramme à apposer sur les piles (pictogramme du bas) : Si ce pictogramme est combiné avec un symbole chimique, il répond également aux exigences posées par la Directive relative au produit chimique concerné.(57) 05
Français
Consignes de sécurité
AvertissementAppareil· Pour réduire les risques d’incendie, d’électrocution ou de dommages au produit, – N’exposez pas cet appareil à la pluie, l’humidité, l’égouttement ou l’éclaboussement. – Ne placez pas d’objets remplis d’eau, tels que des vases, sur l’appareil. – Utiliser exclusivement les accessoires préconisés. – Ne retirez pas les caches. – Ne réparez pas l’appareil vous-même. Confiez l’entretien a un personnel qualifié. – Ne laissez pas d’objets métalliques tomber dans cet appareil. – Ne pas placer d’objets lourds sur cet appareil.Cordon d’alimentation secteur· Pour réduire les risques d’incendie, d’électrocution ou de dommages au produit, – Assurez-vous que la tension d’alimentation électrique correspond à la tension inscrite sur l’appareil. – Branchez la prise secteur dans la prise électrique. – Ne pas tirer, plier ou placer des objets lourds sur le cordon. – Ne manipulez pas la prise avec les mains mouillées. – Tenez le corps de la prise secteur en la débranchant. – N’utilisez pas de prise secteur ni de prise de courant endommagée.· La fiche secteur est le dispositif de déconnexion. Installez cet appareil de sorte que la fiche secteur puisse être débranchée immédiatement de la prise de courant.· Assurez-vous que la broche de terre de la prise secteur est connectée de manière sécurisée pour éviter tout risque d’électrocution. – Un appareil de construction de CLASSE I doit être raccordé à une prise secteur équipée d’une protection par mise à la terre.
AttentionAppareil· Ne placez pas de sources de flammes vives telles que des bougies allumées sur cet appareil.· Cet appareil peut être perturbé par des interférences causées par des téléphones mobiles pendant l’utilisation. En présence de telles interférences, éloignez le téléphone mobile de cet appareil.· Cette unité est destinée aux climats tempérés et tropicaux.· Ne posez aucun objet sur cet appareil. Cet appareil chauffe lorsqu’il est en marche.· Ne touchez pas la surface supérieure de cette unité. Cette unité chauffe lorsqu’elle est en marche.Emplacement· Placez cet appareil sur une surface plane. · Pour réduire les risques d’incendie,d’électrocution ou de dommages au produit, – N’installez pas et ne placez pas cet appareildans une bibliothèque, un placard ni dans aucun autre espace réduit. Assurez-vous que l’appareil est bien ventilé. – Ne bouchez pas les ouvertures d’aération de cet appareil avec des journaux, nappes, rideaux ou objets similaires. – N’exposez pas cet appareil directement aux rayons du soleil, à des températures élevées, à une humidité élevée ni à des vibrations excessives. · Assurez-vous que l’emplacement est assez solide pour supporter le poids de cet appareil ( 28). · Ne pas soulever ou transporter cet appareil en le tenant par les boutons. L’unité pourrait sinon chuter et provoquer des blessures ou son dysfonctionnement.
06 (58)
Pile· Il y a un danger d’explosion si la pile n’est pas correctement remplacée. Remplacez uniquement par le type recommandé par le fabricant.· Manipuler de façon incorrecte les piles peut causer une fuite d’électrolyte ainsi qu’un incendie. – Retirez la batterie si vous n’avez pas l’intention d’utiliser la télécommande pendant un long moment. Rangez-la dans un endroit frais et sombre. – Ne chauffez pas et n’exposez pas les piles à une flamme. – Ne laissez pas la (les) pile(s) dans un véhicule exposé directement aux rayons du soleil pendant un long moment avec fenêtres et portières fermées. – Ne pas démonter ou court-circuiter les piles. – Ne rechargez pas des piles alcalines ou au manganèse. – Ne pas utiliser des piles dont le revêtement a été enlevé. – Ne mélangez pas les anciennes piles avec les piles neuves ou différents types de piles.· Pour jeter les piles, veuillez contacter les autorités locales ou votre revendeur afin de connaître la procédure d’élimination à suivre.· Éviter l’utilisation sous les conditions suivantes – Température extrêmement élevée ou basse lors de l’utilisation, du rangement ou du transport. – Le remplacement d’une batterie par un type qui ne convient pas. – Jeter une batterie dans le feu ou la mettre dans un four chaud, l’écraser mécaniquement ou la découper, peut causer une explosion. – Une température extrêmement élevée et/ou une pression d’air extrêmement faible peut causer une explosion ou créer une fuite de liquide ou de gaz inflammable.
InstallationAppareil Eteignez tous les appareils avant le branchement et lisez le mode d’emploi approprié. · Concernant les dimensions de cet appareil( 28) · Reportez-vous à l’illustration suivante pour lesdimensions des pieds de cet appareil.Avant
A
A : 340 mm
B : 313 mm
B
Disque d’étalonnage· Bien que le disque puisse être déformé selon l’environnement de stockage ou l’utilisation en raison de ses caractéristiques, il est conçu pour être lu pour la fonction “Cartridge Optimiser” même s’il est légèrement déformé.· Posez ce disque à la verticale pour le ranger. L’empilement de disques ou l’inclinaison de disque pour le ranger peut déformer le support.
Français
Consignes de sécurité (59) 07
Guide de référence de la commandeCet appareil
01 Bouton Veille/Marche (
)
[
] (éteint) : L’appareil est hors tension.
[
] (allumé) : L’appareil est sous tension.
· L’appareil utilise toujours un peu d’électricité en mode éteint. Le mode éteint utilise moins de puissance.
02 Voyant d’alimentation · Bleu : L’unité est allumée. · Éteint : L’unité est éteinte.
03 Prise pour casque· Lorsqu’une fiche est branchée, les enceintes et les bornes REC OUT/PRE OUT n’émettent pas de son. ( 19)· Le son n’est pas émis par la prise du casque quand “MAIN IN” est sélectionné comme source d’entrée de cette unité. ( 18)· Une pression acoustique excessive provenant des écouteurs ou d’un casque peut entraîner une perte de l’ouïe.· Une écoute prolongée au volume maximal peut endommager les oreilles de l’utilisateur.
04 Bouton du volume · — dB (min), -88,0 dB à 0 dB (max)
 report this ad
05 Affichage · Des informations comme la source d’entrée, etc., s’affichent. ( 26) · La source d’entrée clignote sur l’
[xyz-ips snippet=”download-snippet”]