
TELLUR TLL331251 Video DoorBell WiFI User Manual
For other languages, please visit smart.tellur.com
Thank you for choosing Tellur!
To ensure an optimum performance and safety, please read this user manual carefully before using the product. Keep this user manual safe for future references.
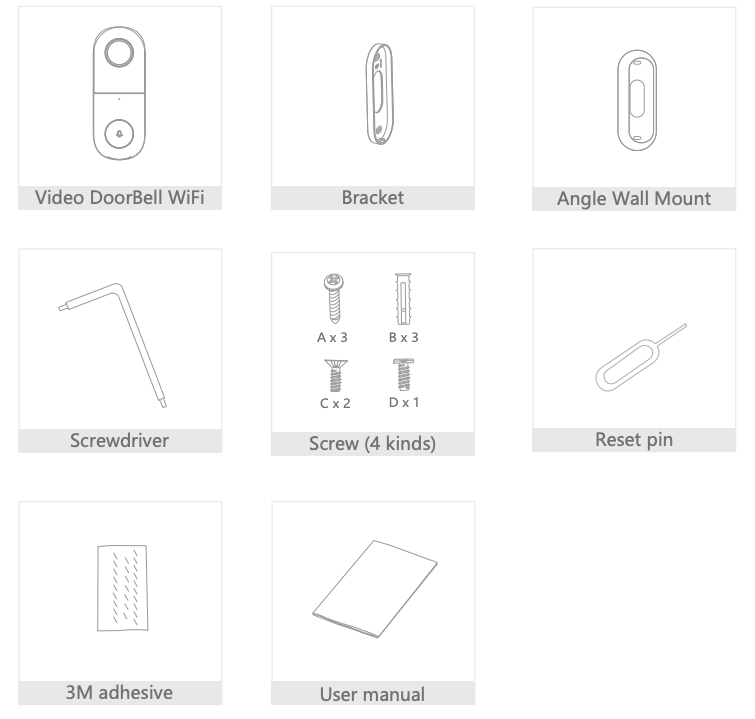
What’s in the box
Please consult this checklist for all parts.
Product diagram
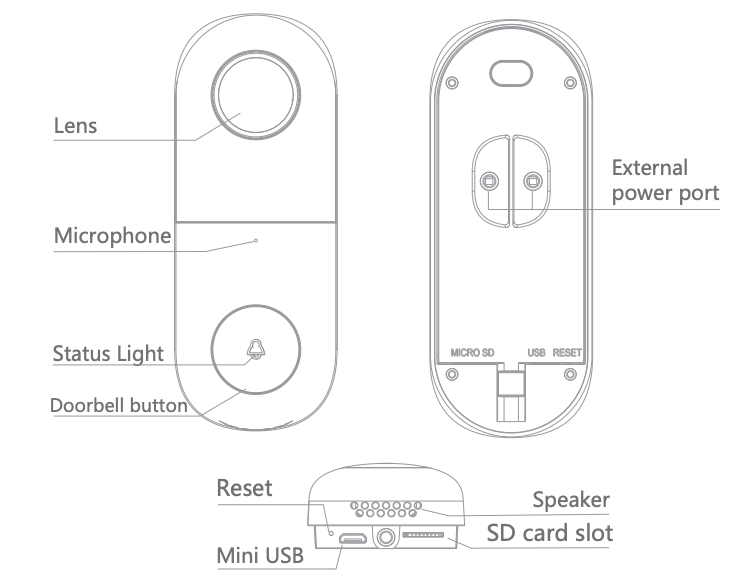
Power supply: AC 12~24VDoorbell button: Press the button to activate the doorbellStatus indicator:
- Solid red light on: network is malfunctional
- Blinking red light: waiting for network connection (quickly blinking)
- Solid blue light on: the doorbell is working correctly
Microphone: Captures sound for your videoSD card slot: Supports local SD Card storage (Max. 128GB)Reset: Use the reset pin to press and hold for 5 seconds
Product installation
Option 1
Doorbell general installation
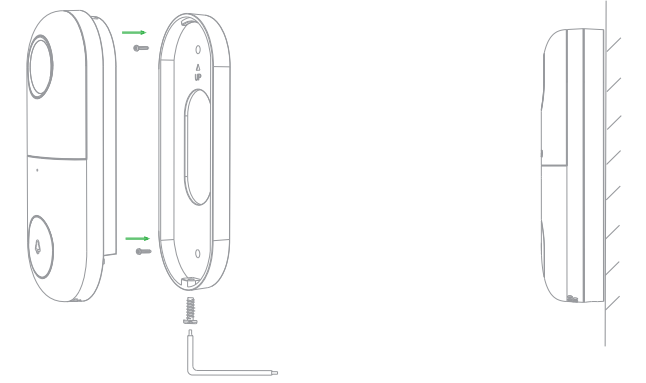
- Fix the bracket on the wall using the mounting screws
- Install the doorbell into the bracket and lock it with the screw
Option 2
Angle Wall Mount + Bracket + Doorbell Installation
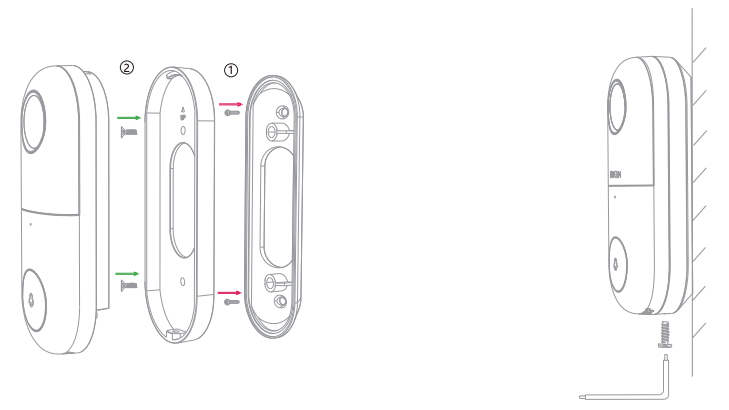
- Fix the angle wall mount on the wall
- Fix the mounting bracket in the angle wall mount
- Install the doorbell into the bracket and lock it with the screw
Pairing the device
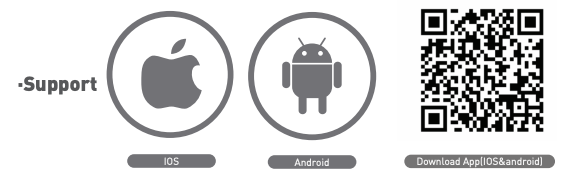
Download the Tellur Smart app, available for both iOS and Android OS.
Scan the QR code to download Tellur Smart App
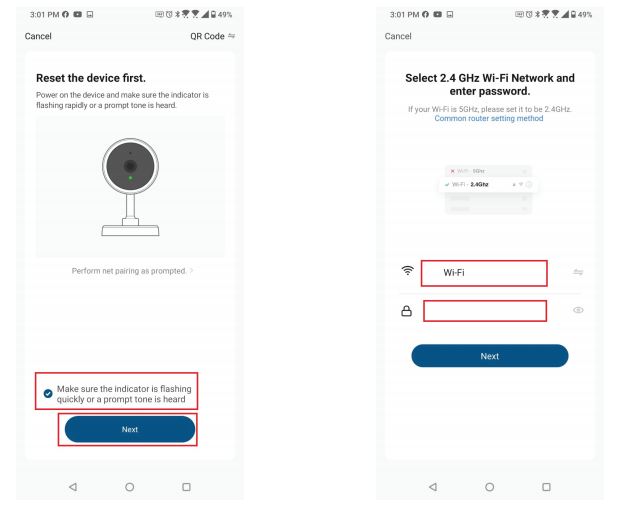
Set up router
This device only supports 2.4GHz frequency band router, does not support 5GHz frequency band router, please set the relevant parameters of the router before WiFi configuration, WiFi passwords do not include special characters such as #$%^&*(). When the device is configured in WiFi, the mobile phone and device are as close as to the router, which can speed up the configuration of the device.

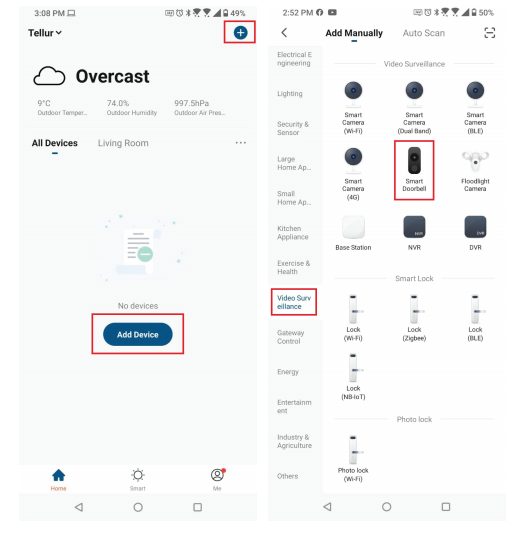
Add the device
- Open the Tellur Smart app and click “Add device” or “+” and then select “Video Surveillance” -> “Video Doorbell”.

- Power on and reset the Video DoorBell until the status indicator is flashing quickly or a prompt tone is heard, and then click “Next”. Then input your WiFi password and click “Next”. Click to change network
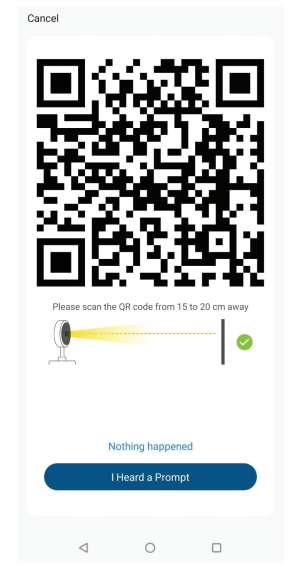
- With the Video DoorBell scan the QR code that appeared on your phone. When the device makes a sound, click “I heard a Prompt” and the configuration will complete.
- When connecting, make sure your router, smartphone and the Video DoordBell are as close as possible.
Product features
Two-way audio
When a visitor pushes the doorbell button, you will get a call on your smartphone. When you answer, you can see and hear the visitor on Tellur Smart app.
Motion detection
Motion sensors will notify you when movement is detected.
Device sharing
You can share the device with added family members or friends. This way they can also preview online.
There is no limit to the number of sharing devices, but only 6 accounts can preview at the same time.
Record
Record every moment using high-capacity SD card storage.
Day & Night
Powerful night vision means no interruptions, even in complete darkness.

Disposal and recycling information
 Disposal and recycling information
The crossed-out wheeled-bin symbol on your product, battery, literature or packaging reminds you that all electronic products and batteries must be taken to separate waste collection points at the end of their working lives; they must not be disposed of in the normal waste stream with household garbage. It is the responsibility of the user to dispose of the equipment using a designated collection point or service for separate recycling of electrical and electronic equipment waste (WEEE) and batteries according to local laws. Proper collection and recycling of your equipment helps ensure EEE waste is recycled in a manner that conserves valuable materials and protects human health and the environment. Improper handling, accidental breakage, damage, and/or improper recycling at the end of its life may be harmful for health and environment.
References
[xyz-ips snippet=”download-snippet”]