![]()
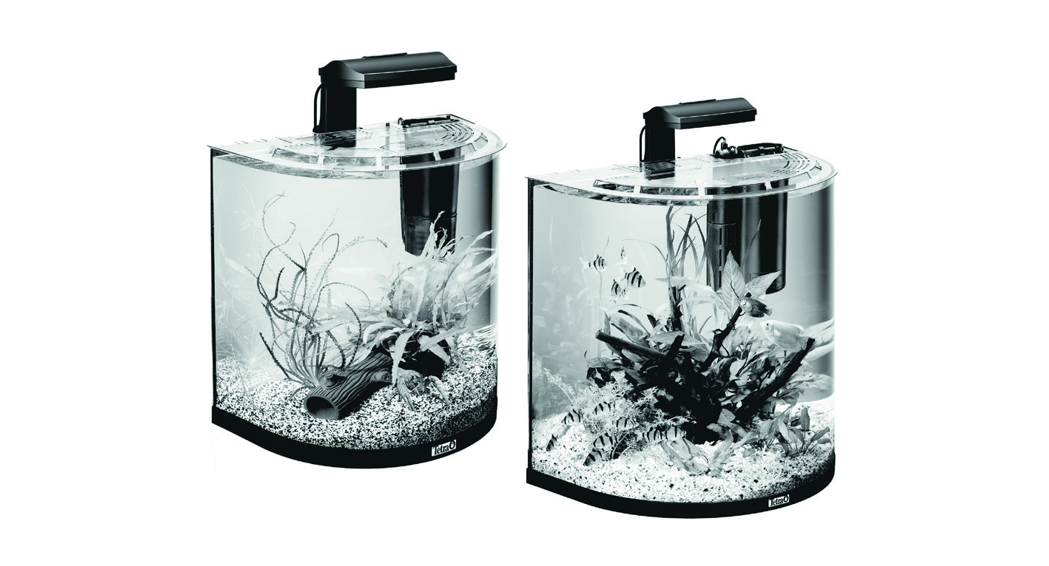
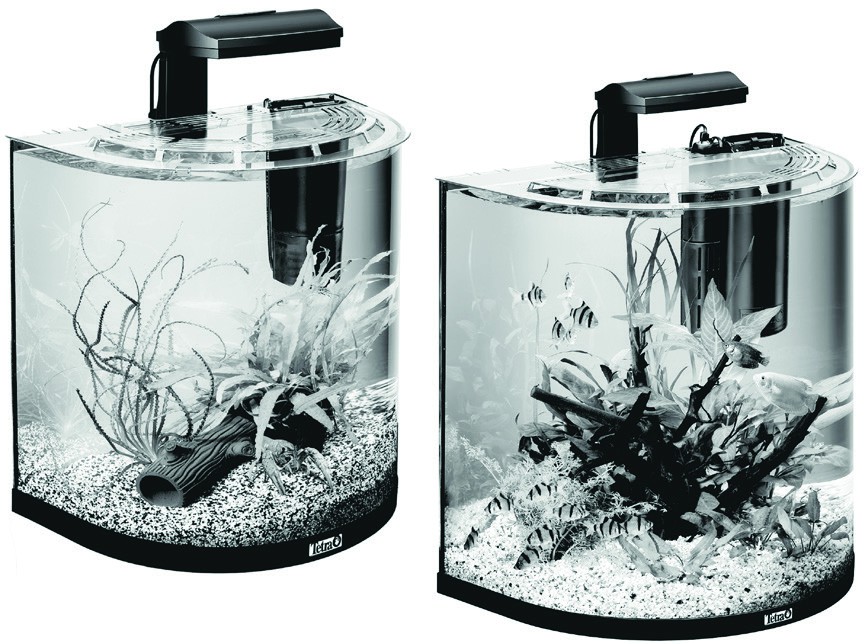
AquaArt Explorer Line 30 l/60 l
For more information: www.tetra.net

English translation of the original German instructions
![]() WARNING
WARNING
- This device is suitable for use by children aged 8and over as well as people with reduced physical, sensory or mental capacities or a lack of experience and knowledge if they are supervised or have been instructed how to safely use the device and understand the resultant risks.
- Children must not play with the device.
- Children must not conduct cleaning or user maintenance activities without supervision.
- Switch off and unplug all devices in your aquarium before reaching into the water.
- Damaged connection cables cannot be replaced. Dispose of the device.
Safety instructions
Preventing hazardous situations
- Only connect the LED light to a professionally installed plug socket.
- Make sure that the mains supply system is protected by an AC/DC-sensitive residual current circuit-breaker (RCCB).
- Only connect the LED light to the mains if the local supply voltage corresponds to the specifications in the technical data.
- Protect the power plug from moisture.
- Never touch the power cables and plugs of electrical devices with wet hands.
- Make sure that the socket is immune to the ingress of water and moisture.
- Pull only on the plug to remove it from the socket do not pull on the power cable.
- Always disconnect the LED light from the mains before cleaning or carrying out any maintenance tasks.
- Do not allow children to play with small parts as there is a risk of choking.
- The power plug must be freely accessible so that the LED light can be easily and quickly disconnected from the mains in an emergency.
- Never make any technical changes to the device.
Preventing material damage
- Do not bend or crush the mains connection cable.
- Only use original spare parts and accessories.
- Never transport the aquarium when it is filled.
- Only clean the aquarium with soft cloths or sponges.
- For cleaning purposes, use clean water or special cleaning products for aquaria.
Preface
These instructions constitute an integral part of the product. Keep these instructions near the product. Please include the instruction manual when passing on the product.
Legend(to Figures A, B, D)
| No. | Description |
| 1 | LED light |
| 2 | Aquarium lid |
| 3 | Tank |
| 4 | Power cable with plugs |
| 5 | Frame |
| 6 | Filter (for the Explorer Line 30 I)Filter box with heating element (for the Explorer Line 60 I) |
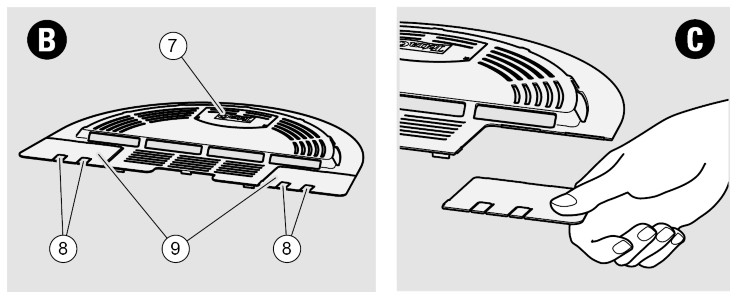
| 7 | Feed flap |
| 8 | Cable guides (closed with covers upon delivery) |
| 9 | Optional positions for electrical devices (closed with covers upon delivery) |
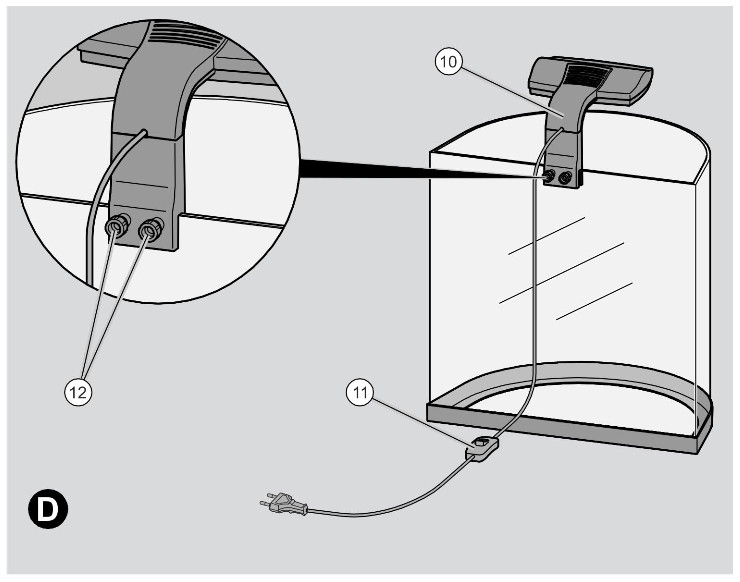
| 10 | Light arm |
| 11 | Light switch |
| 12 | Securing screws |
Style conventions in these instructions
Various elements of the instructions feature defined style conventions. As the result you can quickly recognise the type of text concerned: Standard text Cross references
- Lists or
- Actions
Warnings and information
These operating instructions contain the following categories of warning notices and instructions.
Warnings![]() CAUTIONNotes containing the word CAUTION warn of a situation which leads to slight or moderate injuries.
CAUTIONNotes containing the word CAUTION warn of a situation which leads to slight or moderate injuries.
InformationATTENTION!These notes warn of a situation which leads to material damage or environmental pollution.
Intended use
The aquarium is designed exclusively for keeping ornamental fish and invertebrates such as crabs or shrimps. The maximum water temperature of 35 °C must not be exceeded. The aquarium is designed for use only in enclosed rooms. The LED light may only be mounted and operated on this aquarium.Proper use also includes heeding all the information in these instructions and in all attached instructions and complying with the safety information.The use of the product for any other purpose is regarded as improper and may result in damage to property or personal injury and shall render the warranty null and void.In particular, the aquarium must not be used in the following cases:
- If you carry out unauthorized modifications or repair work.
- If you use the aquarium outside enclosed rooms.Tetra GmbH will not accept liability for loss or damage incurred by improper use.
Unpacking and installation
There must be properly installed and earthed sockets (230 V ~ 50 Hz) near the installation site of the aquarium for the electrical devices in it.
- Pull out the plugs of all the electrical devices installed in the aquarium.
![]() CAUTIONShards of glass can cause cuts.
CAUTIONShards of glass can cause cuts.
- Ensure that you do not break the tank.
- Do not touch the shards of glass if the tank breaks.
- Wear gloves.
- Remove all shards of glass carefully.
ATTENTION!The aquarium lid may be damaged and the glass broken if you unpack it incorrectly.
- Lift the aquarium by the frame only.
- Always lift and transport the aquarium with another person.
- Open the packaging.
- Carefully lift the aquarium out of the packaging.
ATTENTION!The aquarium may be damaged if you select an unsuitable position for it.
- Ensure that the position is flat, horizontal, and waterproof.
- Ensure that the position for it is capable of taking the weight of the unit.
The load capacity of the installation position must be high enough to support three times the filled weight of the aquarium. Information about the gross weight is available in the section entitled Technical data starting on page 9.
- Place the aquarium with the frame at the bottom in the required position.
- Take out all the parts that are in the tank.
- Clean any impurities out of the tank.
- Never use any hard, pointed or sharp objects for cleaning purposes.
- Use soft cloths or sponges.
- Add warm tap water at a temperature of approx. 25 °C to the tank.
- Check the tank for leaks.
- If the aquarium is leaking, empty it and return the tank to your stockist for a replacement.
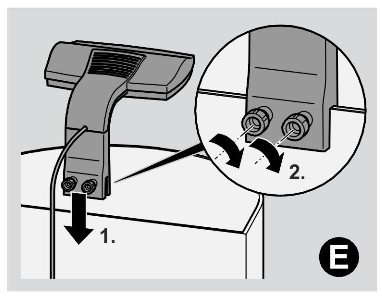
Installing the LED light
(Figures A and B)
- Pull out the plugs of all the electrical devices installed in the aquarium.
- Install the LED light in the position provided for it (Figure A).
- Do not overtighten the securing screws for the LED light in order to avoid damaging the aquarium wall.
Installing the filter in the Explorer Line 30 l
The AquaArt Explorer Line 30 l Crayfish and the AquaArt Explorer Line 30 l Goldfish are supplied with the EasyCrystal Filter 250.
- Pull out the plugs of all the electrical devices installed in the aquarium.
- Remove the aquarium lid.
- Select a position to install the filter on the inside of the tank which is not curved.
- Ensure that you keep the filter the required distances from the base and from equipment in the aquarium.The required distances are listed in the attached instructions for the filter.
- Ensure that you satisfy the requirements relating to the water level set out in the instructions for the filter.
- Secure the filter vertically on the inside of the tank as shown in the instructions for the filter.
The cable guides and optional positions for electrical devices in the aquarium lid are closed with covers upon delivery. The covers can be removed by hand or with a pair of pliers.
ATTENTION!The aquarium lid may be damaged if too much force is used to remove a cover.
- Score the edges of the cover with a sharp knife before you remove the cover.
- Remove the cover carefully.
- If the filter is installed level with the aquarium lid, carefully remove the cover from the corresponding optional position in the aquarium lid (Figures B and C).
- If the filter is installed below the aquarium lid, carefully remove the cover from a cable guide for the mains cable (Figures B and C).
- If the cable guides or optional positions have sharp edges, smooth them with a small file.
- Route the power cable upwards and out of the aquarium.
- Follow the attached instructions for the filter to complete the remainder of the installation work.
Installing the filter box and heating element in the Explorer Line 60 lThe AquaArt Explorer Line 60 l is supplied with the EasyCrystal FilterBox 300. This contains the filter. In addition it houses the supplied heating element.
- Pull out the plugs of all the electrical devices installed in the aquarium.
- Remove the aquarium lid.
- Select a position to install the filter box on the inside of the tank which is not curved.
- Ensure that you keep the filter the required distances from the base and from equipment in the aquarium.The required distances are set out in the attached instructions for the filter box.
- Ensure that you satisfy the minimum immersion depth (as specified on the outside of the filter box).
- Secure the filter box vertically on the inside of the tank as shown in the instructions for the filter box.
- Install the heating element in the filter box as described in the instructions for the filter box.Upon delivery, the cable guides and optional positions for electrical devices in the aquarium lid are closed with covers. The covers can be removed by hand or with a pair of pliers.
ATTENTION!The aquarium lid may be damaged if too much force is used to remove a cover.
- Score the edges of the cover with a sharp knife before you remove the cover.
- Remove the cover carefully.
- If the filter box is installed level with the aquarium lid, carefully remove the cover from the corresponding optional position in the aquarium lid (Figures B and C).
- If the filter box is installed below the aquarium lid, carefully remove the covers from the cable guides for the mains cables of the filter and heating element (Figures B and C).
- If the cable guides or option positions have sharp edges, smooth them with a small file.
- Route the mains cables for the filter and heating element upwards out of the aquarium.
- Follow the attached instructions for the filter box, filter and heating element to complete the remainder of the installation work.
Installing additional electrical devicesYou can install additional electrical devices (for example heating elements) in the aquarium if required.
- Pull out the plugs of all the electrical devices installed in the aquarium.
- Install electrical devices as described in the relevant instructions for use and other instructions supplied by the manufacturer.
- Carefully remove the covers from the required cable guides and optional positions in the aquarium lid (Figures B and C).
- Proceed as described in the previous section.
Connecting and starting
- Start the electrical devices installed in the aquarium as described in the attached instructions.
LED light
- Fit the plug into the socket.
There are two switch positions for selecting the colour of the lighting:
- Day lighting: The lighting unit emits daylight white light.
- Night lighting: The lighting unit emits blue light. This creates an attractive moonlight effect.
- Ideally the light should be on for 8 to 12 hours per day.
- Using a timer the day lighting could be turned on and off automatically.
Cleaning
- Pull out the plugs of all the electrical devices installed in the aquarium.
- Empty the tank.
ATTENTION!Incorrect cleaning may damage the aquarium or poison the tank contents.
- Never use any hard, pointed or sharp objects for cleaning purposes.
- Use soft cloths or sponges.
- Use only clean water or special aquarium cleaning products for cleaning purposes. These are available from your stockist. Particularly the corners of the tank must be cleaned carefully to prevent damage to the glued joints of the glass walls.
- Clean the aquarium carefully.
Maintenance
- Pull out the plugs of all the electrical devices installed in the aquarium.
![]() CAUTIONShards of glass can cause cuts.
CAUTIONShards of glass can cause cuts.
- Ensure that you do not break the tank.
- Do not touch the shards of glass if the tank breaks.
- Wear gloves.
- Remove all shards of glass carefully.
- Carry out maintenance work on the electrical devices in the aquarium as described in the attached instructions.
LED light
- Clean the LED light with a dry or slightly moist cloth if it gets dirty.
- The light source is not replaceable. When it reaches its end of life, the LED light must be replaced.
Technical support
Please contact your local stockist or the Tetra Technik Service Center in the event of faults.
Technical data
| AquaArt Explorer Line | 30 lGoldfish | 30 lCrayfish | 60 l |
| Volume | 30 l | 30 l | 60 l |
| Net weight of tank | 6.9 kg | 6.9 kg | 13 kg |
| Gross weight (with water) | 37 kg | 37 kg | 73 kg |
| Dimensions | L: 28 cmB:41 cmH: 51 cm | L: 28 cmB:41 cmH:51 cm | L: 36 cmB:51 cmH:61 cm |
| Tetra EasyCrystal | Filter 250 | Filter 250 | FilterBox300 |
| Heating element | — | — | Tetra HT50 |
| LED light | |||
| Voltage | 220 – 240 V — 50/60 Hz | ||
| Power Day lighting | 4W | 4W | 6W |
| Power Night lighting | 1.5 W | 1.5 W | 1.5 W |
| Protection class | II | II | II |
| Protection rating | IP X7 | IP X7 | IP X7 |
Disposal
There are national and regional laws on the environmentally-friendly disposal of electronic modules, recyclable materials and other components.
- Please contact your local authority for the relevant information on disposal.
- Please comply with the legal requirements when disposing of the components.

Warranty
Our modern manufacturing techniques, highquality components and rigorous quality control checks enable us to provide a two-year warranty on the adhesive glass joints of the aquarium and for the function of the supplied electrical devices. The warranty period starts on the date of purchase. Keep your receipt in a safe place. No claims may be made on the warranty in cases of improper use and tampering, nor does the warranty cover normal wear and tear of expendable parts.In the event of complaints, please contact your local stockist or Tetra GmbH, Tetra Technik Service Center, Postfach 1580, D-49304 Melle, Germany, www.tetra.net.
![]() Tetra GmbHHerrenteich 78D-49324 MelleGermanyFor more information: www.tetra.net.
Tetra GmbHHerrenteich 78D-49324 MelleGermanyFor more information: www.tetra.net.![]() TL 50436/03-2019
TL 50436/03-2019
References
[xyz-ips snippet=”download-snippet”]