ThermoWorks Smoke X4 Four Channel Wireless Thermometer Instruction Manual
Getting Started:
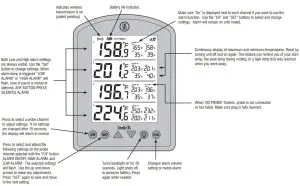
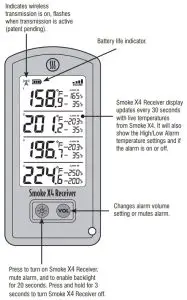
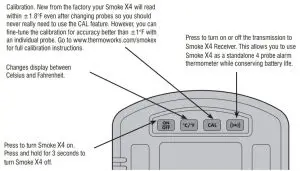
Turn Smoke X4 and Smoke X4 Receiver on and within 30 seconds they will be connected (‘con’ will be displayed on Smoke X4 Receiver until it connects). Smoke X4 Receiver will update information every 30 seconds from the base unit while in range.
Wireless transmission can be turned on or off by pressing the wireless button on the rear of the base unit. Wireless signal can be received 6,562-feet (1.24-miles) line of-sight with no obstructions, less if transmitting between walls or obstacles (patent pending).
To set an alarm simply press “CH” to select the desired channel and then press “SET” to first turn the alarm function on or off. ALARM ON or OFF will begin to flash, use the arrows to change from on or off on the selected channel. Press “SET” again to accept the change and move to adjusting the HIGH ALARM. With the HIGH ALARM digits flashing use the up and down arrows to adjust the desired temperature. Press “SET” again to accept the HIGH ALARM changes and move on to LOW ALARM. With the LOW ALARM digits flashing use the up and down arrows to adjust the desired temperature. Press “SET” again to accept all changes and return to normal mode. Smoke X4 Receiver will show the updated alarm settings within 30 seconds of adjustment on the base unit. Alarms that are sounding can be muted with any button press either on the base or Smoke X4 Receiver.
You’re now ready to use Smoke X4 for the first time.
Smoke X4/Smoke X4 Receiver Sync Instructions
Smoke X4 and Smoke X4 Receiver come synced out of the box so you should only need to do this when replacing or adding additional Smoke X4 Receivers.
How to Sync Smoke X4 with Smoke X4 Receiver:
- With Smoke X4 powered on press and hold button for 5 seconds until “Sync” appears on the screen.
- Now that Smoke X4 is in Sync mode, make sure Smoke X4 Receiver is powered on.
- Press and hold the “VOL” button for 5 seconds on Smoke X4 Receiver. The display should read “Sync” for a short amount of time.
- Both Smoke X4 and Smoke X4 Receiver will beep and return to normal functionality signaling a successful pairing.NOTE: To sync multiple Smoke X4 Receivers to one base, please follow the steps above on one Smoke X4 Receiver at a time. Putting Smoke X4 into Sync mode will not disable or interfere with previously synced Smoke X4 Receivers.
Tips for Use & Care Instructions
What’s Included:
Smoke X4 (base), Smoke X4 Receiver (receiver), Batteries (Installed), (3x) Pro-Series® HighTemp Cooking Probe (TX-1001X-OP), Pro-Series® High Temp Air Probe & Grate Clip (TX1003X-AP), lanyard, 8 High Temp Silicone Color Probe Rings, and this instruction card.
Tips for Use:
- Your Smoke X4’s body should not be affixed directly to a smoker or grill’s lid or left in the smoker or oven. The high heat will melt the pastic housing.
- Insert the cooking probe so that the tip rests at the thickest part of the meat or food. Avoid gristle or bone.
- Pinch Grate Clip, insert probe, and attach clip to the grate. Place air probe 1 2 inches away from food, avoiding sides of the cooker.
- Grate Clip can be adjusted for different-sized grates by gently bending. We recommend leaving the air probe in the clip while adjusting.
- Set your desired alarm temperatures. Chef-recommended doneness temperatures are on the reverse of this card. If cooking meat, set the alarm somewhat lower to allow for carryover heat during resting.
- The cables may be closed in an oven door or under a BBQ hood with the following precautions.
Cautions for Pro-Series Probes
- Use hot pads or gloves when removing the probe from meat. It will be hot!
- Do not pull on the cable. Use the molded mini-handle.
- The cables will withstand 700°F (370°C) and the transition/handle 644°F (340°C) for short periods.
- Probe tip itself is rated to 572°F (300°C). Do NOT expose probe tip to flames or coals.
- Construction is moisture-resistant but we do not recommend full immersion of the cable.
- Clean probe by wiping with damp cloth and kitchen cleaner.
- Keep the probe cable away from oven elements, flames, coals, grill or oven racks—all of which can reach temperatures far higher than 700°F (even if an oven is set lower). The probe cable can be damaged at higher temperatures. The inner insulation will melt and the probe will short (displaying “NO PROBE!” on the alarm display).
- When using ovens or smokers, avoid pinching the cable between hot surfaces such as a cast metal grill hood without some insulating protection. Use an access hole if available.
- Avoid repeated kinking or twisting of the probe cable which can break wires.
- With care, the probe should last a long time. Eventually, you may need to replace it. If the probe becomes damaged, the base unit will flash “NO PROBE!”. Affordable replacements are available. See our website for full list of probe options.
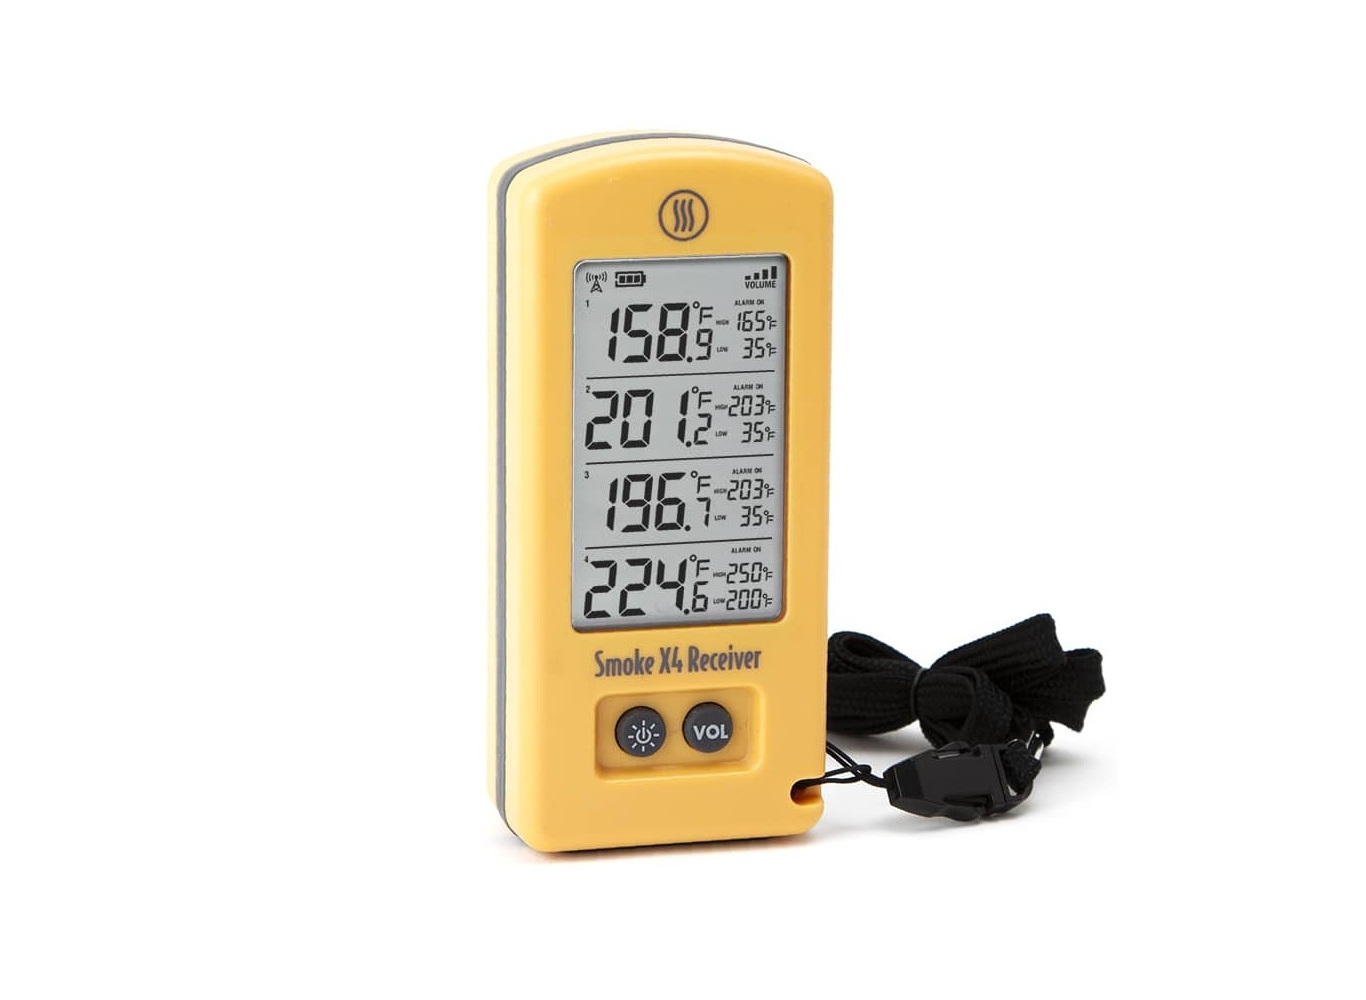
PRODUCT OVERVIEW
Optional Accessories
- High Temp Straight Penetration Probe, 4.5-inchThe durable High Temp Straight Penetration Probe delivers better accuracy, faster readings, and a wider temperature range than probes sold with “low-cost” houseware temperature alarms.Model #TX-1004X-SP

- Waterproof Needle ProbeExcellent choice for cooking thick or thin portions. Also, ideal for monitoring the internal temperature of food during Sous Vide cooking. Needle probe delivers Super Fast® 2-second response. Fully submersible. Model #TX-1002X-NP
- High Temp 12-inch ProbeGreat for larger cuts of meat or deep insertion into soup urns or hot holding tanks. Durable, fast, and accurate. Model #TX-1005X-12
- High Temp 2.5-Inch ProbeThis shorter High Temp Straight Penetration Probe is perfect for thinner or smaller cuts of meat where the extra probe length can get in the way. Insert into briskets or loins to continuously monitor them as they cook. Model #TX-1009X-ST
- Cable ExtensionExtend your Pro-Series probes’ cable an extra meter with this durable cable designed to keep your readings accurate. Model #TX-1008X-PX
- AC AdapterOptional AC Adapter for Smoke X4.Model # TX-1012X-SA
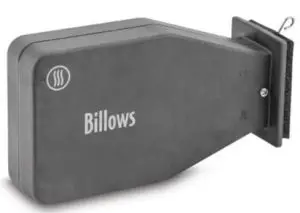
- Billows™ BBQ Temperature Control Fan Eliminate vent adjustments and take control of the temperature in your smoker.Model #TX-1600
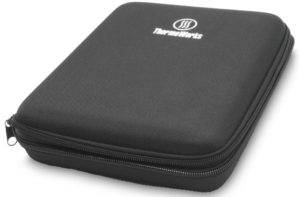
- Large Zippered Storage Case Zippered storage case designed to store all of your favorite thermometers and probes.Dimensions: 8” x 9.5” x 2”Model #TX-1010X-SC
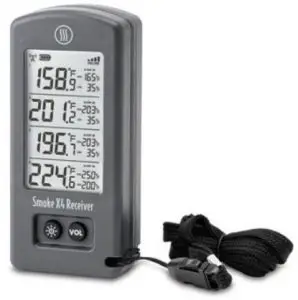
- Spare Smoke X4™ ReceiverA ruggedized receiver device to be paired directly to Smoke X4’s base unit with audible alerts.Model #TX-1801-XX


Go to www.thermoworks.com/smokex for additional product information and more tips for use
CABLE SHOULD AVOID:
- Flames
- Immersion
- Racks
- Coals
- Elements
- Kinks


Damage from the above voids probe warranty.
Pro-Series Probes available at www.thermoworks.com/pro-series
Pro-Series Probes work with Smoke X4™, Smoke X2™, Smoke™, Signals™, ChefAlarm®, DOT® and BlueDOT™
Meat Temperatures
Chef & USDA Recommended
For additional temperature recommendations, go to blog.thermoworks.com
| BEEF | SERVE TEMPERATURES | LAMB • VENISON | |
| Bleu | 110°F | 43°C | |
| Rare | 120 – 130°F | 49 – 54°C | |
| Medium Rare | 130 – 135°F | 54 – 57°C | |
| Medium | 135 – 145°F | 57 – 63°C | |
| Medium Well | 145 – 155°F | 63 – 68°C | |
| Well | 155°F – up | 68°C – up | |
| Ground Beef Beef Brisket – BBQ | 160°F190 – 205°F | 71°C88 – 96°C | USDA Recommended Fork tender |
| PORK | VEAL • FRESH HAM | ||
| Medium | 137°F | 58°C | |
| USDA – Done | 145°F | 63°C | |
| Well Done | 150°F – up | 66°C – up | |
| Pre-Cooked Ham | 120°F | 49°C | Carmelized glaze, juicy |
| Sausage | 160°F | 71°C | Warm, juicy |
| Pork Ribs – BBQ | 190 – 205°F | 88 – 96°C | Fall off the bone |
| Pork Shoulder – BBQ | 190 – 205°F | 88 – 96°C | Fork tender |
| POULTRY | CHICKEN • TURKEY • DUCK • PHEASANT • QUAIL • GOOSE | ||
| Whole or Ground | 165°F | 74°C | USDA & Chef Recommended |
| Legs and Thigh | 170 – 180°F | 77 – 82°C | Safe at 165°F, but more tender at higher temp |
| SEAFOOD | |||
| Ahi Tuna | 115°F | 46°C | “Sashimi” grade |
| Shrimp | 120°F | 49°C | Pink, slightly constricted |
| Salmon | 125°F | 52°C | Flaky and tender |
| Halibut | 130°F | 54°C | Opaque, moist |
| Scallops | 130°F | 54°C | Milky white, firm |
| Lobster | 140°F | 60°C | Opaque, not constricted |
PULL MEAT • LET IT REST – Remember to remove meat from the heat prior to reaching your ideal internal temperature. During the rest, the internal temperature may rise anywhere from a few to several degrees depending on cooking temperature and the size and thickness of the meat.
www.thermoworks.com741 E. Utah Valley Dr. American Fork, UT 84003
For service or warranty:
1-800-393-64341-801-756-7705[email protected]
This device complies with part 15 of the FCC Rules. Operation is subject to the following two conditions:(1) this device may not cause harmful interference, and(2) this device must accept any interference received, including interference that may cause undesired operation. This equipment complies with the FCC RF radiation exposure limits set forth for an uncontrolled environment. This equipment should be installed and operated with a minimum distance of 20 centimeters between the radiator and your body.
This device complies with Industry Canada Licence-exempt RSSs. Operation is subject to the following two conditions:(1) this device may not cause harmful interference, and(2) this device must accept any interference, including interference that may cause undesired operation of the device.
Special Notice
Changes or modifications not expressly approved by the party responsible for compliance could void the user’s authority to operate the equipment.
NOTE: This equipment has been tested and found to comply with the limits for a Class B digital device, pursuant to part 15 of the FCC Rules. These limits are designed to provide reasonable protection against harmful interference in a residential installation. This equipment generates, uses and can radiate radio frequency energy and, if not installed and used in accordance with the instructions, may cause harmful interference to radio communications. However, there is no guarantee that interference will not occur in a particular installation. If this equipment does cause harmful interference to radio or television reception, which can be determined by turning the equipment off and on, the user is encouraged to try to correct the interference by one or more of the following measures:\
- Reorient or relocate the receiving antenna.
- Increase the separation between the equipment and receiver.
- Connect the equipment into an outlet on a circuit different from that to which the receiver is connected.
- Consult the dealer or an experienced radio/ TV technician for help
 report this ad
FCC ID: 2AI67-S4T / IC: 22116-S4TFCC ID: 2AI67-S4R / IC: 22116-S4R
References
[xyz-ips snippet=”download-snippet”]