Stainless Steel Pro Logger
Operating Instructions
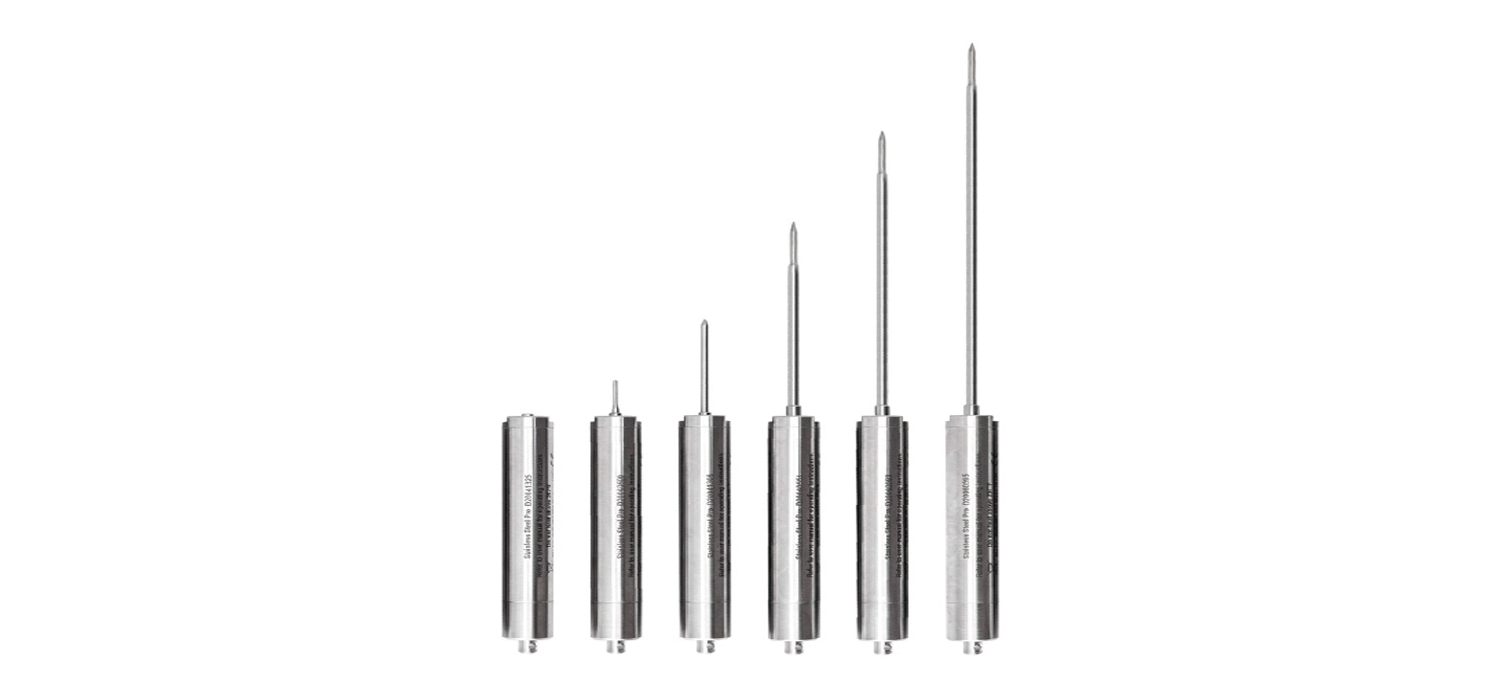
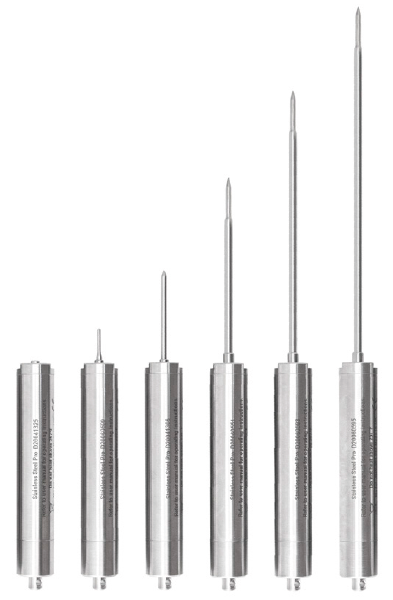
| MODEL | ORDER CODE |
| Internal Sensor | THS-294-900 |
| 50mm Probe | THS-294-930 |
| 100mm Probe | THS-294-931 |
| 150mm Probe | THS-294-932 |
| 200mm Probe | THS-294-933 |
| Fast-Response Probe | THS-294-940 |
Specifications
- Range : –4 to 257°F (–20 to 125°C)
- Accuracy : ±0.9°F (±0.5°C)
- Resolution : 0.1°
- Memory : 16,000
- Waterproof : IP67Rating
- Sensor Type : Thermistor
- Interval Rate : 1 sec. to 255 min.
- Battery : 3.6V 2/3 AA Lithium (High- Temp) 3 year life typical when interval rate is set at 6 seconds or higher
- Body : 0.89 dia. x 5.08 L inches
- Dimensions : (22.5 dia. x 129 L mm) excluding probe
- Weight : 0.37 lbs. (170g)
Your new ThermaData Stainless Steel Pro Logger uses advanced thermistor technology for high–precision temperature recording. Your IP67waterproof data logger will measure temperature in harsh environments. Data is collected within the unit’s onboard memory and a PDF report can be downloaded via USB. Settings and more in-depth data analysis can be adjusted via ThermaData Studio for Windows.
Install Software – Thermadata Studio
This data logger utilizes a USB-C connection to interface with your PC. Along with the hardware, you’ll need to download and install the free software, ThermaData Studio, from www.ThermoWorks.com/software . Once you have the software installed, open and running, and the logger connected, you’re ready to start working.
NOTE: ThermaData Studio software is updated regularly. Please visit www.ThermoWorks.com/software to check for any recent updates.
Setting Up The Logger*
- Unscrew the USB end cap (with the hole in it).
- Connect the logger to the PC using a USB-C lead.
- The logger will automatically download a pdf of the log it has recorded. While this is happening the red LED next to the USB connector will flash.
- The logger will pop up as being recognized as a Mass Storage Device on your PC.
- Select the ‘Instrument Settings’ button on the ‘ThermaData’ tab of ThermaData Studio.
- If you have more than one instrument plugged in you will need to select the correct serial number for your logger from the drop down box.
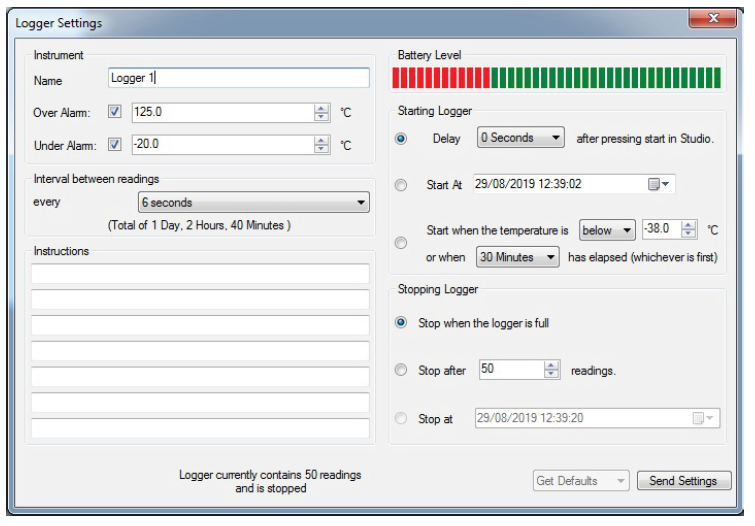
- Fill in all required fields including Start/Stop method, Alarm limits, Sample rate, and name.
- There are an optional 7 instruction lines that will appear on the auto generated pdf.
- Select the ‘Send Settings’ button at the bottom of the window.
- A pop-up window will confirm you want to proceed.
- Now when you are ready to start the logger you must select the ‘Start’ button at the bottom of the window (Unless you chose a ‘Start At Time’ option which does not require the START button).
- You can confirm the logger has started with your preferred start method by checking the text under the ‘Instructions’ in the Settings window.
- The logger can now be disconnected and the end cap re-fitted, ensuring the o-ring is undamaged and not twisted so that the unit remains watertight.
Reading The Logger*
- Allow the logger to cool so that it can be handled before connecting to a PC using the USB-C lead.
- The red LED next to the USB connector will flash while the automatic pdf summary is generated (this can take up to 40 seconds for 16,000 readings).
- The pdf summary will pop-up as a Mass Storage Device, which can be saved to your selected folder.
- Alternatively, if you want to download the data, open ThermaData Studio.
- Select the ‘Download’ button on the ‘Home’ tab.
- A data-download progress bar will appear. 16,000 readings can take up to 20 seconds to download.
- Select whether to ‘Continue’ which saves the data with a default name/ location and opens it, or ‘Save As’.
- A Data Summary window and a Graph will be displayed.
- To view the individual readings select the ‘Data’ button on the ‘Home’ tab.
Battery Change
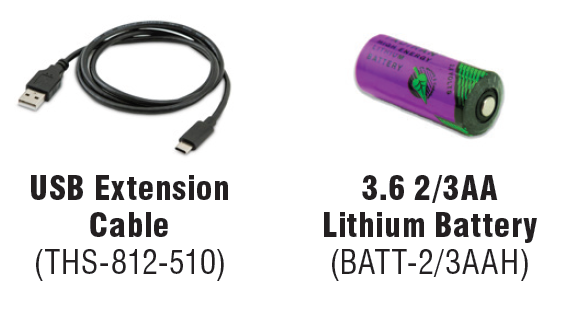
This data logger comes with a preinstalled Lithium 2/3 AA 3.6V nonrechargeable battery (high temp).
Failure to use the same type of battery could cause errors, failure or even damage to the logger.
The battery level is shown in the Status & Settings windows using ThermaData Studio. If the battery needs replacing, unscrew the sensor end cap using an appropriate sized wrench. Slide the metal body down to expose the battery and replace with new, noting polarity (flat negative end to the spring contact).
Note: Your hands contain static, therefore handling of the PCB must be kept to an absolute minimum.Slide the body of the instrument back up and tighten the Sensor Cap, ensuring the o-ring is undamaged and not twisted so that the unit remains watertight.
Attention
- This instrument is not rechargeable.
- Do not exceed a USB input of 5V.
- Please use the USB-C lead provided (no cable with a greater length of 3-meters should be used).
*Additional details and full operating instructions can be found in the ThermaData Studio software help file.
Guarantee
This instrument carries a two-year warranty against defects in either components or workmanship. During this period, products that prove to be defective will, at the discretion of ThermoWorks, be either repaired or replaced without charge. This warranty does not apply to probes, where a six-month period is offered. Full details of liability are available within ThermoWorks’ Terms & Conditions of Sale at www.thermoworks.com/product-warranty.
For warranty, service, and technical assistance, please contact
ThermoWorks’ Technical Support at (801) 756-7705 or email at
References
[xyz-ips snippet=”download-snippet”]