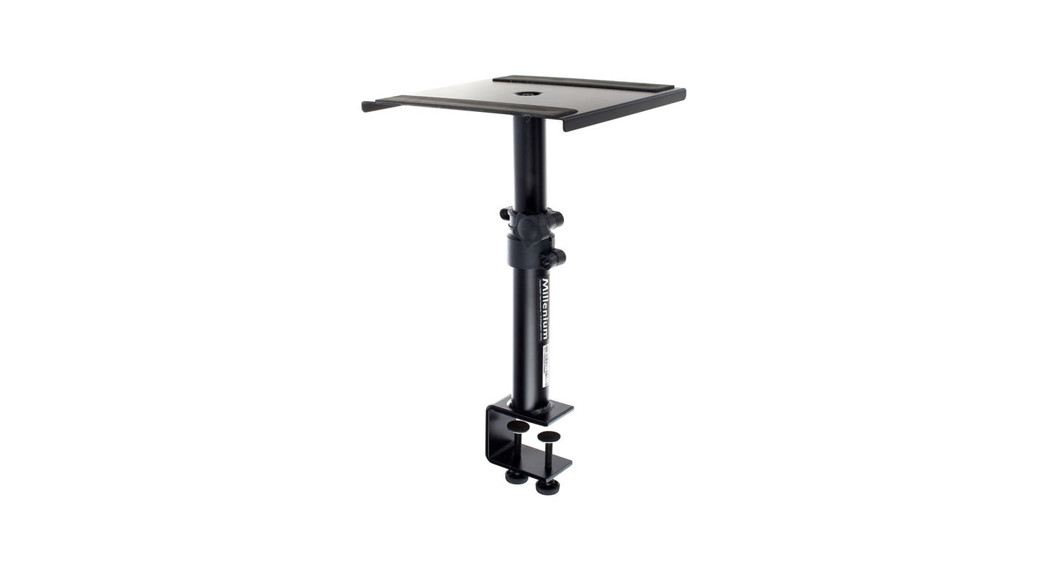
![]() MilleniumFloor Monitor Stand DM1
MilleniumFloor Monitor Stand DM1
Quick Start GuideThis quick start guide contains important information on the safe operation of the product. Read and follow the safety advice and instructions given. Retain the manual for future reference. If you pass the product on to others please include this manual.
Safety instructions
Intended useThis device is used for the height-adjustable installation and alignment of speaker boxes. Any other use or use under other operating conditions is considered to be improper and may result in personal injury or property damage. No liability will be assumed for damages resulting from improper use.
 Danger for childrenEnsure that plastic bags, packaging, etc. are disposed of properly and are not within reach of babies and young children. Choking hazard! Ensure that children do not detach any small parts from the product. They could swallow the pieces and choke!
Where to use the productNever use the product
- in conditions of extreme temperature or humidity
- in extremely dusty or dirty areas
- at locations where the unit can become wet
General handling
- To prevent damage, never use force when handling the product.
- Never immerse the product in water. Just wipe it with a clean dry cloth. Do not use liquid cleaners such as benzene, thinners, or flammable cleaning agents.
Features
- The speaker plate is 6-way height-adjustable, ensures stability, and allows adjusting the dispersion angle of the speaker (± 10 °)
- For floor installation
- Incl. rubber pads and speaker spikes
Set-up
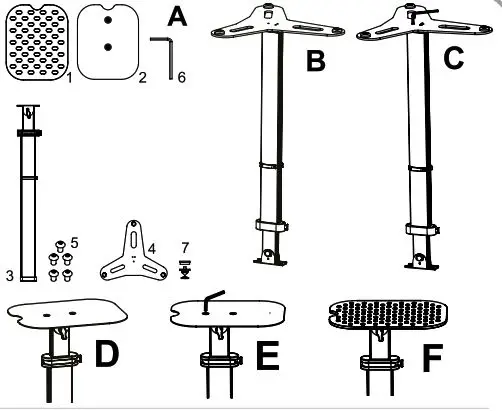
A) First make sure the scope of delivery is complete:
| 1) Rubber mat2) Speaker plate3) Support arm4) Foot | 5) Hexagon bolt (5 ×)6) Allen wrench7) Accessory (rubber pads and speaker spikes) |
B) Place the base (4) above the lower end of the support arm (3).C) Screw the foot to the support arm with 3 hexagon screws (5).D) Place the speaker plate (2) above the upper end of the support arm (3).E) Screw it to the support arm with 2 hexagon bolts.F) Put the rubber mat on the speaker plate.
Adjustment and alignment
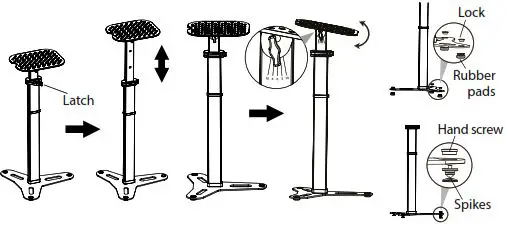
- Release the latch and bring the speaker plate to the desired height. Six lockable settings at 120 mm intervals are available. The box is in an optimal position when the loudspeaker(s) are at the level of the user’s ears. Close the latch again to lock the plate in position.
- If this can not be achieved, you can vary the angle of the speaker plate so that the speakers emit in the direction of the user’s ears.
- To do this, loosen the rotary knob and set the desired angle between ± 10°. Tighten the knob again and proceed accordingly with the second stand. Both should have the same angle. In each case, orient yourself on the scale below the rotary knob.
- To isolate the stands acoustically from the ground, either attach 3 of the included rubber pads under each stand and lock them with their counterparts, or place 3 of the spikes supplied in the openings and lock them with the enclosed hand screws.
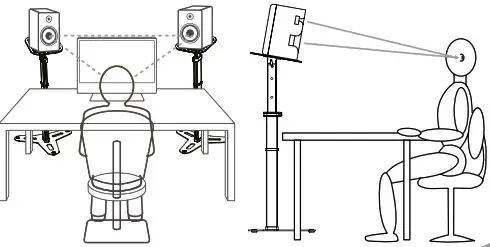
- Place the stands with the speakers so that they form an equilateral triangle with the user and the speakers emit directly towards the user’s ears.
Technical specifications
| Height | 900 – 1500 mm |
| Dimensions speaker plate (W × D) | 256 – 330 mm |
| Load capacity | 30 kg (max.) |
| Weight | 7.24 kg |
 report this ad
For the transport and protective packaging, environmentally friendly materials have been chosen that can be supplied to normal recycling. Ensure that plastic bags, packaging, etc. are properly disposed of. Do not just dispose of these materials with your normal household waste, but make sure that they are collected for recycling. Please follow the notes and markings on the packaging.
![]() The plasticizer contained in the rubber mat and in the rubber pads of this product may possibly react with the contact surface of the speaker box or the floor covering and after some time cause permanent dark stains there. If in doubt, do not let the rubber mat get in direct contact with the speaker box surface and use felt pads. To protect the floor covering also felt glides or a carpet can be used.
The plasticizer contained in the rubber mat and in the rubber pads of this product may possibly react with the contact surface of the speaker box or the floor covering and after some time cause permanent dark stains there. If in doubt, do not let the rubber mat get in direct contact with the speaker box surface and use felt pads. To protect the floor covering also felt glides or a carpet can be used.
Thomann GmbH • Hans-Thomann-Straße 1 • 96138 Burgebrach • www.thomann.de • [email protected]DocID: 451562_11.11.2020
References
[xyz-ips snippet=”download-snippet”]