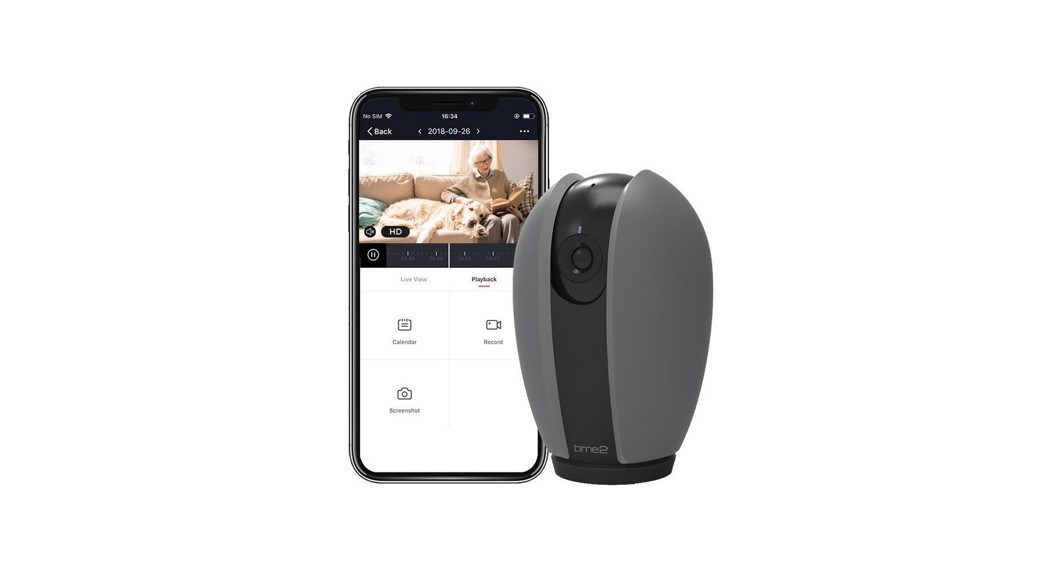
![]() Olivia3Start-Up GuideProtect and monitor all that you love and value
Olivia3Start-Up GuideProtect and monitor all that you love and value
Struggling to read?View this startup a guide online attime2technology.com/manuals
What’s in the box

Be readyYou will need your WiFi router password. Write it down below so its handy when you need it!
Get Started
Connect Olivia to the mains using the power adapter and USB cable provided.The red LED will come on once plugged in and Olivia will chime twice before she is ready to connect.If you would like Olivia to record, you will be required to insert a Micro SD card. Olivia will support any sized Micro SD card up to 128 GB.

What do the flashing lights mean?

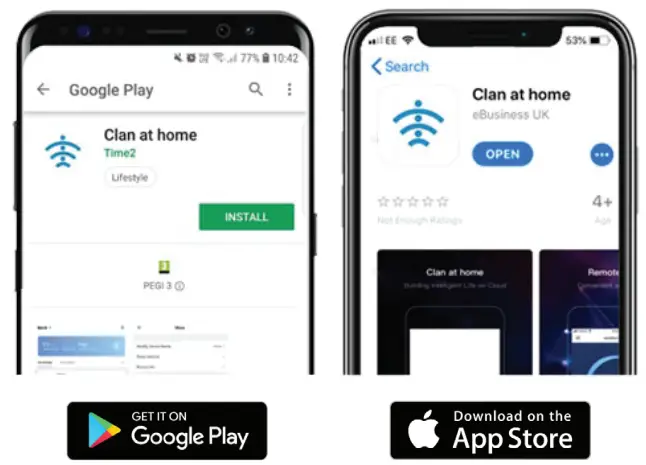
Download App
Download the “Clan at home” app from the iOS App Store or Google Play Store
Register

Step 1Select Register, carefully read the Privacy Policy and select Agree if you would like to progressStep 2Enter your email address

Add Home
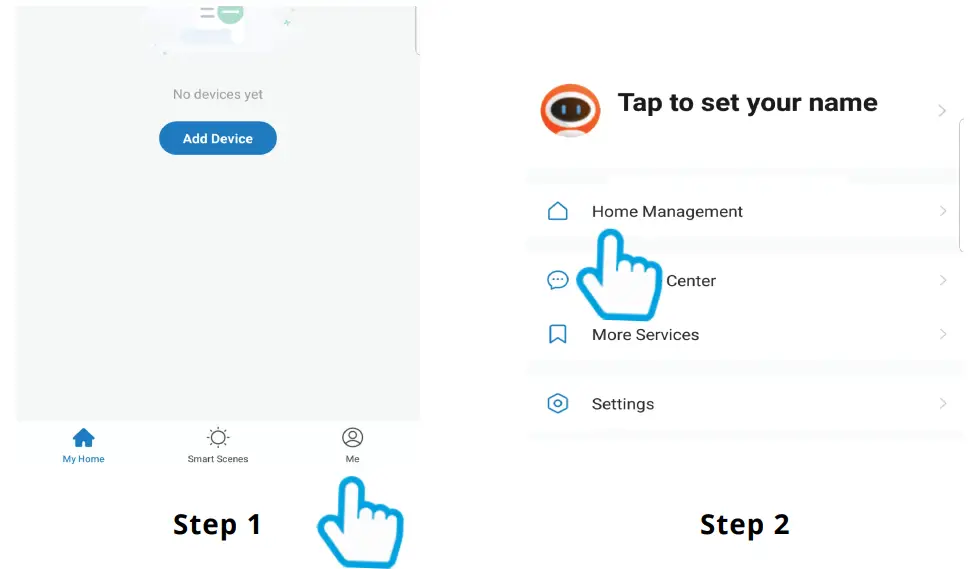
Step 1Click Me in the bottom right-hand cornerStep 2Select Home Management
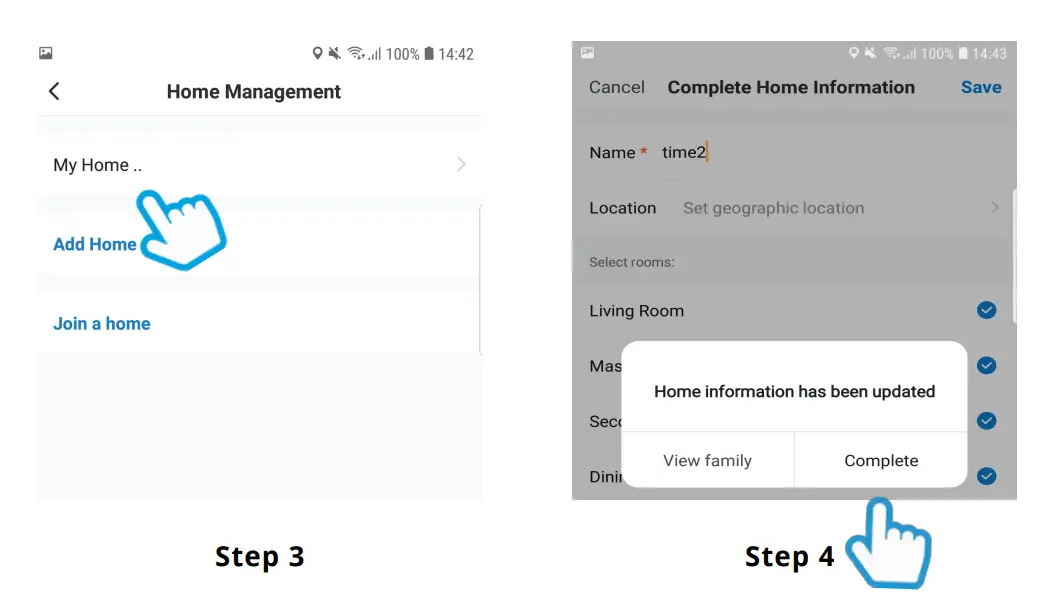
Step 3Select My Home. Enter a name for your home and a location. Click SaveStep 4Select Complete and your home will be created
Add Olivia3
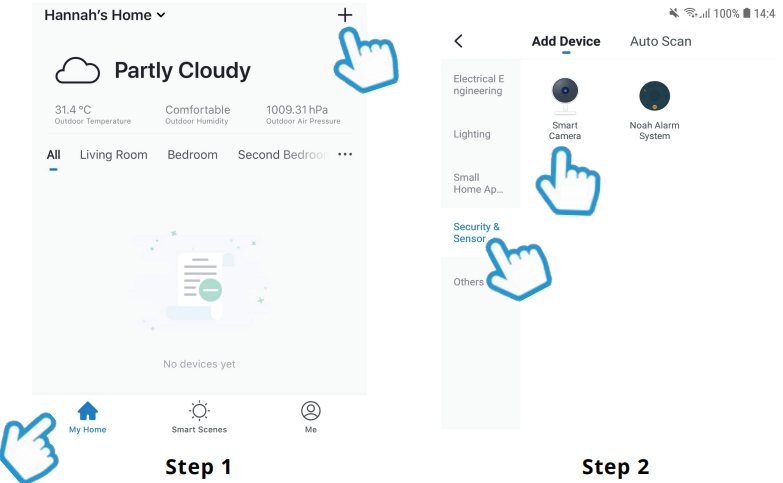
Step 1In My Home, click the (+) icon in the top right-hand corner of the screenStep 2Select Security and Sensors down the left-hand side and click Smart Camera
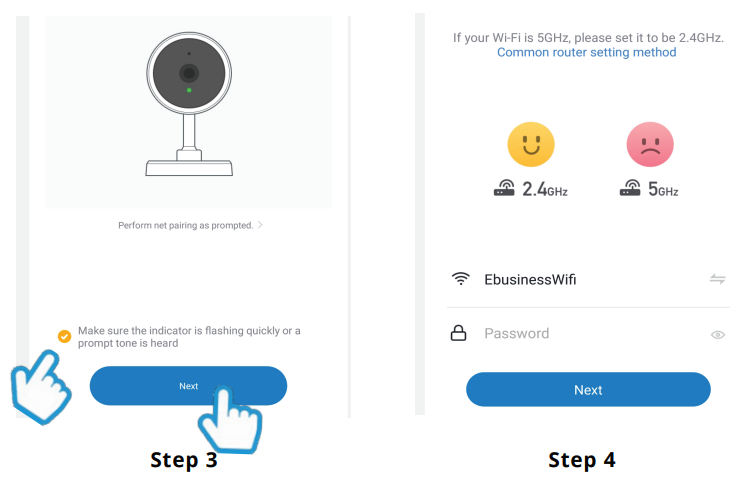
Step 3Make sure the LED indicator is flashing red, then select the tick box and press NextStep 4Enter your WiFi router password. Then press Next

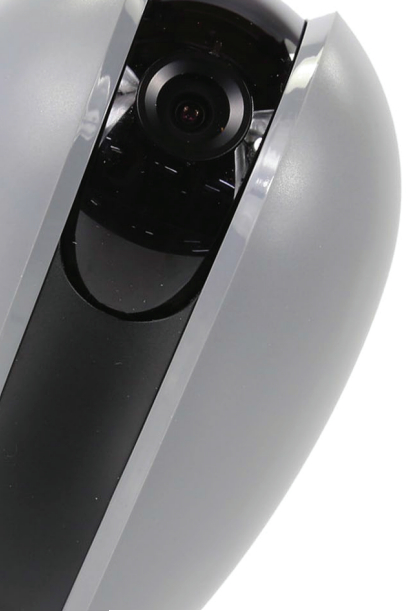
Step 5Remove the plastic film from the camera lens Hold your phone up to Olivia as described in the AppStep 6If you heard Olivia chime, press I Heard a Prompt If you don’t hear the chime, reposition Olivia in front of the phone and scanQR code again
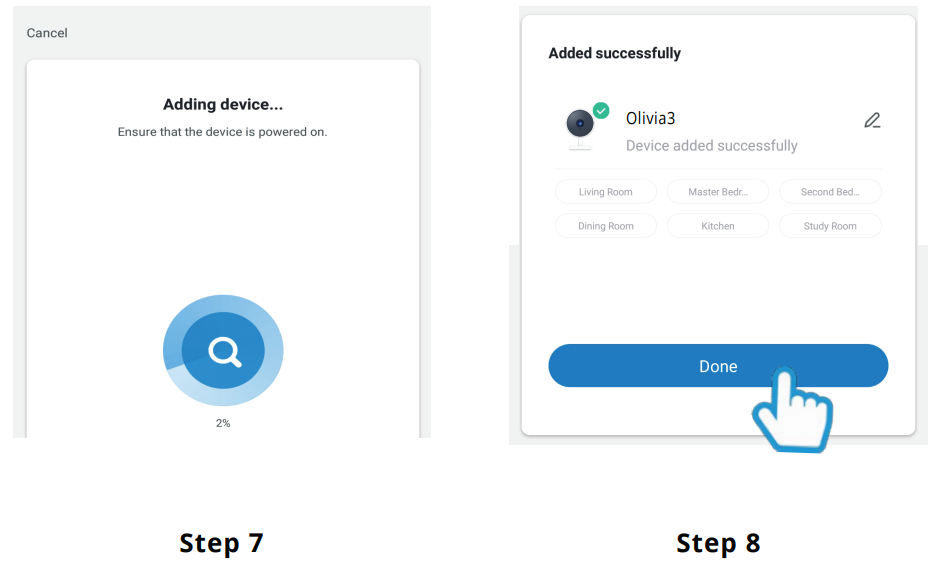
Step 7Olivia will then establish a connection to ClanStep 8Once connected you can change Olivia’s name and select the room she’s in. Press Done
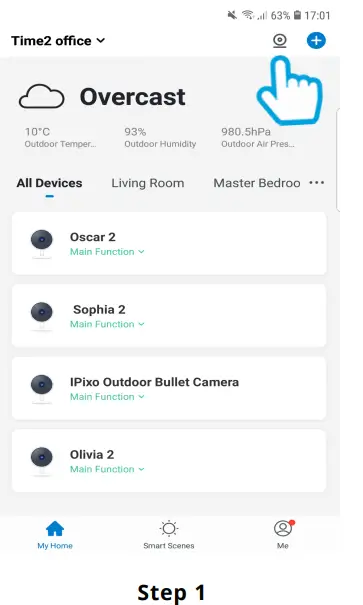
Live View
Add SD Card
If you would like Olivia to record, you will be required to insert a Micro SD Card. Olivia will support any sized Micro SD Card up to 128GB
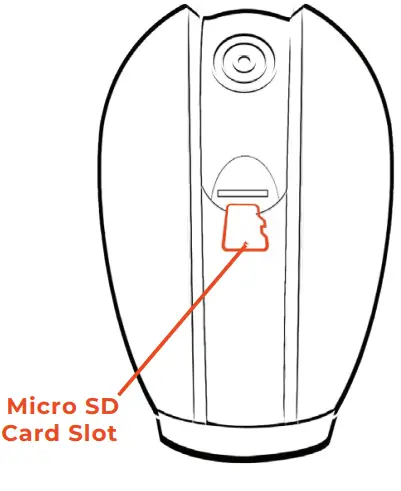
Step 1Turn off power to OliviaStep 2Gently rotate the lens upwards to locate the Micro SD Card slot. Insert the card in to the slot far enough for it to click into placeStep 3Turn the power to Olivia back on
Format SD Card
Before Olivia can start recording, you will have to format the Micro SD Card.

Step 1Select your camera and click on the pencil icon in the top right. Select SD Card Settings.Step 2Click Format SD Card and press confirm. Olivia will begin to format the Micro SD Card.
Please note: it will take a couple of minutes to format
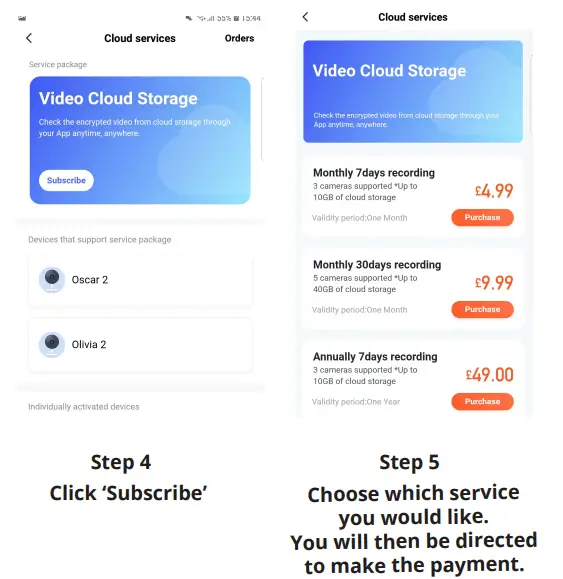
Cloud Storage (Single-Camera)
If you would like Olivia to record, you will be required to insert a Micro SD card Alternatively, you can sign up for the optional cloud storage.The camera can be set to record continuously or once it detects movement.You can also choose to store the recorded footage for 7,14 or 30 days.

Step 1Click on the pencil iconStep 2Click on Purchase VAS
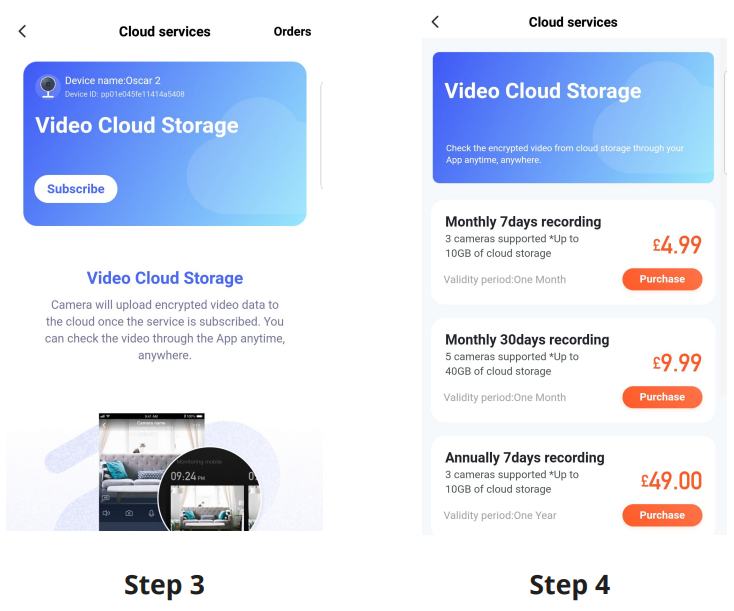
Step 3Click SubscribeStep 4Choose which service you would like. You will be then directed to make the payment.
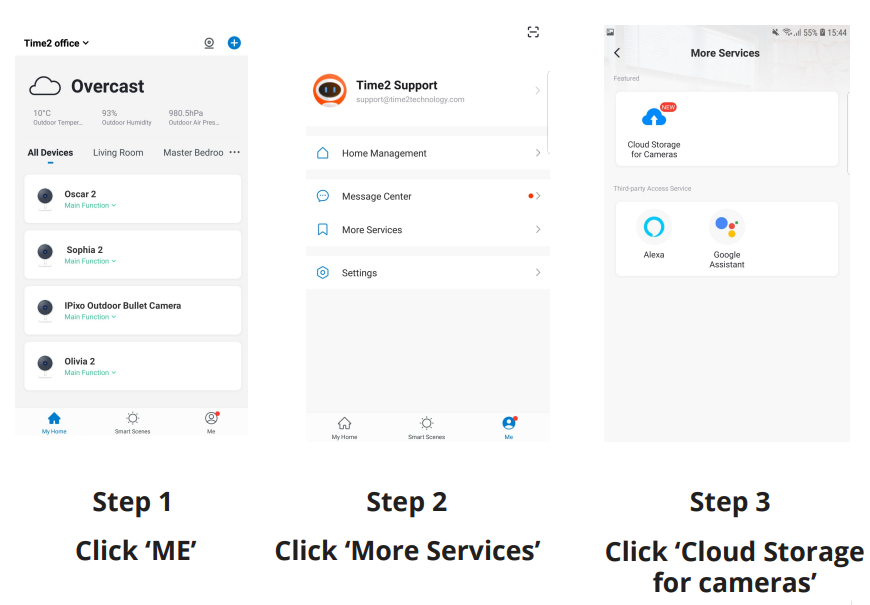
Cloud Storage (Multiple)Instead of paying per camera why not bundle your Cloud Storage.Please note selecting this option will only set the camera to record when it detects movement.
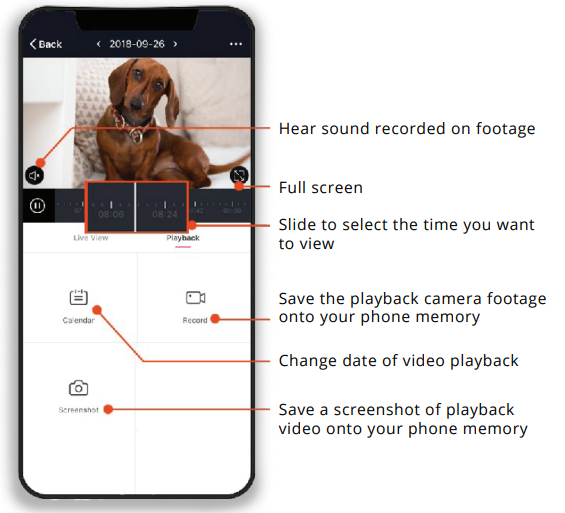
Playback
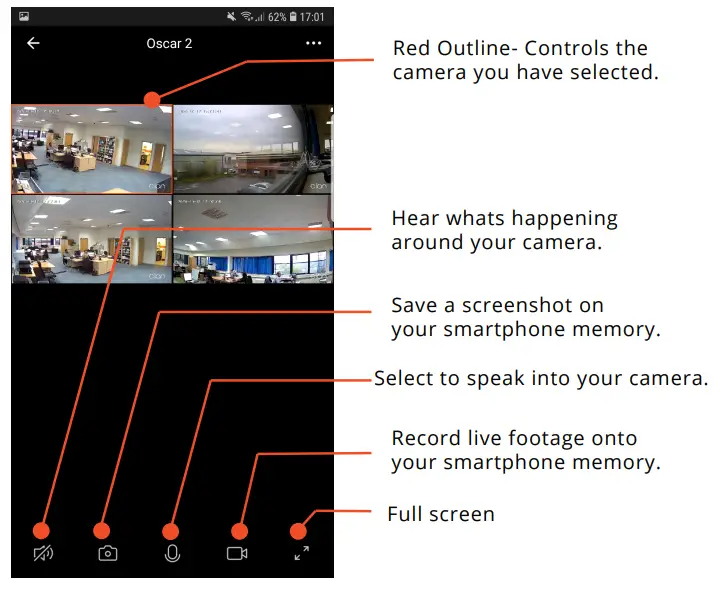
Multi-Camera View
Step 1Click on the camera in the top right-hand corner.
Web View

Step 1Go to the following website on your PC. https://www.time2technology.com/webview/ and a QR code will be displayed.

Step 2Go into the Clan at Home App and click on Me in the bottom right-hand corner.Step 3Click on the square on the top right-hand corner.

Step 4Using your phone scan the QR code. Ensure the QR code is within the green square.

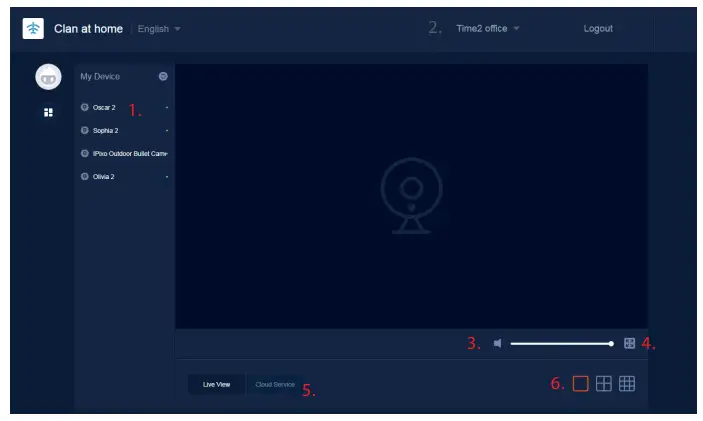
- Select the home where you would like to view your cameras.
- Select your camera.
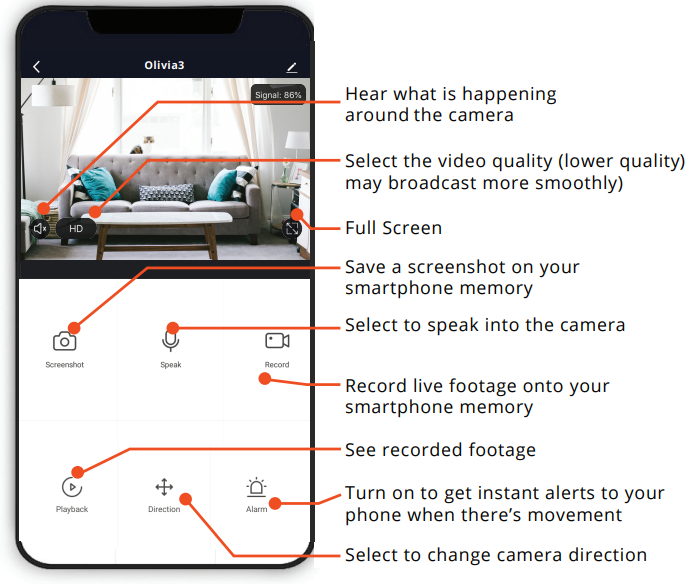
- Speaker – Listen in on what is going on around your camera.
- Full screen
- Cloud Service – View the recorded footage from the Cloud Service.
- Multi-Camera View – Select how many cameras you would like to see at once.
Reset
If you are having trouble connecting to Olivia you may need to do a reset.

Use the reset pin provided to hold down the button on the front of the camera for up to 10 seconds until the camera chimes twice and the LED is flashing red.
Installation

Easy MountingUse the provided mounting bracket to mount the camera onto a surface, simply attach the bracket, ensuring it fits snugly on to the bottom of the camera.Then twist to the left. This locks the bracket into the camera.
Be a part of ClanAre you on Facebook? Join our Clan to speak to other members of the Clan and our dedicated UK based support team:www.facebook.com/groups/partoftheclan
Need further Help?Contact our Customer Support team on Social Media

 report this ad
![]() @time2HQ
@time2HQ
or visit our support pagetime2technology.com/support
References
[xyz-ips snippet=”download-snippet”]