Vehicle Weighing ScaleOwner’s Manual
TXDi- series VER 201

TMT
NOTE:
- The unauthorized copying of some or all of this manual is prohibited.
- The information contained herein is subject to change without notice.
- If there are any questions such as wrong or missing parts of the contents listed in this manual, please contact us.
- To improve the product performance, functions can be changed with no notice.
- Please understand that TMT does not have responsibility for a demand related to loss, lost profit etc. caused by operating the product, regardless of the third clause.
WARNING DEFINITIONS
1. Precautions
 Please be informed that we’re not responsible for any incident or mishap caused by partial modification of this product. To avoid such situation, customers need to contact our customer service team or system installation staff in advance, and any modification should be conducted under our surveillance.
- Use only approved enhancements and batteries. Do not connect incompatible products. Use only batteries, chargers, adaptor, and enhancements approved by TMT for use with this particular model.The use of any other types may invalidate any approval or warranty, and may be dangerous. For availability of approved enhancements, please check with your dealer.
- Do not install the scale in strong direct sunlight and dust.
- Please confirm that the local voltage is correct for the power adapter.
- Do not use inflammable substances for cleaning.
- Avoid sudden changes of temperature if possible
- Do not use the product in a place with a high-voltage current or severe electronic noise.
- Do not use the product in a place with severe vibration.
- Do not put too much pressure to keys.
- Avoid from the shock of excessive weight.
- MICRO USB-B port is for firmware update.
Do not connect for any other purpose.
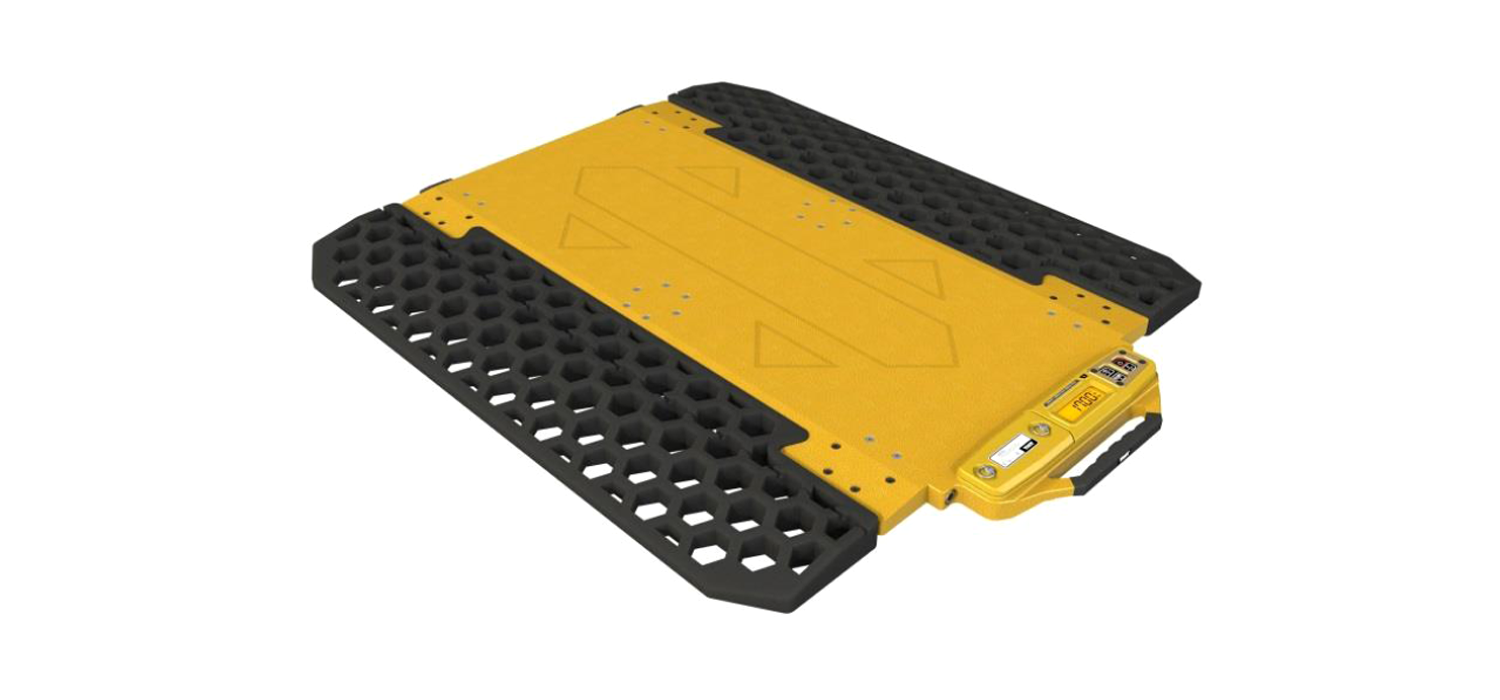
2. Introduction
- Easy to exchange the battery pack.
- Slim(34mm) type.
- Weigh-In-Motion(WIM)
- Outstanding water resistant(IP66) and vibration proof effect.
- Wireless communication: ZigBee
- Long battery lifetime by one time charging
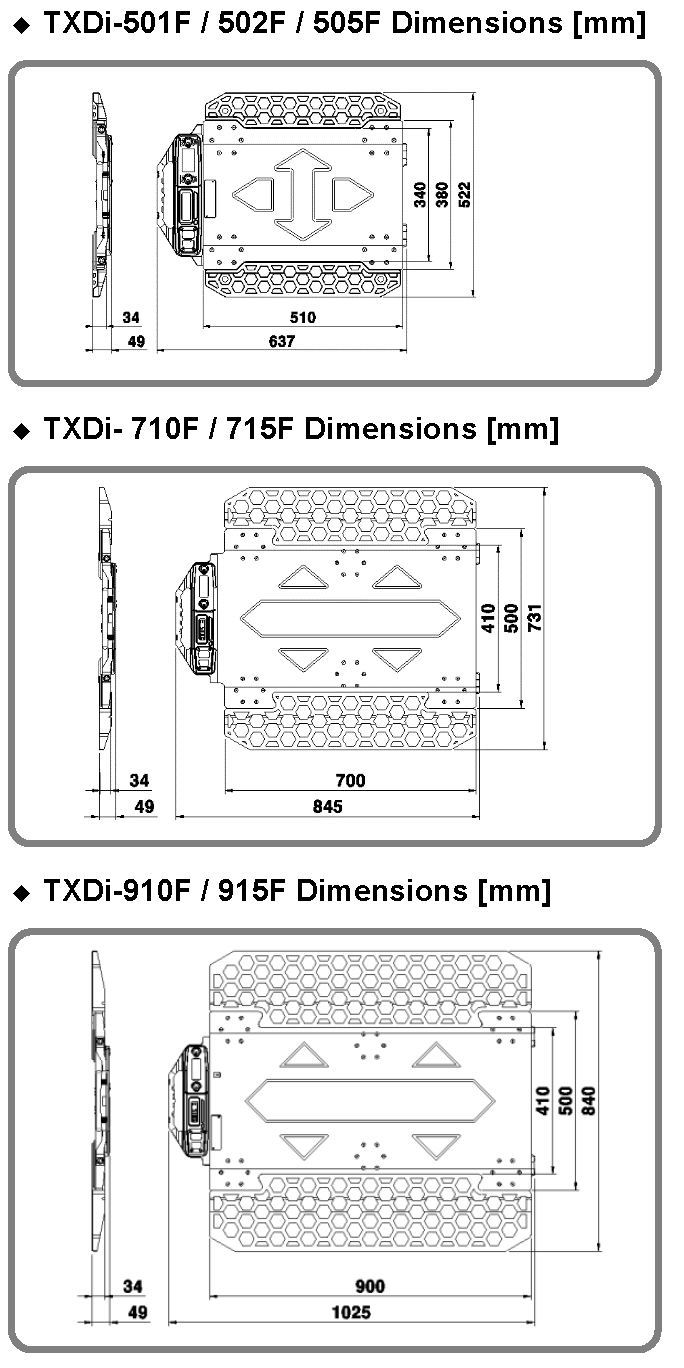
3. Installation
Be cautious of below situations, when placing the product on the road.
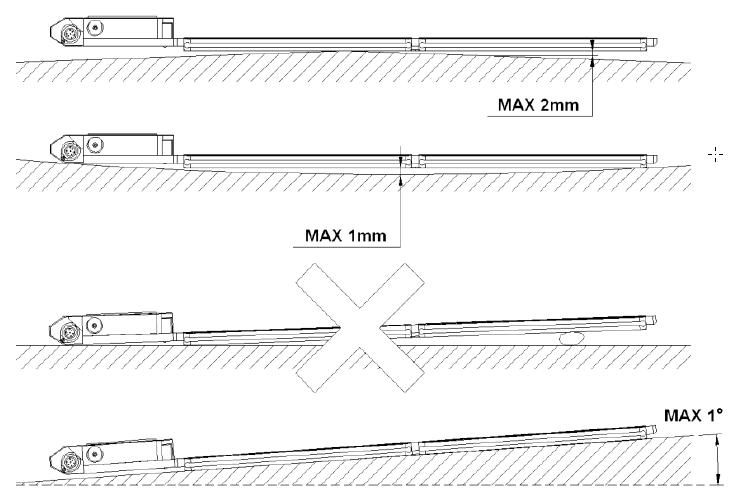

As shown above, if it is used with the indicator, please refer to indicator’s operating manual.
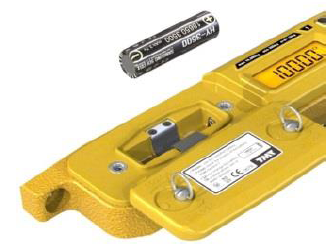
4. Use of Battery Pack
Use only approved power adaptor and batteries.Do not connect incompatible products.The use of any other types may invalidate any approval or warranty, and may be dangerous. For availability of approved enhancements, please check with your dealer.
4.1. Indicate battery level
The battery level is displayed for a while when the power is turned on.(Display in 10% increments)Ex : BAT 70 (70%)
4.2. Battery charging
- Step1. Turn clamps that exit on both sides of battery cover to the right in a quarter. Step2. Pull out a battery.
- Step3. Check the battery polarity and insert it into the charger.
- Step4. The RED lamp lights up when charging.
- Step5. If a charging is completed, the GREEN lamp is on.
- Step6. The battery charging time takes about 3~6 hr.(Charging time is subject to be changed according to battery condition & capacity.)
4.2. Battery lamp
In order to prevent the electric discharge, after r is on, the power will be turned off automatically after about 1~5 hours. (It’s subjected to be changed according to using conditions.)
5. Description of Panels and Symbols


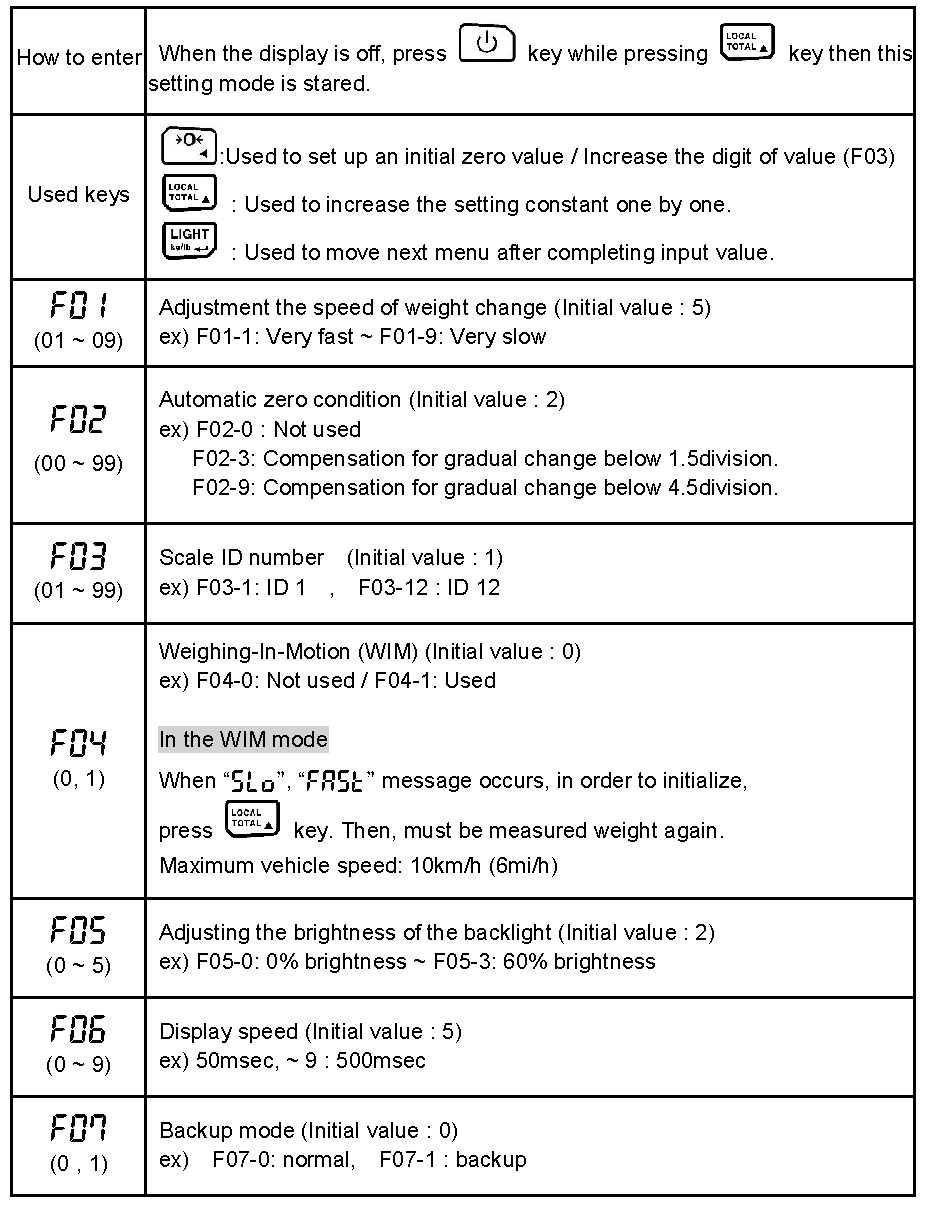
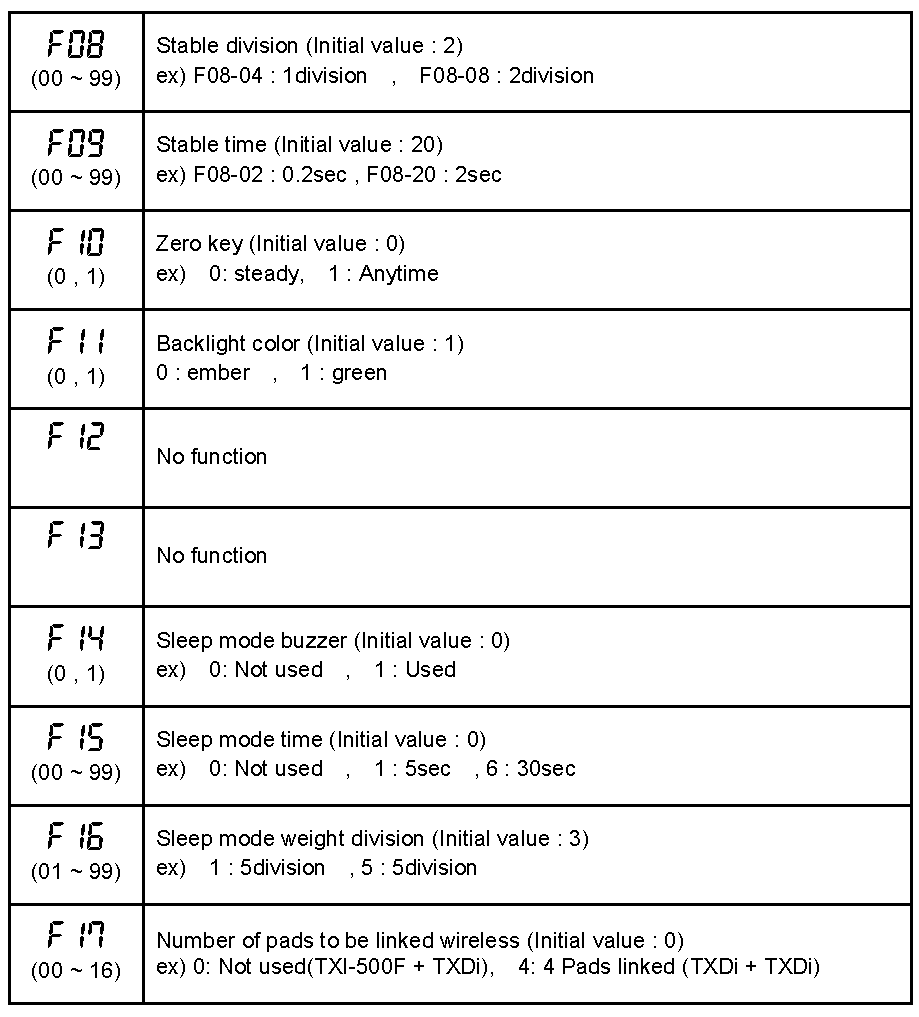
6. Setting Mode
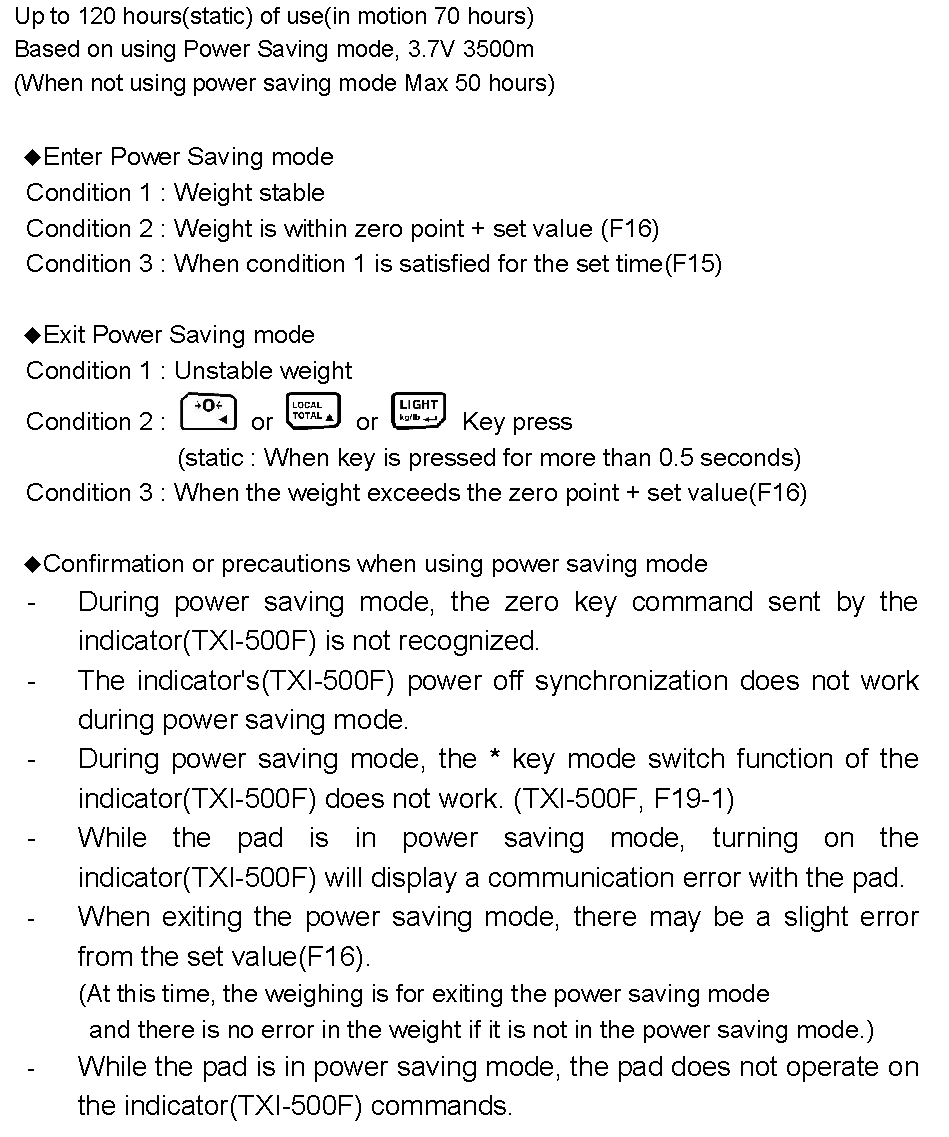
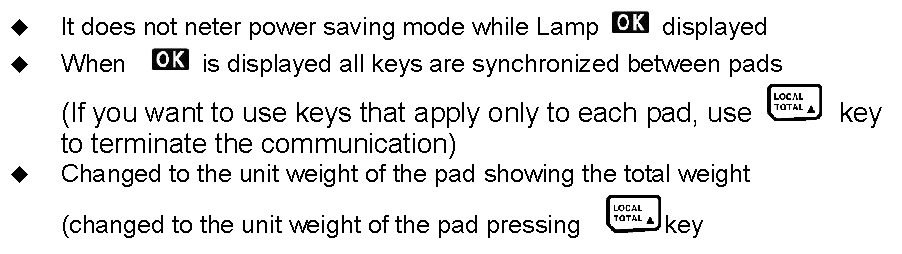
7. Power Saving Mode

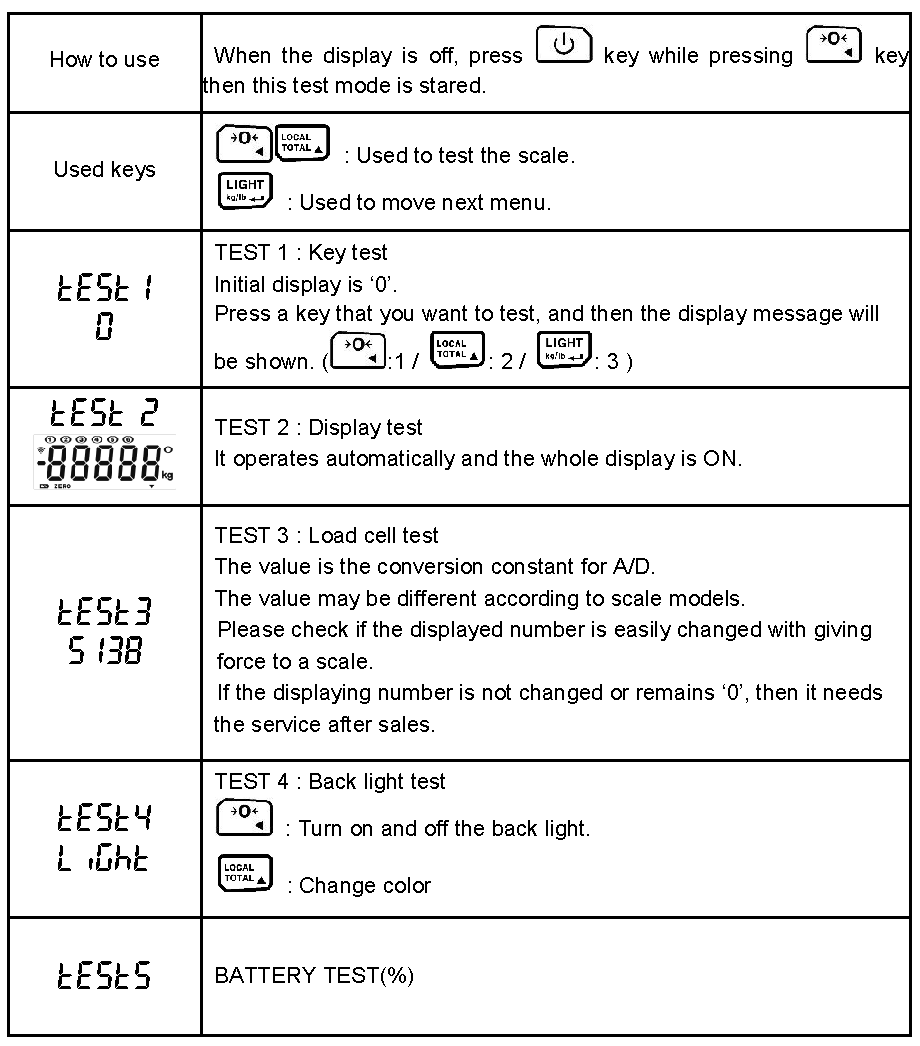
8. Test Mode
9. Paring Mode

10. Pad to Pad Communication(F17 – 2~16)
11. Specifications


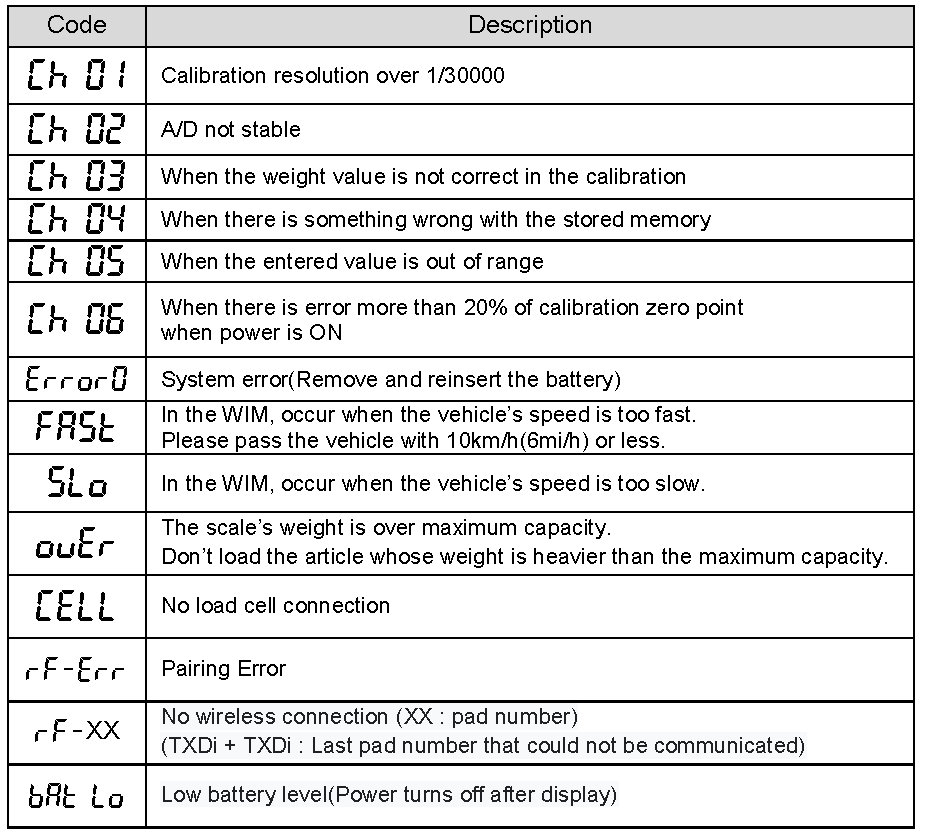
12. Check Message
[xyz-ips snippet=”download-snippet”]