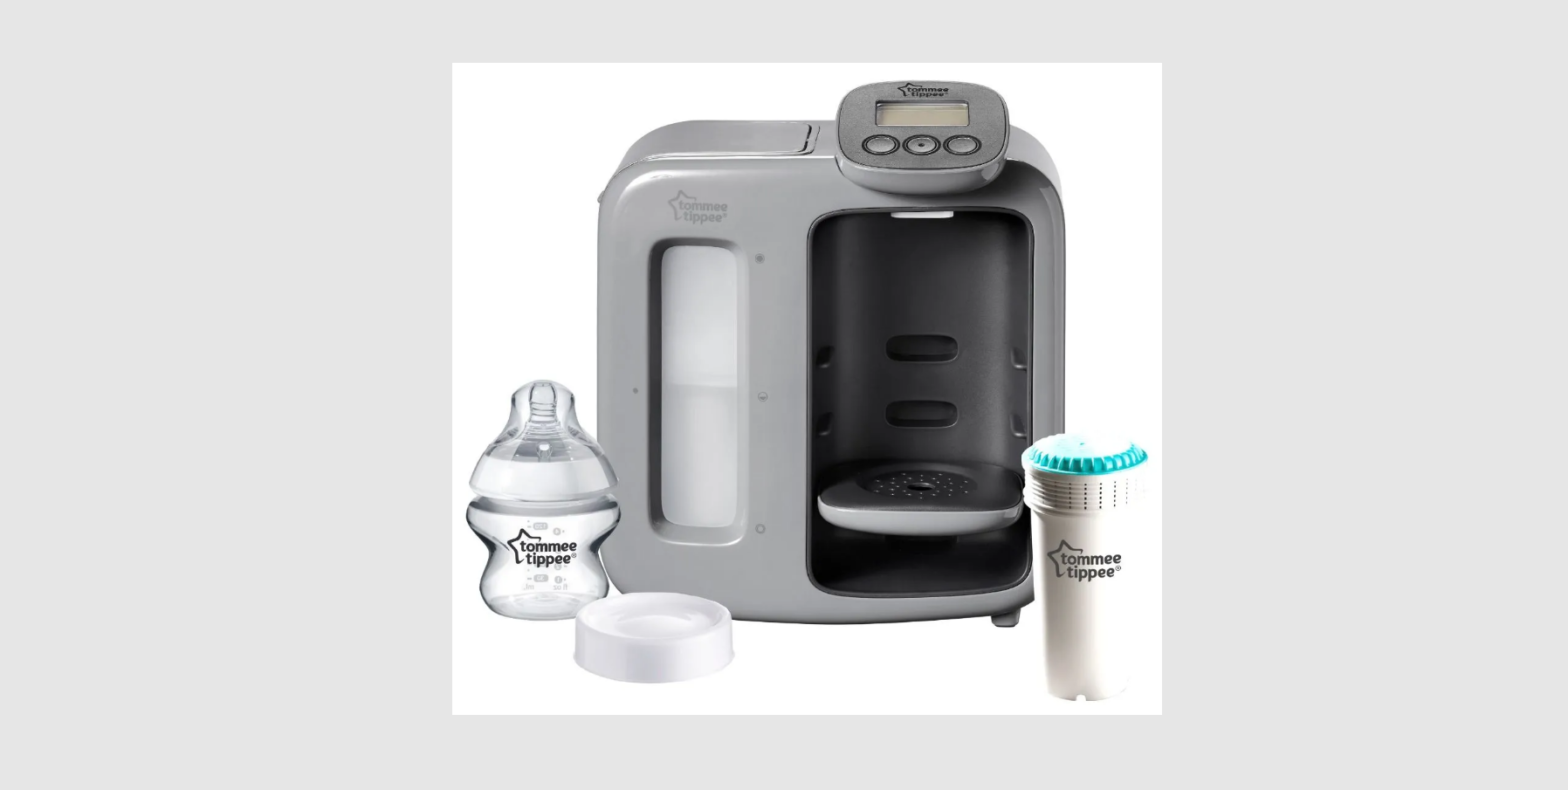
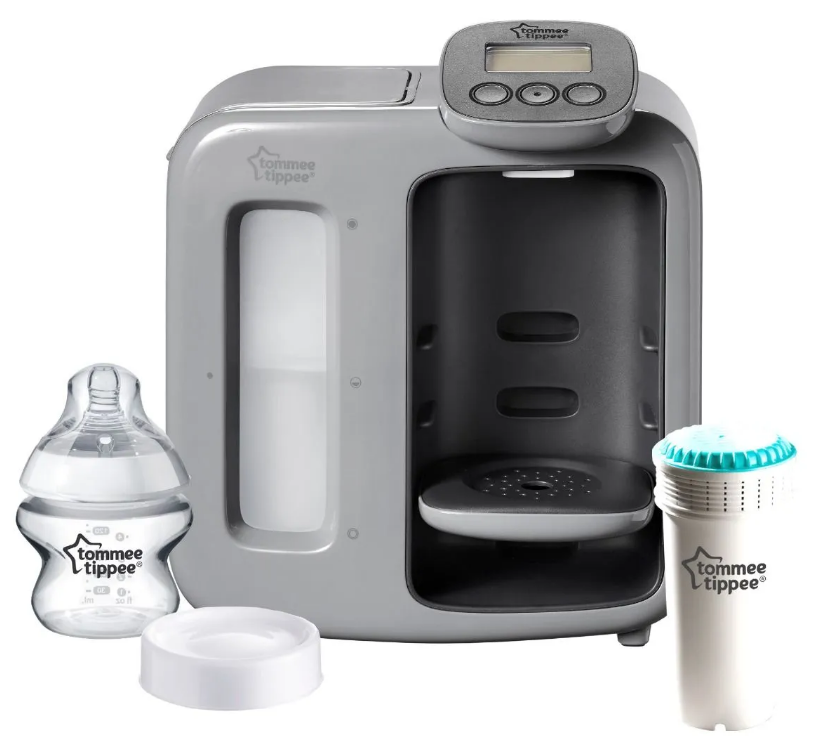
tommee tippee perfect prep day & night
tommee tippee perfect prep day & night
IMPORTANT WARNINGS
Keep this instruction sheet for future reference as it includes important information. These instructions can also be found at www.tommeetippee.comThis appliance is intended for household use only. Do not use outdoors.Before plugging in the Perfect Prep for the first time, ensure that the voltage is compatible with your electricity supply by checking the label on the base of the unit.Ensure water has been added to the unit before switching the unit on.Do not immerse in water. To protect against fire, electric shock, and injury to persons, do not immerse cord, plugs or other parts of the unit in water or other liquid.Misuse of the product may result in the risk of fire, electric shock, and/or personal injury. This appliance shall not be used by children. Keep the appliance and its cord out of reach of children.Appliances can be used by persons with reduced physical, sensory or mental capabilities or lack of experience and knowledge if they have been given supervision or instruction concerning use of the appliance in a safe way and understand the hazards involved.Children shall not play with the appliance.User maintenance, other than cleaning, descaling and filter replacement is not required for this product. Cleaning and user maintenance shall not be done by children.Do not touch hot surfaces. When in use the Perfect Prep contains hot water and steam. Keep hands away from dispensing spout as it can cause burns and scalds. Use in a well-ventilated area.Do not operate any appliance with a damaged cord or plug or after the appliance malfunctions or has been damaged in any manner. If the supply cord is damaged it must be changed by a qualified person in order to avoid a hazard. If the damage is new the unit must be returned to the manufacturer.If within a retail warranty period this product should be exchanged at the place of purchase. The manufacturer will then be made aware.Any questions? Visit our website www.tommeetippee.com Always use on a flat heat-resistant surface. Do not move appliances when in use. Do not let the cord hang over the edge of the kitchen work surface or touch hot surfaces. The product has been fitted with a cold wind on the rear of the unit to allow you to adjust the length of the cord safely. It is recommended that the cord be kept as short as possible. Do not use any accessories other than those supplied with this appliance.FOR DOMESTIC USE ONLY – NOT INTENDED FOR COMMERCIAL USE
GETTING TO KNOW YOUR PERFECT PREP MACHINE
 Screen
- Back button
- Select button
- Forward button
- Water hopper
- Bottle stand
- Dispenser outlet
Included inside:1x 150ml bottle with slow flow teat,1 x anti-bacterial water filter, milk storage lid

INSTRUCTIONS FOR USE
SET UP:
- Power on your perfect prep by pressing the middle button.When you plug your unit in for the first time you will see this:
- Press and hold the right button for 3 seconds, then release (a gear icon will appear).
- Press the middle button to enter settings.
- Scroll through with left or right to find the preferred language and confirm by pressing the middle button.
- Before you use your Perfect Prep for the first time, you need to run a cleaning cycle and fit your filter.
- Press the select button and then follow the directions on your screen.
- Once you’ve fitted your filter, the unit will warn you that the tank is empty and that you need to add water.
- Use cold tap water.
- It can take up to 10 minutes for the water to filter through into the base of the unit.
- Once enough water has filtered through, the tank empty warning light will go off and your system is ready to use.
TIP: The select button can be pressed at any time during the cleaning phase to pause the water pumping through.PRIMING YOUR FILTER
- Only ever handle the filter by holding it by the blue cap.
- Remove the filter from the packaging.
- Remove the sticker from the top of the filter.
- Fill a bowl with cold tap water.
- Submerge the filter in water and gently agitate until the bubbles stop.
- Your filter is now ready to fit into the water hopper.
PRODUCT SETTINGS MENU
- Press and hold the forward button for 3 seconds, then release. This gear icon will appear.
- To scroll through the settings use the back and forward buttons.
- Press the select button to enter a particular setting.
- Settings:

MAKING A FEED
- Turn the machine on by pressing the select button.
- Select the feed size you require using the forward and back buttons and follow the directions on the screen.
REPLACING YOUR FILTERReplacement filters are available from Tommee Tippee Perfect Prep stockists.Do not use other brands of filters in your machine. Even if they fit, they may not remove the same level of bacteria. Using this machine without a Tommee Tippee water filter could put your child’s health at risk.
- Enter settings menu and scroll across to ‘Fit new filter’.
- Press the select button and then follow the directions on your screen.
PERIODIC CLEANING You should clean your machine:
- Before first use then on a 4-weekly basis.
- If your machine hasn’t been used for 1-week.
- When replacing your filter.It is advisable to regularly clean the external machine surfaces with a clean cloth (preferably with an antibacterial solution), including the dispenser spout.
- Enter settings menu, then scroll across to ‘Clean unit’.
- Press the select button and then follow the directions on your screen.
DESCALINGThe screen will notify you when you need to descale your machine.The descaling process will remove deposits of calcium and other minerals in the system that may affect its performance.
- Enter settings menu and scroll across to ‘Descale unit’.
- Press the select button and then follow the directions on your screen.
The descaling process can take up to 30 minutes, fortunately, you won’t need to do this very often.We recommend using food-grade white/clear vinegar to descale your machine when required.EMPTYING YOUR UNIT
- If you want to drain your machine of water enter the settings menu and scroll across to ‘Empty unit’.
- Press the select button and follow the directions on your screen.
FAQs
Where is the best place to keep my Perfect Prep?The Perfect Prep should be kept in a cool, dry location, avoiding direct sunlight and kept away from warm appliances. This is recommended to avoid the tank temperature getting too warm.What does the hotshot do? The hotshot helps to dissolve the formula powder quickly and easily, it also kills bacteria that may be present in the formula itself. The water dispensed in the hot shot is at a temperature of over 70°C.How often do I need to change the filter? On average the filter should last around 3 months, however, this depends on the frequency of use and what size bottles you are preparing.Why do I have to use a Tommee Tippee filter? Most standard water filters do not include an anti-bacterial filtration membrane, so even if they fit in your machine, they will NOT remove the same level of bacteria.Why do I need to submerge the filter before first use?Submerging primes the filter before use, ensuring that any air bubbles or loose particles within the filter are removed prior to use.How long can I leave unused water in the tank?Water is a foodstuff. We recommend using it within 1-2 days.
Dos and Don’ts
It is essential that good hygiene practices are observed in the use and maintenance of your Perfect Prep Machine.Dos✓ Ensure your hands and all surfaces that come in to contact with the machine and its components (including filter) are clean.✓ Before first use clean the machine following the set up steps on the screen.✓ Keep the machine away from direct sunlight.✓ Only use cold tap water during regular use.✓ Keep the outside of the machine clean.✓ Be careful when handling hot water.✓ Always adjust the height of the bottle stand so the bottleneck is close to the dispensing spout. This is to maintain the temperature of the water and to avoid any splashes.✓ Keep well clear of the dispensing spout as the unit produces steam and very hot water.✓ For your child’s safety always check the food temperature before feeding.DON’TS✗ Do not allow the water tank to be contaminated. The inside of the machine should be cleaned by following the cleaning process in this leaflet.✗ Do not clean with solvents or harsh chemicals.✗ The machine is intended for use in a kitchen. It is not suitable for use in a nursery.✗ Do not use hot water other than during cleaning cycles. If the water in the tank is lower than 5°C or higher than 28°C, the machine will not operate. If this happens, either change the water or allow the water to cool and restart.✗ Do not pour boiling water over the water filter.✗ When topping up the hopper, do not fill beyond the max icon.✗ Be careful not to spill any water on the outside of the machine.✗ Do not remove the back panel from the machine.
INFORMATION ON THE DISPOSAL FOR WASTE ELECTRICAL & ELECTRONIC EQUIPMENT (WEEE)

This symbol on the products and accompanying documents means that used electrical and electronic products should not be mixed with general household waste. For proper disposal for treatment, recovery and recycling, please take these products to designated collection points where they will be accepted on a free of charge basis. In some countries, you may be able to return your products to your local retailer upon the purchase of a new product. Disposing of this product correctly will help you save valuable resources and prevent any possible effects on human health and the environment, which could otherwise arise from inappropriate waste handling.Please contact your local authority for further details of your nearest collection point for WEEE. Penalties may be applicable for the incorrect disposal of this product in accordance with national legislation. The product is fitted with a BS 1363 mains plug containing a 5A fuse. If it ever becomes necessary to replace the fuse, only use fuses that are marked BS 1362, and rated at 5A. In the unlikely event that this plug is not suitable for the sockets in your home, it should be removed and a suitable plug fitted as follows: The wires of the mains lead are colored in accordance with the following code:GREEN AND YELLOW – EARTHBLUE – NEUTRALBROWN – LIVEAs these colors may not correspond with the colored markings sometimes used to identify the terminals in the plug, connect as follows. The wire colored GREEN AND YELLOW must be connected to the terminal marked E or by the earth symbol or colored GREEN or GREEN AND YELLOW. The wire-colored BLUE must be connected to the terminal marked N or colored BLACK. The wire colored BROWN must be connected to the terminal marked L or colored RED. If you are in any doubt about how to wire a plug or replace a fuse safely, consult a qualified electrician.Don’t forget to register your Perfect Prep Machine.For details of how to do this, go to tommeetippee.co.uk/product-registration
Let us know what you thinkWe’d love to hear what you think about our products. Share your photos, reviews and tell us about your experiences on our social channels.helping you Parent On tommeetippee.com
Mayborn (UK) Limited,Balliol Business Park,Newcastle upon Tyne,NE12 8EW, UKTOMMEE TIPEEE®. Copyright © 2021Patented: EP2948032B1All intellectual property is owned or used under licenseby Mayborn (UK) Limited and/or its affiliatesMade in China.42374618040321_3
The Tommee Tippee Perfect Prep Day & Night is a smaller version of the Tommee Tippee Perfect Prep. It is designed to be used in a nursery or child’s bedroom. It has a night light and a timer that can be set for 15 minutes, 30 minutes, 45 minutes or 60 minutes. The timer will automatically shut off after the selected time period has passed. The timer can be set to turn on in the morning as well. The Tommee Tippee Perfect Prep is designed to be used in the kitchen. It has a larger capacity than the Day & Night model and does not have a night light or a timer.
To use your Perfect Prep, simply fill it with water to the line indicated on your unit, plug it in and press down on the lid until you hear it click into place. You can then place your baby’s bottles inside and push down on them until they reach just below the water line. This will prevent any milk from leaking out of the bottle when you go to feed your baby later on. You can also place your baby’s pacifiers in your unit to keep them clean and germ free while you are away from home.
Your Tommee Tippee Perfect Prep comes with an easy-to-use cleaning brush that allows you to easily remove any milk residue that may have built up inside of your unit over time. Simply fill your unit with warm water, add some dish soap and allow it to sit for about 10 minutes before using your cleaning brush to scrub away any milk residue that may be present inside of your unit. After scrubbing away any residue, rinse out all of the soap from inside of your unit and allow it to air dry for 24 hours before using it again.
If you are having trouble with water leaking out of your unit, make sure that you have filled it to just below the water line indicated on your unit before placing any bottles inside of it or else this will cause water to leak out onto your countertop or table when you place bottles inside of it later on. You should also make sure that you have pushed down on each bottle until they reach just below the water line as well before placing them inside of your unit as this will prevent any milk from leaking out onto your countertop or table later on as well. If you are still having trouble with leaks after filling up your unit properly, try adding some white vinegar into one side of your unit while leaving the other side empty so that air bubbles can form in between both
The Perfect Prep day & night machine makes bottle feeding a dream. It preps the perfect bottle in just two minutes, for stress-free bottle feeding at any time of the day or night. Contains a pre-loaded filter that will last up to three months.
As long as your bottle isn’t oversized, there shouldn’t be any drawbacks to using the Prep Machine with another bottle brand
Just make sure you replace the filter and follow the cleaning instructions on the perfect prep website before reusing. If your machine is Tommee Tippee like mine, you can find the instructions HERE
For this reason you need to manually flush the hot water through the unit by pressing this button the cleaning mode button and hold for two seconds. The cleaning mode light will illuminate the boiled
descaling soonA red warning light will illuminate when the unit requires descaling soon. If the light flashes, you should descale immediately.
Due to recent weather changes, you may find that your temperature warning light has decided to come on! Don’t worry, this is a key safety feature and can be easily resolved. The Perfect Prep Machine contains a probe that measures the temperature of the water in the tank, preventing it from dispensing water above 25 C
The Perfect Prep automatically controls the quality, volume and temperature of water in making up a formula feed. Once the water is in the hopper it passes through a unique filter to remove bacteria and other impurities in the water
My LO is 4 weeks and takes the water from the prep machine. Has done for roughly a week, no problems. HV happy with it.
VIDEO
References
Product Registration | Tommee Tippee close maestro mastercard paypal visa american express apple pay google pay padlock phone account search icon-arrow icon-chevron wishlist-filled wishlist wishlist-outline share reviews reviews-filled facebook youtube ins
Simple & Intuitive Baby Products | Tommee Tippee
Simple & Intuitive Baby Products | Tommee Tippee
Product Registration | Tommee Tippee close maestro mastercard paypal visa american express apple pay google pay padlock phone account search icon-arrow icon-chevron wishlist-filled wishlist wishlist-outline share reviews reviews-filled facebook youtube ins
[xyz-ips snippet=”download-snippet”]


 Screen