
![]() TonyRay Aero Mode Co., Ltd
TonyRay Aero Mode Co., Ltd
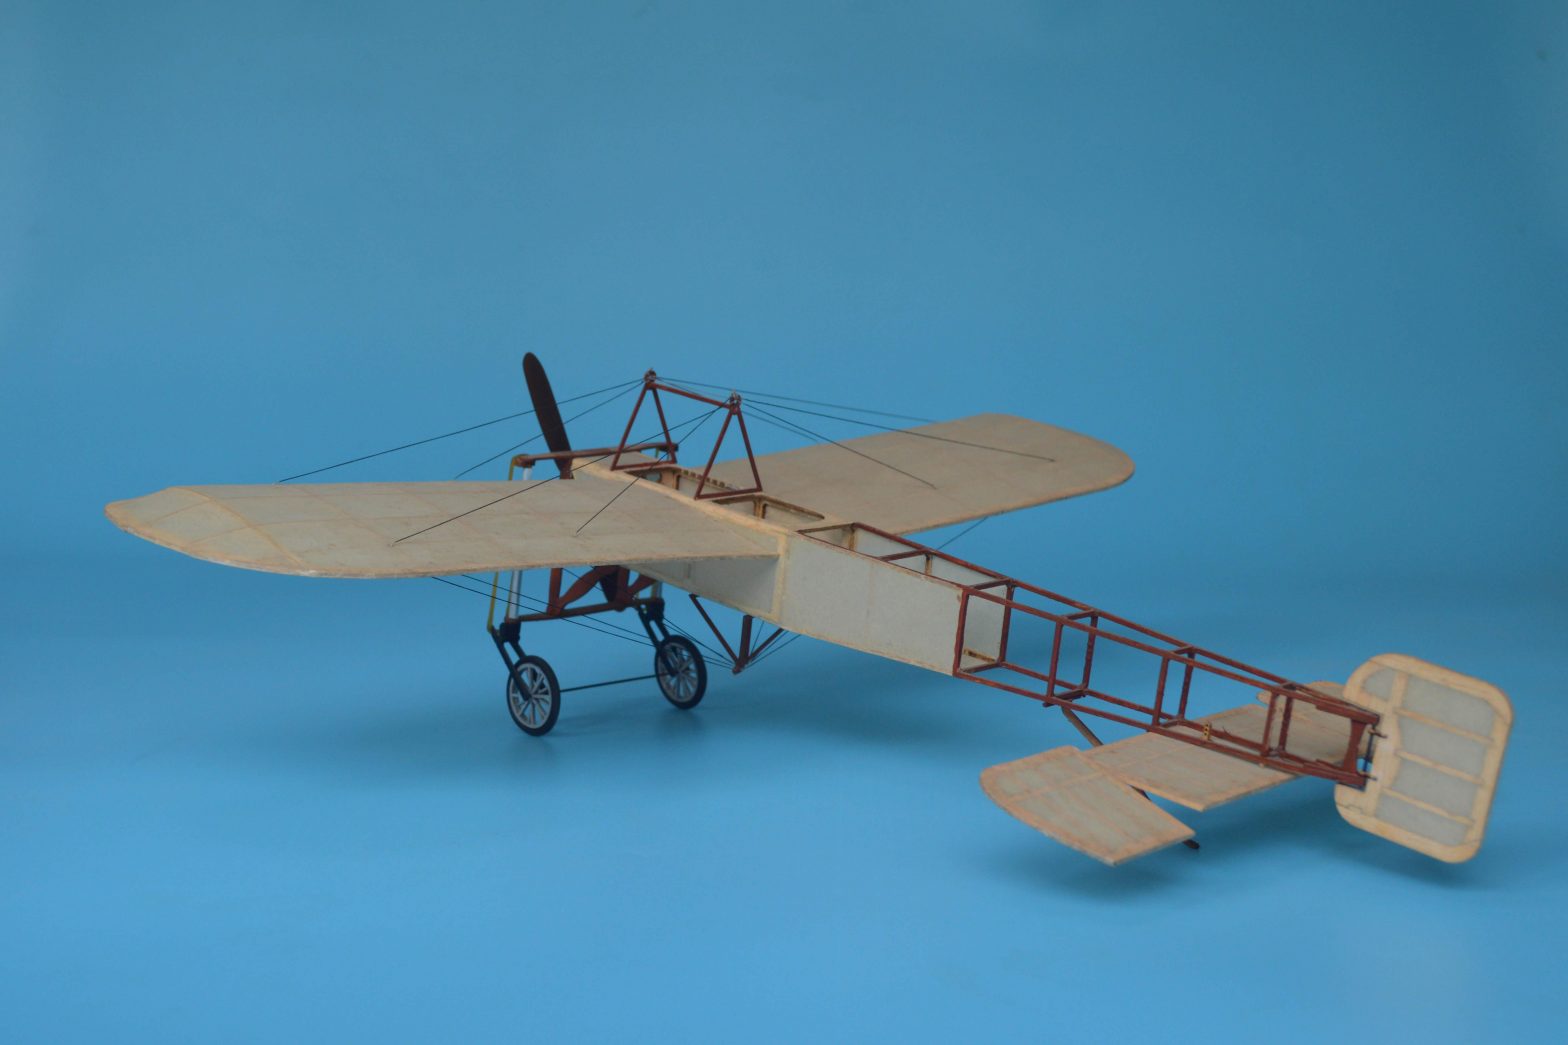
Bleriot XI Monoplane
Build instructions
|
Specifications |
|
| Wing Span | 16.5in / 420mm |
| Wing Area | 1.91 sq dm |
| Flying weight | 35g-40g |
| Fuselage length | 367mm |
| Scale | 1 / 20 |
| Requires |
| RC transmitter with 3 channels |
| 1.7g micro servos*2 |
BEFORE YOU BEGIN
Attentions and Tips
- Read through the manual before you begin, so you will have an overall idea of what to do.
- Check all parts. If you find any serious defects or missing parts, please contact your local dealer.
- Please build your kit in strict accordance with the sequence of the user manual.
- Pre-Sanding: Before removing any parts from the laser-cut plywood sheet, use a sanding block loaded with 250 – 400 grit sandpaper and lightly sand the backside of the sheet. Which can significantly reduce burn marks of the wood and make the parts match better
- Before building the model part on drawings, It is recommended to cover a layer of kitchen cling film (polyethylene film) on the drawing. This way can prevent parts from sticking to the drawing and causing damage.
- Parts Assembly: This product’s tabs and notches interlock like a 3D puzzle. We strongly suggest that when fitting parts, you “dry fit” (use no glue) the partstogether first. It is advised to work 1 – 2 steps ahead in the instructions, using this dry-fit technique. This allows the opportunity to inspect the fit and location ofassembled components and shows the benefits of our construction technique. As each successive part is added, it contributes to pulling the entire assembly square. Once you arrive at the end of a major assembly sequence, square your work on a flat work surface, and bond the dry-fit joints with glue. Using the dry-fit process, you’ll be able to recover from a minor build mistake, and will ultimately end up with a square and true assembly.
- This is a precision laser-cut kit. Our lasers cut to within 0.2mm inaccuracy. Yet the wood stock supplied to us by the mill may vary in thickness by up to 0.2-0.3mm. This variance in the wood stock can cause some tabs and notches to fit very tightly. With this in mind, consider lightly sanding or lightly pinching a tight-fitting tab, rather than forcing the parts together. You may break some parts in the assembly, but please don’t worry, after the final covering work, it will not affect the strength and appearance of your model. You will end up with a circle and true airframe.
KIT INVENTORY
|
Wood Sheet Inventory |
|
| 1.5mm Balsa | 2 |
| 1mm balsa | 1 |
| 1mm Plywood | 1 |
| Hardware parts | |
| M1*3 Screws | 4 |
| Rubber Wheel (diameter:30mm) | 2 |
| Carbon rod (diameter: 1mm length:20mm) | 4 |
| Heat shrinkable tube | 1 |
|
Paper parts |
|
| A4 Size 1:1drawings | 2 |
| Covering tissue (Vintage colour) | 1 |
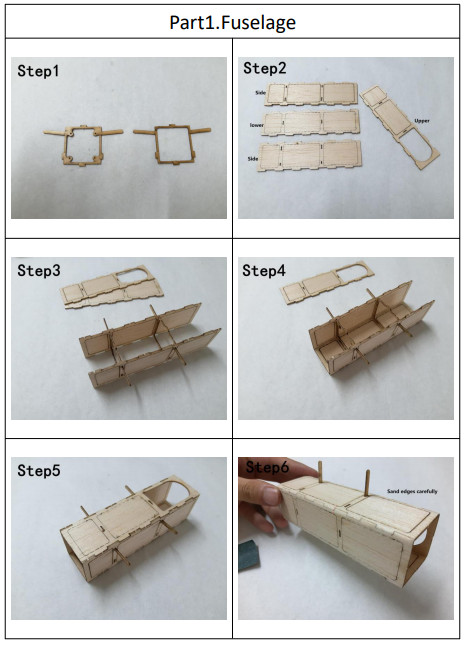
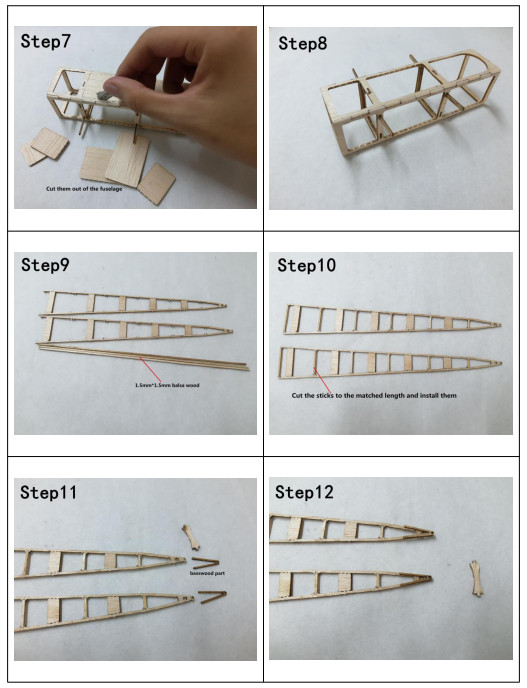
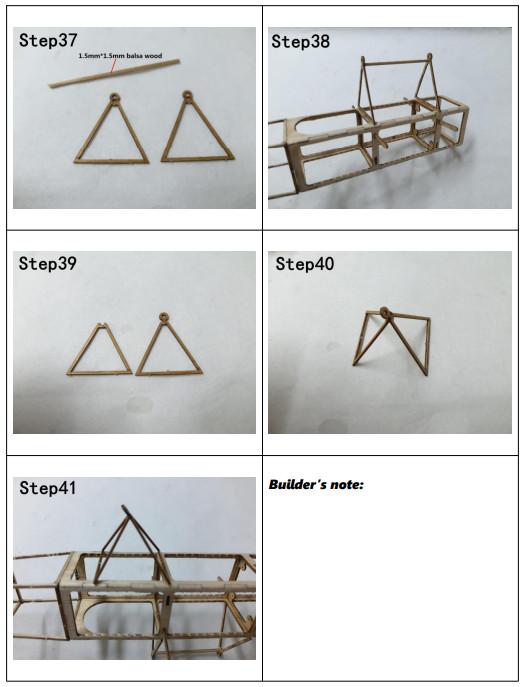
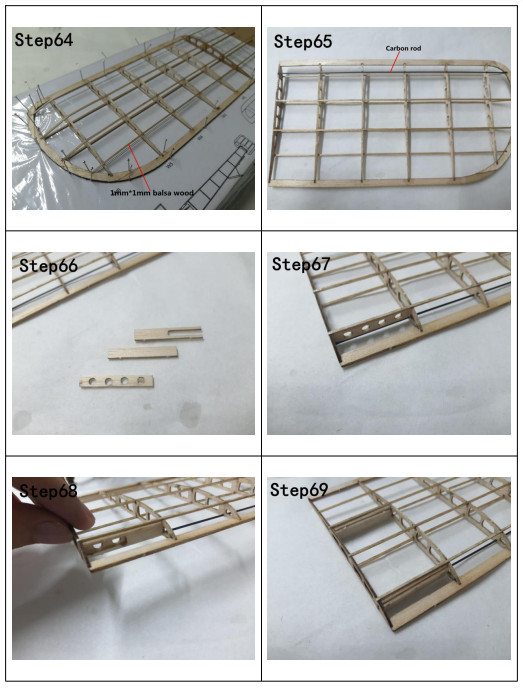
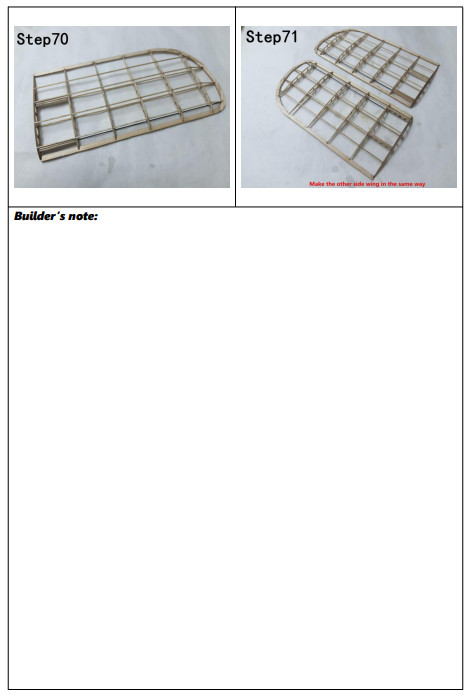
Build instructions


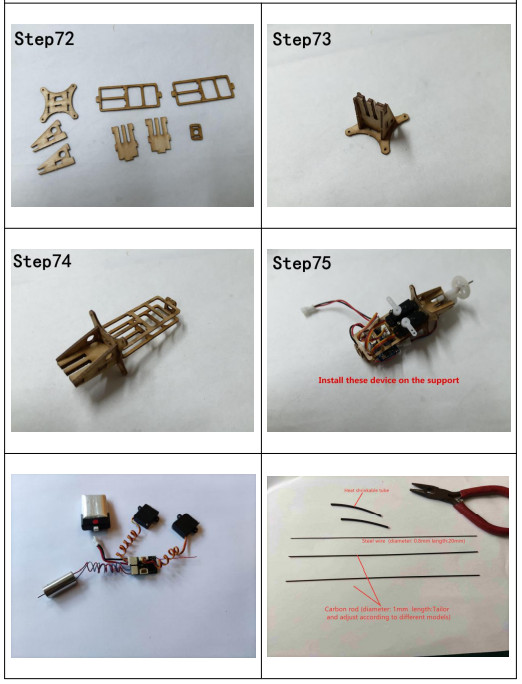
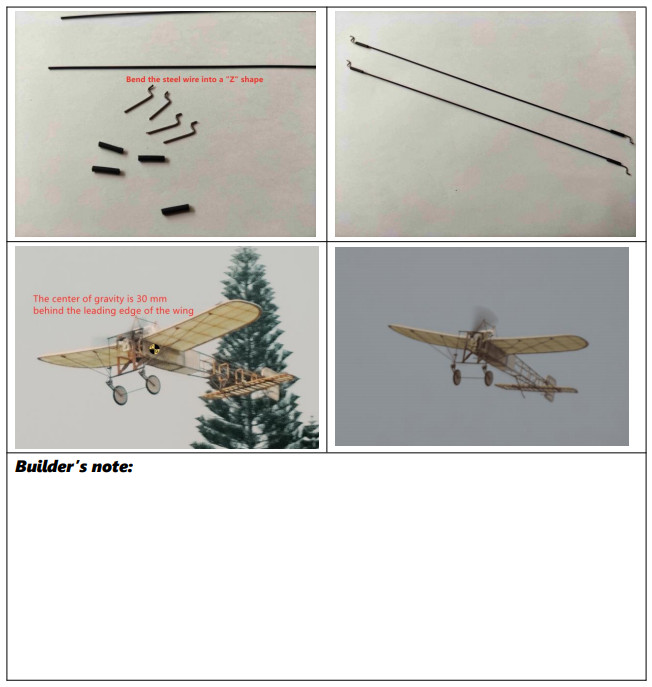
Part7.ElectronicsNote: Before you cover the fuselage, you should install the module in advance
Thank you!
[xyz-ips snippet=”download-snippet”]