 TOASTER OVENINSTRUCTION MANUALWTR-M25ASS
 BEFORE OPERATING THIS PRODUCT,READ, UNDERSTAND, AND FOLLOW THESE INSTRUCTIONS.BE SURE TO SAVE THIS BOOKLIST FOR FUTURE REFERENCE
PRODUCT SAFETY
SAFETY INSTRUCTIONS
 WARNINGSThis appliance is intended for domestic household use only and should not be used for any other purpose or in any other application, such as for non-domestic use or in a commercial environment. The temperature of accessible surfaces may be high when the appliance is operating.
- We have designed and made this appliance to meet European safety standards, but as with any appliance, you must take care to stay safe and get the best results.
- This appliance must be used on the electric voltage shown on the rating plate on the base of this appliance; failure to use the correct voltage will render the guarantee void.
- This appliance must be disconnected from the mains when not in use.
- This appliance is not intended to be operated by means of an external timer or separate remote control system.
- Do not allow appliances to be exposed to rain or moisture.
- This appliance can be used by children aged from 8 years and above and persons with reduced physical, sensory or mental capabilities or lack of experience and knowledge if they have been given supervision or instruction concerning use of the appliance in a safe way and understand the hazards involved. Children shall not play with the appliance. Cleaning and user maintenance shall not be made by children unless they are older than 8 and supervised.
- This appliance is intended for indoor use only, do not use outdoors.
IMPORTANT SAFETY INSTRUCTIONS WARNING
- Keep the appliance and its cord out of reach of children less than 8 years.
- Do not use an appliance for any purpose other than its intended use.
- To protect against electric shock do not immerse cord, plugs, or appliances in water or other liquid.
- Unplug from outlet when not in use and before cleaning. Allow cooling before cleaning the appliance.
- Do not operate the appliance with a damaged cord or plug or after the appliance malfunctions or has been damaged in any way. Consult the retail store where you bought the appliance for advice.
- Do not let the cord hang over edge of a surface, or touch hot surfaces.
- Do not place the appliance on or near a hot gas or electric burner, or in a heated oven.
- Always attach a plug to the mains cord.
- To disconnect from the mains, remove the plug from wall outlet.
- Do not disconnect from the mains by pulling on the mains cord; grasp the plug itself to remove it.
- Do not immerse the product, its mains cord or plug in water.
- A short power-supply cord is provided to reduce the risk of a tripping hazard.
- Do not place foil-wrapped articles in the oven.
- Remove all protective wrapping prior to placing bread in the oven.
- If the supply cord is damaged, it must be replaced by the manufacturer, its service agent or a similarly quali ed person to avoid a hazard.
- Do not use this appliance within reach of a bath or a sink or any vessel containing water or liquids.
- If the appliance is dropped into water do not reach for it, switch o the appliance and disconnect at the mains and drain the water before retrieving the appliance, do not use the appliance again until it has been checked by a quali ed service agent. The rear surface of the appliance shall be placed against a wall.
- For the details on how to clean surfaces in contact with food please see section “Care and Cleaning ” on page 10.
SAVE THESE INSTRUCTIONSHOUSEHOLD INDOOR USE ONLY
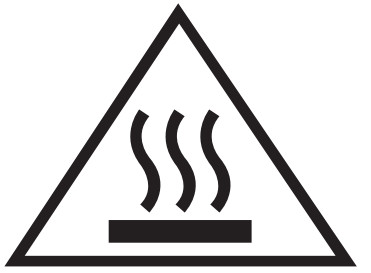 Warning: Hot Surface!
BEFORE FIRST USE
- Remove all accessories and shipping materials packed inside the oven.
- Wash all accessories in warm soapy water. Wipe the inside of the oven with a damp cloth or sponge. Blot dry with paper towels to be sure the unit is dry before using.
- Place oven on a at the counter or other stable surfaces DO NOT OPERATE ON THE SAME CIRCUIT WITH ANOTHER APPLIANCE.
- When operating the oven, keep at least 10 cm of space on the front and both sides of the oven for adequate air circulation.
- Make sure the crumb tray is properly installed before using.
- For the rst time, set the temperature knob to Max, the function setting on toast, and the timer to 15 minutes. This will burn o any oils still on the oven.
NOTEThe oven may smoke during this process.This is normal for a new oven and will not last more than 10-15 minutes.
PRODUCT INTRODUCTION
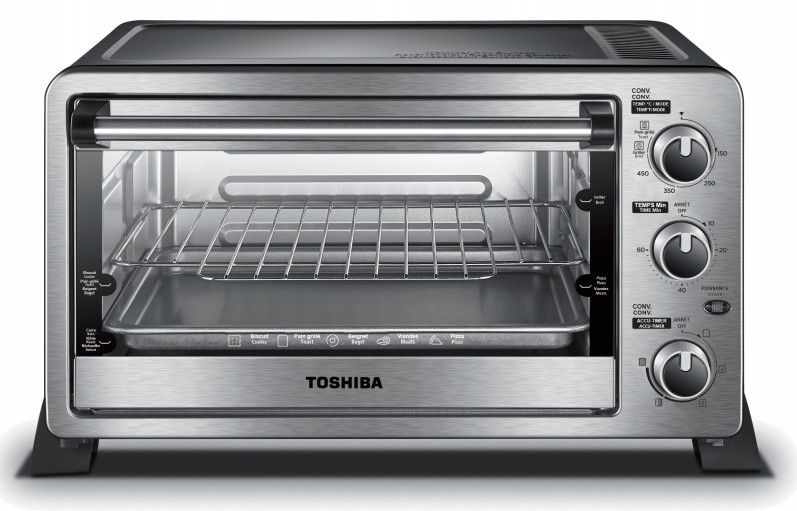
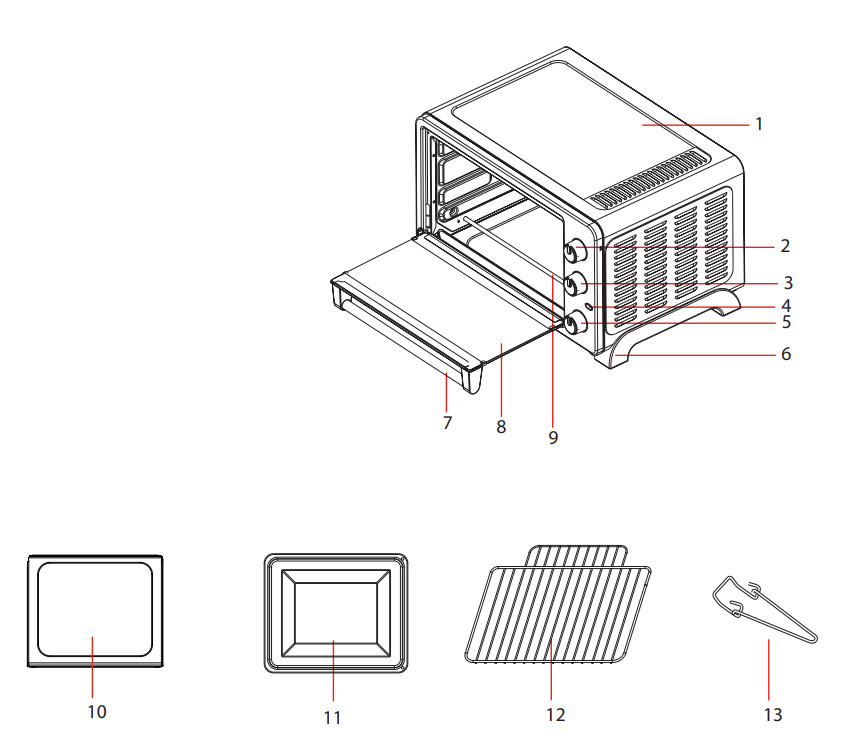
NAMES OF PARTS
When using electrical appliances, basic safety precautions should always be followed, including the following:
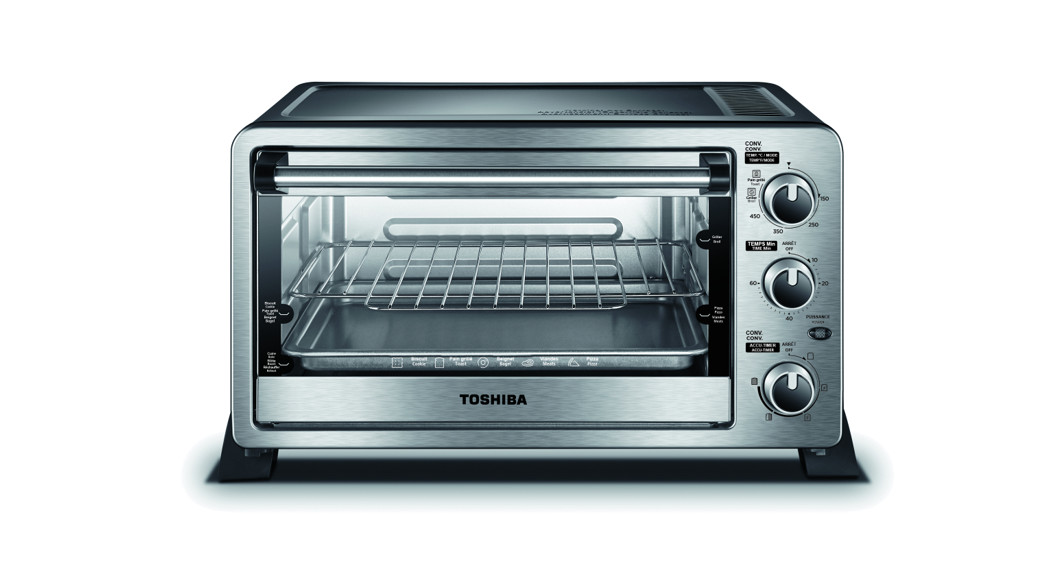
| 1. Housing2. Temperature/ mode knob3. Time knob4. Indicator light5. Accu-Time knob6. Oven foot7. Door handle | 8. Glassdoor9. Heating element10. Crumb tray11. Baking Pan12. Baking Rack13. Rack clamp |
 OPERATION
HOW TO USE
CAUTION the oven surfaces are hot during and after use general instructions.
- Place the Baking Rack in a position that will accommodate the height of the food to be cooked.
- The food must be put into the baking pan to avoid the fire danger caused by the accumulation of food chipping on the heating pipes.Make sure that you always use an ovenproof container in the oven, never use plastic or cardboard containers in the Oven.
- Clean the heating pipe periodically.
- Never use glass or ceramic pans or lids.
- DO NOT let juices run to the bottom of the oven. Use the Crumb Tray when cooking.
- Set the temperature as suggested by the recipe or as desired.
- Securely shut the door and set the cooking time to begin operating the oven.
INSTRUCTION FOR USE
FUNCTION INSTRUCTION
CONTROL SETTINGSTIME SETTINGThe oven will not turn on without the timer being set. When the time knob is in the “off ” position, the oven will not operate.To set the time, turn the knob clockwise to the desired time. The indicator light is lit only when time has been set. When the timer has reached the OFF position, a bell sound will be heard. The power supply will be cut off automatically.
FOR TOAST:From![]() to
to![]() : From light to dark.FOR THE REST:0-60 MINUTES: The timer can be set up to 60 minutes.ADJUSTING TIMETimer can be changed during the cooking cycle. Just turn the timer knob to the desired time and continue cooking.
: From light to dark.FOR THE REST:0-60 MINUTES: The timer can be set up to 60 minutes.ADJUSTING TIMETimer can be changed during the cooking cycle. Just turn the timer knob to the desired time and continue cooking.
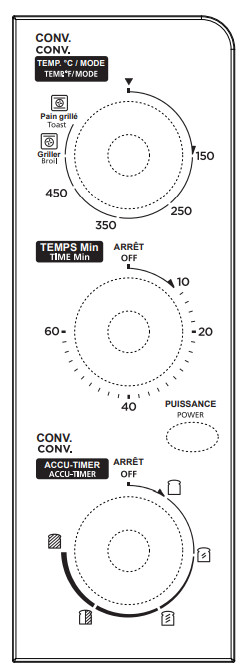
NOTETo select the cooking time, First rotate the timer knob more then 90 degrees, and then turn the switch back to the time you require.TEMPERATURE SETTINGTurn the temperature knob clockwise to the desired temperature setting.The temperature can be set from 150 F to 450 F. For the Toast or Broil function, the temperature cannot be set.TOAST FUNCTION:Use the toast function for foods such as corn, bread, cookies and heating food.
- Place the baking rack to the desired height.
- Set the TEMP/MODE Knob to” Toast “.
- Rotate the ACCU-TIMER Knob clockwise to desired cooking time.
- The oven will start cooking.
- Always remove food with oven mitts. The food and oven are very hot.
BROIL FUNCTION:The Broil Function is ideal for fish, beef, steak, vegetables, etc.
- Place the baking rack to the desired height.
- Set the TEMP/MODE Knob to” Broil “.
- Rotate the TIME knob clockwise to desired cooking time.
- The oven will start cooking.
- Always remove food with oven mitts. The food and oven are very hot.
150ºF – 450 :
- Place the baking rack to the desired height.
- Set the TEMP/MODE Knob to the desired temperature from 150 F – 450 F .
- Rotate the TIME knob clockwise to desired cooking time.
- The oven will start cooking.
- Always remove food with oven mitts. The food and oven are very hot.
CARE AND CLEANING
- Before cleaning unplug the toaster oven and allow it to cool completely.
- Wash all the attachments with mild, soaped water including the rack and the baking tray.
- Do not use abrasive cleaners, scrubbing brushes and chemical cleaner as this will cause damage to the non-stick coating of the baking tray.
- Using a wet cloth to wipe the inner of the oven.
- To clean the door by using a wet cloth saturated with detergent or soap.
- Never immerse the unit in water or other liquid.
- Any other servicing should be performed by an authorized service representative.
SPECIFICATION
| MODEL | WTR-M25AS5 |
| CUBAGE | 25L |
| VOLTAGE | 120V- |
| AC FREQUENCY | 60Hz |
| POWER | 1500W |
| LIA/”H | 18.9×15.6×10.8 inches (480 x 396 x 274 mm) |
| NET WEIGHT | 10.6 lbs(4.8 kg) |
ONE YEAR LIMITED WARRANTYThis product carries a warranty stating that it will be free from defects in material and workmanship for a period of one year from the date of purchase. This warranty is valid for the original retail purchaser from the date of initial retail purchase and is not transferable.Keep your original sales receipt.IMPORTANT:1. This warranty does not cover damages resulting from accident, misuse or abuse, lack of reasonable care, the afixing of any attachments not provided with the product, loss of parts, or subjecting the appliance to any but the specified voltage. ( Read directions carefully. )2. This warranty is void if this product is ever used for other than private household purposes.3. This warranty is void if this product is ever used outside of United States.If service is required during the warranty period, properly pack your unit. We recommend using the original carton and packing materials.If additional assistance is needed, please contact customer assistance at: Midea America (Canada) Corp.Markham, ON L3R 8V21-855-238-5607Midea America (Canada) Corp. expressly disclaims all responsibility for consequential damages or incidental losses caused by use of the appliance. Some states do not allow this exclusion or limitation of incidental or consequential losses so the foregoing disclaimer may not apply to you. This warranty gives you specific legal rights, and you may also have other rights which may vary from state to state. The serial number can be found on the back cabinet. We suggest that you record the serial number of your unit in the space below for future referenceModel Number:_______________________Serial Number:________________________SAVE THIS FOR YOUR RECORDSMade in China
Customer Assistance:1-855-238-5607Midea America (Canada) Corp.Markham, ON L3R 8V2
[xyz-ips snippet=”download-snippet”]

 OPERATION