tp-link Network Camera
*Images may differ from actual products.
Appearance
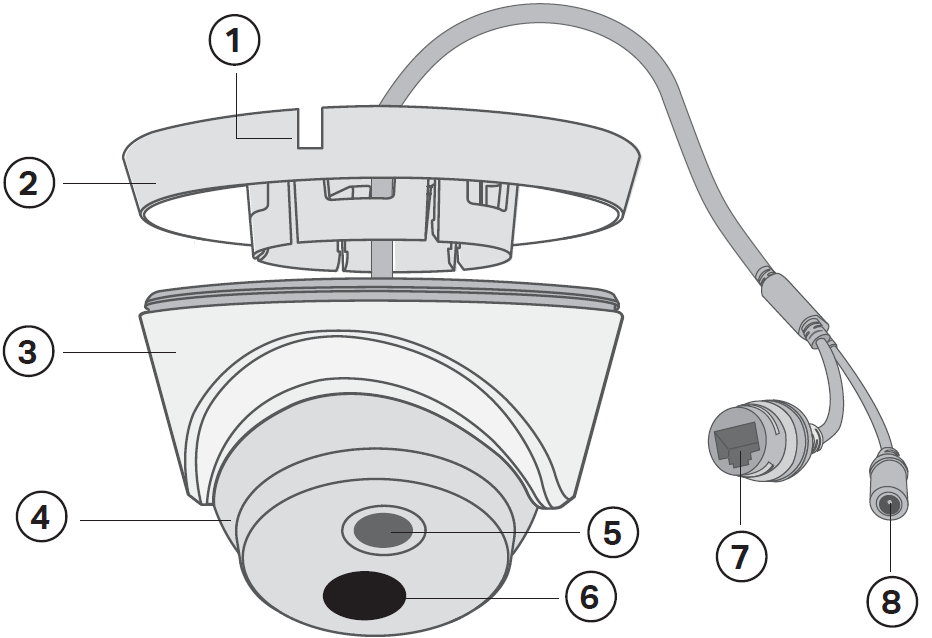
- Side Outlet
- Camera Base
- Camera Body
- Camera
- Lens
- IR LED
- RJ45 10/100MSelf-Adaptive Ethernet Port (supports PoE) *
- Power Supply Interface (12V DC) *
*The camera’s standard power supply is 12V DC or PoE (802.3af/at). The power source should meet LPS, PS2, and other requirements according to IEC 62368-1.
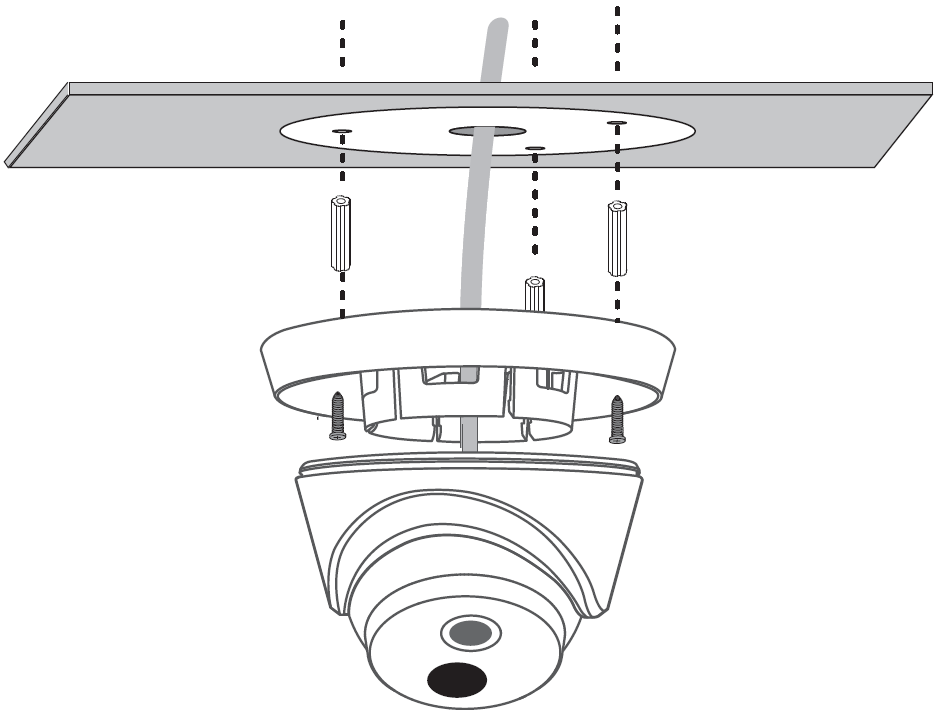
Wall/Ceiling Mounting
Option 1: Cable through the wall/ceiling
- Drill HolesStick the mounting template to the desired mounting place. Drill 3 screw holes and 1 cable hole according to the template.

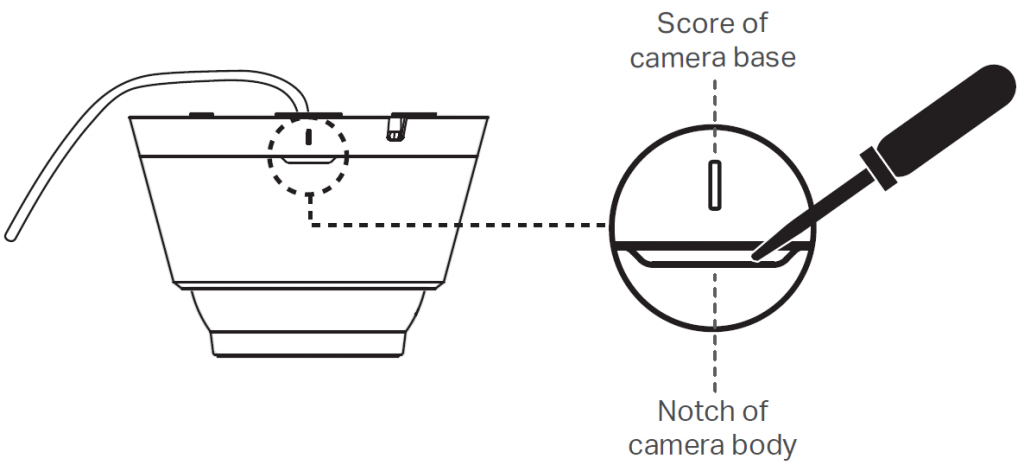
- Open the Camera CaseAlign the notch of the camera body with any score on the camera base, and use a screwdriver to gently pry open the camera case.
- Secure the CameraRoute the cable through the wall/ceiling. Insert anchors into the holes, use screws to affix the camera base, and attach the camera to it.
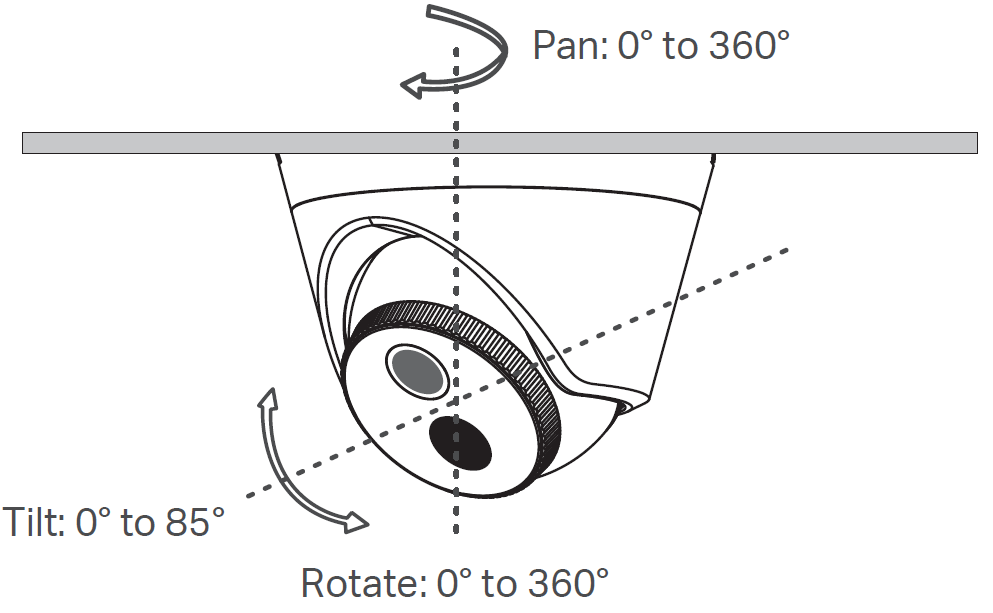
- Adjust the Surveillance AngleAdjust the surveillance angle as needed. Make sure the lens is positioned above the IR LED for normal viewing.


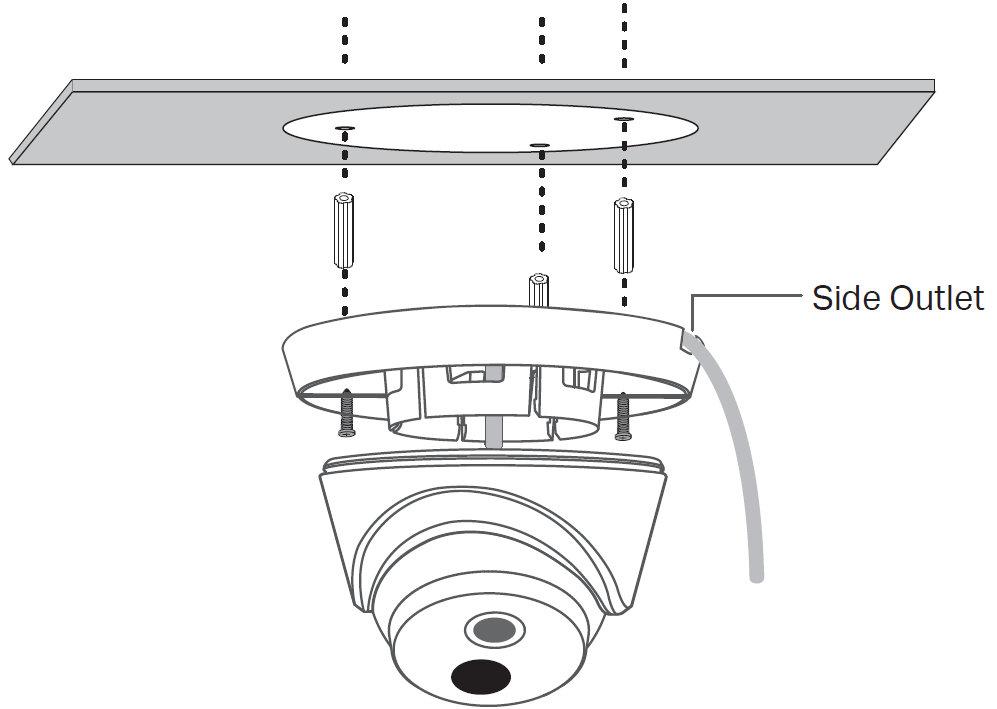
Option 2: Cable through the side outlet
- Drill HolesStick the mounting template to the desired mounting place. Drill 3 screw holes according to the template.
- Open the Camera CaseAlign the notch of the camera body with any score on the camera base, and use a screwdriver to gently pry open the camera case.
- Secure the CameraRoute the cable through the side outlet. Insert anchors into the holes, use screws to affix the camera base, and attach the camera to it.
- Adjust the Surveillance AngleAdjust the surveillance angle as needed. Make sure the lens is positioned above the IR LED for normal viewing.


Use Your Camera with an NVR
The camera works with an NVR for easier batch access and management. *Here we use a VIGI NVR as an example.
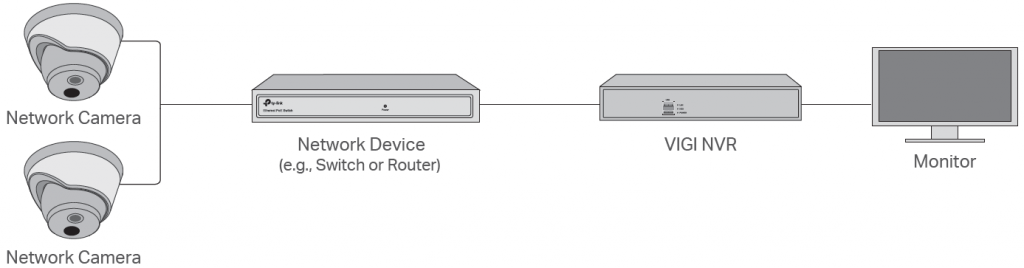
Step 1. Connect the HardwareConnect your cameras to the same network as your NVR(as shown above).
Step 2. Power On the CamerasPower on your cameras with the PoE power supply or an external power supply.Note: The camera’s standard power supply is 12V DC or PoE (802.3af/at). The power source should meet LPS, PS2, and other requirements according to IEC 62368-1.
Step 3. Add Cameras with the NVRBefore you start, make sure your NVR is working properly.
- Right click on the Live View screen, and click Add Camera.
- Select your camera and click + to add your camera directly.
If you have disabled Plug and Play on your NVR, create a password or use a preset password for your camera. Note: If you can’t find your camera, refer to FAQ-Q1.
Done! You can now view live video and manage cameras.
Using your cameras with other NVR brands:Step 1: Power on your cameras and connect them to the network.Step 2: Activate the cameras using the VIGI Security Manager or TP-Link VIGI app (refer to the next section).Step 3: Refer to the NVR’s User Manual to add cameras.
More Management Methods
You can also access and manage your cameras via any of the methods below.
Method 1: Via the VIGI Security Manager (Windows only)
View live video and modify camera settings on your computer.
- Download the VIGI Security Manager on your computer at https://www.tp-link.com/support/download/vigi-security-manager/.
- Install the VIGI Security Manager and open it.
- Cameras on the same network as your computer can be automatically discovered. Go to Settings > Discovered Devices, click + Add to activate your discovered cameras by setting passwords, and follow the instructions to add your cameras.
Method 2: Via the VIGI App
Remotely view live video, manage cameras, and get instant alerts.
- Download and install the TP-Link VIGI app.
- Open the TP-Link VIGI app and log in with your TP-Link ID. If you don’t have an account, sign up first.
- Tap the + button on the top right and follow the app instructions to activate and add your cameras.

Frequently Asked Questions (FAQ)
Q1: What can I do if no cameras are discovered?
- Refresh to discover your camera again.
- Make sure the camera is powered on.
- Make sure your camera and NVR/computer are in the same subnet. If not, use the VIGI Security Manager to set camera’s network parameters.
- Try to add your camera manually.
- For other NVR brands, make sure you have activated the camera by setting a password via the VIGI Security Manager or TP-Link VIGI app.
Q2: How do I know the camera is powered on?
- The IR LED will turn on for 20 seconds once the camera is powered on. If it’s off, you can cover the lens for several seconds and check if the IR LED turns on.
- Check the Ethernet port LED status of the network device your camera is connected to.
For more questions, please refer to https://www.tp-link.com/support/faq/2850/
If you have any suggestions or needs for the product guides, you are welcome to email [email protected]For technical support, replacement services, user guides, and more information, please visit https://www.tp-link.com/support, or simply scan the QR code.
![]()
References
[xyz-ips snippet=”download-snippet”]