tp-link TL-SG108-M2 5/8-Port 2.5G Multi-Gigabit Desktop Switch

Installation Guide
5/8-Port 2.5G Multi-Gigabit Desktop Switch
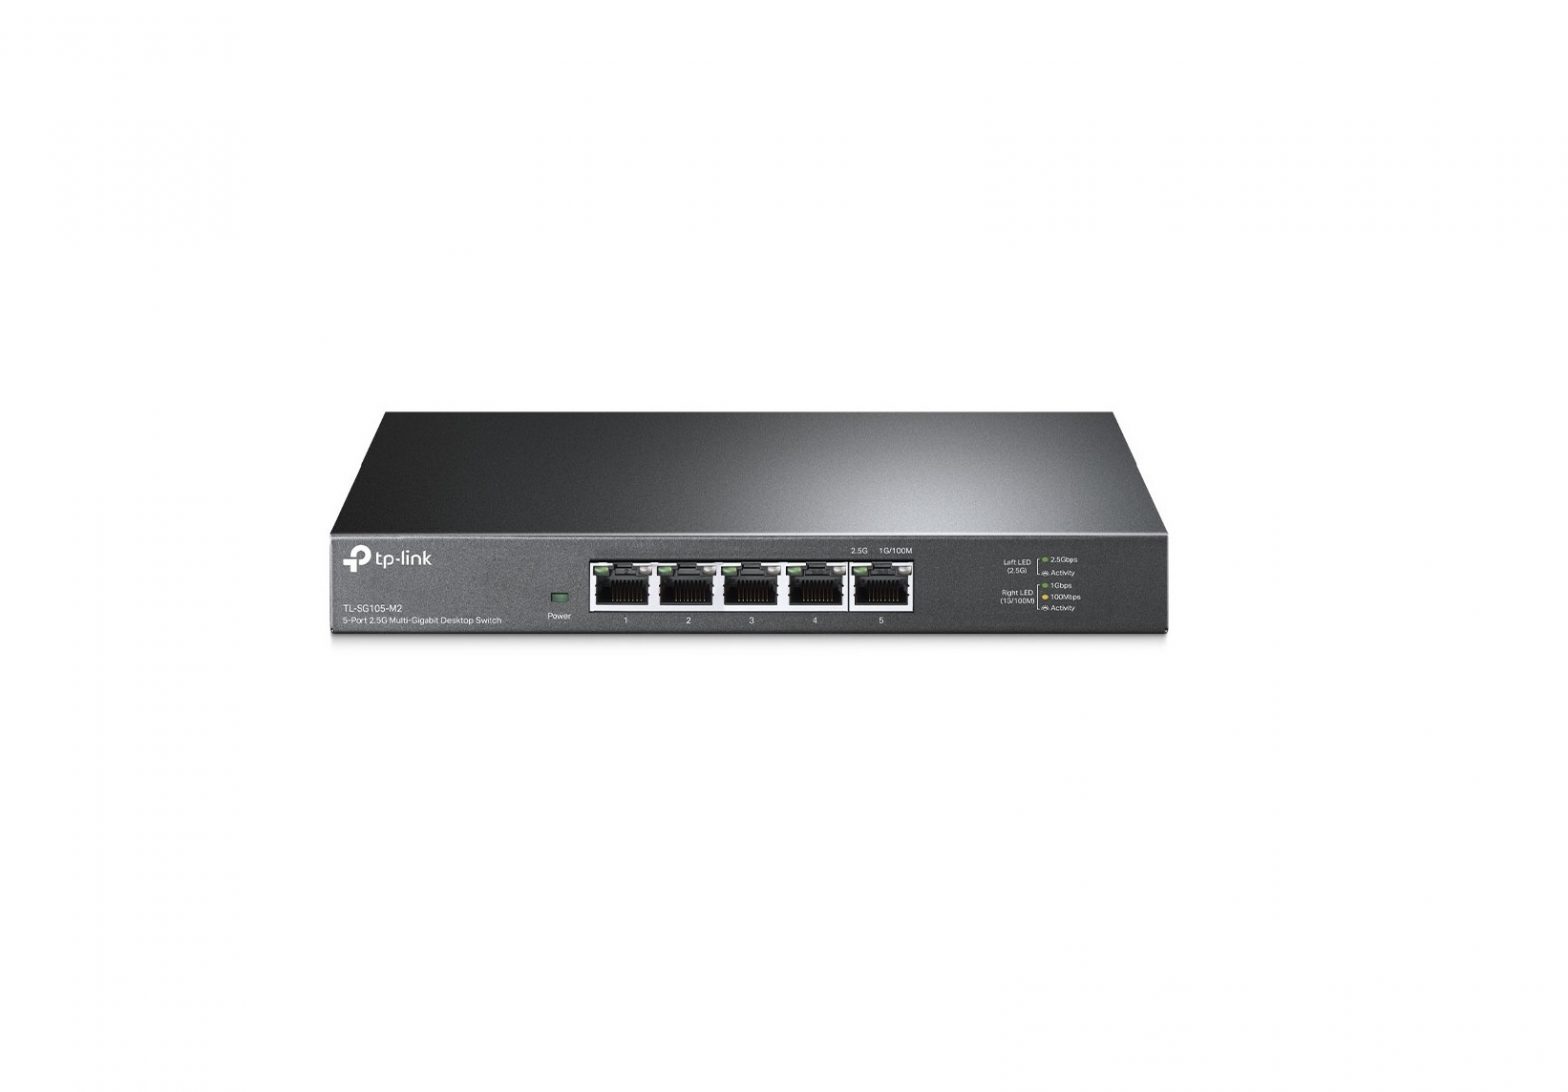
Panel Explanation
| Power | |
 |
On: Power onOff: Power of |
| Kensington Security Slot | |
 |
Secure the lock (not provided) into the slot to prevent the device from being stolen. |
| Port LED | |
 |
When one of the LED is on/flashingOn: Connecting to a device but no activityFlashing: Transmitting or receiving data
Left LED (2.5G)Green: Running at 2.5 GbpsFlashing: Transmitting or receiving data Right LED (1G/100M)Green: Running at 1 GpbsYellow: Running at 100 MbpsFlashing: Transmitting or receiving data |
Note:For simplicity, we will take TL-SG105-M2 for example in this Guide.
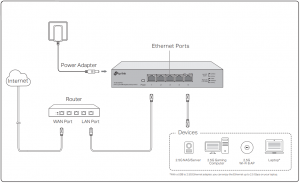
Connection

Specifications
General Specifications
| Standard | IEEE802.3, IEEE802.3u, IEEE802.3ab,IEEE802.3bz, IEEE802.3x, IEEE802.1p |
| Protocol | CSMA/CD |
| Network Media (Cable) | 100Base-TX: UTP category 5 cable or above (max. 100 m)1000Base-T: UTP category 5e cable or above (max. 100 m)2.5GBase-T: UTP category 5e cable or above (max. 100 m) |
| Interface | 5/8 100 Mbps/1 Gbps/2.5 Gbps Auto-Negotiation RJ45 Ports |
| MAC Address Table | 16K |
| Switching Capacity | TL-SG105-M2: 25 GbpsTL-SG108-M2: 40 Gbps |
| Transfer Method | Store-and-Forward |
| MAC Address Learning | Automatically learning, automatically aging |
| Advanced Features | QoS (802.1p/DSCP Priority), 802.3x flow control |
| Frame Forward Rate | 100Base-TX: 148810pps/Port1000Base-T: 1488095pps/Port2.5GBase-T: 3720238pps/Port |
| Wall mountable | Yes |
| Distance between mounting holes | 150 mm |
Environmental and Physical Specifications
| Operating Temperature | 0˚C to 40˚C (32˚F to 104˚F) |
| Storage Temperature | 40˚C to 70˚C (-40˚F to 158˚F) |
| Operating Humidity | 10% to 90% RH non-condensing |
| Storage Humidity | 5% to 90% RH non-condensing |
Frequently Asked Questions (FAQ)
Q1. The Power LED is not lit.
The Power LED should be lit when the power system is working normally. If the Power LED is not lit, check as follows:A1: Make sure the power adapter is connected to the switch with power source properly.A2: Make sure the voltage of the power supply meets the requirements of the input voltage of the switch.A3: Make sure the power source is ON.
Q2. The right and left LED are not lit when a device is connected to the corresponding port.
It is recommended that you check the following items:
A1: Make sure that the cable connectors are firmly plugged into the switch and the device.A2: Make sure the connected device is turned on and works normally.A3: The cable must be less than 100 meters long (328 feet).
 |
To ask questions, find answers, and communicate with TP-Link users or engineers, please visit https://community.tp-link.com to join TP-Link Community |
 |
For technical support and other information, please visit https://www.tp-link.com/support, or simply scan the QR code. |
 |
If you have any suggestions or needs on the product guides, welcome to email [email protected]. |
EU declaration of conformity
TP-Link hereby declares that the device is in compliance with the essential requirements and other relevant provisions of directives (EU)2015/863, 2014/30/EU, 2014/35/EU, 2009/125/EC and 2011/65/EU.The original EU declaration of conformity may be found at https://www.tp-link.com/en/ce.
Safety Information
- Keep the device away from water, fire, humidity or hot environments.
- Do not attempt to disassemble, repair, or modify the device. If you need service, please contact us.
- Do not use damaged charger or USB cable to charge the device.
- Do not use any other chargers than those recommended.
- Adapter shall be installed near the equipment and shall be easily accessible.
- Place the device with its bottom surface downward.
- The plug on the power supply cord is used as the disconnect device, the socket-outlet shall be easily accessible.
Please read and follow the above safety information when operating the device. We cannot guarantee that no accidents or damage will occur due to improper use of the device. Please use this product with care and operate at your own risk.

References
[xyz-ips snippet=”download-snippet”]

