

Quick Installation GuideWireless N Nano RouterTL-WR802N
Operation Mode
| Scene | Operation Mode | Application |
| Travel | Wireless Router | To share a wired (Ethernet) connection to wireless devices, such as in a hotel room, small office and so on. |
| WISP (Hotspot) | To create your personal Wi-Fi hotspot from a public Wi-Fi network such as in a hotel room, on a trade show and so on. | |
| Home | Range Extender | To extend the range of an existing Wi-Fi network. |
| Client | To enable your wired device (such as Blu-ray® players, smart TVs, or game consoles) to connect to a Wi-Fi network. | |
| Access Point | To transform an existing wired (Ethernet) network to a Wi-Fi network. |
During Travel
Wireless Router (Default)
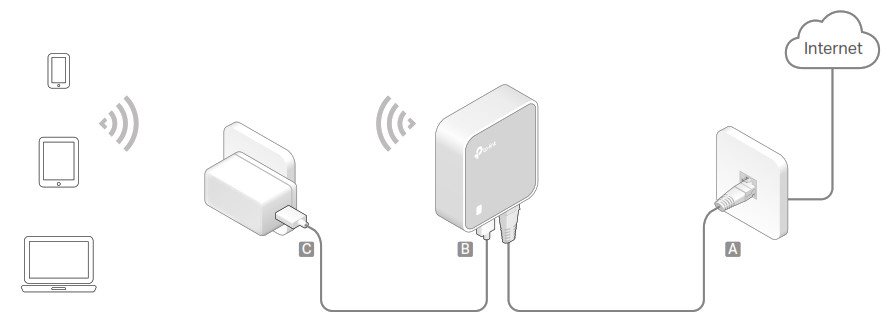
- Connect the router according to Step A to C in the left diagram.
- Use the default Wi-Fi name (SSID) and password printed on the Wi-Fi Info Card or on the product label at the bottom of your router to connect to the Wi-Fi.Check the internet connection on your laptop or smartphone, and please note that:– If you can access the internet without any restriction, no other configuration is required.– If you’re redirected to an authentication page, please complete the following steps to access the internet.
- Launch a web browser and type http://tplinkwifi.net in the address bar. Create a password to log in.
- Click Next to start the Quick Setup. Select Wireless Router and click Next.
- Select the WAN Connection Type and follow the step-by-step instructions to configure the parameters. When using the router in a hotel room or a small office, please select Dynamic IP.
- On the Wireless page, either keep the default Wireless Network Name and Wireless Password or customize them, and then click Next.
- Click Save to complete the configuration.
![]() If you have changed the default Wi-Fi name and password, please reconnect your wireless devices to the new one.
If you have changed the default Wi-Fi name and password, please reconnect your wireless devices to the new one.
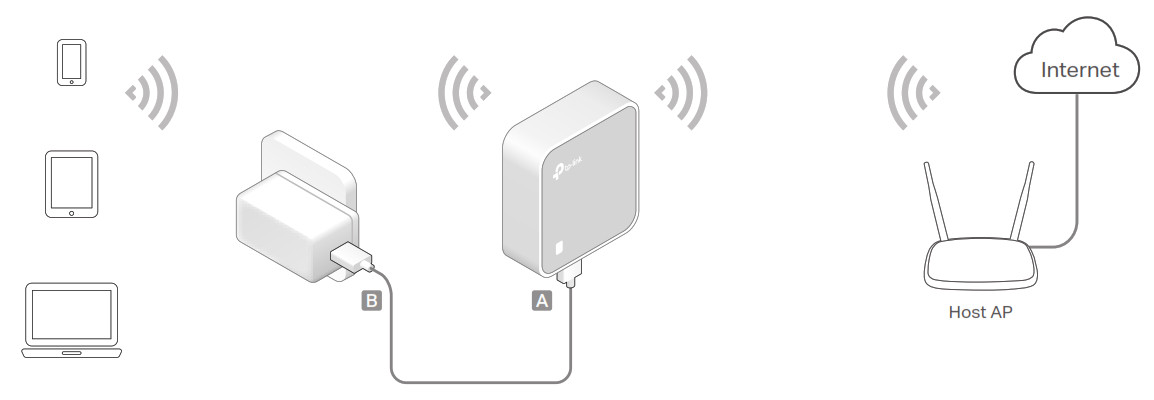
WISP (Hotspot)

- Connect the router according to Step A to B in the left diagram.
- Use the default Wi-Fi name (SSID) and password printed on the Wi-Fi Info Card oron the product label at the bottom of your router to connect to the Wi-Fi.
- Launch a web browser and type http://tplinkwifi.net in the address bar. Create a password to log in.
- Click Next to start the Quick Setup. Select WISP and click Next.
- Select the WAN Connection Type and follow the step-by-step instructions to configure the parameters. When using the router in a hotel room or a small office, please select Dynamic IP.
- Select the public Wi-Fi that you want to connect to, and click Next.
- Type in the public Wi-Fi’s password. In the AP Setting section, customize your Wi-Fi network name and password, then click Next.
- Click Finish to complete the configuration.
![]() If you have changed the default Wi-Fi name and password, please reconnect your wireless devices to the new one.
If you have changed the default Wi-Fi name and password, please reconnect your wireless devices to the new one.
Other Information
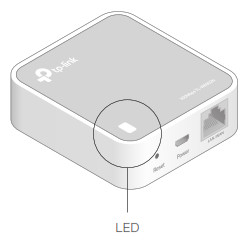
Ports and LED:
| LED Status | Indication |
| Solid | The router is connected to the host Wi-Fi network or internet. |
| Blinking | Blinking steadily: The router is disconnected from the host Wi-Fi network or internet.Blinking irregularly: The router is booting or updating firmware. |
| Port | Description |
| LAN/WAN | This port functions as the WAN port in Wireless Router mode and as the LAN port in WISP, Range Extender and Client modes.This port is for connecting to the existing router in Access Point mode. |
| Power | Connect to a USB charger, power adapter or computer USB port via the USB cable for power supply. |
| Reset | Use a pin to press and hold the Reset button until the LED blinks. |
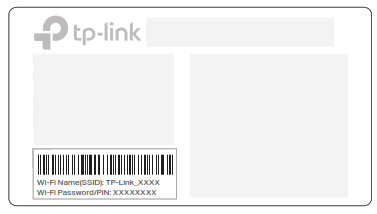
Find default Wi-Fi name (SSID) and password on:• Wi-Fi Info Card:
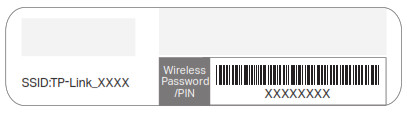
• Product Label:
Using Amazon Fire TV Stick or Chromecast when traveling:
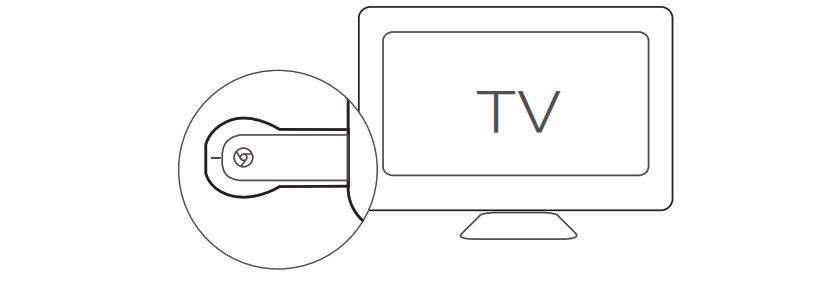
![]() Connect your laptops, smartphones or tablets to the router.
Connect your laptops, smartphones or tablets to the router.![]() Plug the HDMI streaming stick directly into the hotel TV.
Plug the HDMI streaming stick directly into the hotel TV.![]() Follow the on-screen instruction to connect to the router’s Wi-Fi.
Follow the on-screen instruction to connect to the router’s Wi-Fi.![]() Enjoy streaming content on the TV.
Enjoy streaming content on the TV.
At Home
- Range Extender
- Connect the router according to Step A to B in the left diagram.
- Use the default Wi-Fi name (SSID) and password printed on the Wi-Fi Info Card or on the product label at the bottom of your router to connect to the Wi-Fi.
- Launch a web browser and type http://tplinkwifi.net in the address bar. Create a password to log in.
- Click Next to start the Quick Setup. Select Range Extender and click Next.
- Select the Wi-Fi network you want to connect to and click Next.
- Type the Wi-Fi network’s password in the Password field, and customize the Wireless Name of Range Extender, or copy from the root AP. Then click Next.
- Select the Type of the router or leave Smart IP as the default setting for most cases, and click Next.
- Click Finish to complete the configuration.
![]() The extended network shares the same password as that of your host network.
The extended network shares the same password as that of your host network.
- Client
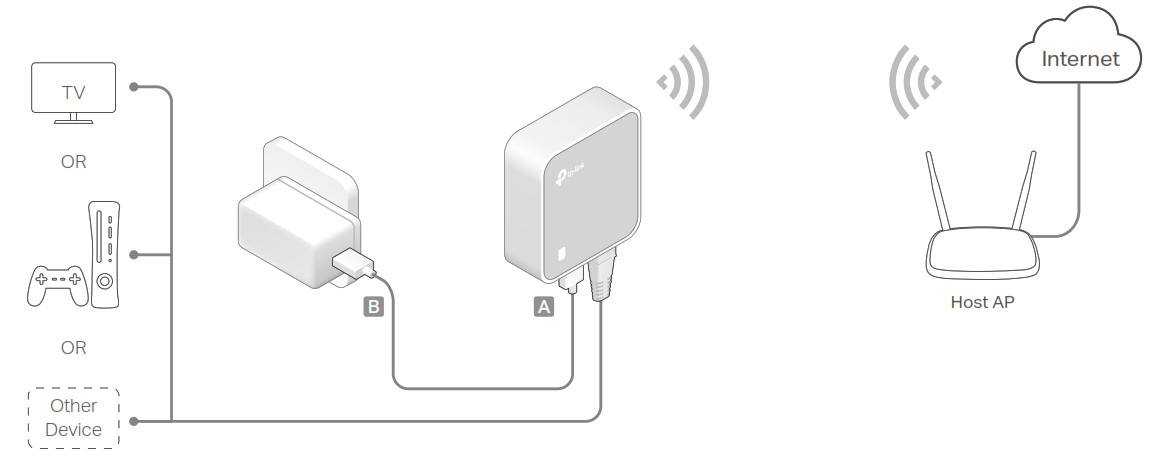
- Connect the router according to Step A to B in the left diagram.
- Use the default Wi-Fi name (SSID) and password printed on the Wi-Fi Info Card or on the product label at the bottom of your router to connect to the Wi-Fi.
- Launch a web browser and type http://tplinkwifi.net in the address bar. Create a password to log in.
- Click Next to start the Quick Setup. Select Client and click Next.
- Select the Wi-Fi network you want to connect to and click Next.
- Type the Wi-Fi network’s password in the Password field and click Next.
- Select the Type of the router or leave Smart IP as the default setting for most cases, and then click Next.
- Click Finish to complete the configuration, and then your Ethernet-only device can access the internet.
- Access Point Mode
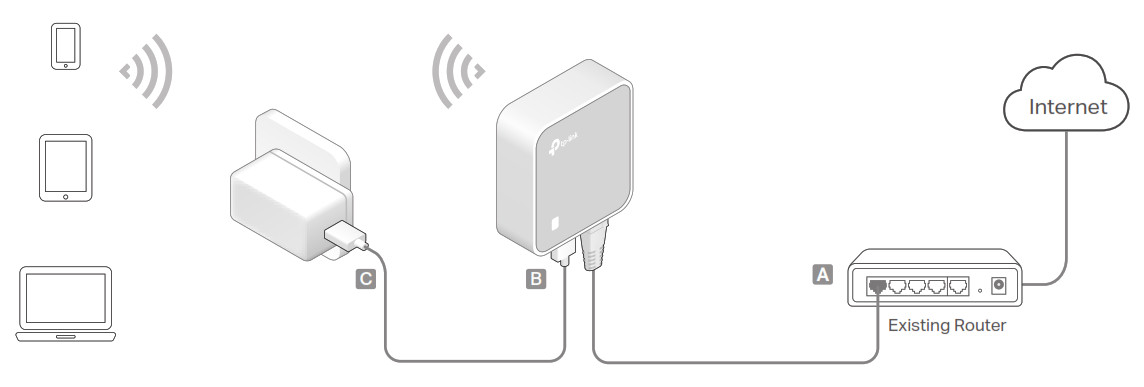
- Connect the router according to Step A to C in the left diagram.
- Use the default Wi-Fi name (SSID) and password printed on the Wi-Fi Info Card or on the product label at the bottom of your router to connect to the Wi-Fi.
- Launch a web browser and type http://tplinkwifi.net in the address bar. Create a password to log in.
- Click Next to start the Quick Setup. Select Access Point and click Next.
- Keep the default Wireless Network Name and Wireless Password or customize them, and then click Next.
- Select the Type of the router or leave Smart IP as the default setting for most cases, and then click Next.
- Click Finish to complete the configuration.If you have changed the default Wi-Fi name and password, please reconnect your wireless devices to the new one.
Frequently Asked Questions (FAQ)
Q1. What should I do if I cannot access the internet?
- If you’re using a cable modem, unplug the Ethernet cable and reboot the modem. Wait until its LED is on and stable, and then reconnect the Ethernet cable to the modem.
- If you’re in a hotel room or on a trade show, the internet may be limited and requires that you authenticate for the service or purchase the internet access.
- If your internet access is still unavailable, contact TP-Link Technical Support.
Q2. How do I restore the router to its factory default settings?
- With the router powered on, use a pin to press and hold the Reset button for about 5 seconds until the LED blinks.
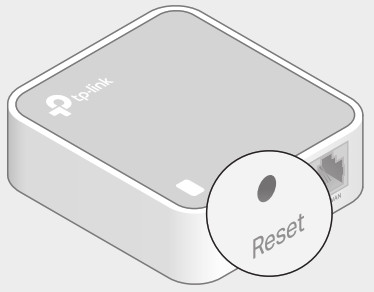
Upon resetting, all previous configurations will be cleared, and the router will reset to the default Wireless Router mode.
Q3. What should I do if I forget my web management password?
• Refer to FAQ > Q2 to reset the router, and then create a password to log in.
Q4. What should I do if I forget my Wi-Fi password?• If you have not changed the default Wi-Fi Password, it can be found on the Wi-Fi Info Card or on the product label at the bottom of your router.• Connect a computer to the router via an Ethernet cable. Log in to the web management page, and go to Wireless > Wireless Security to retrieve or reset your Wi-Fi password.
Q5. What can I do if my wireless signal is unstable or weak?It may be caused by too much interference.
- Set your wireless channel to a different one.
- Choose a location with less obstacles that may block the signal between the router and the host AP. An open corridor or a spacious location is ideal.
- Move the router to a new location away from Bluetooth devices and other household electronics, such as cordless phones, microwaves, and baby monitors, to minimize signal interference.
- When in Range Extender mode, the ideal location to place the router is about halfway between your host AP and the Wi-Fi dead zone. The location you choose must be within the range of your existing host network.

Safety Information
- Keep the device away from water, fire, humidity or hot environments.
- Do not attempt to disassemble, repair, or modify the device.
- Do not use damaged charger or USB cable to charge the device.
- Do not use any other chargers than those recommended.
- Do not use the device where wireless devices are not allowed.
- Adapter shall be installed near the equipment and shall be easily accessible.
TP-Link hereby declares that the device is in compliance with the essential requirements and other relevant provisions of directives 2014/53/EU, 2009/125/EC, 2011/65/EU and (EU)2015/863.The original EU declaration of conformity may be found at https://www.tp-link.com/en/ce.
![]() For technical support, replacement services, user guides, and other information, please visit https://www.tp-link.com/support, or simply scan the QR code.
For technical support, replacement services, user guides, and other information, please visit https://www.tp-link.com/support, or simply scan the QR code.

![]() To communicate with TP-Link users or engineers, please join the TP-Link Community at https://community.tp-link.com.
To communicate with TP-Link users or engineers, please join the TP-Link Community at https://community.tp-link.com.![]() If you have any suggestions or needs on the product guides, you are welcome to email [email protected].
If you have any suggestions or needs on the product guides, you are welcome to email [email protected].
References
[xyz-ips snippet=”download-snippet”]