
Portable Thermal PrinterUser’s Manual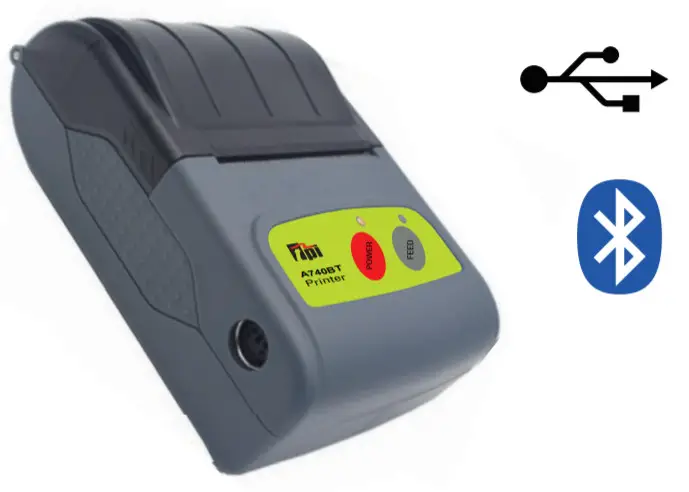
![]()
Attentions:
- The printer should be away from the water and avoid the sunlight, glare, and heat source direct exposure. Avoid any liquid, dust, and metal objects in the interior of the printer.
- The high environment temperature (>45°C) or the low temperature(<5°C) will reduce the print quality.
- The high humidity (>85%RH) or the low humidity (<20%RH) will reduce the print quality.
- Don’t open the cover of the paper bin in the printing process.
- Using low-quality or storage for too long time print paper will reduce the print quality, even damage the printer.
- If there is dirt at the print head, need to use a soft cotton or cotton swab to dip alcohol and wipe it clean to prevent the print head from being worn.
- Don’t touch the print head and retainer directly in order to avoid damaging the print head because of static electricity.Don’t scratch or touch the print head with a hardened object to avoid damaging the print head.
- Please try to use up the battery before charging, which can effectively protect the battery life.
- Please use the power supply attached to the product, or else, it may damage the printer or cause the charging time to extend.
- In the course of an accident, please disconnect the printer power supply, and remove the printer battery immediately.
- If the user disassembles the printer, the company has the right to refuse a warranty on the product.
![]() This printer uses thermal resistance to detect the temperature of the print head. If the print head is overheated, the circuit will cut off the power and stop printing. The overheat temperature of the print head is 80°C.
This printer uses thermal resistance to detect the temperature of the print head. If the print head is overheated, the circuit will cut off the power and stop printing. The overheat temperature of the print head is 80°C.
Storage precautions:
- If not using the printer for a long time, please be sure to remove the battery from the printer, and disconnect the charger’s power supply.
- The storage time of printing content is short using ordinary thermal printing paper. If you want to print the long-term preservation, please select the long-term thermal printing paper.
- The thermal printing paper should not be stored in a high temperature, humidity environment, or direct sunlight. If its package has been opened, please place it in a dark place.
Product introduction

Functions and features
| Items Parameters | ||
| PrintingParameters | Printing Method | Thermal dot line printing |
| Resolution | 203dpi,8 dots/mm | |
| Printing Width | 48mm(384 dots) | |
| Printing Speed | 90mm/s | |
| Communication | Wired | Standard : Micro-USB port |
| Wireless | Optional:2.0 Bluetooth/SPP(for Android),4.0 Bluetooth (for OS) | |
| CommandSets | / | ESC/POS Command sets |
| Storage | RAM | 4KB for receiving buffer |
| FLASH | FLASH: 4MB, NV BMP FLASH:64 KB | |
| Characters | Chinese | GB18030 ,24×24 |
| Characters and faces | ASCII 9×17,12×24 | |
| User-Defined | Support | |
| Language(code page) | Support simplified & traditional Chinese, English, and other 45 kinks of international character sets. | |
| Tables | / | Support dots printing with different densities |
| Support raster bitmap print | ||
| Support to download the bitmap print,the maximum size of each bitmap is not more than 64Kthe total size of the download is 64K. | ||
| Barcode | 1D | UPC-A,UPC-E,EAN-8.EAN13,CODE39,1TF,CODEBAR,CODE128,CODE93,etc. |
| 2D | QR Code | |
| Detection | Sensor | Out of paper |
| Indicators | LED | Power(red),Battery charging/Out of paper(Green), Bluetooth(Blue) |
| PrintingPaper | Type | Standard thermal receipt paper or thermal table paper |
| Width | 57.5±0.5mm | |
| Thickness | 0.056-0.1mm(receipt paper), 0.1-0.12mm(table paper) | |
| External Diameter | 40mm(Max) | |
| Paper Loading | Easy paper loading structure | |
| Physical Features | Paper Tore | Manual |
| OperatingEnvironment | Temperature: -10 C -50 C ,Humidity:25%-80%RH | |
| StorageEnvironment | Temperature:-40 C – 70 C , Humidity:593%RH (40 C ) | |
| Size | 78mmx45mmx112mm((WxDxH) | |
| Weight | 0.9Kg (printer&Battery) | |
| Reliability | Print Head | 150Km |
| Motor | 360,000 hours | |
| Softwares | Drivers | Windows(WIN7/W1N8/W1N10Nista/XP/2000) |
| UBUNTU 12.04 32/64, UBUNTU 14.04 32/64 | ||
| APP | Printer Setting Tool | |
| Power Supply | Battery | Rechargeable Li-ion Battery,7.4 V ,2000mAh |
| Charger | Input:100-240 VAC/0.5A,50/50HZ:Output:12VDC/1A |
Basic operation
3.1 Power on the printer
In power-off status, press down the “Power on/off ” button and hold on for 2 seconds, then the printer will beep once and into working status, the power indicator light (red).Noted: If the “charging indicator (green)” of the printer is flashing, indicating that the battery power of the printer has been less than 20%, please charge it in time.
3.2 Power off the printer
In power-on status, press down the “Power on/off ” button and hold on for 2 seconds, the printer will beep twice then power off, and all the indicators will go out.
3.3 Print self-test page
After the user gets the printer, the printer can be self-test to detect the current settings and working status.When the printer is powered off and the print paper is loaded correctly, press down the “Power on/off ” button and “Feed” button simultaneously, after hearing a beep sound, release the two buttons, the printer will print a self-test page.The self-test page contains information about the current status of the printer, settings, and printing examples, such as the battery power, Bluetooth PIN, Bluetooth BDA, printing language, program version, font, etc.
3.4 Feed paper(manual)
In the normal working status, press the “Feed” button, the printer will feed paper.
3.5 Battery charging
After using a period of time, the printer’s battery power will be consumed, when the printer’s green indicator light flashes slowly, indicating that the battery power has less than 20% and need to charge in time. This printer uses a charger for battery charging which outputs 12VDC/1A. A full charge takes about 4 hours.
The battery charging method:
Insert the AC input plug of the charger into the AC power socket(100- 240VAC, 50/60Hz) and insert the output plug into the power input socket of the printer(12VDC/1A). When charging, the green indicator will flash. When the battery power is sufficient or the battery is fully charged, the green indicator light goes out.
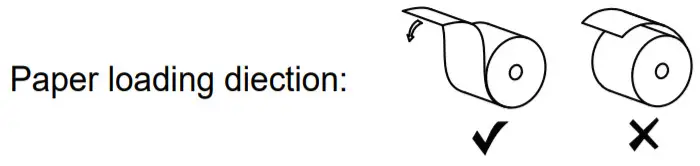
3.6 Paper loading method
Open the cover of the paper bin, draw out the head of the paper roll, and put it into the paper bin in the direction shown below.
Communication connection 1 By Bluetooth
This series of printers can be equipped with Bluetooth 2.0 (SPP) or Bluetooth 4.0 (BLE) communication functions. Bluetooth 2.0 can support communication with the mobile terminal based on the Android system, and Bluetooth 4.0 can support communication with the mobile terminal based on the Apple iOS system.
Bluetooth connection method: After powering on the printer, use the mobile terminal or the other communication equipment with Bluetooth to search the printer, after selecting the corresponding printer, enter the Bluetooth PIN code to connect, after a successful connection, can be used normally. Usually, the Bluetooth PIN code is “0000”, for more details, please refer to the “self-test page”.
4.2 By USB port
Before using the USB port to print communication, you need to use the USB cable to connect the printer and PC.
The USB port can be set to “virtual serial port” or “print port” modes. Usually, the “print port” mode doesn’t need to install the driver, but the “virtual serial port” mode needs it.
The USB port working mode switching method: (1) Power off the printer and load paper correctly →(2) Press down the “Power on/off ” button and “Feed” button simultaneously, loosen them until the printer finished “self-test page” printing →(3) Press down the “Feed” button for 2 seconds again to complete the switch operation (at the bottom of the “self-test page” will have a corresponding description).
Accessories
| Printer | 1PC |
| Battery | 1PC |
| Charger | 1PC |
| USB cable | 1PC |
| Paper roll | 1PC |
| User’s manual | 1PC |
Note: the specific product accessories may be different from this list. if in doubt. please consult your supplier.
Appendix:The instructions of indicating light and buzzer signal
The printer is provided with a buzzer and 3 indicating lights for prompting the printer status, the indicator lights are used to indicate the current state of the printer, and the buzzer is used to indicate the change of the printer status.The details are as follows:
| Operation | Printer status | Power indicator | Out of paperindicator | Bluetooth indicator | Buzzer |
| Press the “Power” button for
2s in the power-off status |
Power ON | ON | OFF | OFF | Beep 1 sound |
| Press the “Power” button for
2s in the power-on status |
Power OFF | OFF | OFF | OFF | Beep 2 sound |
| Over waiting time | Standby | Slowly flash | OFF | OFF | — |
| Press “Feed” button in the power-on status | Feeding paper | ON | OFF | OFF | Beep 1 sound |
| Enough paper | ON | OFF | OFF | – | |
| Out of paper or open the paper bin cover | Slowly flash | Slowly flash | OFF | – | |
| Transmitting data | Bluetooth connect | ON | OFF | ON | – |
| Low battery( < 20%) | Low power status | OFF | Slowly flash
 report this ad report this adOFF |
||
| Inset charger | Charging | OFF | Quickly flash | OFF | – |
| Fully charged | OFF | ON | OFF | – |
Note: if the standby time of the printer is set to 0 seconds, then the printer will immediately into standby after POST, and the power indicator light will still flash.
Contents of this manual without the permission of the company shall not be free to change and replication, we reserve the right to change the product, if the user needs the product further information can contact directly with the supplier.
[xyz-ips snippet=”download-snippet”]