
TRACEABLE Decimal Stopwatch

GENERAL FEATURES
- 4 buttons operation
- Large LCD display with contrast adjustment
- 12/24 hour display
- Normal time and chime
- Daily alarm
- Full 1/100 second chronograph with working range from 0 to 19 hr. 59 min. 59.99 seconds with 100, 300 or 500 memory records of split and lap time.
- Recall function for recorded split and lap times
- Count-Down timer with working range from 0 to 19hr. 59 min. 59.9 seconds
- Three operating modes (Countdown Repeat, Countdown Stop, Countdown then count up) for countdown timer
- Stroke measurement
- Decimal second, minute and hour chronograph As you choose each “mode”, a message will be displayed for a second before you enter the mode:

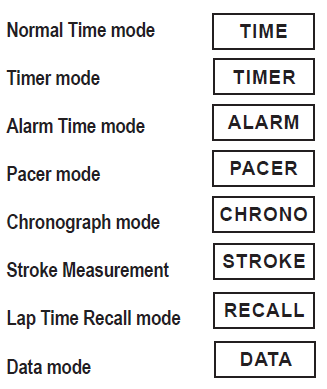
The operation of the stopwatch is divided into modes (as noted above):
- Normal time mode
- Alarm time mode
- Chronograph and Recall mode
- Data mode
- Count-down timer mode
- Pacer mode
- Stroke measurement mode
BUTTON OPERATION
- Mode – used to change the mode of the watch
- Start / Stop / Set – used to start and stop the timer counting or the chronograph function
- Recall – used for recalling recorded split and lap times
- Lap/ Split/ Reset / Select – for taking the record of the split and lap time Press [MODE] button to toggle modes.
Note that there is no auto-return function in the stopwatch. Whenever you change modes, the stopwatch will remain in that mode until the [MODE] button is pressed again. Each time you enter a mode, a message will be displayed for a second before you enter the mode.Note: In the following descriptions, items printed in dark gray stand for flashing digits.
NORMAL TIME MODE
Starting point for operating your stopwatch is NORMAL TIME. If NORMAL TIME is not displayed, press [Mode] until it is.Year: 2001Date : January 1Day of week : MondayTime : 12:00 amThe display format is as below:
During clock display, press [START] to switch between 12Hr and 24Hr display mode. To toggle chime ON or OFF, you can press [RESET]. The bell icon will be ON and OFF correspondingly.
NORMAL TIME SETTINGPress and hold [RECALL] for 2 seconds to enter setting mode. The normal time setting starts with second. The second digits will then be flashing. You can change the flashing digit by pressing [START] button. To speed up the setting you can press and hold [START] for longer than 2 seconds to activate fast setting. To select other digits, press [RESET] button. The setting order is: Second, Minute, Hour, Year, Month, Date, month-date (m-d) or date-month (d-m), Sound ON or OFF, Contrast (darkness of the digits – default is 9), then back to Second, and recycles again. Note: when the second is to be set, press [START] to reset the second digits to zero. At the end of setting, press [RECALL] or [MODE] to exit from the setting mode and back to Normal Time Display.
- Display for Sound ON or OFF setting: Let the current status be “ON”.
- Press [START] to toggle Sound ON or OFF.
- Display for contrast adjustment: Let the current contrast be “5”.
Press [START] consecutively to advance the contrast up to 16, then cycle back to 1. The contrast setting will be shown on the display.
NOTE:
- The hour digits may be displayed in 12hr or 24hr format.
- The year digits can be set from 2000 to 2099. The date adjusts automatically for odd and even months including February of leap years. The day of week also adjusts automatically after you set the date.
ALARM TIME MODEPress [MODE] until you enter Alarm mode. This mode is used for displaying the daily alarm time and allows you to enable or disable the alarm. When you enter the Alarm Time mode, the display shows the alarm time on the upper line while the date is shown in the middle of the display and the normal time is on the lower line. To toggle the alarm ON or OFF, press [RESET]. When alarm is ON, the indicator “(((o)))” will be ON while it will be turned off when alarm is disabled. When alarm time is reached, the alarm signal will sound for 60 seconds. Press any button to stop the alarm sound.
SETTING ALARM TIMEPress and hold [RECALL] for 2 seconds to activate the alarm setting. The alarm “minute” digits will flash as an indication. Adjust the flashing digit by pressing [START]. To set the alarm hour digits, press [RESET] to switch to hour digits and then press [START] to adjust. Press [RECALL] or [MODE] to exit from Alarm setting mode.
CHRONOGRAPH AND RECALL MODEPress [MODE] until you enter the Chrono mode. The stopwatch can measure up to 19 hours. 59 minutes, 59.99 seconds. When you enter the Chronograph mode, the display format is as below. The upper line shows the split time, the middle line shows the lap time and the accumulated elapsed time is displayed on the lower line.
Whenever the stopwatch stops running, the “STOP” indicator will be ON. Press the button [START/STOP] to start the stopwatch. As it runs, the current elapsed time is shown on the lower line. To view the current split/lap time, you can press [LAP/SPLIT]. The number of split/lap times is shown on the upper left corner. The corresponding split and lap times are displayed on the upper and middle line. Press [LAP/SPLIT] again, the next split/lap time will be shown and the number of split/ lap time is updated. The stopwatch can store up to 500 split/lap times) the split/lap times can be stored into the memory as you press [LAP/SPLIT] to view the current split/lap time. Meanwhile, the lap and split time will be frozen for 5 seconds. After this 5-second period, the lap and split time will return to normal.
In addition, the fastest lap, the slowest lap, and the averages of all laps will also be recorded. As you press [STOP] to stop the chronograph, the last lap/split time will also be stored (provided that the last lap/split time is not the first lap/split time). When there are 5 free memories left, the icon “FULL “ will blink to remind you of the nearly full situation. Whenever the storage is full, extra split/lap times will not be stored into memory but will still be shown on the display. Any fastest and slowest laps will not be stored. The memory counter will flash as the extra split/lap times are being displayed. The icon “FULL “ will be steadily ON. To stop the chronograph, press [STOP]. The indicator “STOP” will come on again to show the status. Press [RESET] as the stopwatch stops to reset the stopwatch while the split/lap times will be kept in memory. When the stopwatch starts running from reset state, all the lap memories will be cleared.
DECIMAL TIMING
- The stopwatch can operate as a normal 1/100 second chronograph as well as decimal minute, decimal second, and decimal hour chronograph. As you press [MODE] to enter the chronograph mode, the normal 1/100 second chronograph display will be shown. Reset the chronograph to 00, then press [LAP/SPLIT] to go to the second chronograph mode (1/100s). You will note the change by looking at the bottom of the display to see 1/100s.Change to the 1/1000 of a minute chronograph mode by pressing [LAP/SPLIT] again (1/1000M).
- Go to the 1/10,000 hour chronograph by pressing [LAP/SPLIT] again (1/1 0.000H).
Please note that if the stopwatch has started running (or is running), no selection for chronograph operating modes can be made until the stopwatch has been stopped and reset.Segmented run memory for lap/split time storage:A header consisting of the date/time stamp is attached to each segment to indicate the moment when you began recording the particular timing segment. To get to this feature, press [MODE] in chronograph mode to enter DATA mode when the stopwatch has been stopped. Records tor different segments can be recalled, read or deleted. Detailed operation in “DATA” mode is described in Data Mode section below.
CHRONOGRAPH DATA RECALL MODEPress [RECALL] in Chronograph mode to recall stored split/lap time memories. The mode message will be shown up for one to two seconds as mode message display is enabled.
RECALLThe split and lap time will be displayed on the upper and the middle line, respectively. The lower line shows the current stopwatch counting. During data recall, the fastest lap time will be reviewed first.
TIMER MODEPress [MODE] until you enter the Timer mode. 3 count-down operation modes are available on this stopwatch;
- Count down repeat (CR)
- Count down stop (CS)
- Count down, then count up (CU)
The timer is set at the factory to the count-down repeat (CR) mode. At entering timer mode, the mode message “TIMER” will be shown for a second before the timer counting is to be displayed.
The upper line shows the programmable timer value (initially set at 0:00:00:0) while the middle line displays the current timer counting. Time of Day clock display is at the lower line of the display. “CR” indicates the current timer operating mode while the timer cycle counter is located at the upper left of the display.Before starting the timer , enter a countdown time first. Then press [START] to start timer running. When the timer counts down to zero, a 3 second “beep … beep” sound will be generated for a timer setting within one minute; 15 second “beep … beep “ sound for 1 minute to 10 minutes setting and 30 second “beep … beep” sound for over 10 minutes. Pressing any key will stop the beep sound.Under CR operation mode, the timer value will be reloaded and count down will start again. The timer cycle counter will be increased by one and updated on the display.Under CS operation mode, the timer, after counting down to 0:00’00”, will stay at 0:00’00”0 until you press [RESET] to reload the timer value.Under CU operation mode, the timer, after counting down to 0:00’00”0, will count up and stop at 19:59’59”9.
HOW TO SET THE TIMERPress and hold [RECALL] for 2 seconds to activate timer setting . Timer setting starts with second digits, which are shown blinking. You can press [START] to advance the flashing digits. Or you can press [RESET] to select other digits. The setting is in sequence of second, minute, hour and timer operating mode (CR, CS and CU).NOTE: You can only set Hour, Minute and Seconds. The 1/10 second cannot be set.
PACER MODEPress [MODE] until you enter the Pacer mode. In the Pacer mode, you can set the standard pacer speed from 5 to 240 beats per minute in the following values:5, 10, 20, 30, 40, 50, 60, 80, 100, 120, 150, 180, 200, 240
The digits are flashing to indicate that the pace count is ready for setting. Press [RESET] to select the pace count. Once the desired pace count is selected, press [START] to confirm the setting and start the pace count. The display will show the elapsed time on the upper line, the pace count number on the middle.
WARRANTY, SERVICE, OR RECALIBRATION
For warranty, service, or recalibration, contact:
TRACEABLE® PRODUCTS12554 Old Galveston Rd. Suite B230Webster, Texas 77598 USAPh. 281 482-1714 • Fax 281 482-9448E-mail [email protected] • www.traceable.comTraceable® Products is ISO 9001:2018 Quality-Certified by DNV and ISO/IEC 17025:2017 accredited as a Calibration Laboratory by A2LA.
 report this ad
Traceable® is a registered trademark of Cole-Parmer.©2020 Traceable® Products. 92-1031-30 Rev. 5 040220![]()
References
[xyz-ips snippet=”download-snippet”]