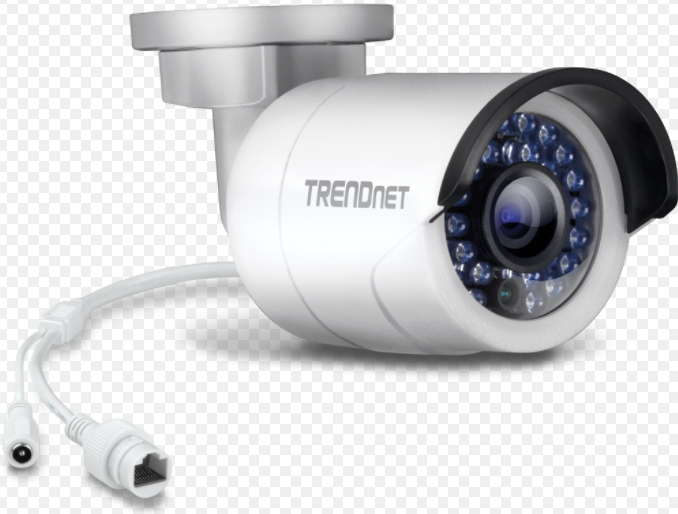
TRENDNET indoor / Outdoor 3 MP HD PoE IR Network Camera
Before You Start
Package Contents
- TV-IP312PI
- CD-ROM (Utility and User’s Guide)
- Quick Installation Guide
- Mounting kit
Minimum Requirements
- Power over Ethernet (PoE) switch (e.g. TPE-S50) or PoE Injector (e.g. TPE-113GI)
- A networked computer and web browser
- Wired network
- Network cable
Note: The TV-IP312PI only works with Power over Ethernet (PoE) devices that follow the IEEE 802.3af standard.
Free Mobile App: TREND net IP View RequirementsSupported Operating SystemsAndroid (version 2.3.3 or above)iOS (version 5.1.1 or above)
Hardware Installation and Configuration
- Do not install or mount the IP camera until after you complete the installation steps below. Temporarily place the IP camera next to your computer.
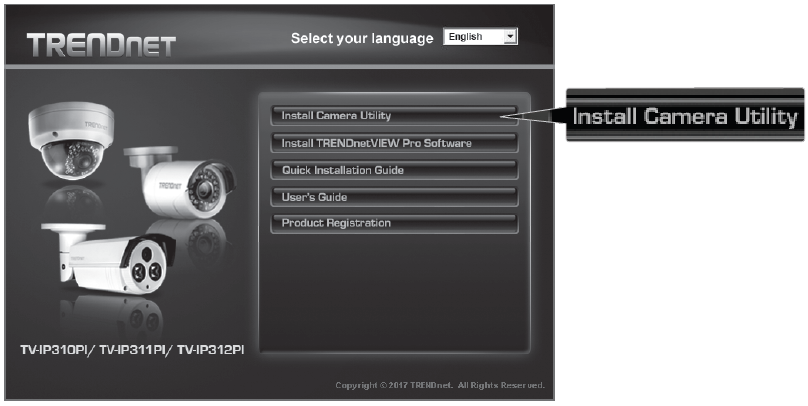
- Insert the Utility CD-ROM into your CD-ROM drive.

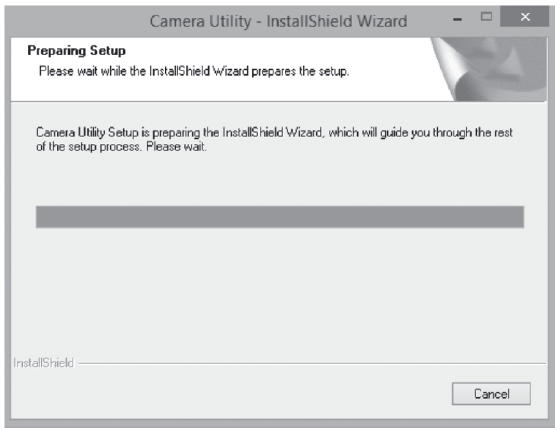
- Click Install Camera Utility.
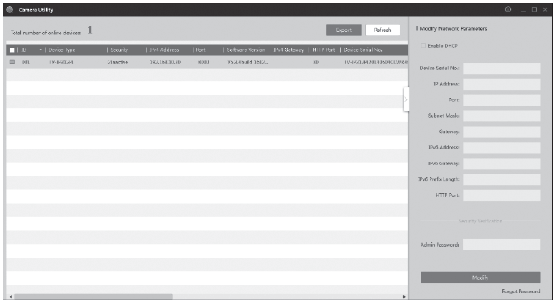
- Run the utility and you will see your camera is set to Inactive under security.
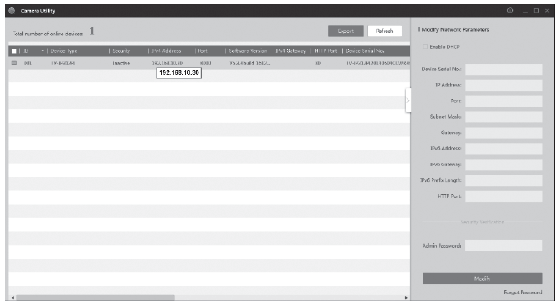
- After the utility is done scanning. Click on the IP address section of the camera you would like to access.
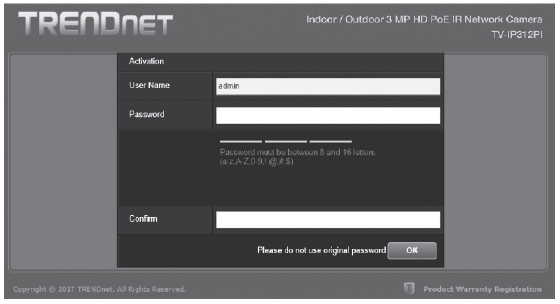
- Once you get to the login page you will be prompted to change the password. Please follow the password requirements and enter your new password.
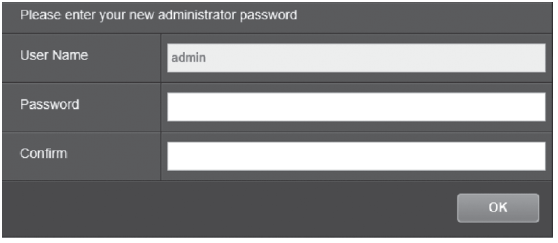
- Once you login the camera will prompt you for a password change. Please change the default password.
- Now you can access the camera’s configuration page for Live view and additional settings. For more details, please refer to the User’s Guide.
- Scan the QR code below to download a free mobile app to view the camera from your IOS or Android device. Please refer to the quick install guide for instructions on how to setup your camera in the app from your cameras download page at www.TRENDnet.com.
Using the TV-IP312PI with a PoE switch (TPE-S50)
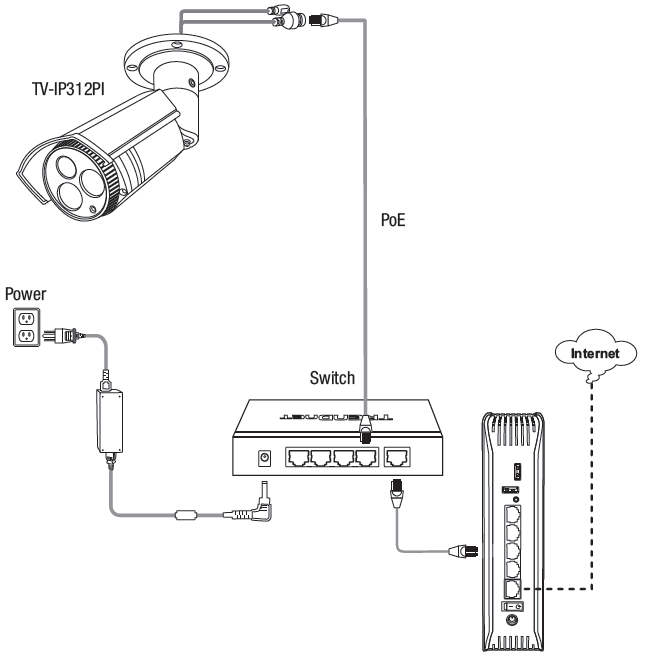
- Connect the provided network cable from the Power over Ethernet switch (e.g. TPE-S50) to the network port on the IP Camera.
- Connect the switch to your network.
Mounting the camera
Note: For tips on capturing appropriate camera viewing angle, please refer to the user’s guide.
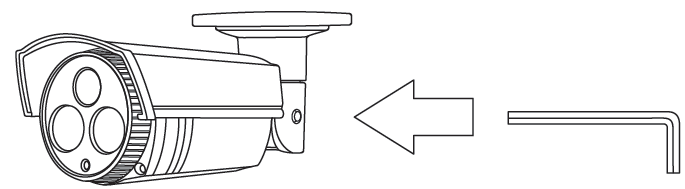
- Loosen the adjustable nut and manually position the camera as desire.
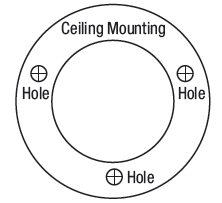
- Place the provided template label on the wall or ceiling.
- Drill holes at each marked position on the template. Make sure the drill bit matches the size of the holes on the template.
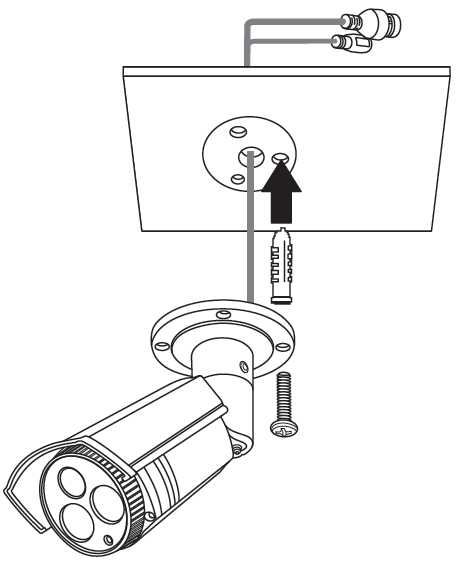
- Insert the provided screw anchors into the holes.
- Insert the cables through the hole in the wall or ceiling.
- Align the mounting bracket with the screw anchors, and then use the provided screws to secure the camera to the mounting surface.
- Manually adjust the zoom and focus. Using the free app, confirm the zoom and focus matches installation requirements.
- Refer to User’s Guide for more details on installation and configuration.

Declaration of Conformity
Manufacturer’s Name and Address
TREND net, Inc.20675 Manhattan PlaceTorrance, CA 90501 USAZwolsestraat 156 2587 WBThe Hague The Netherlands
Product Information
Product Name: Indoor/Outdoor 3MP HD PoE IR Network CameraModel Number: TV-IP312PITrade Name: TREND net
TRENDnet hereby declare that the product is in compliance with the essential requirements and other relevant provisions under our sole responsibility.This product is herewith confirmed to comply with the Directives.
Directives:
Directive LVD 2014/35/EUDirective EMC 2014/30/EUDirective RoHS 2011/65/UEREACH Réglement (CE) N° 1907/2006
Person responsible for this declaration.Place of Issue: Torrance, California, USA Date: January 05, 2017Name: Sonny Su Title: Director of TechnologySignature:
Certifications
This device complies with Part 15 of the FCC Rules. Operation is subject to the following two conditions:(1) this device may not cause harmful interference, and(2) this device must accept any interference received.Including interference that may cause undesired operation.
Waste electrical an electronic products must not be disposed of with household waste. Please recycle where facilities exist. Check with your Local Authority or Retailer for recycling advice.
Applies to PoE Products Only: This product is to be connected only to PoE networks without routing to the outside plant.NoteThe Manufacturer is not responsible for any radio or TV interference caused by unauthorized modifications to this equipment. Such modifications could void the user’s authority to operate the equipment.
Product Warranty RegistrationPlease take a moment to register your product online. Go to TRENDnet’s website at: www.trendnet.com/register
![]()
References
[xyz-ips snippet=”download-snippet”]