![]()
Quick Start Guide
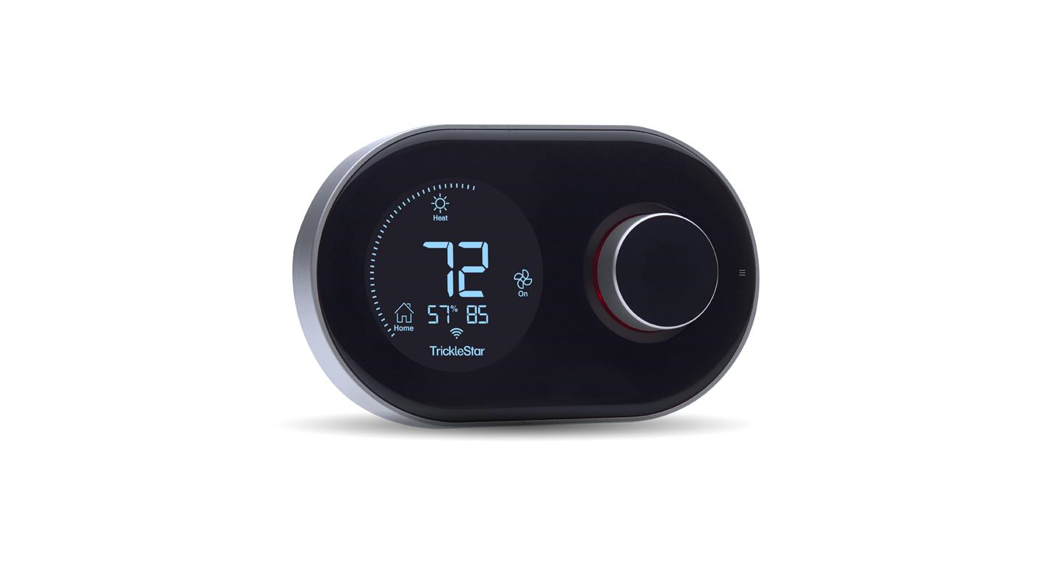
TS2501 Wi-Fi Smart ThermostatIt is easy to install and set up the TrickleStar Wi-Fi Smart Thermostat. For details on the installation, refer to the online Installation Guide:
www.tricklestar.com/Resources/TS2501-Wi-Fi-SmartThermostat-Installation-Guide.pdf

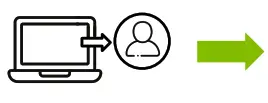
Website: www.tricklestar.comEmail: [email protected]Toll-Free: 1-888-700-1098Installation Workflow for HomeownerBefore you start the installation, be sure to check the Thermostat compatibility and create a Portal account.

https://portal.tricklestar.com/tstat/compatibility
A. Check compatibility– Is the TrickleStar Thermostat compatible with your HVAC system?– Is the C-Wire Kit needed? https://portal.tricklestar.com/tstat/compatibility

https://portal.tricklestar.com
B. Create and log in to PortalCreate a Portal account using the QR code or through the website: portal.tricklestar.com Then, log in to the Portal.

https://portal.tricklestar.com/AddThermostatStart01
C. Add your device and start the Thermostat Setup Wizard
Installation Workflow
 Step 1Install the TrickleStar Thermostat.

Step 2Connect the TrickleStar Thermostat to Wi-Fi via the Portal and complete the Start-Up Configuration.

Step 3Select the settings for the TrickleStar Thermostat. (Optional)

Step 4Add the TrickleStar App. (Optional)
Installation Workflow for Contractor
Before you start the installation, be sure to check the Thermostat compatibility and create a Portal account.
https://portal.tricklestar.com/tstat/compatibility
A. Check compatibility– Is the TrickleStar Thermostat compatible with your HVAC system?– Is the C-Wire Kit needed? https://portal.tricklestar.com/tstat/compatibility
https://portal.tricklestar.com
B. Create and log in to PortalCreate a Portal account using the QR code or through the website: portal.tricklestar.comThen, log in to the Portal.
https://portal.tricklestar.com/AddThermostatStart01
C. Add your device and start the Thermostat Setup Wizard

D. At Thermostat Setup Wizard, create a new site for the homeowner
Step 1Install the TrickleStar Thermostat.
Step 2Connect the TrickleStar Thermostat to Wi-Fi via the Portal and complete the Start-Up Configuration.
Step 3Select the settings for the TrickleStar Thermostat. (Optional)
Step 4Transfer ownership to the homeowner.
Step 5Add the TrickleStar App on the homeowner’s smartphone. (Optional)
Thermostat LCD Display
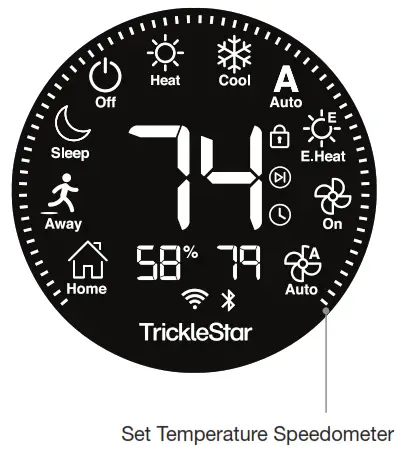
| Home IndicatorModes: Home | Wi-Fi IndicatorIndicates Wi-Fi connection and its signal strength | ||
| Away IndicatorModes: Away | Bluetooth IndicatorWhen connected to one or more occupancy sensors.Flashes: The thermostat is scanning for occupancy sensor | ||
| Sleep IndicatorModes: Sleep | Key-Lock IndicatorIndicates the input is locked | ||
| Off IndicatorSystem: Off | Hold IndicatorIndicates Permanent Hold / Vacation Hold.Flashes: Temporary Hold | ||
| Heat IndicatorSystem: Heat | Schedule IndicatorIndicates a schedule is in progress | ||
| Cool IndicatorSystem: Cool | Humidity IndicatorDisplay the room humidity in percentage | ||
| Auto IndicatorSystem: Auto | Room Temperature IndicatorDisplay the room temperature | ||
| E.Heat IndicatorSystem: EmergencyHeating | Set Temperature IndicatorDisplay the set temperature | ||
| Fan On IndicatorFan: On | TrickteStar | TrickleStar LogoBrand (Always on) | |
| Fan Auto IndicatorFan: Auto |
Thermostat Features

| User Interface Functions | Functions |
| Jog Dia | • Press once to set the Modes (Home, Away, or Sleep)• Rotate clockwise to increase the Set Temperature or to select the next setting• Rotate counterclockwise to reduce the Set Temperature or to select the previous setting• Press again to confirm your selection |
| Side Button | • Press once to set the System (Off, Heat, Cool, Auto, or E.Heat)• Press twice to set the Fan (On or Auto)• Hold for 10 seconds to enter the System Configuration Mode |
| System Reset Pinhole | Use a paper clip to press this button for system reset |
Jog Dial Backlight
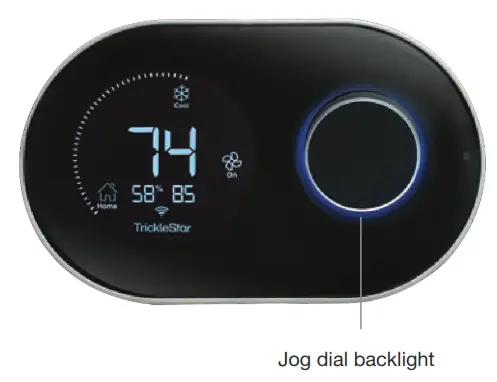
Jog Dial Backlight
| WhiteIn configuration mode or setting mode | |
| GreenWhen there is demand/response activity | |
| RedWhen Emergency Heating is turned on (heat pump only) | |
| BlueWhen Cooling is turned on | |
| OrangeWhen Heating is turned on |
OffWhen Emergency Heating, Heating and Cooling are turned off
Tricklestar Portal
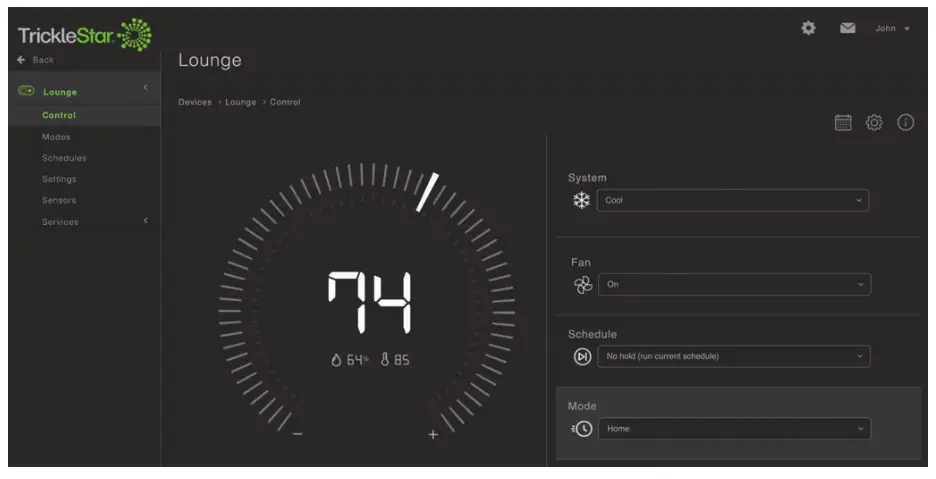
At the Devices page, you can use the icons under Action to change the settings for your device.

| Portal Icons | Description | Functions |
| Control | Change the Set Temperature, System, Fan, Schedule/Hold and Modes, and viewhumidity and room temperature | |
| Modes | Set Heat/Cool Set Temperature and Fan for Home, Away, Sleepand Vacation mode | |
| Schedules | Add/edit/delete your daily/weekly schedule events | |
| Usage | Monitor daily/weekly/monthly energy usage and create a summary report | |
| Settings | Set advanced settings for your Thermostat | |
| Alerts | Set Low or High Temperature and Humidity alerts |
Click on your Device Name to go to the Control page. You can change the settings for the Thermostat. You may also access to the Modes, Schedules, Settings, Sensors, and Services pages on the left panel.
Tricklestar App
Be sure that you have created a Portal account via portal.tricklestar.com
- Enable the Wi-Fi and Location Services on your smartphone.
- Download and install the Tricklestar App from the Google Play Store or Apple App Store.
- Sign in to the Tricklestar App with your registered email and password.
 report this ad
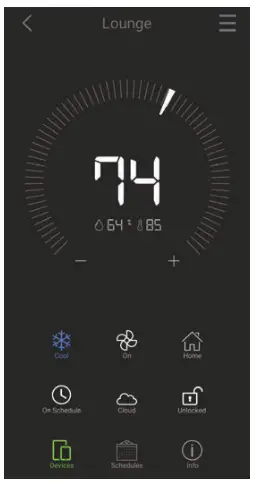
| App Icons | Description | Functions |
| Devices tab | Set the System, Fan, Modes, Schedule/Hold, Cloud/LAN Mode, and Input Lock | |
| Schedules tab | View the daily/weekly schedule events and set Vacation settings | |
| Info tab | View Mode settings, Device Info, Sensors, and Services settings | |
| System | System option: Off, Heat, Cool, Auto, E.Heat | |
| Fan | Fan option: On, Auto | |
| Modes | Modes option: Home, Away, Sleep | |
| Schedule/Hold | Schedule mode or Temporary/Permanent Hold | |
| Cloud/LAN | Cloud (different network) or LAN mode (same network) | |
| Input Lock | Input Lock or Unlock |
References
[xyz-ips snippet=”download-snippet”]