![]()
![]()
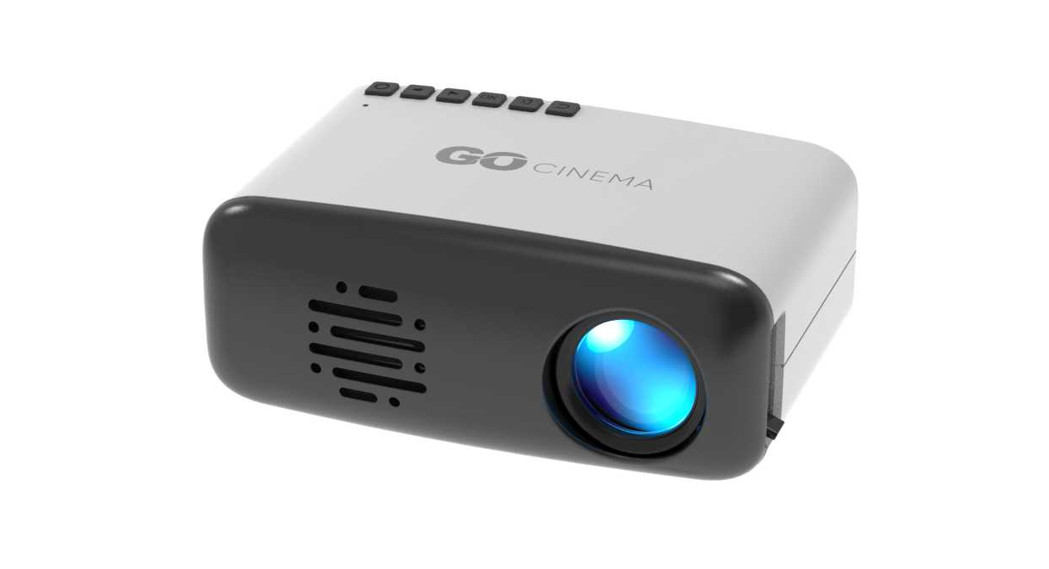
LED Home Cinema Projector HD 1080pBring theTHEATERANYWHERE!USER MANUAL
INTRODUCTION
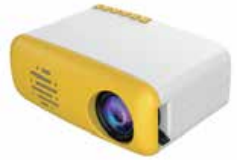
Enjoy your favorite media – whether it be video games, movies, photos, and text – with dynamic, enhanced visuals and the convenience of portability. GO Cinema is a compact projector that delivers a distinctive, home theater experience anywhere you like. Be it indoors or outdoors – all you’ll need is the right darkened space, a solid place to project, and the perfect vibes will be set in motion thanks to you and the GO Cinema!* Please read this manual carefully before using and/or setting up the Go Cinema, and keep it handy for future reference, as needed.
FEATURES
- A 60” dynamic image
- LED lifetime up to 30,000 hours
- Works best for in-home, dark environment video entertainment
WHAT’S IN THE BOX?
1- Go Cinema projector1- Wireless Remote1- Lens Cover1- AC Power Adapter1- HDMI Cable1- AV/RCA Cable1- User Manual
LET’S GET STARTED
- Connect the power cable (DC12V 2A) on the right side of the projector then plug it into an available outlet.

- Once the plugged in, the control keys on top of the projector will light up.
- Press the POWER button on the projector or the remote control to turn on the projector.


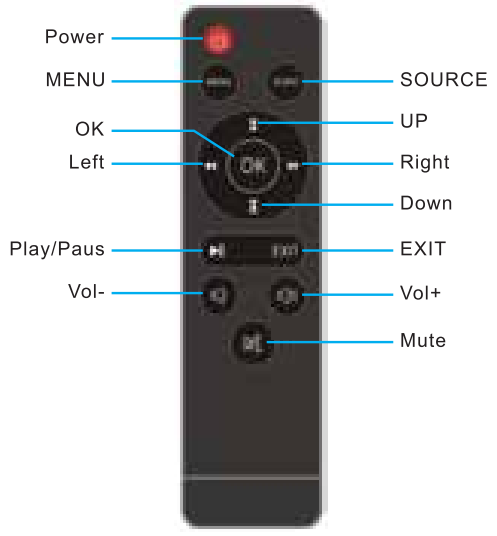
LET’S TAKE A LOOK AT THE REMOTE
* PLEASE NOTE: The Go Cinema’s remote is powered by two AA batteries. Please insert them before use.
LET’S GET STARTED – THE BOOT SCREEN
- When the Go Cinema powers up, after two to five seconds the main display will be shown as below and the pictures will flash. You can use the arrow button(s) on the remote, or the arrow buttons on the top of the Go Cinema itself, to make the appropriate selection.

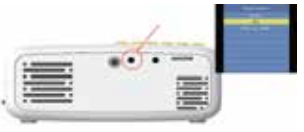
- To adjust the image/focus, turn the knob just above the lens while observing the on-screen image pixels near the center of the screen. Optimal focus occurs when the on-screen pixels are clearly visible. Depending on how large your (projected) screen is, the focus near the edges of the screen may be less sharp than those at the center of the screen.
- A Keystone image (the Keystone Image Adjustment knob is located just behind the Focus knob) is created when the Go Cinema’s beam is projected on the screen at an angle. Keystone correction will restore the distorted image to a rectangular or square center.
LET’S GET CONNECTED!
When connecting a signal source to the Go Cinema, be sure to:
- Use the correct type of cables for each source
- Be sure the cables are firmly inserted
- In the connection illustrations shown below, some cables may not be included with the projector (see WHAT’S IN THE BOX?). They are commercially available online and/or from electronics stores.

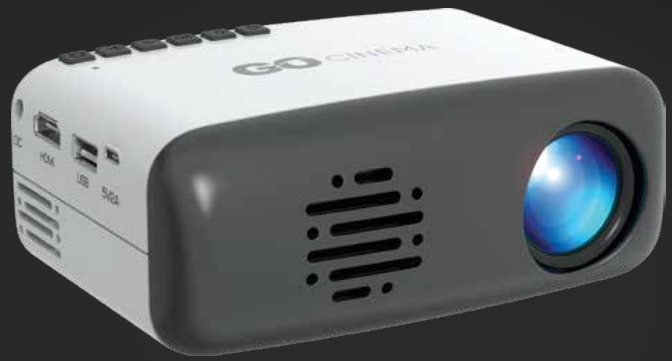
USING HDMI DEVICES
HDMI (High-Definition Multimedia Interface) supports uncompressed video data transmission between compatible devices such as: Laptops, DTV tuners, DVD players, Blu-ray players, Chromecast, Fire TV, etc. HDMI transmits both video and audio signals via a single cable. You should use the included HDMI cable when making a connection between the Go Cinema and compatible HDMI devices. The HDMI port is on the right-side panel of the Go Cinema and is marked “HD.”

Supported file 576P,480P,720P,1080P,640X480,800X600,1024 X768,1280X1024,1280X720,1440X900,1920X1080,1366X768,1 280X800,1440X960,1600X1200,1680X1050.
USING AN AV/RCA CONNECTION
Follow the diagram below to connect the Go Cinema to a device that has RCA (yellow/red/white) inputs. You should use the included AV/RCA cable when making a connection between the Go Cinema and compatible AV devices. The female AV/RCA connector is on the right-side panel of the Go Cinema and is marked “AV.”
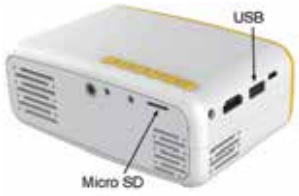
USING A USB CONNECTION OR MICRO SD CARD TO PLAY MEDIA\
Insert a USB stick with media into the USB socket located on the right side of the Go Cinema (it is marked ‘USB’).The Micro SD slot is on the back and marked ‘Micro SD’.
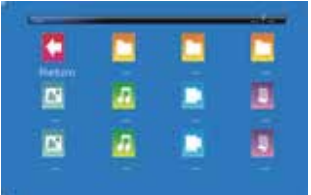
 When you select the Media icon, you’ll see the Go Cinema screen as below.
The USB/Micro SD media port supports the following media formats:
| System requirement | ||
| Multi–media | Audio file | MP3/VVMA/OGG/AAC/ FLAC/APENVAV |
| Image files | JPEG/BMP/PNG | |
| Video file | Full Format Support | |
| Text file | TXT |
From this menu, you can use the remote (or the keys on top of the projector) to choose the content you wish to display: Photos, Music, Video, or Text.

Once you’ve chosen, you can then select (again, using the remote or the keys on top of the projector) the subfolder and/or file you wish to display.
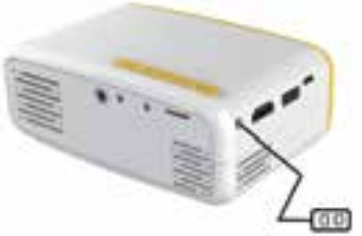
USING THE AUDIO/3.5MM CONNECTION
This jack can be used to connect 3.5mm headphones or external speakers. It is located on the back of the Go Cinema.
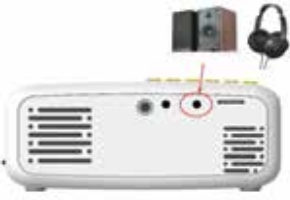
Image menuUsing the remote control: Press the MENU key then the main menu will appear on your display; press the LEFT or RIGHT keys to choose the IMAGE submenu; press the UP or DOWN keys to choose the display mode you wish to adjust then press the OK key to confirm your selection.
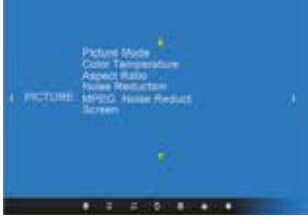
In the IMAGE submenu, you can select the following modes: Picture Mode (text, video, picture, user-defined); Color Temperature (cold, hot, user-defined); Aspect Ratio (auto, 4:3, 16:9, point-to-point, panoramic, zoom1, zoom2, just scan), and Noise Reduction (close, low, middle, high).
Audio submenuUsing the remote control: Press the MENU key then the main menu will appear on your display; press the LEFT or RIGHT keys to choose the AUDIO submenu; press the UP or DOWN keys to choose the display mode you wish to adjust then press the OK key to confirm your selection.
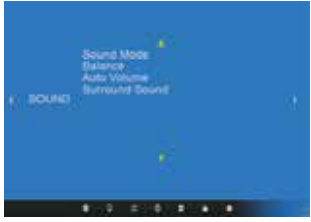
In the AUDIO submenu, you can set the Sound Mode (music, power, sports, user-defined); Balance (-50 to+50; 120Hz, 500Hz, 1.5Hz, 5Hz, 10Hz), Auto Volume (on or off) and Surround Sound (close, surround, SRS).Time submenuUsing the remote control: Press the MENU key then the main menu will appear on your display; press the LEFT or RIGHT keys to choose the TIME submenu; press the UP or DOWN keys to choose the display mode you wish to adjust then press the OK key to confirm your selection.

In the TIME submenu, you can set the Clock (standard or 24 hr./military); Off Time; On Time; Sleep Timer (30 min., 60 min., 90 min., or user-defined), and Auto Sleep.
Option submenuUsing the remote control: Press the MENU key then the main menu will appear on your display; press the LEFT or RIGHT keys to choose the OPTION submenu; press the UP or DOWN keys to choose the display mode you wish to adjust then press the OK key to confirm your selection.

In the OPTION submenu, you can set the Text Language (23 choices); Restore the Projector Back to Factory Default Settings; Auto Set the Color Range, and Update the Software/Firmware via the USB port.
SPECS
Display Native Resolution: 320 x 240Contrast: 800:1HDMI Supported Video Resolution: 1920 x 1080Power Consumption: 10W – 24W (operating)Display Color: 16.7KProjection Size: 24-60”Supported Signal/Input Ports: USB/HDMI/Micro SD Card/3.5mm/AV-RCADimensions: 5.1” x 3.6” x 2” (129 x 91 x 52mm)
IMPORTANT SAFEGUARDS
- Use the Go Cinema only as intended and as described in this manual.
- Do not look into the Go Cinema’s lens while the projector is working.
- Do not put any cloth (or other materials) over the ventilation holes of the theater.
- The Go Cinema is not water-proof, so do not get it wet or place a vase, cup, bowl, etc. anywhere near it.
- The Go Cinema should be always be used (and stored) in a dry and clean place.
- If the Go Cinema is not in use for a long period, be sure that it is off and the power cord is unplugged.
- Please use the factory original foam and other shockproof materials when transporting the Go Cinema.
- If the Go Cinema is defective or broken, do not attempt to repair it yourself. Please contact Izumi customer support to arrange for proper repair protocols.
- To avoid the risk of electric shock, do not disassemble (or attempt to repair) the Go Cinema in any way, shape, or form.
If you have any other questions or issues with product use and/or care, please contact Izumi Technical Support at:[email protected] or call us at: 1855-GO-TZUMI.tzumi™ Inc. Distributed by Izumi Inc. NY, NY 10016. © Copyright 2020 Izumi Inc. All Rights Reserved. Made in China.Other trademarks and trade names are those of their respective owners. Subject to change without prior notice.
![]()
Go Cinema Projector Distributed by Izumi Inc. NY, NY 10016. © 2020 Izumi Inc.All Rights Reserved. Made in China. Other trademarks and trade names are those of their respective owners. All pictures shown are for illustration purposes only. The actual product may vary due to product enhancement. Subject to change without prior notice.
 report this ad
![]()
[xyz-ips snippet=”download-snippet”]