![]()
uAvionix AV-Link EXPQUICK START GUIDE
Specifications
| Input Voltage/PowerSizeWeightOperating temperature rangeMaximum pressure altitude | 9 to 30.3 VDC52.06 x 52.63 x 25.91 mm32.2 grams-45°C to +70°C35,000ft |
Limited Warranty
uAvionix products are warranted to be free from defects in material and workmanship for two years from the installation of tail beacon on the aircraft. For the duration of the warranty period, uAvionix, at its sole option, will repair or replace any product which fails in normal use. Such repairs or replacement will be made at no charge to the customer for parts or labor, provided that the customer shall be responsible for any transportation cost.
Restrictions: This warranty does not apply to cosmetic damage, consumable parts, damage caused by accident, abuse, misuse, fire or flood, theft, damage caused by unauthorized servicing, or a product that has been modified or altered.
Disclaimer of Warranty: IN NO EVENT, SHALL UAVIONIX BE LIABLE FOR ANY INCIDENTAL, SPECIAL, INDIRECT, OR CONSEQUENTIAL DAMAGES, WHETHER RESULTING FROM THE USE, MISUSE, OR INABILITY TO USE THE PRODUCT OR FROM DEFECTS IN THE PRODUCT. SOME STATES DO NOT ALLOW THE EXCLUSION OF INCIDENTAL OR CONSEQUENTIAL DAMAGES, SO THE ABOVE LIMITATIONS MAY NOT APPLY TO YOU.Installing AV-Link 1
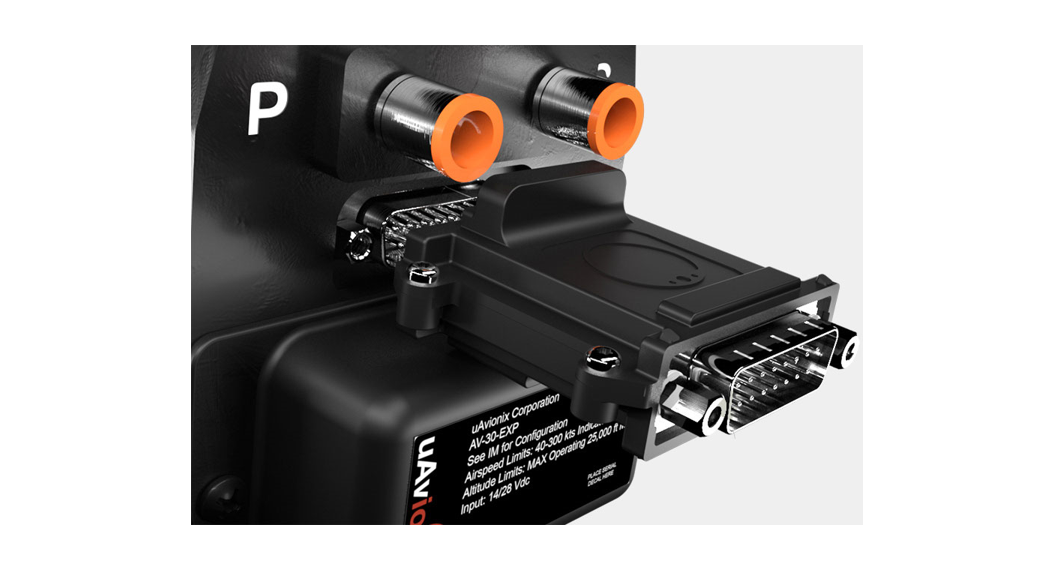
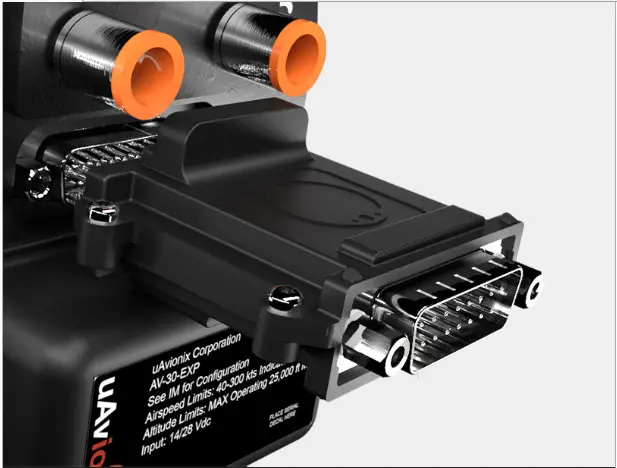
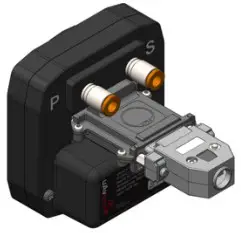
Attach AV-Link to AV-30
Attach the AV-Link to the back of the AV-30 by inserting the unit into the DB-15 connector on the back of the AV-30.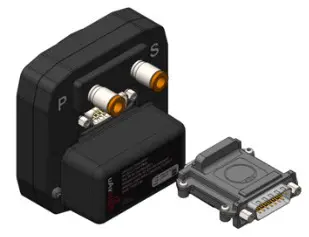
Tighten Jack Screws (2x)Using a 3/16” nut driver, tighten the two [2] Jack Screws to 5 in-lbs max. DO NOT overtighten.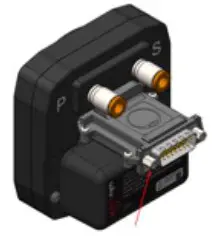
Reattach original back-shell connectorUsing a flat screwdriver, tighten the two [2] screws to 5 in-lbs max. DO NOT overtighten.
Update AV-30 Software 2
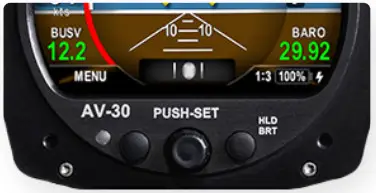
Power on the AV-30Power on the AV-30 after the link has been installed.
Connect PC via Wi-FiConnect a PC to the AV-Link Wi-Fi Network (AV_XXXX).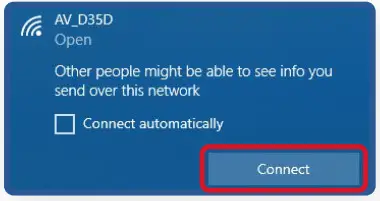 Open Web BrowserIn a Web Browser, navigate to the AV-Link home page via the following URL: 192.168.4.1
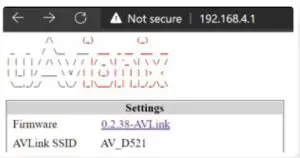
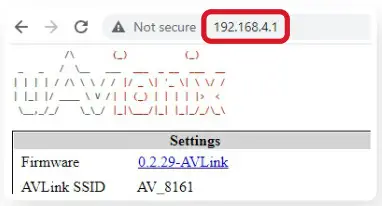
Select AV Firmware UpdateAt the bottom of the page select AV Firmware Update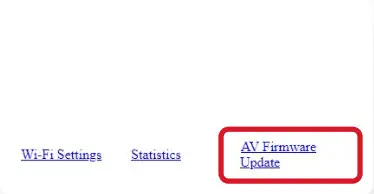
Update AV-30 Software 2
Choose Update FileStart the Update Select Choose File, then select the downloaded AV-30 firmware.Download Firmware:http://uavionix.com/downloads/service_bulletins/displays/AV-30-E/2.0.3/UAV1004037-001-av30e-2_0_3-68867db.bin
Choose Update FileSelect Choose File, then select the downloaded AV-30 firmware.Download Firmware:http://uavionix.com/downloads/service_bulletins/displays/AV-30-E/2.0.3/UAV1004037-001-av30e-2_0_3-68867db.bin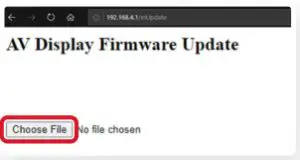
Start the UpdateOnce the file has been selected,Click Start UpdateDO NOT power off the unit or close the web browseruntil the update is complete.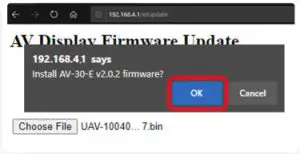
AV-30 will RebootThe screen on the AV-30 will go black while the device reboots
Update Complete Verify Firmware VersionAfter the reboot, the AV-Link homepage will be displayed.
Connect ADS-B Receiver 3
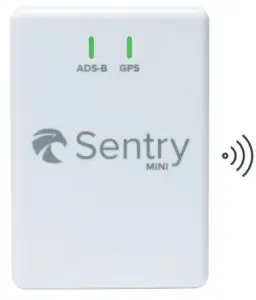
 Auto ConnectBy default, AV-Link will automatically identify preferred uAvionix™ ADS-B devices and connect to the earest device, making the initial use very simple.AV-Link will automatically connect to the nearest:• Sentry• Sentry Mini• SkyEcho• echo• sensor
![]() Manually ConnectIf a custom ADS-B Receiver is desired, AV-Link can be connected to nearly any GDL90 receiver via the AV-Link Wi-Fi setup page, accessible by a web browser at: 192 .168.4.1Please refer to section 13.5 of the AV-30-E Pilot Guide to configure a custom ADS-B Receiver.
Manually ConnectIf a custom ADS-B Receiver is desired, AV-Link can be connected to nearly any GDL90 receiver via the AV-Link Wi-Fi setup page, accessible by a web browser at: 192 .168.4.1Please refer to section 13.5 of the AV-30-E Pilot Guide to configure a custom ADS-B Receiver.
Traffic Display on AV-30 4
 Power on the supportedADS-B Receiver Power on the supportedADS-B Receiver |
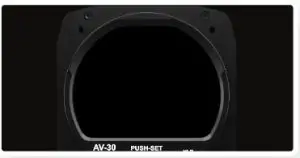
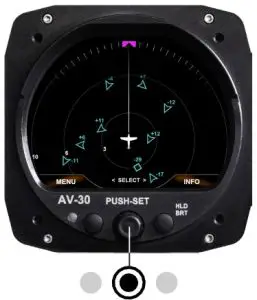 Hold center knob for 3 seconds to change screens. Traffic Display is the third screen. Hold center knob for 3 seconds to change screens. Traffic Display is the third screen. |
 report this ad
![]()
Please reference the AV-30-E Pilot Guide fordetailed operating instructions.Go to AV-30-E Pilot Guide
![]() Copyright 2021, All Rights ReserveduAvionix.com
Copyright 2021, All Rights ReserveduAvionix.com
References
[xyz-ips snippet=”download-snippet”]