![]()
H-4415, H-4416, H-8140
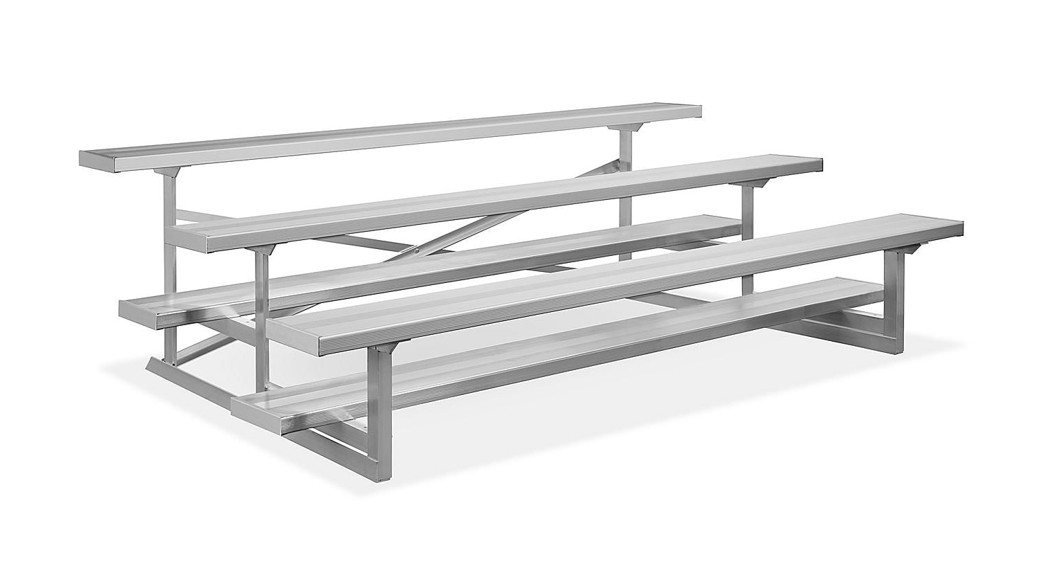
ALUMINUM BLEACHER MOUNTING HARDWARE FOR GRASS.
1-800-295-5510uline.com
TOOLS NEEDED

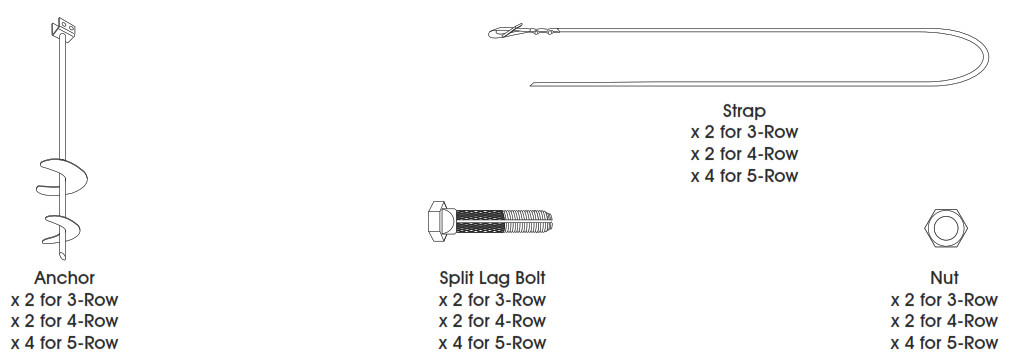
PARTS
INSTRUCTIONS
 WARNING! Before ground anchor installation, determine that the anchor locations around bleachers will not be close to any underground electrical cables, water lines or sewer piping. Failure to determine the location of electrical cables may result in serious personal injury.
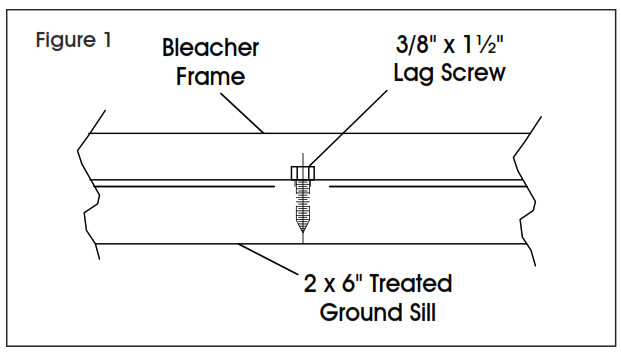
1. Before assembling the bleachers, attach the bleacher frame to the 2 x 6″ treated ground sill (not included) with 3/8″ x 11/2″ lag screws (not included). (See Figure 1)
2. Anchor will be on each end of the bleacher. The Bleacher frame needs to rest on a 2 x on the treated ground sill (not included).![]() NOTE: Anchors require using either an electric auger or post hole digger and backfilling the holes.
NOTE: Anchors require using either an electric auger or post hole digger and backfilling the holes.
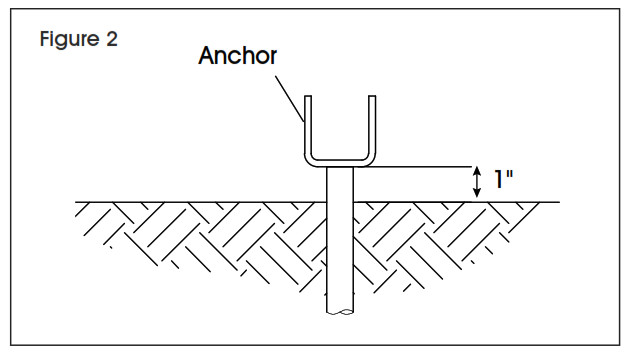
3. Thread the auger end of the anchor into the ground, so the tip is 1″ above the ground. (See Figure 2)
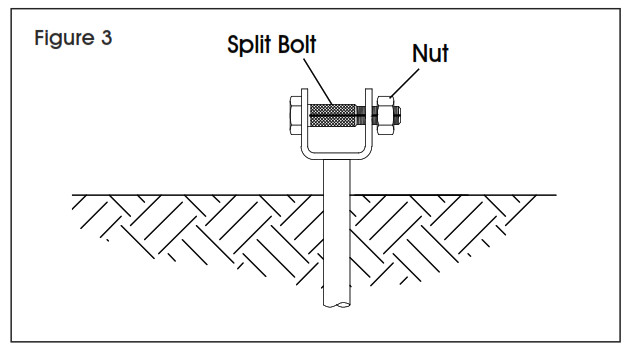
4. Insert split lag bolt through holes in the end of the anchor and secure loosely with nuts. (See Figure 3)
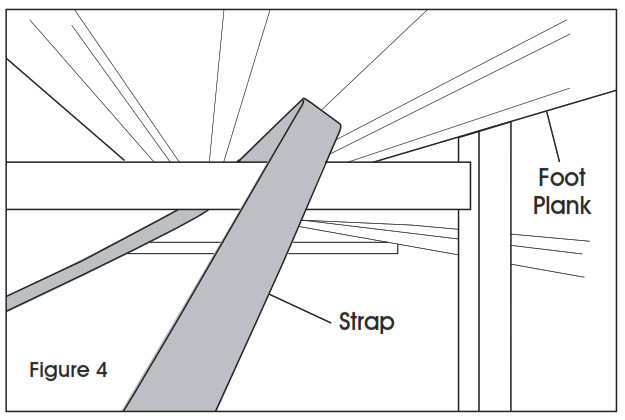
5. Insert the strap over the frame under the foot plank. The buckle of the strap should end just below the bleacher frame and thread through buckle. (See Figure 4)
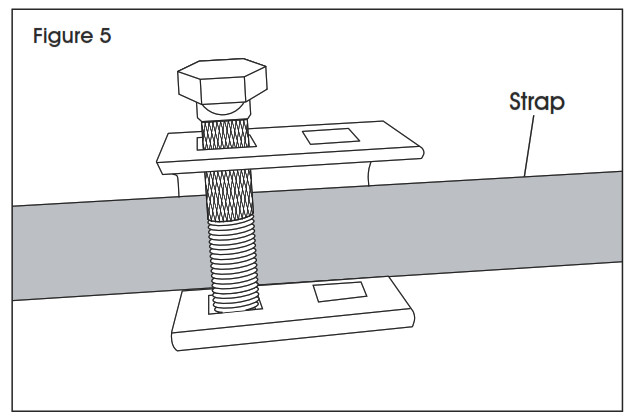
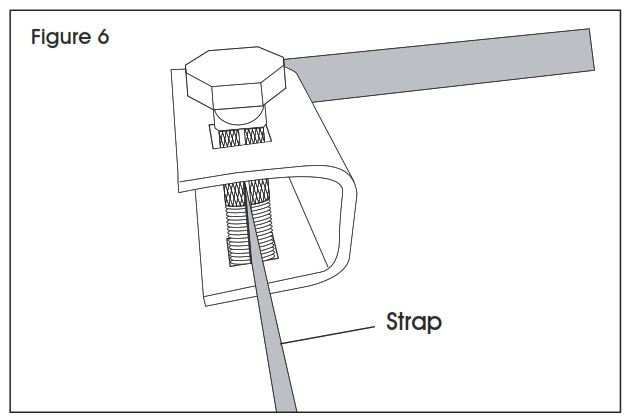
6. Slide the strap through split bolt. (See Figures 5-6)![]() NOTE: Split bolt can be used in either hole and from either side.
NOTE: Split bolt can be used in either hole and from either side.
7. Slide the end of the strap through the buckle, pull out slack and tighten. Repeat for other end. (See Figure 7)
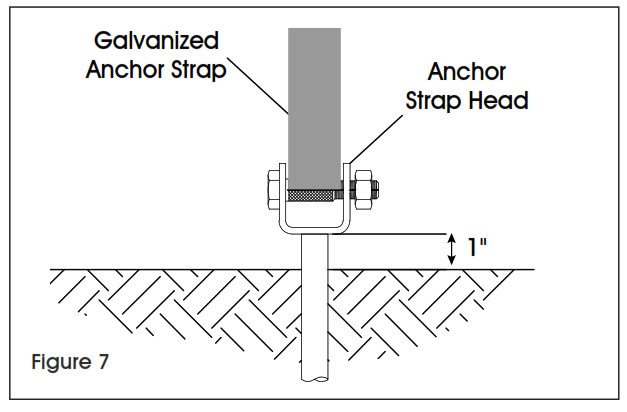
8. Tighten nuts.9. Cut excess strap.
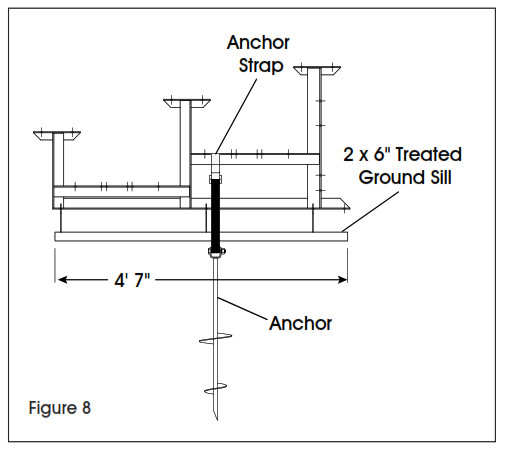
FOR 3-ROW BLEACHER
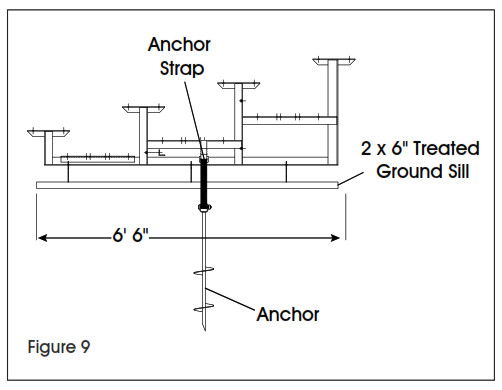
FOR 4-ROW BLEACHES
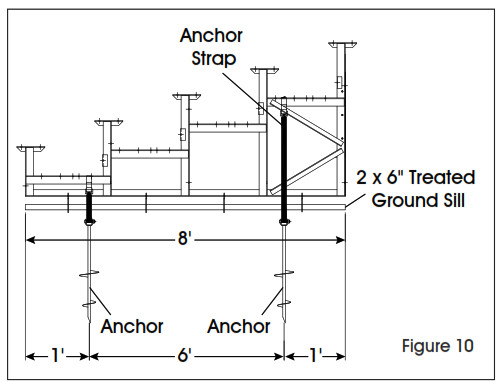
FOR 5-ROW BLEACHES
[xyz-ips snippet=”download-snippet”]