ULINE Bathroom Mirror

TOOLS NEEDED

PARTS

INSTALLATION
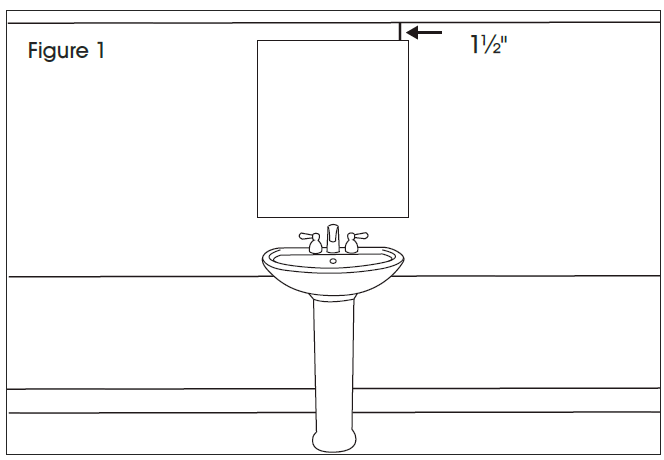
- Verify all dimensions and wall space prior to installation.NOTE: At least 1½” of clear space is needed above the mirror on the wall for easy installation. (See Figure 1)
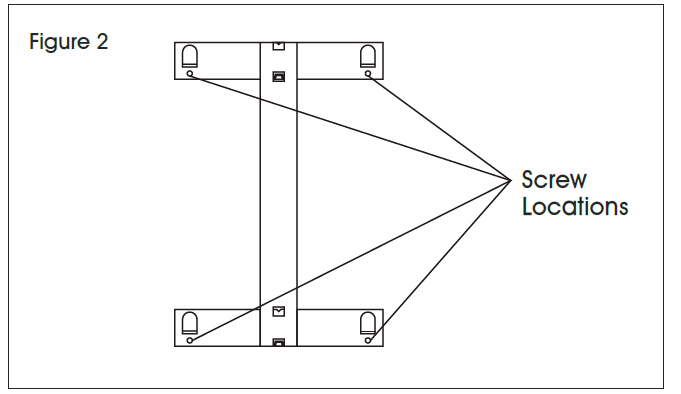
- Hold mounting bracket on the wall where mirror will be placed. Mark four holes where screws and wall anchors will be placed. (See Figure 2)NOTE: Mirror will extend 2¼” above mounting bracket and 2″ below bracket. (See Figure 3)
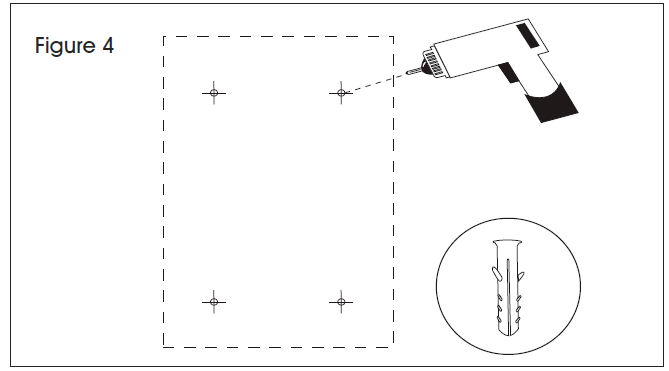
- Drill holes in wall at marked locations. Insert wall anchors. (See Figure 4)
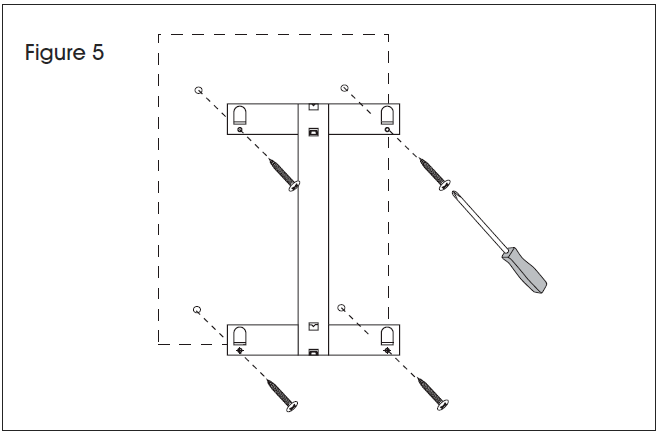
- Hold bracket over drilled holes and insert screws. Tighten using a Phillips screwdriver. (See Figure 5)
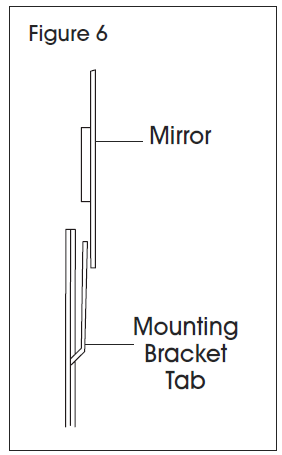
- Carefully slide mirror down onto the bracket, ensuring it locks into bracket tabs. (See Figure 6)
- Try lifting mirror after installation. Unit was correctly installed if it does not slide off.
 NOTE: Mirror will extend 2¼” above mounting bracket and 2″ below bracket. (See Figure 3)
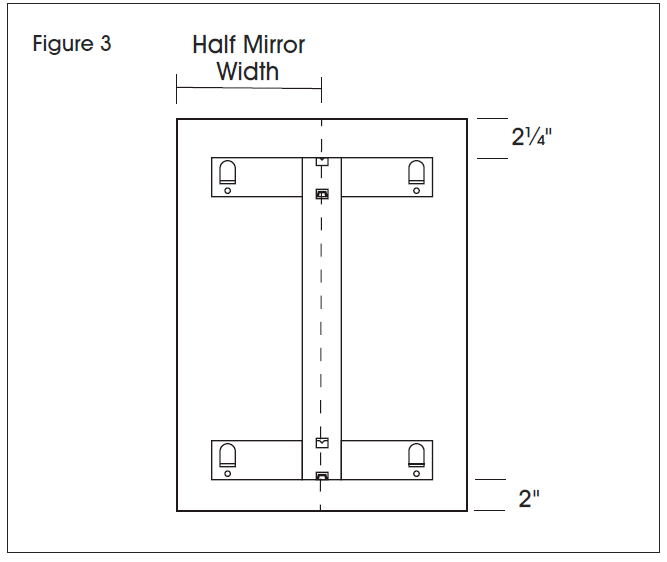
NOTE: If looking to replace or remove mirror, call Uline Customer Service at 1-800-295-5510 to order the H-9526 removal tool.
IMPORTANT!
- Adequate in-wall backing must be provided by installer to fully support weight of unit. Always check local codes and ordinances prior to installation.
- Use extreme care when removing wall bracket from back of mirror. Do not allow tabs or slots to become flat or bent out of shape.
- Ensure slots on back of mirror slide over all the wall bracket tabs. When mirror is secured to wall, a concealed locking tab will audibly snap into locking position.
- If mirror lifts off wall, check for damaged tabs or slots.
- Mirrors are not interchangeable from horizontal to vertical, or vice versa.

1-800-295-5510uline.com
[xyz-ips snippet=”download-snippet”]