
![]()
ULINE Center Pull Towel Dispenser Instructions
H-1132
1-800-295-5510uline.com
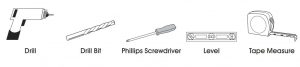
TOOLS NEEDED
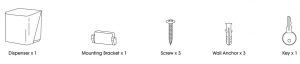
PARTS
MOUNTING INSTRUCTIONS
![]() NOTE: For both permanent and temporary mounting, ensure that proper mounting hardware is used for appropriate wall composition. Enclosed hardware may not be compatible with your wall surface.
NOTE: For both permanent and temporary mounting, ensure that proper mounting hardware is used for appropriate wall composition. Enclosed hardware may not be compatible with your wall surface.
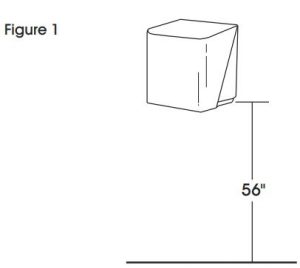
PERMANENT MOUNTING
- Place opened dispenser in intended mounting position and mark location of three screw holes. Recommended mounting height is 56″ from floor to bottom of dispenser. (See Figure 1)

- Install top two screws halfway into wall. Position dispenser on screws.
- Install bottom screw through hole in dispenser and tighten.
- Finish tightening top two screws.
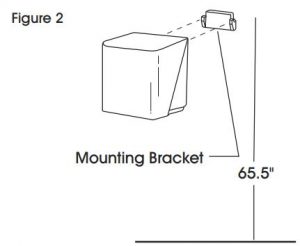
TEMPORARY OR PORTABLE MOUNTING
- Place mounting bracket in position and mark location of two screw holes. Recommended mounting height is 65.5″ from floor to top of bracket. (See Figure 2)
- Screw bracket to wall and mount dispenser. NOTE: Temporary mounting may be made permanent by installing third (bottom) screw through hole in dispenser back.
LOADING INSTRUCTIONS
- Open dispenser cover.
- Push in the slide until the dispensing opening is exposed. (See Figure 3)
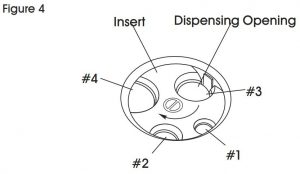
- Select appropriate dispensing opening on insert and rotate into position until it locks into place. Release the slide so it fully opens. (See Figure 4)
- Start roll from center by pulling out approximately 6″ of leading edge.
- Load roll by feeding leading edge downward into opening. Make sure that roll is seated completely in recess of dispenser. (See Figure 5)
- Close the cover firmly while making sure the towel doesn’t get caught inside. NOTE: If cover is not locking, twist key counterclockwise to close latch mechanism.
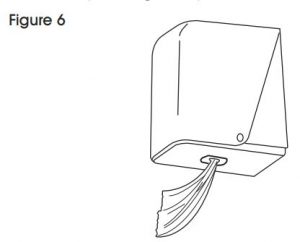
- Begin dispensing. Tear off the first few crumpled sheets. (See Figure 6)


![]() NOTE: To clean, use a soft wipe with mild soap and water.
NOTE: To clean, use a soft wipe with mild soap and water.
KEY INSTRUCTIONS
![]() NOTE: Dispenser comes with turn knob installed, not keyed lock. If keyed lock is desired, see instructions below.
NOTE: Dispenser comes with turn knob installed, not keyed lock. If keyed lock is desired, see instructions below.
KEYED DOOR OPERATION
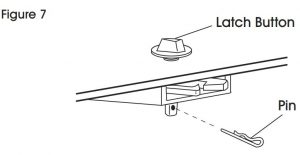
- Open dispenser to reveal latch mechanism on side of cover. Release latch button by removing pin in latch button stem. Pull latch button out and save for future use. (See Figure 7)
- Insert key and turn.
[xyz-ips snippet=”download-snippet”]