
ULINE Drop (N) Tell Indicators Installation Guide
MOUNTING
- Mount the DROP (N) TELL indicator with either adhesive back tape or two #6-32 screws. There is pressure sensitive tape on the back of the indicator.
- If mounting with adhesive back, remove the liner from the tape and press the unit to a flat surface on the package or on the product to be monitored.
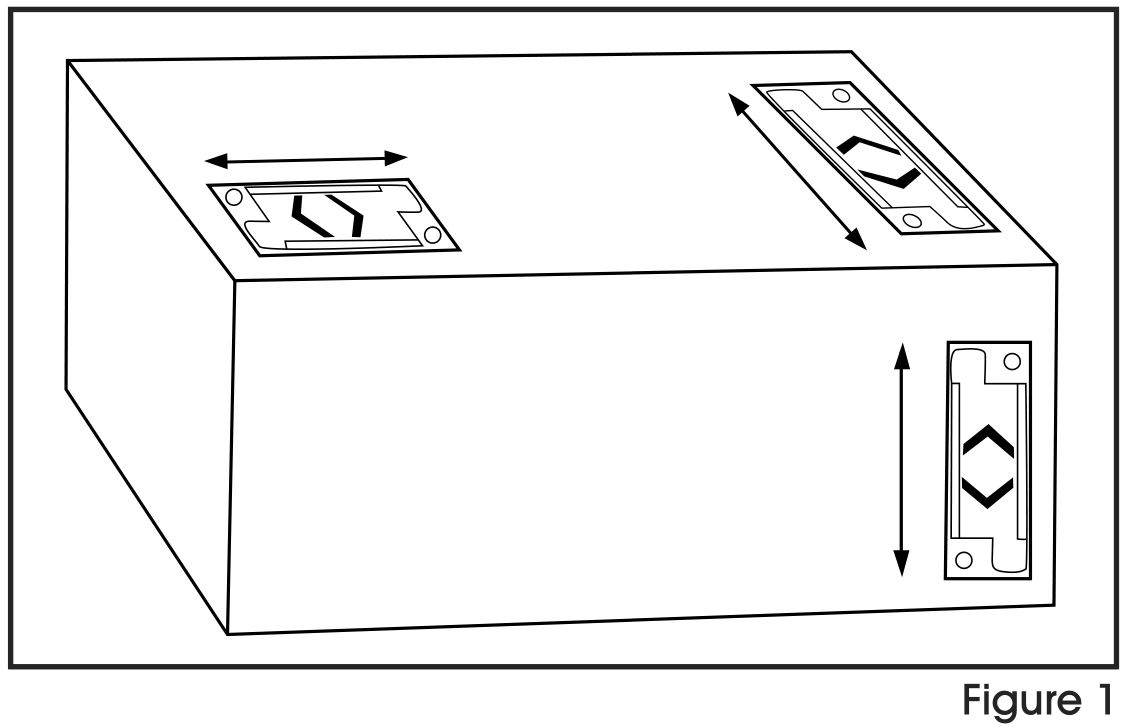
- The DROP (N) TELL indicator must be aligned with arrows pointed toward the direction of the shock to be monitored. Three units are needed to provide complete three-dimensional readout (six directions). (See Figure 1)
RESETTABLE INDICATOR ACTIVATION
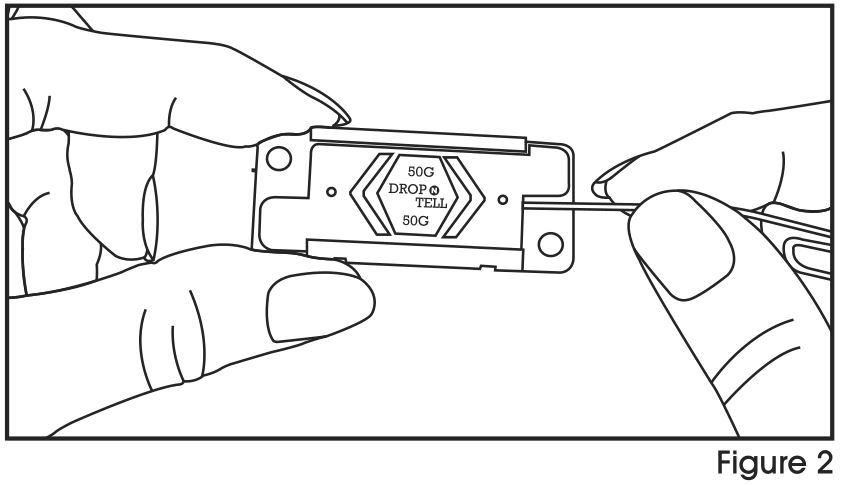
- Push the end of a paper clip into the small hole on the side of the indicator until the arrow snaps back. (See Figure 2)
![]() NOTE: Apply only enough pressure to reset the arrow and spring assembly. The arrow will snap quickly into a covered position and a slight snap can be heard. The indicator is now ready for use.
NOTE: Apply only enough pressure to reset the arrow and spring assembly. The arrow will snap quickly into a covered position and a slight snap can be heard. The indicator is now ready for use.
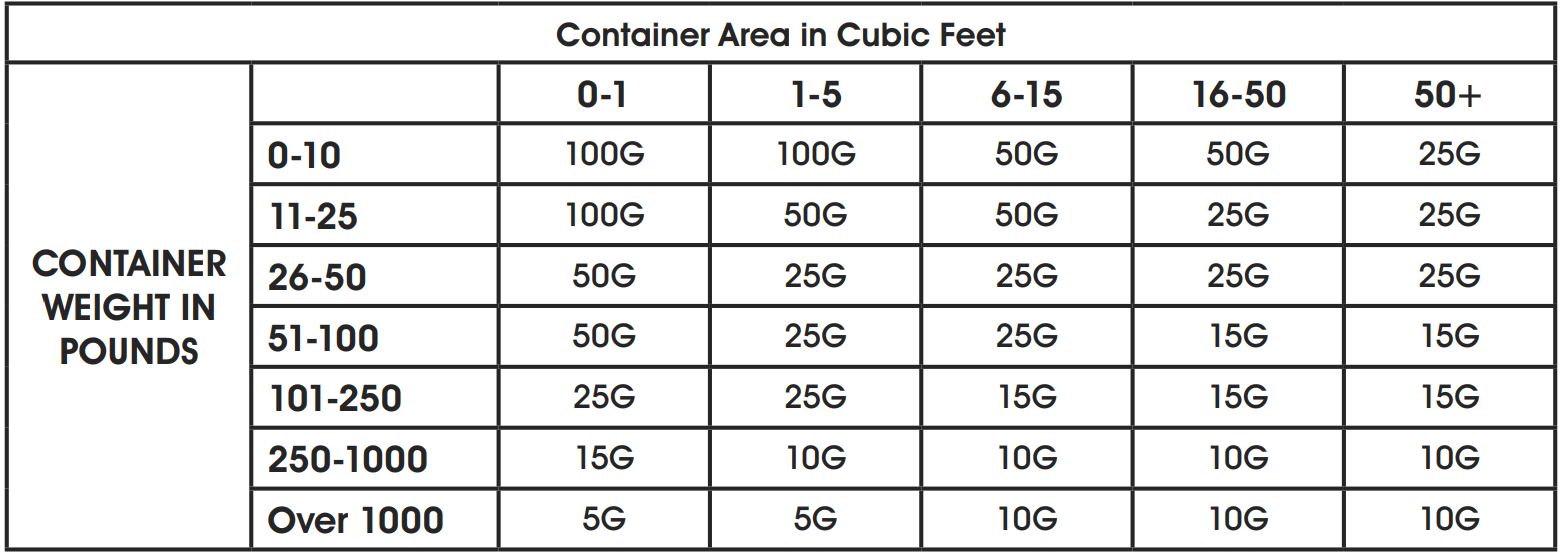
TYPICAL USAGE CHART
- Activation depends upon the type and the amount of cushioning used to protect a product in transit. Drop height will also affect activation.
[xyz-ips snippet=”download-snippet”]