
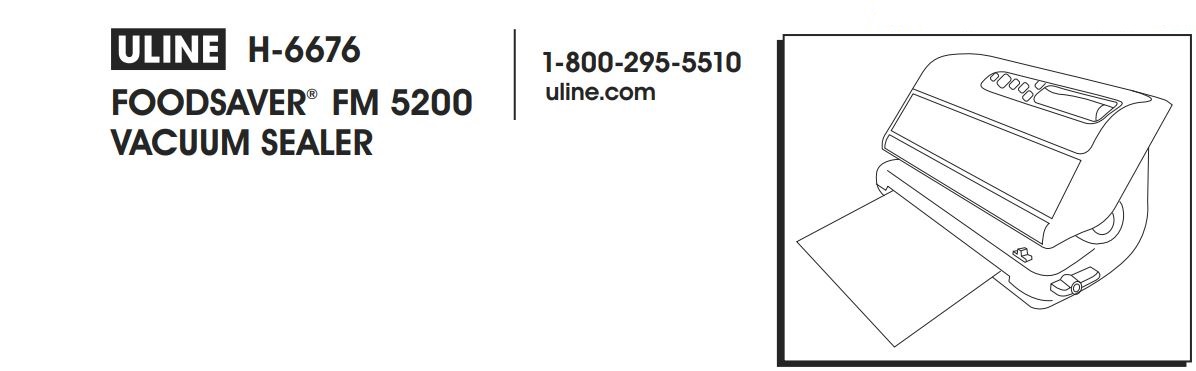
ULINE Foodsaver FM 5200 Vacuum Sealer User Manual
PARTS
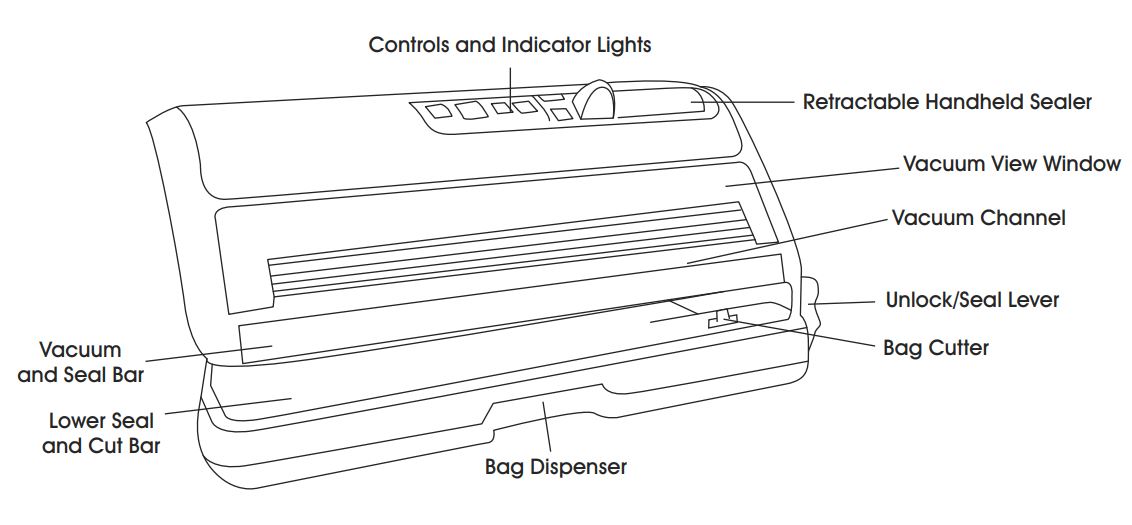
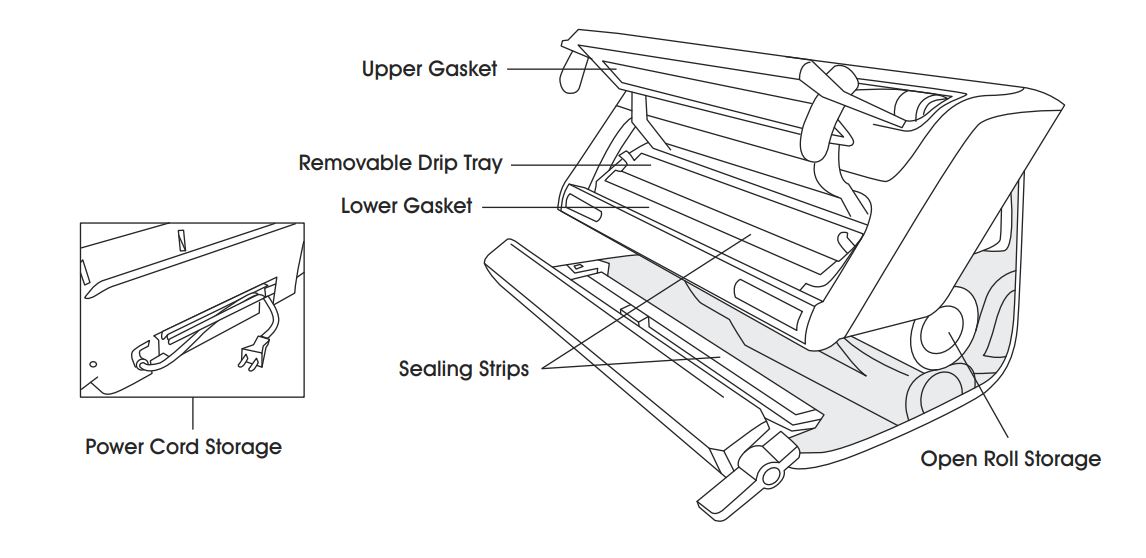
DISPLAY

SAFETY
When using electrical appliances, basic safety precautions should always be followed to reduce the risk of fire, electric shock and/or injury to people, including the following:
- Unplug outlet when not in use and before cleaning. Allow to cool before putting on or taking off parts and before cleaning this appliance.
- To protect against electric shock, do not immerse any part of appliance, power cord or plug in water or other liquid.
- To disconnect, unplug power cord from electrical outlet. Disconnect by pulling on plug; do not pull on cord.
- Do not operate with a damaged cord or plug, or after appliance malfunctions or has been damaged in any manner.
- Use appliance only for its intended use.
- Appliance should not be used by children or people with reduced physical, sensory or mental capabilities.
- Close supervision is necessary when any appliance is used near children. Children should not play with appliance.
- Do not place on or near wet surfaces or heat surfaces such as a hot gas or electric burner or heated oven. Extreme caution must be used when moving products containing hot liquids.
- Do not let cord hang over edge of table or counter or touch hot surfaces. Place cord where it cannot be pulled.
- Lid closes down automatically with force. Do not obstruct lid from closing. Do not manually force lid to close.
- Do not put fingers or any foreign objects inside vacuum view window while sealing.
- Polarized plug is intended to fit in a polarized outlet only one way.
- A short power supply cord is provided to reduce the risk of becoming entangled in, or tripping over, a longer cord. If a long, detachable power supply cord or extension cord is used, the marked electrical rating of the detachable power supply cord or extension cord should be at least as great as the electrical rating of the appliance.
- The longer cord should be arranged so that it will not drape over the countertop or tabletop, where it can be pulled on by children or tripped over unintentionally.
TIPS
- Vacuum packaging is not a substitute for the heat process of canning. Perishables still need to be refrigerated or frozen.
- For best results, use only Food Saver® bags, rolls and accessories.
- During the vacuum packaging process, small amounts of liquids, crumbs or food particles can be inadvertently pulled into the vacuum channel. Empty the drip tray after each use.
- Avoid overfilling. Always leave at least 3″ of bag material between bag contents and top of bag. This allows room for the bag material to cinch tightly against the food and prevents the bag from pulling out of the vacuum channel during the sealing process. Leave at least one additional inch of bag material for each time you plan to reuse the bag.
- Do not create own side seams for Food Saver® bag. These bags are manufactured with a special side seam, which is sealed all the way to the outer edge.
- To prevent wrinkles in the seal when vacuum packaging bulky items, gently stretch bag flat while inserting bag into vacuum channel and continue to hold bag until pump starts.
- When vacuum packaging items with sharp edges, protect bag from punctures by wrapping item in soft cushioning material, such as a paper towel.
- When using accessories, remember to leave 1″ of space at top of canister or container.
- Pre-freeze fruits and blanch vegetables before vacuum packaging.
- Wait 20 seconds between seals to allow appliance to cool.
INSTRUCTIONS
VACUUM AND SEAL A BAG
1. With both hands, insert open end of bag through bottom of vacuum view window into drip tray. (See Figure 1)
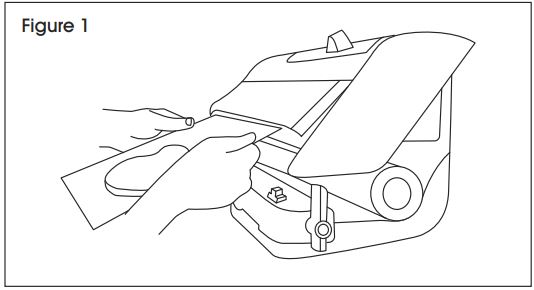
![]() NOTE: Vacuum view window allows user to see where to insert end of bag into drip tray, before activating the vacuum and seal bar.
NOTE: Vacuum view window allows user to see where to insert end of bag into drip tray, before activating the vacuum and seal bar.
2. With bag in place, push and release vacuum and seal bar with both hands. Vacuum view window will automatically close and grasp the bag, which begins the vacuum and seal process. (See Figure 2)
![]() CAUTION! Do not put fingers or any foreign objects inside vacuum view window while vacuum sealing. Lid closes down automatically with force. Do not obstruct lid from closing. Do not manually force lid to close.
CAUTION! Do not put fingers or any foreign objects inside vacuum view window while vacuum sealing. Lid closes down automatically with force. Do not obstruct lid from closing. Do not manually force lid to close.

3. When red seal indicator light turns off, vacuum seal process is complete. Vacuum view window will release, and sealed bag is ready for storage. (See Figure 3)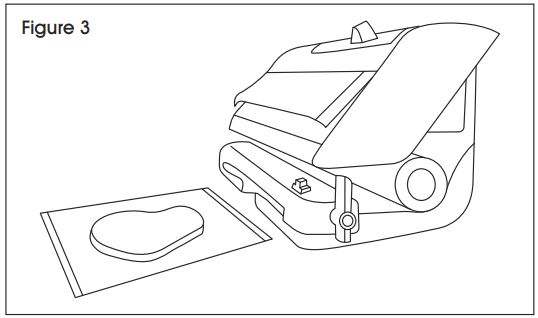
![]() NOTE: When dry and moist lights flash, the drip tray is full and needs to be emptied. Vacuum and seal function will begin again after drip tray is emptied.
NOTE: When dry and moist lights flash, the drip tray is full and needs to be emptied. Vacuum and seal function will begin again after drip tray is emptied.
INSTALL A ROLLNOTE: Only Food Saver® rolls fit in cartridge.
1. Press power button. Power indicator light will illuminate to indicate power is on.2. Open the express bag maker lower seal and cut bar by pulling forward, away from the appliance. (See Figure 4)

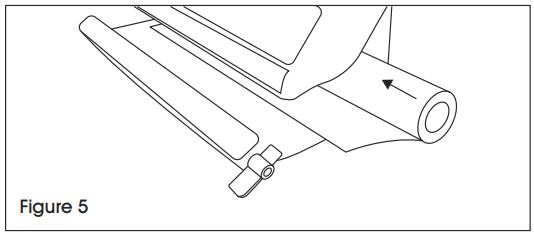
3. Insert roll from either side of appliance and slide in until it sets into notched out area. (See Figure 5)
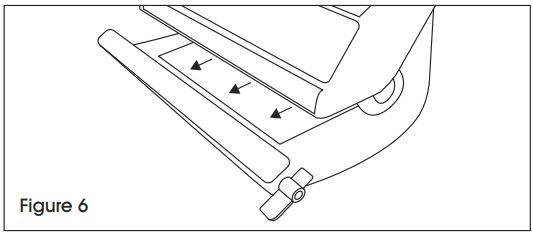
4. Pull bag material forward to white line, sliding edges of bag all the way to indicator line marked on appliance (See Figure 6)
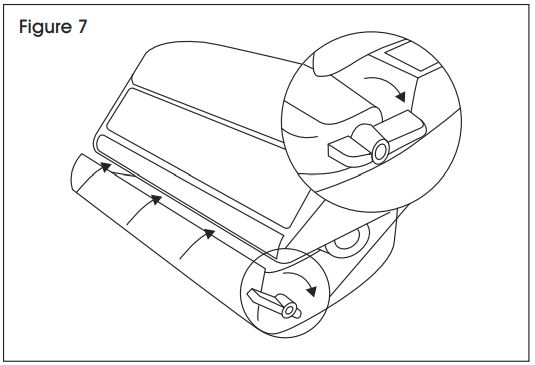
5. Close express bag maker lower seal and cut bar by pushing all the way back until it stops. Turn unlock/seal lever to seal position to make first seal. (See Figure 7)
![]() NOTE: Red seal indicator light pulses while seal is being made. When red seal indicator light turns off, the seal is complete. User cannot use vacuum view window until red light turns off.
NOTE: Red seal indicator light pulses while seal is being made. When red seal indicator light turns off, the seal is complete. User cannot use vacuum view window until red light turns off.
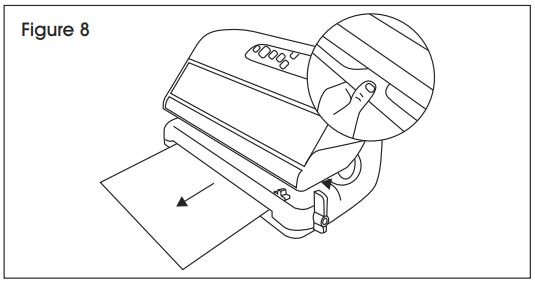
MAKE A BAG FROM A ROLL1. Turn lever to unlock position and pull bag from bag dispenser area to desired length. (See Figure 8)
![]() IMPORTANT! Accurately measure the amount of bag material needed by placing the food to be sealed on the counter and pulling enough bag material to fit the amount of food for each bag. Leave 3″ of space between bag contents and top of bag.
IMPORTANT! Accurately measure the amount of bag material needed by placing the food to be sealed on the counter and pulling enough bag material to fit the amount of food for each bag. Leave 3″ of space between bag contents and top of bag.
2. Turn unlock/seal lever to seal position. This creates the first seal of the next bag. (See Figure 9)

![]() NOTE: Red seal indicator light pulses while seal is being made. When the red seal indicator light turns off, the seal is complete.
NOTE: Red seal indicator light pulses while seal is being made. When the red seal indicator light turns off, the seal is complete.
3. Slide bag cutter across to get current bag. (See Figure 10)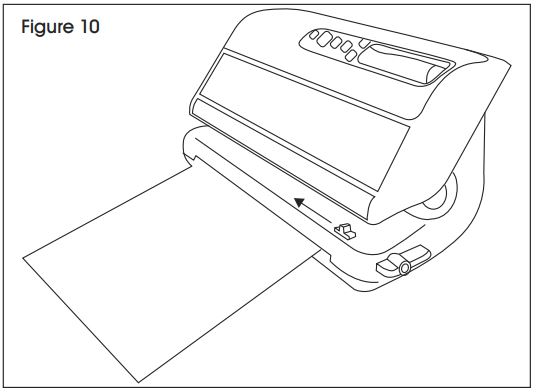 IMPORTANT! Turning the unlock/seal lever creates seal for next bag.
USE RETRACTABLE HANDHELD SEALER1. Pull retractable handheld sealer from appliance. (See Figure 11)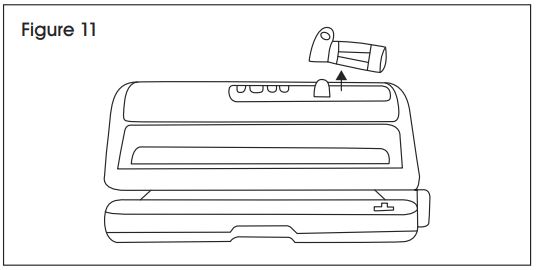 2. Place end of retractable handheld sealer over valve on bag or container. (See Figure 12)
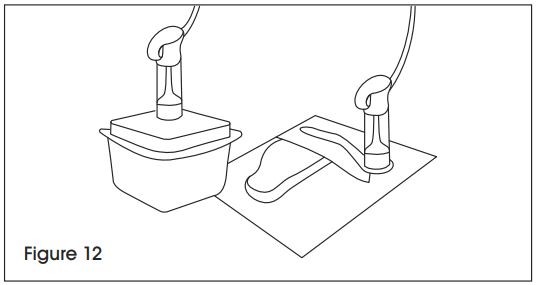
 3. Press accessory button on main appliance.
![]() NOTE: Hand sealer works with Food Saver® bags, rolls and containers only.
NOTE: Hand sealer works with Food Saver® bags, rolls and containers only.
MAINTENANCE
- Unplug from outlet and allow to cool before cleaning.
- Do not immerse any part of appliance, power cord or plug in water or other liquid.
- Check gaskets and around drip tray to ensure they are free from food materials. Wipe off gaskets with warm, soapy cloth if needed. Upper gasket cannot be removed.
- The removable drip tray makes cleanup easy when small amounts of liquids are inadvertently pulled into the vacuum channel during vacuum process.
- Empty drip tray after each use. Wash in warm, soapy water or place on top rack of dishwasher. Dry thoroughly before re-inserting into the appliance.
![]() IMPORTANT! Always leave unlock/seal lever in the unlock position when done using appliance.
IMPORTANT! Always leave unlock/seal lever in the unlock position when done using appliance.
![]()
1-800-295-5510uline.com
[xyz-ips snippet=”download-snippet”]