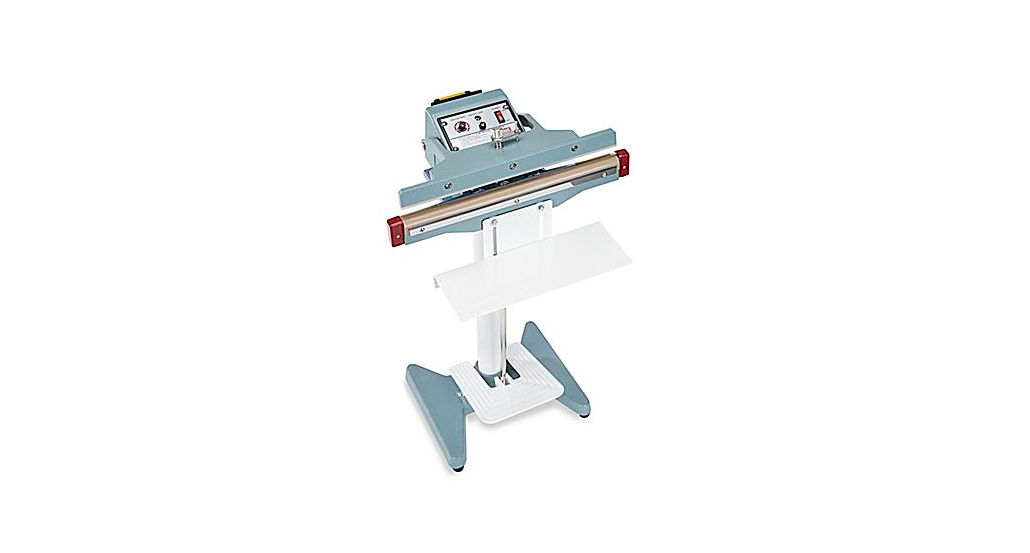
![]() H-1250FOOT-OPERATEDIMPULSE SEALER1-800 -295-5510uline.com
H-1250FOOT-OPERATEDIMPULSE SEALER1-800 -295-5510uline.com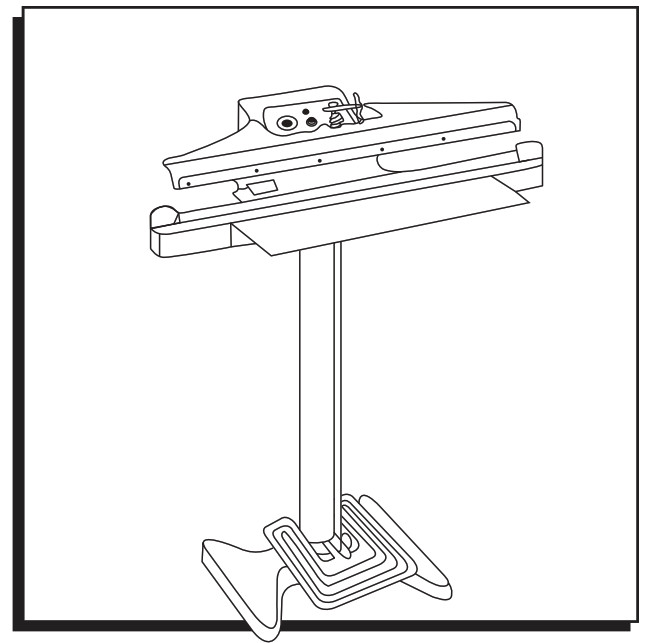
![]() WARNING! Never connect the sealer’s power cord to outlet during assembly.
WARNING! Never connect the sealer’s power cord to outlet during assembly.
SAFETY
- Read all instructions before use and save these instructions for later use.
- Follow all warnings and instructions marked on the product.
- Unplug this product from the power source before cleaning and/or changing any parts.
- Do not rest anything on the power cord. Do not place the machine where the power cord may be stepped on or pulled.
- Always keep out of reach of children and pets.
- This sealer should only be in use with an operator in attendance.
- Never insert clothing, hand, or fingers between the sealing jaws of sealers or into the feed opening of continuous sealers.
- Never touch the heating elements with bare hands while the sealer is plugged into a power source, in operation, or just finished operation. It is HOT.
- Be sure to check for worn parts before starting operation.
- Do not operate with a damaged power cord or plug.
- Always keep the unit clean. Do not use water. Silicone spray may be used to clean the unit. Be sure the unit is unplugged from the power source before cleaning.
- When changing the blade (for sealer with cutter), be careful of the sharp edge.
- When changing the Teflon adhesive, be sure that the entire surface under the heating element is covered with Teflon adhesive. Bend down the excess Teflon adhesive on both ends. This will prevent the heating element from breaking and the machine from grounding.
- When replacing a fuse, be sure the exact voltage and ampere is used.
- Be sure to keep a record of your model number. Specify this number when ordering
- When replacing any parts, be sure to mark down the exact locations of the connections, and the orders of the different pieces.
ASSEMBLY
- Position the pedestal on the floor standing upright.
- Mount the complete sealer assembly to the top of the pedestal and attach it with four screws.
- Position spring under the sealer’s upper level. The pull-rod goes through the spring and is fastened to the upper level.
- With foot pedal metal rod in hand, gently push down upper jaw to meet with the lower jaw. While jaws are compressed, reach under the unit and hook the metal foot pedal rod into the bottom of the spring bar where the 1/2″ hole is exposed.
- With jaws still compressed, lift up the foot pedal to 45˚ angle and slide the metal foot pedal rod into one of two pre-molded slots. This will create tension on the foot pedal and cause the pedal to stand upright at 45˚.
- The sealer is now ready to be used.
TO INSTALL AN OPTIONAL WORKING TRAY AND PLATE1. Remove center screws from bottom sealing jaw.2. Install the working plate as shown.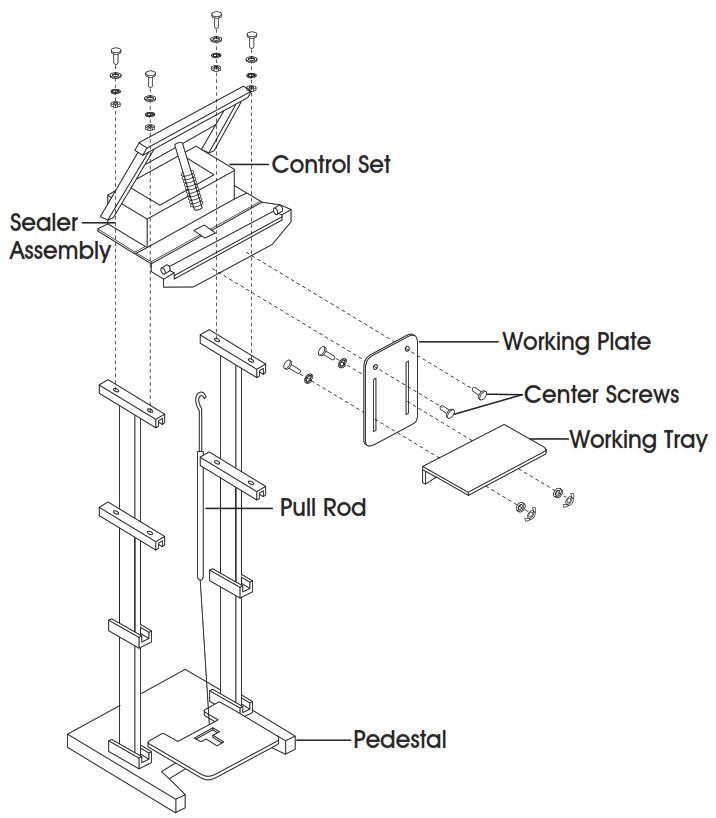
OPERATION
![]() NOTE: Before operating, check the heater (heating element), Teflon cover, Teflon adhesive, and the sealing pad (silicon rubber).
NOTE: Before operating, check the heater (heating element), Teflon cover, Teflon adhesive, and the sealing pad (silicon rubber).
- Insert the Power Cord into the correct receptacle (110V).
- Turn the power switch ON.
- Set the timer knob to the lowest setting. Always start with a low setting and increase gradually. Thicker bags need a higher setting.
- Place the end of the bag under the sealing arm and press the pedal down gently, but firmly.Hold for 2-3 seconds. The red light will go out when the sealing time is complete.a. If the seal is broken or damaged, decrease the sealing time.b. If the seal is not fully welded, increase the sealing time.c. If the sealing material sticks to the sealing pad, decrease the congealing time.d. If the width of the seal is not perfect or does not match the size of the element, increase the congealing time.(Congealing time is necessary for sealing.)
- When the red light goes out, keep pressing the pedal for 2-3 seconds.
 NOTE: Must wait until the congealing time is up.
 - Release the Pedal.
ADDITIONAL INFORMATION1. Always keep the sealer clean. Remove any residue found on the platform and Teflon cover. Silicone spray may be used for this purpose.2. When replacing the heating elements, always check the condition of the bottom Teflon tape.3. A worn Teflon Adhesive can cause the heating element to break. Use only Thermoelectric wire of the identical specifications.4. Occasionally check the condition of the silicon rubber for wear or burns. A damaged silicon rubber will affect the quality of the seal.5. Be sure to turn OFF the power or unplug before replacing any parts.
TROUBLESHOOTING
Most sealers work on the principle that when the sealing arm is pressed down, it activates a microswitch which allows electric current to pass through the heating element (wire). The timer automatically controls the sealing time. If there is no timer, then the sealing time is manually controlled.Sealing is followed by cooling (the amount of time needed for the seal to set). This affects the beauty of the seal. In manual operation, this is dependent on how long the sealing arm is pressed after the pilot light goes off. In the automatic operation, this is the congealing time.
| OPERATING ISSUE | CAUSES |
RECOMMENDATIONS |
| Not sealing. | Disconnected plug. | Check or change the plug. |
| Not sealing. The power lamp is on. | The heater (heating element) is broken.
Spring hook or mounting spring is loose or poorly connected. |
Replace the heater.
Replace or tighten the spring hook connection. |
| The ceiling lamp is on. | Loose or poor contact. Terminals and heating elements are poorly connected. | Clean the terminals and adjust if needed. |
| Teflon cloth burnt. | Timer malfunction prolonged heating time. | Replace timer or decrease the timer setting. |
| The heating wire broke. | The worn Teflon adhesive under the element. | Replace Teflon adhesive. |
| The seal is wrinkled. | The heating timer is set too high or cooling time is not enough. | Lower the timer setting.
Continue pressing the upper leveler for 1-2 seconds after the pilot light goes off. |
| Imperfect sealing. | Worn Teflon cloth. Worn silicon rubber. | Replace the Teflon cloth. Replace the silicon rubber. |
| Broken seal. | Prolonged sealing time. | Decrease timer setting. |
| Not fully welded seal. | Sealing time too short. | Increase sealing time. |
| Seal is sticking. | Dirty Teflon cloth. Dirty silicone rubber. | Clean the Teflon cover. Clean the silicon rubber. |
![]() 1-800-295-5510uline.com
1-800-295-5510uline.com
[xyz-ips snippet=”download-snippet”]