
ULINE Fountain Roller Kit
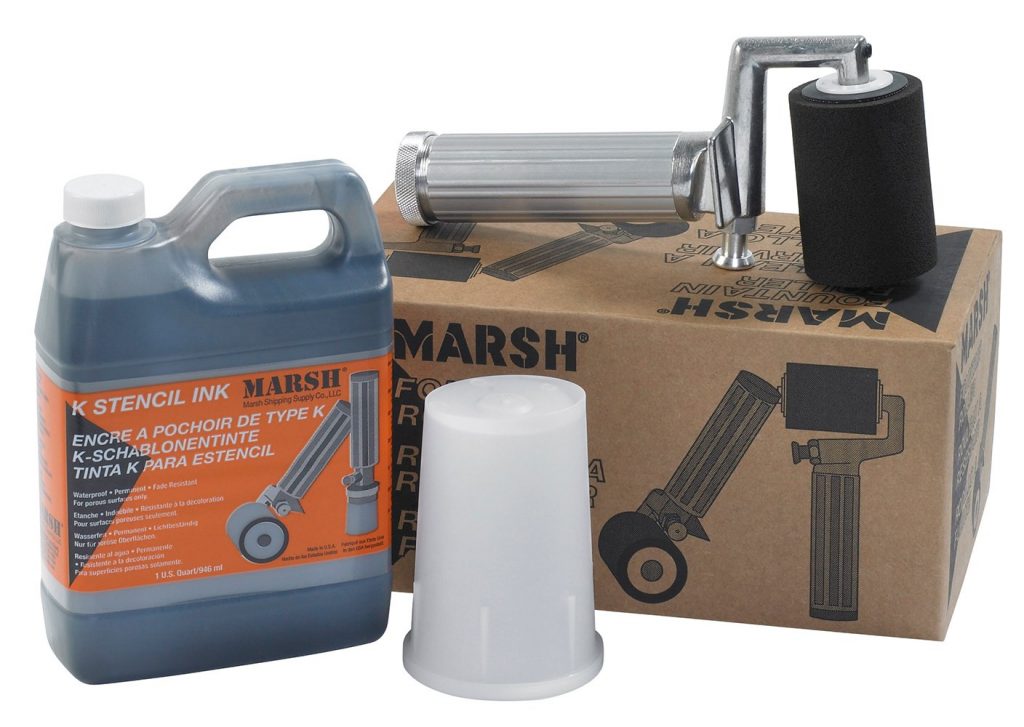
OPERATION FOUNTAIN ROLLER KIT
INKING
- Fill the roller with the proper ink.NOTE: Only use compatible ink.
- Pump 30 to 50 strokes while rolling back and forth on a 6 x 18″ piece of oil board. Continue pumping while rolling. To get uniform distribution of ink, use extra firm pressure on the roller.NOTE: DO NOT use an absorbent material.
- To provide uniform inking around the entire surface of the roller, the inking path length must be at least 12″. This will eliminate light and dark marking.
- To test for uniformity of the ink stripe, make a test roll on a clean carton board using normal rolling pressure.
STENCILING
- Pass the roller back and forth over the stencil with straight passes.
- When more ink is needed, pump once or twice before or while stenciling.
- When stenciling a vertical surface, or if one side of the roller inks too heavily, reverse the roller. (Put the rest bar up.)
OPERATING TIPS
- To correct unequal distribution of ink due to rapid usage of ink from one area of the roller, occasionally squeeze the roller extra firmly as you roll it against a test surface.
- Do not allow the roller to become too dry.
- During continuous stenciling, pump the roller once occasionally. Occasional pumping prevents drying or flooding and oversaturation of the foam rubber.
- Fountain Roller Kits work best with .007″ thin oil boards or plastic sheets.
- Be sure to use roller cover to protect the inked roller when not in use.
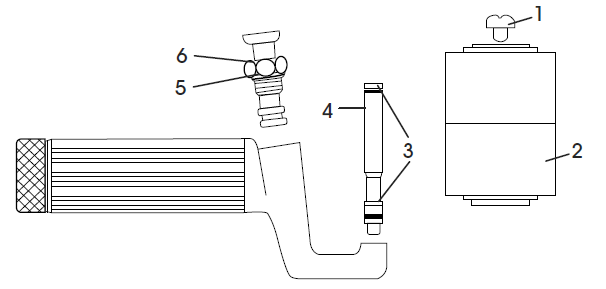
CLEANING THE ROLLER
- Remove the screw (1) and carefully slide the roller (2) off the spindle (4).
- Wipe and cover the spindle with a cloth to absorb fluids. Fill the reservoir 1/4 full of the proper solvent.
- Shake vigorously and then empty the reservoir.
- Refill the reservoir 1/4 full of solvent and pump to flush the valves, ink passages and orifice.
- Drain all solvent from the fountain roller and refill with proper ink.
REPLACING THE ROLLER
- Remove the screw (1) and slide the old roller (2) off the spindle (4).NOTE: Do not pump with the roller removed. Ink will spray from the orifice.
- Wipe and lubricate the spindle (4).
- Carefully slide the new roller over the spindle and o-rings (3).
REPLACING THE PUMP
- Unscrew the hex nut (6) and remove the entire assembly.
- Lubricate the casting and the new pump (5).
- Attach the new pump assembly with the hex nut.
REPLACING THE O-RINGS
- Being careful to not damage the adjacent bearing surface, remove the o-rings (3) with a knife or other pointed tool.
- Carefully fit the new rings into place.
REPLACING THE SPINDLE
- Grasp the spindle (4) with pliers on its undercut portion.
- Unscrew it from the frame.NOTE: Handle the new spindle gently to avoid burring the orifice bearings in the center of the new spindle.
- Install the new spindle by grasping the undercut portion of the new spindle and screwing into the frame.

[xyz-ips snippet=”download-snippet”]