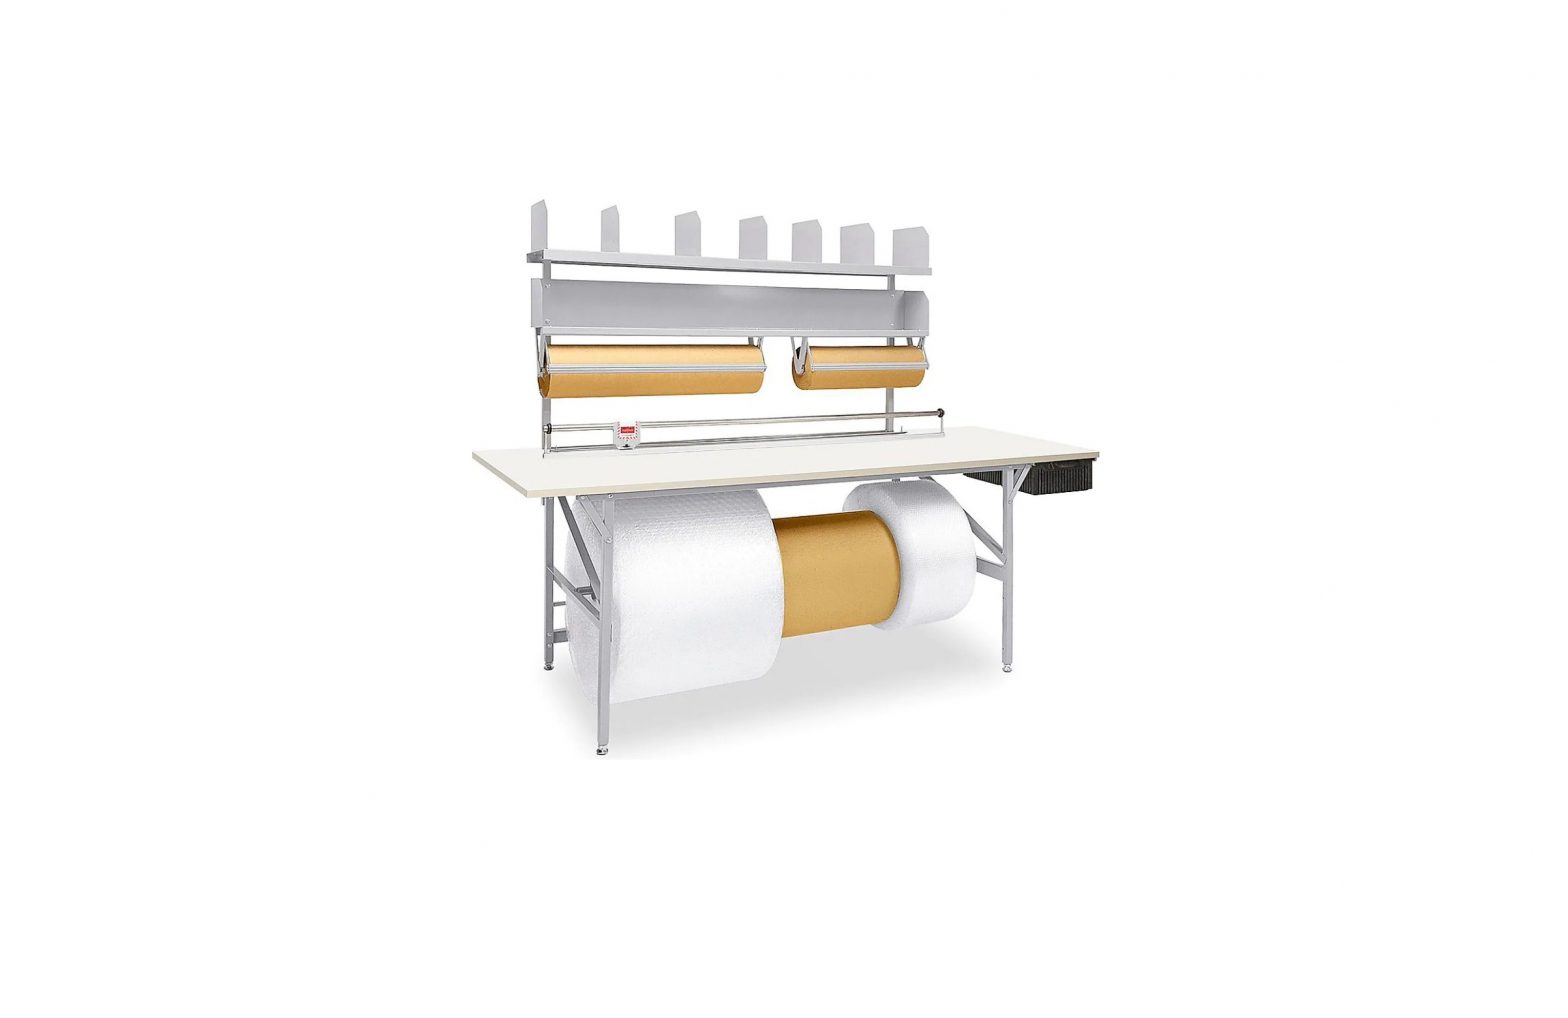
ULINE H-214 Deluxe Packing Table User Guide
TOOLS NEEDED
- 7/16″ Wrench

- Flathead Screwdriver
- Phillips Screwdriver
ASSEMBLY
NOTE: Table unit is shipped in two cartons. The first contains the table top and leg assemblies; the other contains all the hardware, shelves, drawer, dowels and brackets.
LEG ASSEMBLY
Leave table top in the box for added protection and ease of assembly
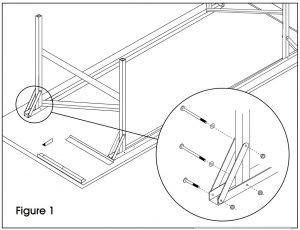
- Attach the right and left leg assemblies to the pre-attached leg channels. (See Figure 1) Attach front leg assemblies using 1/4 – 20 x 2″ hex bolts, washers and nuts. Attach the back leg assemblies using 1/4 – 20 x 4″ hex bolts, washers and nuts.NOTE: Do not tighten 4″ bolts.NOTE: The front of the table can be identified by the drawer channels that extend to the front edge.
- Insert leveling bolts and nuts into legs. (See Figure 2)
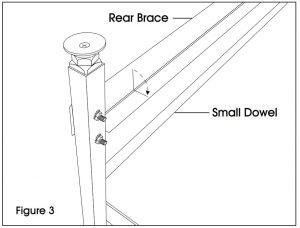
- Insert one small dowel into the nylon bushings located at the rear of each leg.
- Next, attach the rear brace extending from the back of one leg to the other using 1/4 – 20 x 2″ hex bolts. Secure with washer and nut. (See Figure 3)
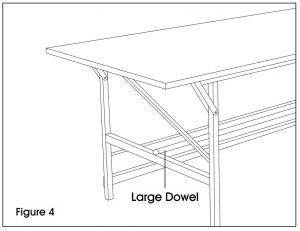
- Turn table over to the upright position.
- Place large dowel into dowel sockets in the middle of the table legs. (See Figure 4)
 NOTE: Do not tighten 4″ bolts.NOTE: The front of the table can be identified by the drawer channels that extend to the front edge.
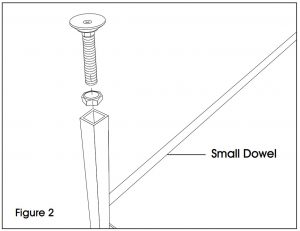
SHELF ASSEMBLY
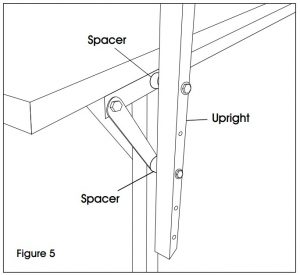
- Attach the right and left shelf uprights by first removing the 4″ bolts from back leg assemblies. Add spacers in between the leg assemblies and shelf uprights, and finally re-insert bolts through the uprights, spacers and leg assemblies. (See Figure 5) The shelving can be positioned at one of the three heights by utilizing the first and third, second and fourth, or third and fifth drilled holes on the shelf upright.NOTE: DO NOT tighten the hardware.NOTE: The nylon bushings on the shelf uprights should be facing inward towards the table.
- Insert ends of the second small dowel into the nylon bushings on the shelf uprights. Bushings and dowel can be positioned in any of 3 height positions depending on your application. Tighten the hardware for the uprights.
 NOTE: DO NOT tighten the hardware.NOTE: The nylon bushings on the shelf uprights should be facing inward towards the table.
TOP SHELF AND DIVIDERS ASSEMBLY
- Attach top shelf to uprights. Align top shelf mounting holes (3rd hole from the ends of the shelf) with holes in uprights. Use 1/4 – 20 x 5/8″ round head screws and nuts to secure shelf. (See Figure 6)
- Attach top shelf dividers using #10 x 3/8″ truss head screws and nuts. Install up to 7 dividers. (See Figure 7)


BOOK SHELF ASSEMBLY
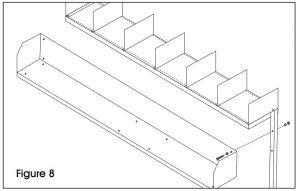
- Attach bookshelf to uprights. Align book shelf bolt holes with the two bolt holes near top of uprights. Secure with 1/4 – 20 x 2″ hex bolts, washers and nuts. (See Figure 8)
ADDITIONAL ASSEMBLY
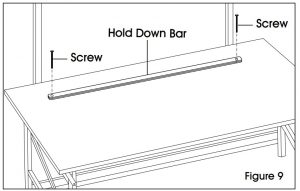
- Install hold down bars. Align holes in bars with the two bolt holes found near the back of the table top. Secure with two #10 x 3″ round head screws. (See Figure 9)
- Install drawer. Slide drawer into channels located underneath the right side of the tabletop
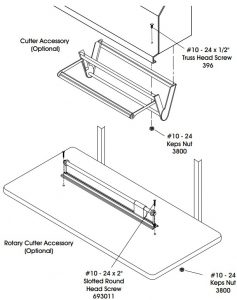
OPTIONAL CUTTERS (NOT INCLUDED)
Phone: 1-800-295-5510Website: uline.com
[xyz-ips snippet=”download-snippet”]