![]()
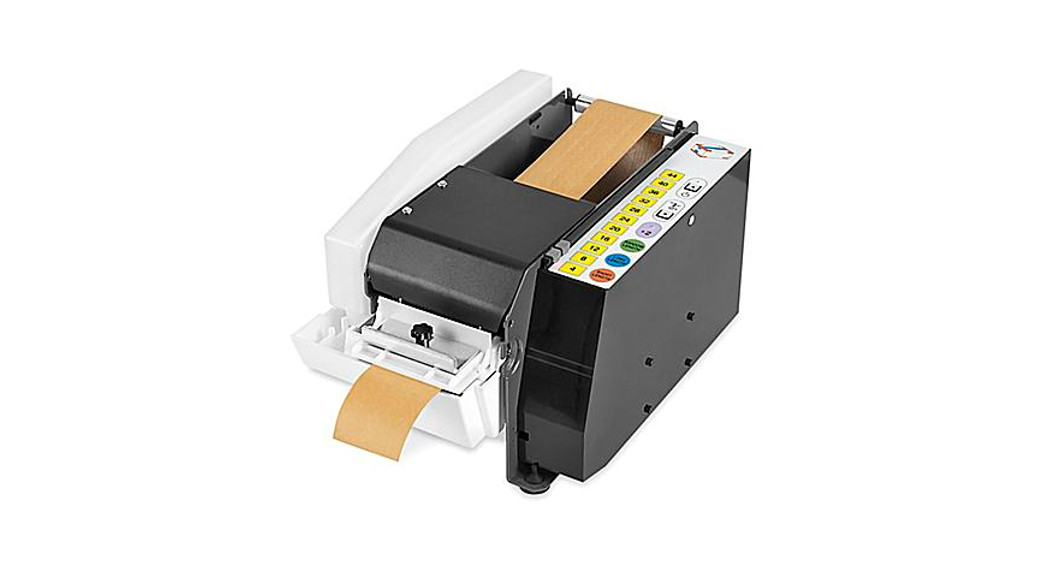
H-2243BATTERY OPERATED KRAFT TAPE DISPENSER
1-800-295-5510uline.com
IMPORTANT! Read this manual thoroughly and familiarize yourself with ALL controls and operating features. Keep this manual for future reference and maintenance. Unpacking: Check the machine for damage. If damage is found, return to Uline.
TECHNICAL DATA
Dimensions of machine: 17¾ x 11½ x 9¾” Weight of machine: 26½ lbs. Voltage and frequency: see machine label Control circuit in DC: 115 Volts Electrical power: 100w Dispensing velocity: 2.5 ft. or 30″ / sec. Length: min. 4″ / max. 46″ Sound measured in a room: less than 70 dB (A)TAPETypes of gummed tape: AllPAPER FEATURESWidth: min. 3/4″ / max. 4″Maximum roll diameter: 7¾”
GENERAL INFORMATION
 CAUTION! Only trained personnel should be allowed to operate or service this machine.
![]() WARNING! Burn Danger Switch off power and allow the top heater to cool down before performing any cleaning, maintenance or repair.Follow all safety and operating instructions contained in this manual. Check state and local safety and electrical codes. Tape dispenser is for use with gummed tape ONLY. Uline accepts no responsibility for damage due to improper use.
WARNING! Burn Danger Switch off power and allow the top heater to cool down before performing any cleaning, maintenance or repair.Follow all safety and operating instructions contained in this manual. Check state and local safety and electrical codes. Tape dispenser is for use with gummed tape ONLY. Uline accepts no responsibility for damage due to improper use.
Keep the machine clean, dry and in good operating condition. DO NOT place or operate the machine in damp or humid environments.![]() WARNING! Avoid short circuits and do not disassemble the batteries.
WARNING! Avoid short circuits and do not disassemble the batteries.![]() WARNING! Do not expose batteries to flames, fire or excessive heat.
WARNING! Do not expose batteries to flames, fire or excessive heat.![]() WARNING! Do not dip the battery in water and do not expose it to high humidity.
WARNING! Do not dip the battery in water and do not expose it to high humidity.
SET-UP INSTRUCTIONS
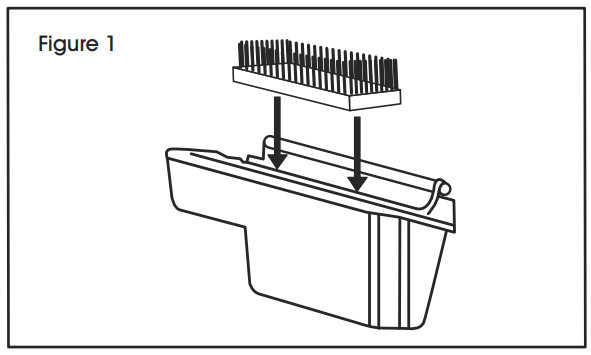
INSTALL WATER RESERVOIRBefore using the dispenser: Wash the moistening brush with soap and water. Rinse thoroughly.
- Insert the brush in the water reservoir. (See Figure 1)

- Switch power on.
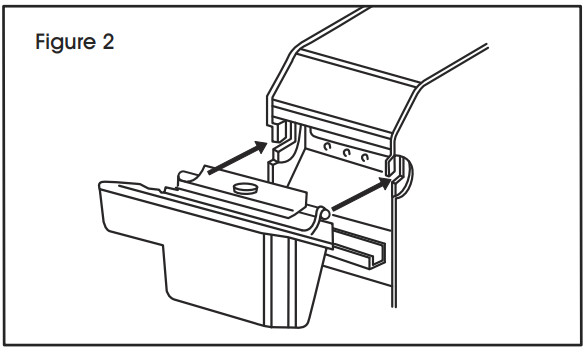
- While holding down the green Random Length button, take the reservoir in your left hand and insert the pivot shaft into the slots on the sides of the dispenser. Move shaft up to the top of the slots. (See Figure 2)
- Slide reservoir down so bottom fits over tab on dispenser.
- Release the green button.
INSERTING THE BATTERY
- Insert the battery by sliding it in it’s location on the water bottle side.
CHARGING THE BATTERY
- Connect the battery charger into an electric supply and insert the battery until it locks into position.
- The LED placed on the feeder indicates the battery charge status: red LED, battery under charge; green LED, battery charge completed.
- After approximately 60 minutes it is possible to verify the charge status of the battery. As it does not have the `memory’ effect this battery can be re-charged at every charge stage.
REMOVING THE BATTERY
- Press the button placed on the upper part of the battery fix plate and remove the battery by sliding it out of position.
FILL WATER BOTTLE
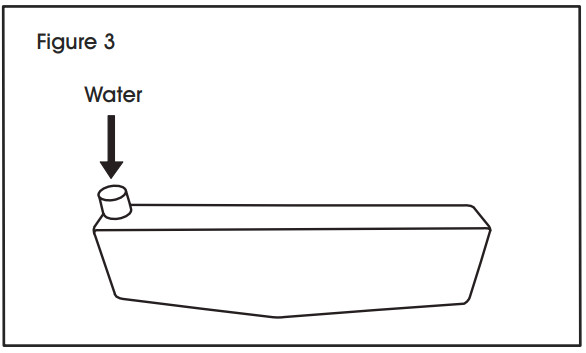
- Remove the bottle from brackets and turn over so filler opening faces up. (See Figure 3) NOTE: If the bottle is not empty, cover the filler opening to prevent spills.
- Fill the bottle with clean water. Cover the filler opening to prevent spilling, turn the bottle over and place the filler opening over desired water level peg in the water reservoir. (See Figure 4) NOTE: Adjust reservoir level: To maintain the optimum moisture level for the type of tape you are using, place the water bottle filler opening over one of the three water level pegs in the water reservoir.

SET-UP INSTRUCTIONS CONTINUED
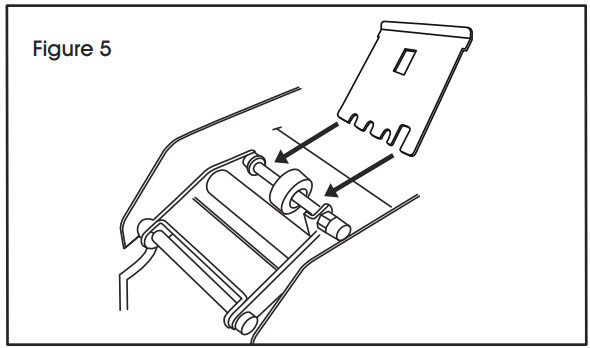
INSTALL UPPER PLATE GUIDEWith the top cover open, slide the upper plate guide under the white wheel.![]() NOTE: Flange should face up and toward the tape compartment. (See Figure 5)
NOTE: Flange should face up and toward the tape compartment. (See Figure 5)
INSTALL WEIGHT
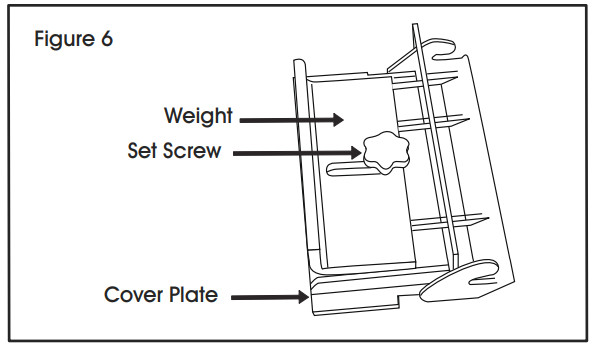
- For lighter paper tapes (60/70 grade), remove the weight. For heavier paper tapes (70+ grade), remove and reposition the weight so the bent part fits over the front of the top heater. (See Figure 6) NOTE: Paper jams often result from the weight not being removed.
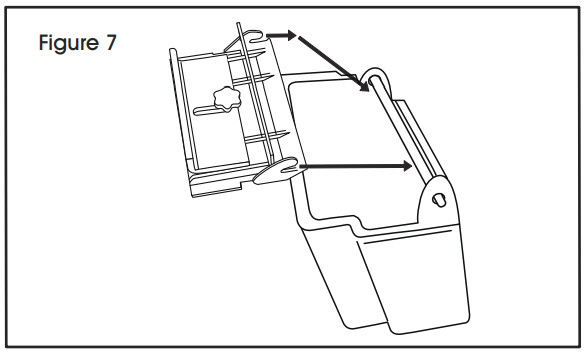
- Take the weight assembly and slide the notches over the pivot shaft on the water reservoir. (See Figure 7)
LOAD TAPE ROLL
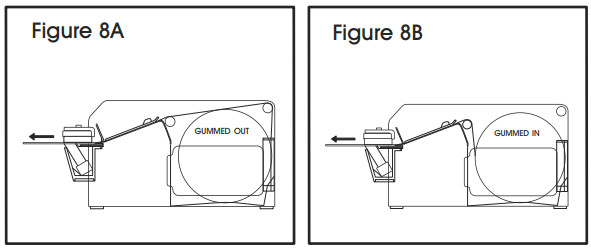
- Adjust roll guide plates to fit tape width. (See Figure 8)
- Reposition the roller for gummed in or gummed out tapes.
- Insert tape roll between guide plates and over roller so tape is positioned gummed side down. Feed the tape under the upper paper guide and white wheel so the tape end extends out the undercover plate and weight. (See Figures 8A and 8B)

OPERATION
Operate machine switched on, tape loaded, and water in the reservoir.
- For pre-set lengths of tape press the numbered key that corresponds to the desired length.
- Add 2″ to pre-set lengths. For example, to make a 10″ length of tape: First, push the +2 key (light comes on), then push the 8 key. The dispenser makes a 10″ length of tape. Push the +2 key again to turn off this feature.
- For custom, tape lengths press and hold the green Random Length key until the desired length is dispensed.
PROGRAMMING TWO LENGTHS OF TAPEYou can program the dispenser to memorize one or two different tape lengths with the Short Length and Long Length keys.![]() NOTE: Programmed keys must be reset each time the dispenser is switched on.
NOTE: Programmed keys must be reset each time the dispenser is switched on.
- Set Short Length While holding down the Short Length key, press the number key that corresponds to the shorter length desired.
- Release both keys to set the short length.
- Set Long Length (Second Length) While holding down the Long Length key, press the number key that corresponds to the longer length desired.
- Release both keys to set the long length.
- Use the Short Length key to dispense your shorter length and the Long Length key to dispense the longer length.
- Slide the color-coded sliding indicators next to the number keys to mark your two chosen lengths.
PROGRAMMING INTERMEDIATE LENGTHS OF TAPEUse this procedure to dispense intermediate lengths of tape (example, 18″ or 22″ lengths)
- Press the +2 key (indicator light is on). This adds 2″ to any pre-set number key you choose.
- Follow Steps 1-6 in “Programming Two Lengths of Tape.”
WHEN DISPENSER IS NOT IN USEAlways switch power off.
MAINTENANCE AND CARE
CAUTION! Only trained personnel should be allowed to operate or service this machine.
WEEKLY MAINTENANCE
- Wash the moistening brush with soap and warm water. Rinse thoroughly with water.
- Clean the dispenser using compressed air (NEVER WATER) to clean off dust and dirt.
MONTHLY MAINTENANCE
- Lubricate the cutting blades with a drop of oil.
- Clean the rubber tape advance wheel with water.DO NOT grease or oil the wheel. Access the wheel by removing the upper paper guide.
- Clean the water reservoir with soap and water.Rinse thoroughly.
REFERENCE
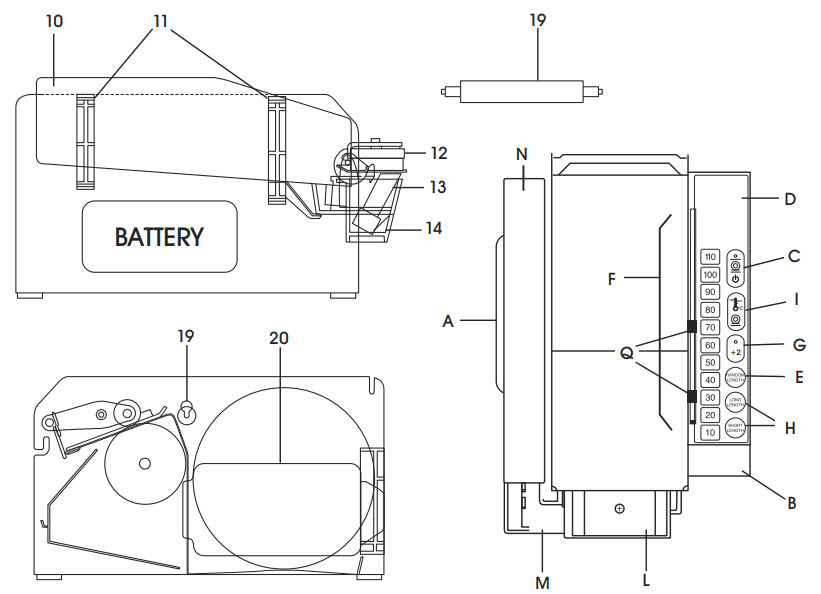
| LETTER / # | DESCRIPTION |
| A | Battery |
| B | Side Cover |
| C | Main Light Switch |
| D | Switch Board |
| E | Green Key Random Length – Dispenses Tape |
| F | Key for 11 Pre-Sets of Tape Length |
| G | +2 (inches) Key – Pre-Sets Length by 2″ |
| H | Shod Length – Sets One Length of Tape ShorterLong Length – Sets One Length of Tape Longer than the First One |
| I | Top Heater Switch (N/A) |
| L | Cover Plate |
| M | Water Tank |
| Q | Colored Indicators |
| N | Water Bottle |
| 10 | Water Reservoir |
| 11 | Bottle Holder |
| 12 | Cover Plate With Weight |
| 13 | Brush |
| 14 | Complete Water Tank Without Brush |
| 19 | 20 Diameter Roll |
| 20 | Roll Guide Plate |
![]()
1-800-295-5510uline.com0621 IH-2243
[xyz-ips snippet=”download-snippet”]