![]()
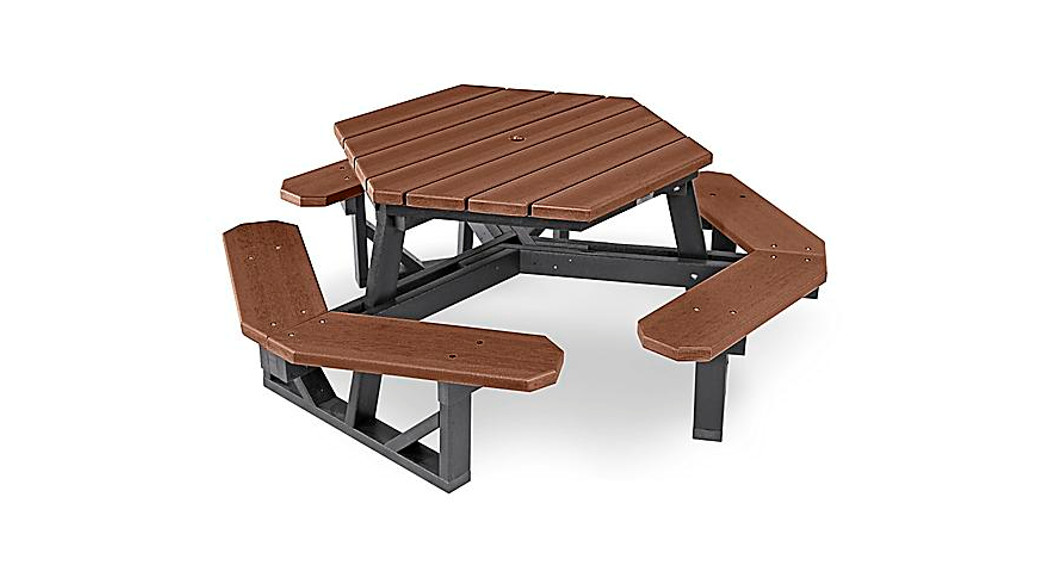
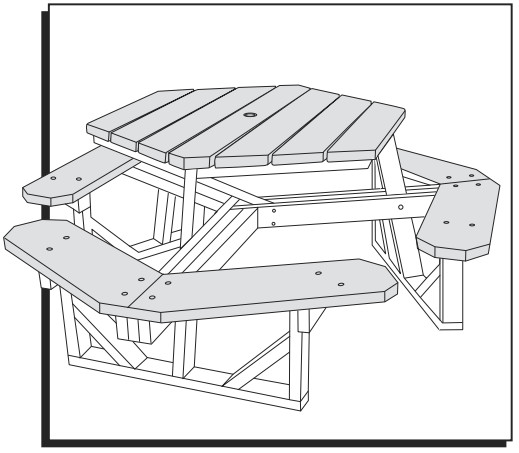
H-2560 HEX PICNIC TABLETOOLS NEEDED7/16″ (11 mm) Socket Bit1-800-295-5510uline.com
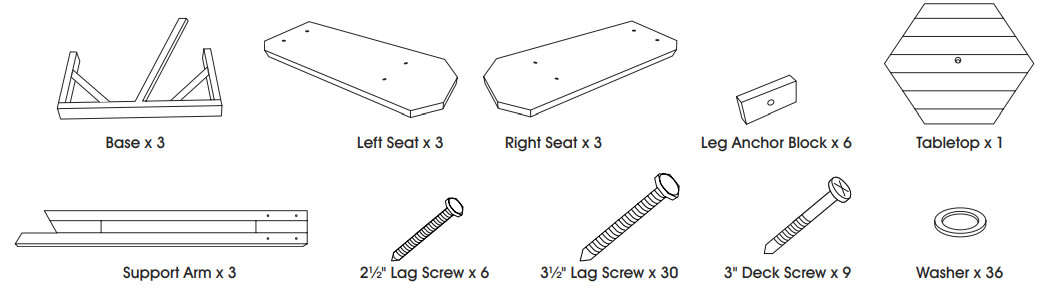
PARTS
ASSEMBLY
![]() NOTE: It is important to keep screws loose throughout the assembly. Tighten during step 11.
NOTE: It is important to keep screws loose throughout the assembly. Tighten during step 11.
- Verify all parts are present before beginning.
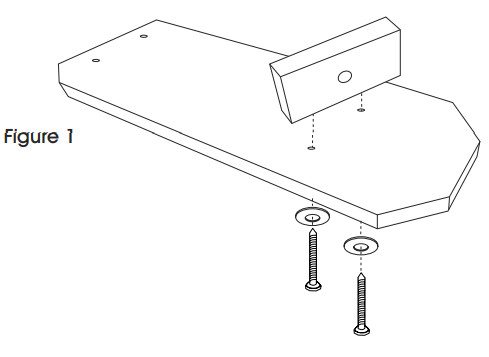
- Loosely attach the six-leg anchor blocks to the bottom of the six seats using the 3½” lag screws, washers, power drill and 7/16″ socket bit (will tighten later in step 11). The bored hole on the leg anchor block faces the side with three edges. (See Figure 1)

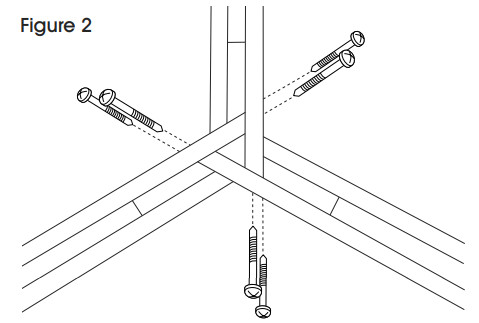
- Place the three support arms on a flat level surface in a fan pattern. Using the 3″ deck screws, loosely attach the support arms together (will tighten later in step 11). Use two deck screws per side. (See Figure 2)
ASSEMBLY CONTINUED - Twist center support of base so it is flush with bottom board. Insert 3″ deck screw into the predrilled hole through the bottom board. Repeat on each base. (See Figure 3)
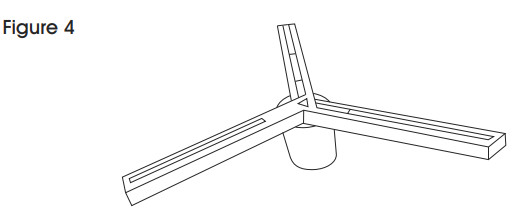
- Position the seat assembly approximately 10-15″ off the floor. A five-gallon bucket under the center works well. (See Figure 4)
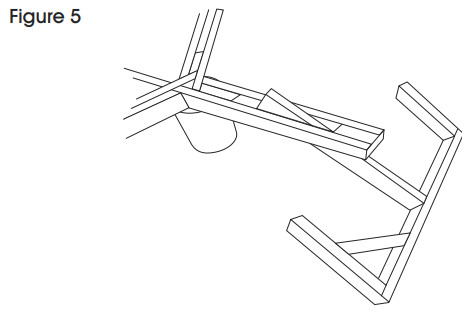
- Insert a base support in the open space of each of the three support arms, centering each leg on the predrilled countersunk holes of the support arms. Loosely attach the base support uprights to the support arms with 3½” lag screws and flat washers. Do not fully tighten at this step. (See Figure 5)
- Place the tabletop on top of table to align with the holes of the base. Make sure the support arms are centered. (See Figure 6)
- Loosely attach each base to the tabletop and support arms using the 3½” lag screws and washers with the power drill and 7/16″ socket bit (will tighten later in step 11).
- Loosely attach the pre-drilled holes of the seat to the support arms using 12 of the 3½” lag screws and 12 washers with the power drill and 7/16″ socket bit (will tighten later in step 11). (See Figure 7)
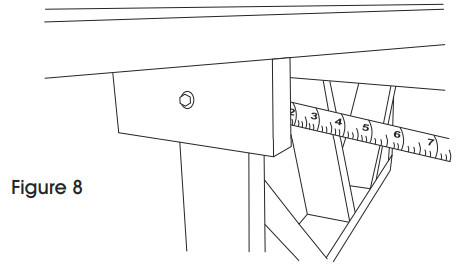
- Use the 2½” lag screws to loosely attach base to the seat (will tighten later in step 11). Use a tape measure to ensure that the seat is centered and 2″ from base. Make sure the seat is pressed flat against the base. (See Figure 8)
ASSEMBLY CONTINUED
- Make sure the table is squared and tighten all lag and deck screws. WARNING! Do not lean on tabletop or seats when assembling. NOTE: H-6681 Mounting hardware sold separately.
 ASSEMBLY CONTINUED
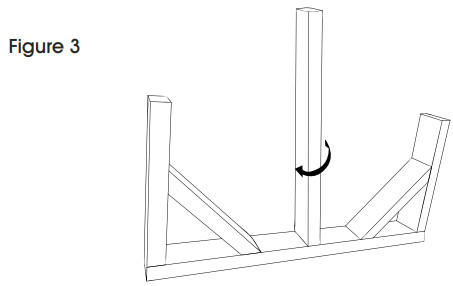


![]()
1-800-295-5510uline.com0721 IH-2560
[xyz-ips snippet=”download-snippet”]