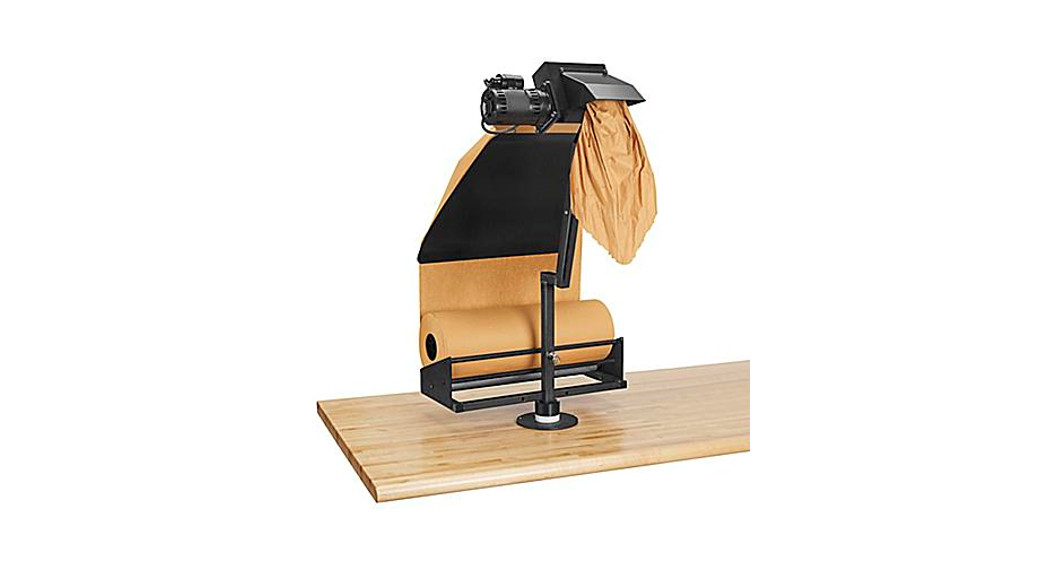

H-5334TABLETOP PAPER MACHINE1-800 -295-5510uline.com
| TOOLS INCLUDED | TOOL NEEDED |
|
 |
ASSEMBLY
- Remove all parts from the three shipping cartons.
- Position the tabletop base on a flat workstation surface.

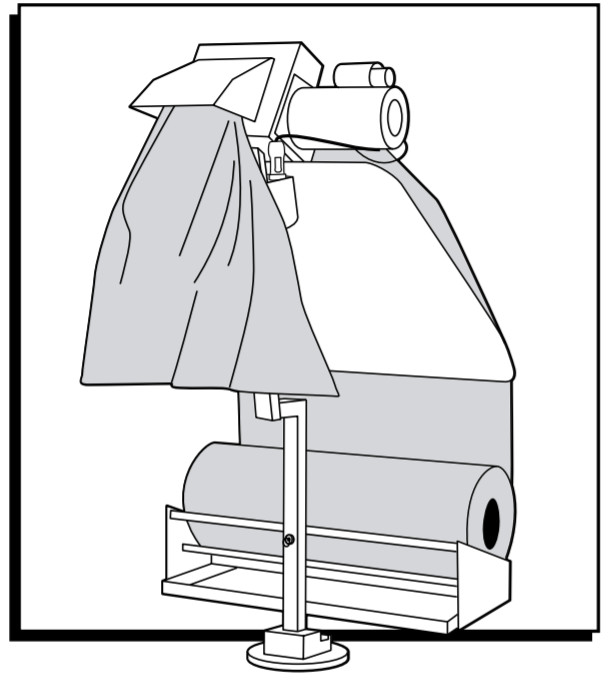
- Rotate the base so the shaft channel is facing the direction you want the paper to exit the machine from. (See Figure 1)
- Fasten the base to the workstation using holes in the base. (See Figure 1)NOTE: Mounting bolts not included.
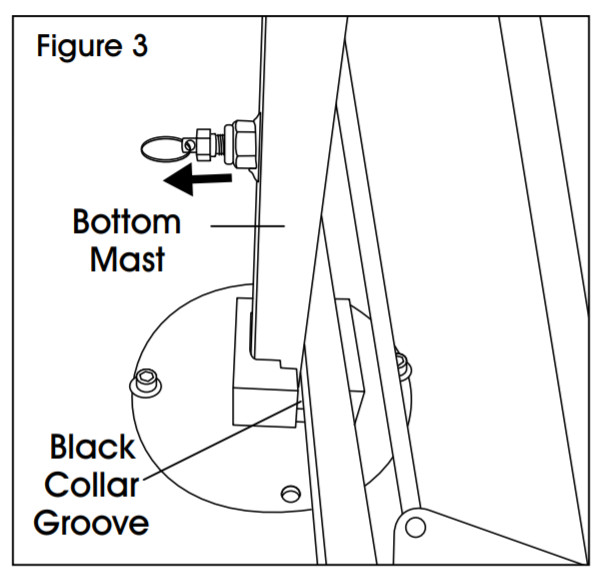
- Rotate the black collar so the shaft channel is on the opposite side of the groove in the collar. (See Figure 1)
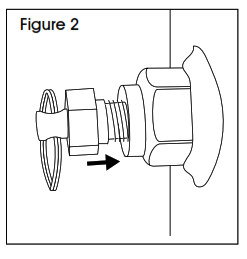
- Fasten the spring-loaded pin and spacer using a 1/2″ wrench all the way into the welded nut on the front of the bottom mast. (See Figure 2)
- While pulling the spring-loaded pin, place the bottom mast onto the shaft of the tabletop base. Lower the body so the crossbar fits into the black collar groove. (See Figure 3)
- Release spring-loaded pin and rotate body until the pin clicks into the channel on the shaft.
- Position topmast so the paper exit is facing front. Insert the topmast into the top of the bottom mast. Secure with 3/8-16 x 3/4″ bolts and 3/8″ lock washers (2 each). (See Figure 4)
- Pull the spring-loaded pinout and turn the unit 180 degrees.
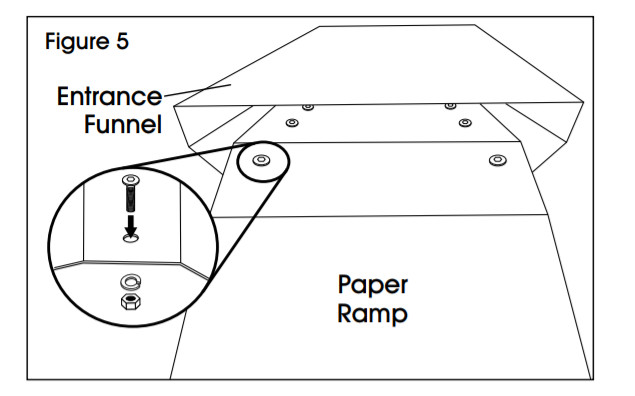
- Place paper ramp onto paper entrance funnel and secure with 10-32 x 1/2″ bolts (6), ensuring bolt head is on the inside of the funnel. Secure with #10 locking washers (6) and 10-32 nuts (6) underneath the paper ramp. (See Figure 5)CAUTION! If the bolt head is not on the inside of the funnel, paper can catch on the bolt shaft and nut.
- Rotate unit 180 degrees back to the original position, with paper exit shoot facing front.
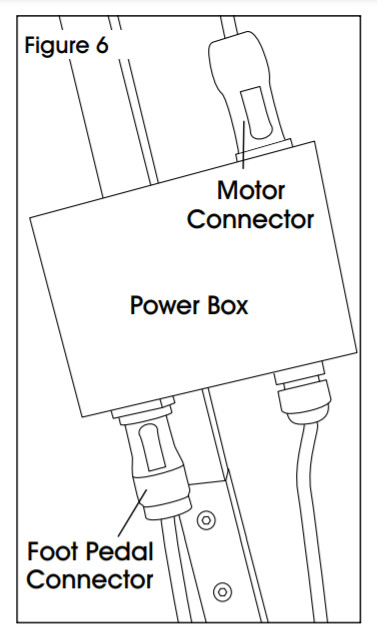
- Insert blue motor connector plug into the blue plug on top of the power box and give a quarter twist to lock. (See Figure 6)
- Insert gray foot pedal connector plug into the gray plug on the bottom of the power box and give a quarter twist to lock. (See Figure 6)NOTE: Both plugs will click when locked in place.


OPERATION
- Plug the power cord into a standard 115V outlet.
- Make sure the power switch is turned off.
- Pull the springloaded pin and turn the unit 180 degrees to make the paper cradle easily accessible.
- Load kraft paper onto the paper cradle with the paper roll unspooling from the outside. (See Figure 7)
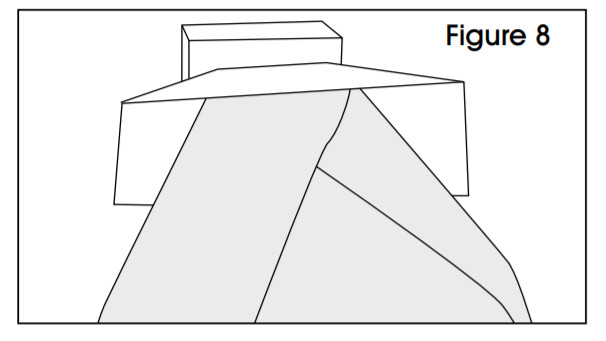
- Pull the end of the paper up towards the paper entrance funnel and fold the paper into itself in a rough triangle shape. (See Figure 8)
- Insert paper into the paper entrance funnel.Using the threading disk, turn knob clockwise until it catches the paper and feeds it through Threading Disk the head and out the exit shoot. (See Figure 9)
- Rotate unit 180 degrees back to the original position, with the paper exit shoot facing front. Turn on with power switch on the ower box.
- Press down on the foot pedal to eject paper from the exit shoot.NOTE: The machine will continue dispensing paper until the foot is let off the foot pedal.
- Release foot pedal.
- Grab the ejected paper and pull strongly in a downward motion to tear the paper from the machine.


TROUBLESHOOTING
| OPERATING ISSUE | CAUSE |
RECOMMENDATIONS |
| No power to the machine. | Unit not plugged in.Motor not connected to power ox.The machine needs to be reset.The foot pedal is not connected to the power box. | Connect the power cord to a standard 115V outlet.Connect the blue motor connector plug to the blue plug on the power box: make sure it has clicked into place.Check the white two amp reset button on the power box to make sure it is recessed.Connect the gray foot pedal connector plug to the gray plug on the power box; make sure it has clicked into place. |
| Paper not pulling through the head. | Paper wadded in entrance funnel, not flat. | Make sure paper is flat and folded in on itself in the entrance funnel. |
| Paper exposed in exit shoot, but not being pulled through with foot pedal operation. | Paper is caught or not threaded through enough.Insufficient drive wheel tension. | Turn threading disk clockwise to advance the paper.Tighten the bolts on the top of the head a quarter turn at a time. Repeat as needed until drive wheels grip paper. |
| Paper jamming. | Not using a recommended paper. Restriction in the entrance or exit funnel. | Use only 30 lb. or 40 lb. kraft paper with machine.Unplug the unit and retrieve any debris or Jammed paper from the machine by tearing the paper from the paper ramp and turning the threading disk clockwise. |
| Paper ripping during operation. | Not using a recommended paper.The live roller on the cradle is not rolling freely.Continuous, back-to-back, short bursts of paper using the pedal.Too much drive wheel tension. | Use only 30 lb. or 40 lb. kraft paper with machine.Paper roll needs to be unspooled from the rear of the paper cradle.Use gentle foot pedal operation. avoid stepping on the foot pedal with extreme force.Loosen the bolts on top of the head a quarter turn at a time. Repeat as needed until drive wheels are no longer ripping the paper. |
If problems persist, please contact Uline Customer Service at 1-800-295-5510.
1-800-295-5510uline.com
References
[xyz-ips snippet=”download-snippet”]