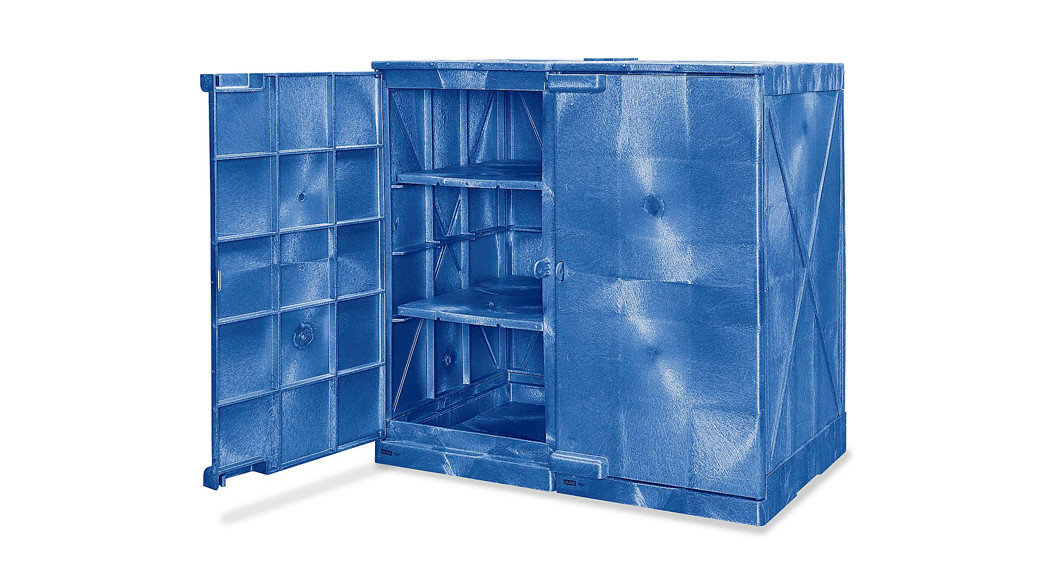
![]() H-566024 GALLON POLY CORROSIVE CABINET1-800-295-5510unline.com
H-566024 GALLON POLY CORROSIVE CABINET1-800-295-5510unline.com
PARTS
|
REF. |
QTY. |
DESCRIPTION |
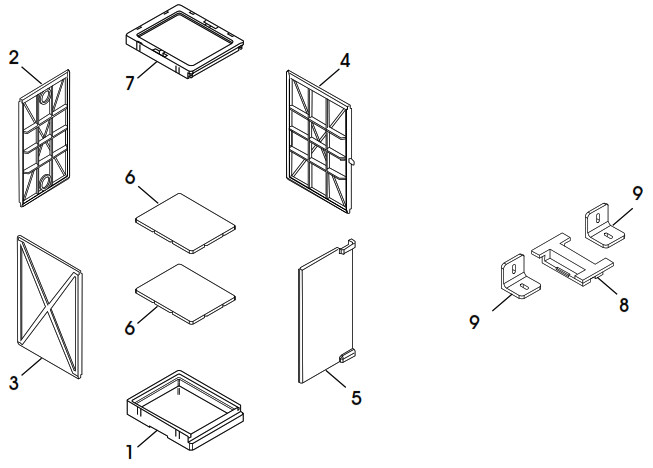
| 1 | 2 | Base Panel with Hinge Pins |
| 2 | 2 | Back Panel |
| 3 | 2 | Side Panel |
| 4 | 2 | Side Panel with Hasp |
| 5 | 2 | Front Door Panel |
| 6 | 4 | Shelf Panel |
| 7 | 2 | Top Panel with Hinge Pins |
| 8 | 2 | I-Beam Lock |
| 9 | 4 | L-Bracket |
| 2 | Door Label (Not Shown) |
ASSEMBLY
![]() NOTE: Cabinet will come in two boxes. You will first build a left, and then a right-hinge door cabinet.1. Place base (1) on level surface facing side D. (See Figure 1)
NOTE: Cabinet will come in two boxes. You will first build a left, and then a right-hinge door cabinet.1. Place base (1) on level surface facing side D. (See Figure 1)
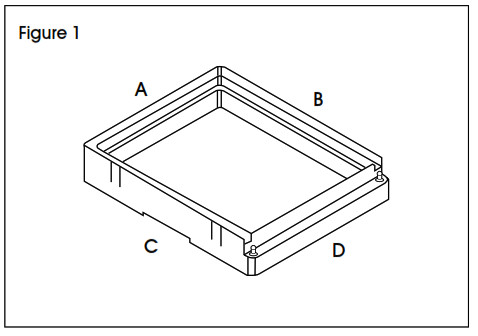
2. Slide back panel (2) into slot A and snap into place. (See Figure 2)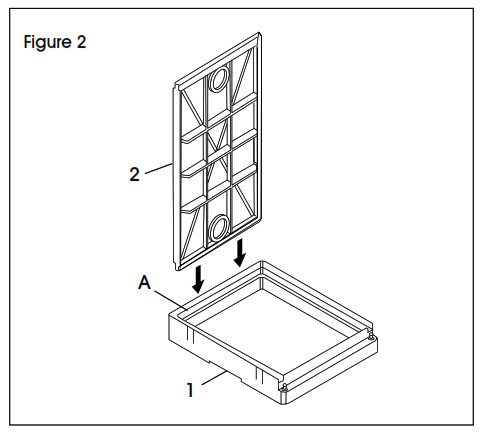 3. Slide side panel (3) into slot C and snap into place. (See Figure 3)

4. Slide side panel with hasp (4) into slot B and snap into place. (See Figure 4)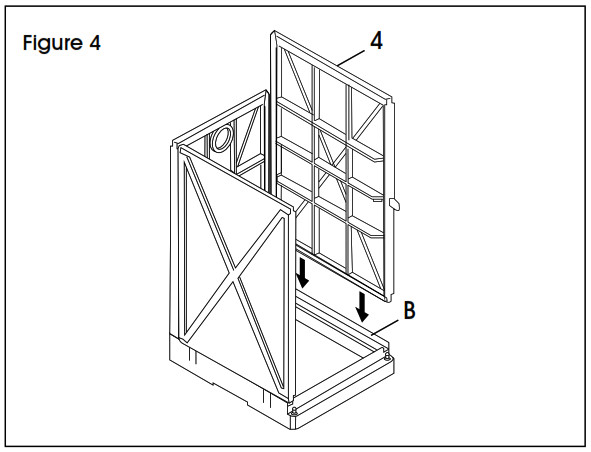
5. Place front door panel (5) bottom hole onto left base hinge pin with handle on the right side when facing side D. (See Figure 5) 6. Line up top panel (7) top hinge pin with top hole in front door panel (5). Snap top panel (7) down onto panels (2, 3, and 4). (See Figure 6)
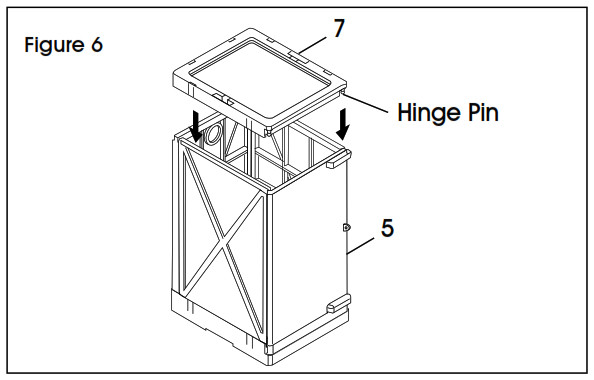 7. Place two shelf panels (6) flat side up onto shelf supports on the back and side panels within the cabinet. (See Figure 7) One shelf can be placed over the sump area.
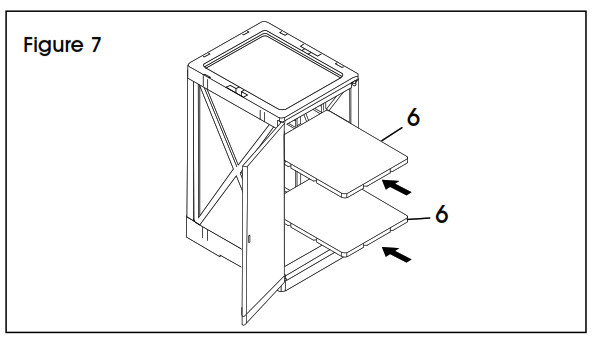 8. Repeat steps 1-7 for the right-hinge door cabinet:
- For step 3: Slide side panel with hasp (4) into slot C and snap into place.
- For step 4: Slide side panel (3) into slot B and snap into place.
- For step 5: Place door panel (5) bottom hole onto right base hinge pin with a handle on the left side when facing D.
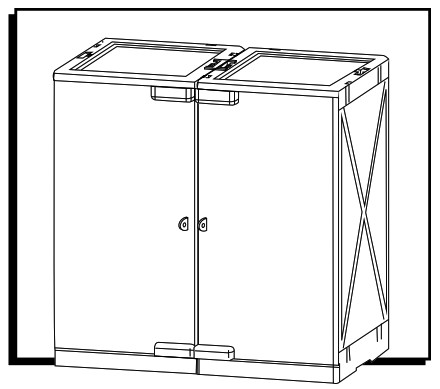
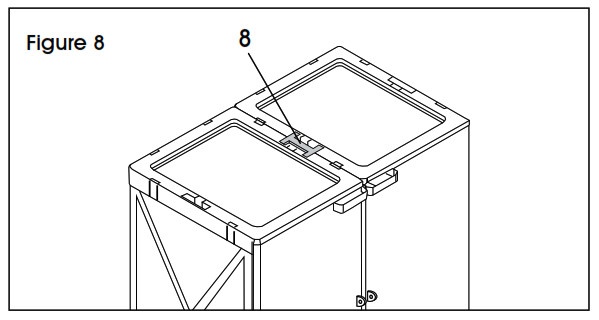
9. Place both cabinets together with the handles of both doors next to each other. (See Figure 8)10. Place I-beam lock (8) in the two corresponding snap-lock wells on the top of both cabinets. (See Figure 8)
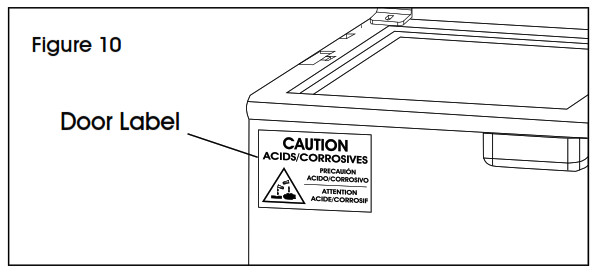
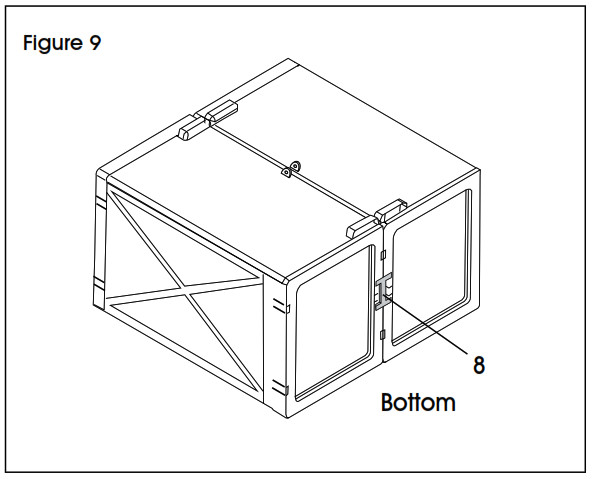 11. Lay the cabinet gently on its back with the two-door panels facing up, and place the second I-beam lock (8) in the corresponding snap-lock wells on the bottom of both base panels. (See Figure 9)12. (Optional) Peel and stick door label. (See Figure 10)
OPTIONAL WALL MOUNTING
TOOLS NEEDED
![]() NOTE: Eight 1/4″ thread diameter lag screws required (not included). Length determined by wall material/thickness.
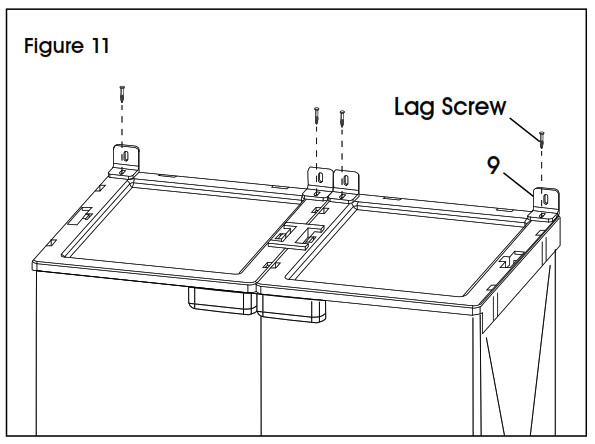
NOTE: Eight 1/4″ thread diameter lag screws required (not included). Length determined by wall material/thickness.![]() NOTE: Cabinets must be completely assembled before mounting onto the wall.1. Place the L-brackets (9) on the top panel of each assembled cabinet. (See Figure 11) Once in the desired position, screw the L-brackets (9) into the top of the cabinet using 1/4″ lag screws.
NOTE: Cabinets must be completely assembled before mounting onto the wall.1. Place the L-brackets (9) on the top panel of each assembled cabinet. (See Figure 11) Once in the desired position, screw the L-brackets (9) into the top of the cabinet using 1/4″ lag screws.
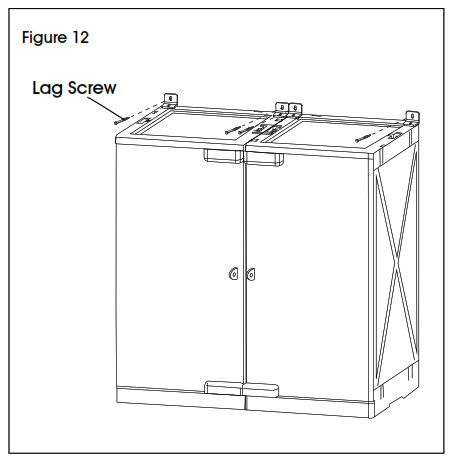
2. Place the cabinet (with L-brackets attached) against the desired wall. Once in position, use four more 1/4″ lag screws and screw them into the L-brackets (9) and wall. Tighten screws until the cabinet no longer moves when pushed on. (See Figure 12)
[xyz-ips snippet=”download-snippet”]