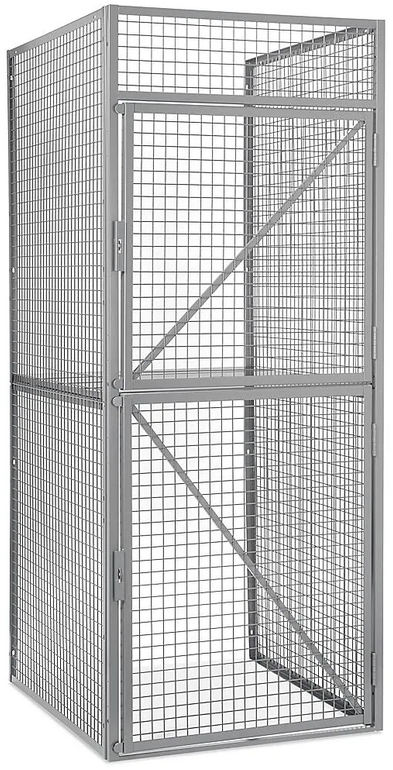
ULINE H-8325 Double Tier Bulk Storage Lockers
TOOLS NEEDED

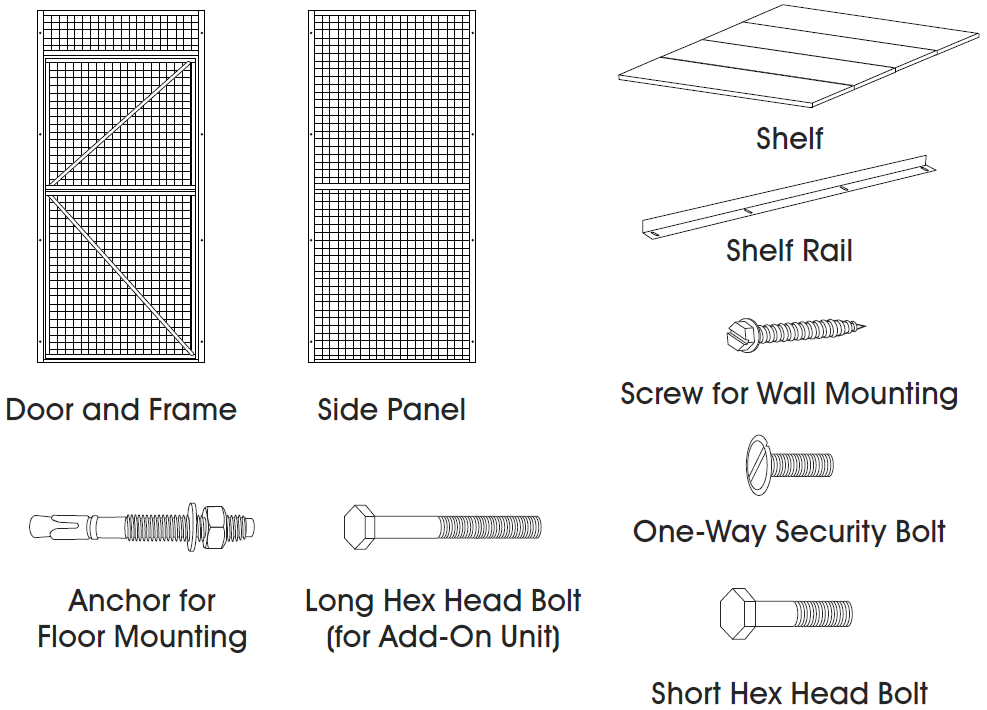
PARTS
|
STARTER UNIT |
ADD-ON UNIT |
||
|
# |
DESCRIPTION |
QTY. |
QTY. |
|
1 |
Door Frame and Doors |
1 |
1 |
|
2 |
Side Panel |
2 |
1 |
|
3 |
Shelf (4-Piece) |
1 |
1 |
|
4 |
Shelf Rail |
2 |
2 |
|
5 |
Short Hex Head Bolt |
16 |
12 |
|
6 |
Optional One-Way Security Bolt |
8 |
8 |
|
7 |
Carriage Bolt for Shelf Rail (Not Shown) |
4 |
2 |
|
8 |
Nut for Shelf Rail (Not Shown) |
4 |
2 |
|
9 |
Long Hex Head Bolt |
N/A |
3 |
|
10 |
Anchor for Floor Mounting |
6 |
4 |
|
11 |
Screw for Wall Mounting |
8 |
4 |
ASSEMBLY
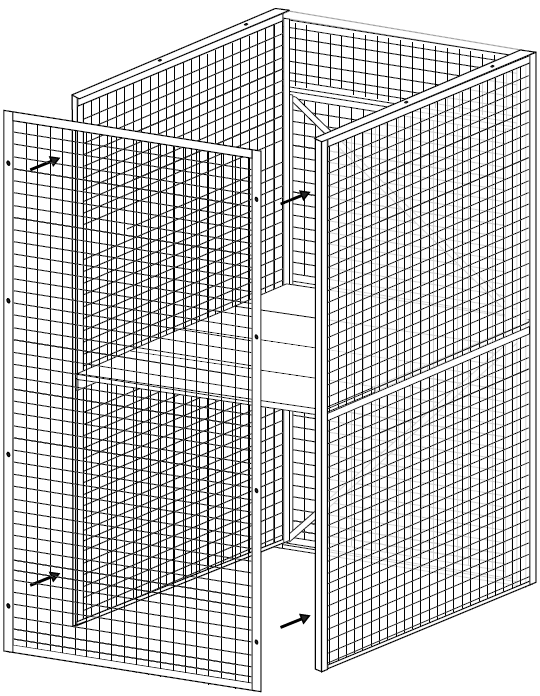
STARTER UNIT ASSEMBLY
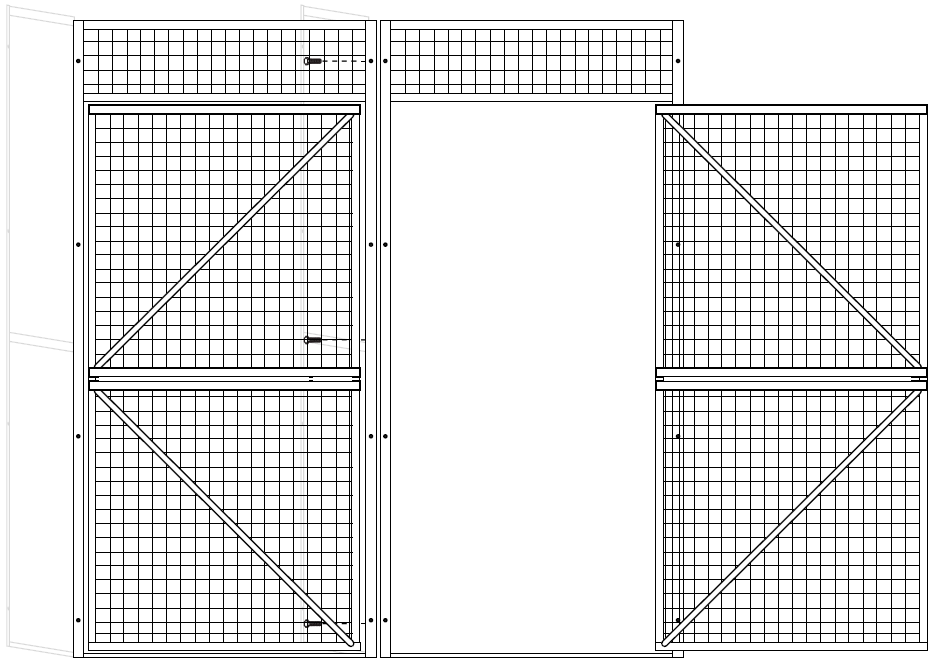
- Place door frame on a protected flat surface, with door opening facing down.

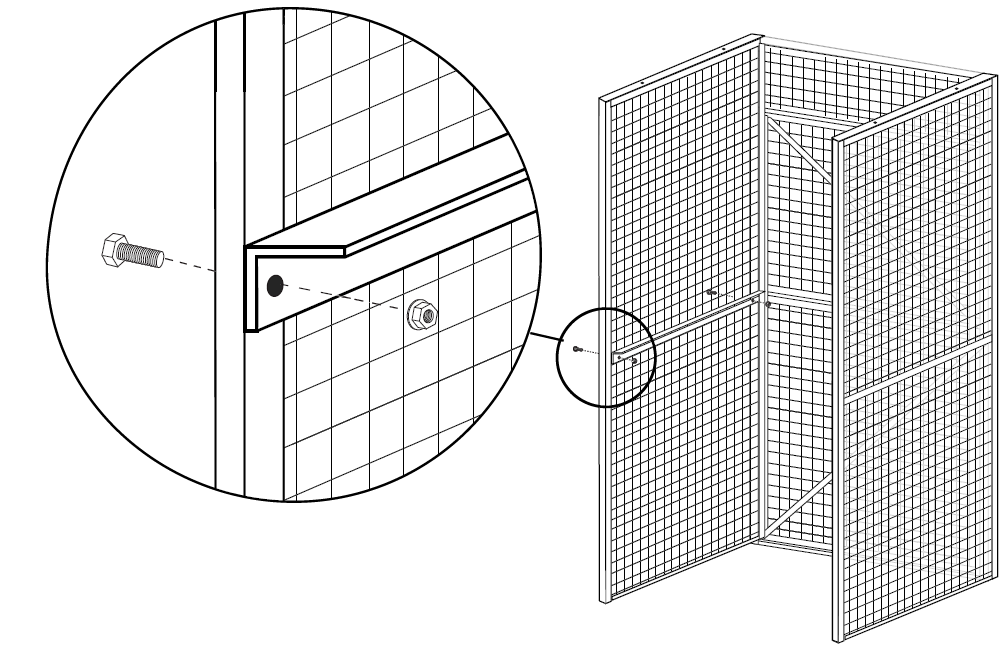
- Bolt first side panel to door frame by inserting four short hex head bolts through side panel into threaded holes circled in door frame. Repeat for other side panel.
- Tighten all bolts fully, and carefully stand unit upright.
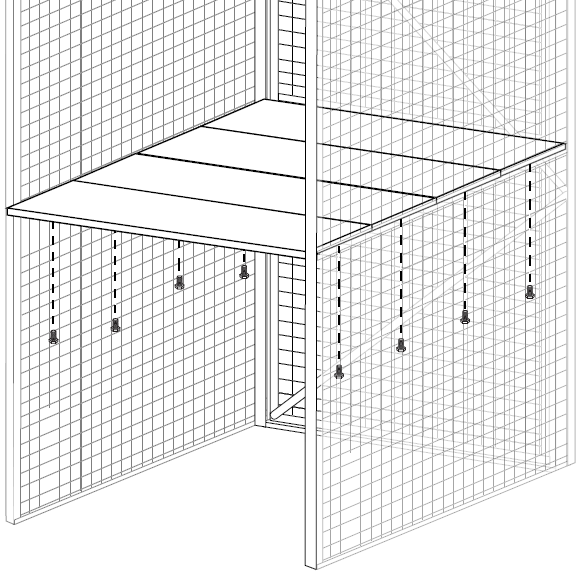
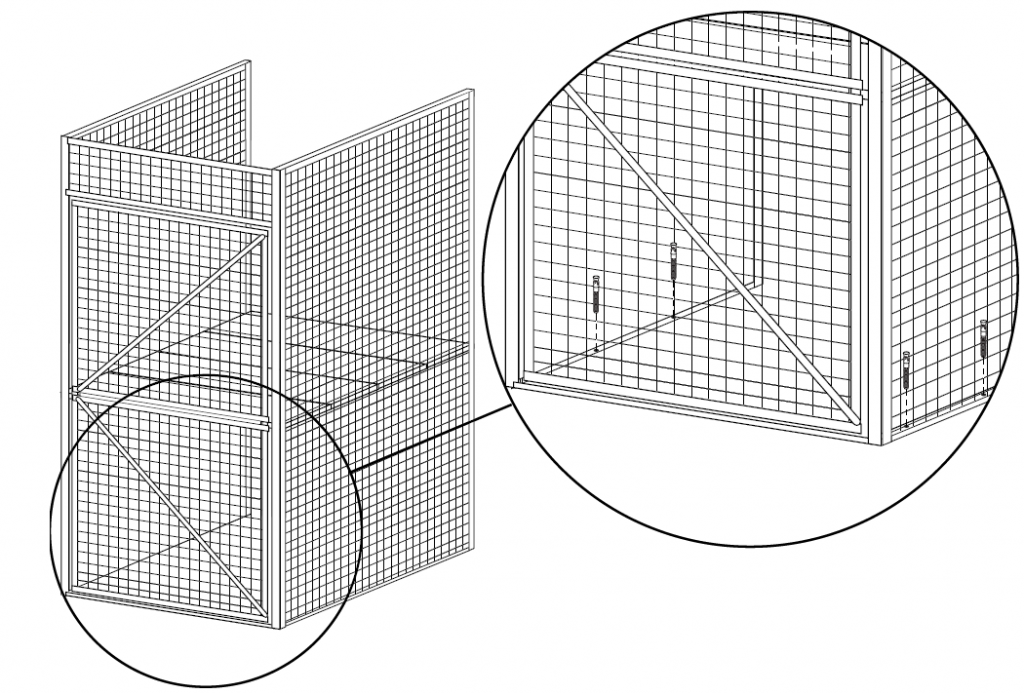
- Bolt shelf rail at middle level to inside of side panel outer flange using two longer carriage bolts and two nuts. Shelf rail will have flush side facing up. Repeat step on opposite side panel.
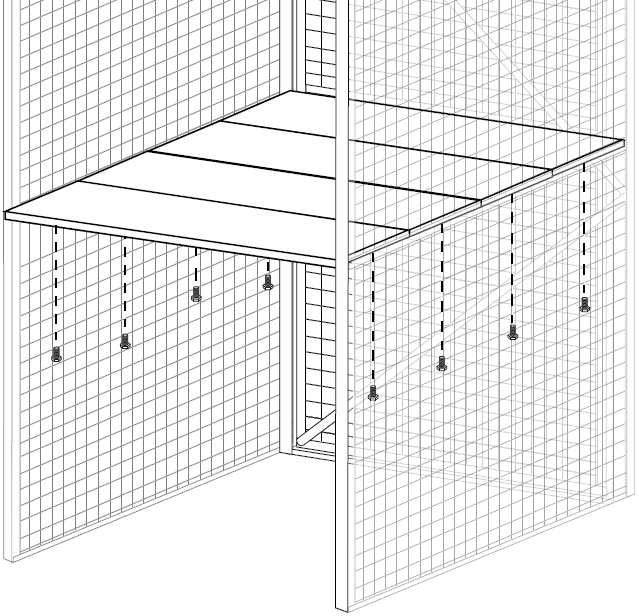
- Place first piece of four-piece shelf on top of rails with flush side facing up. Bolt first piece to shelf rails using two short hex head bolts. Bolts will go through shelf rails and into threaded holes in shelves. Repeat for the next three shelf pieces.
- Tighten all bolts and nuts fully.


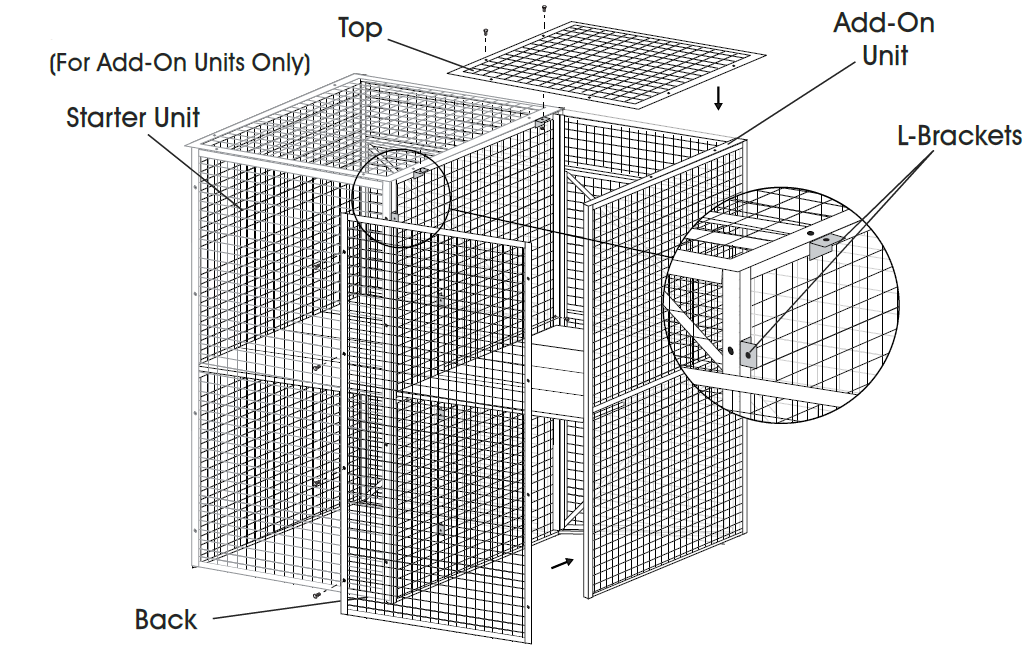
ADD-ON UNIT ASSEMBLY
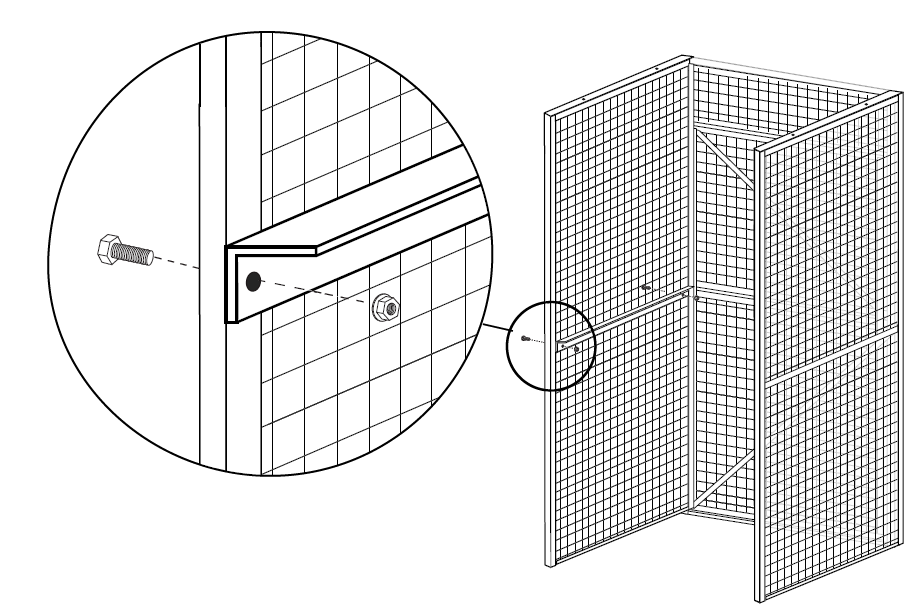
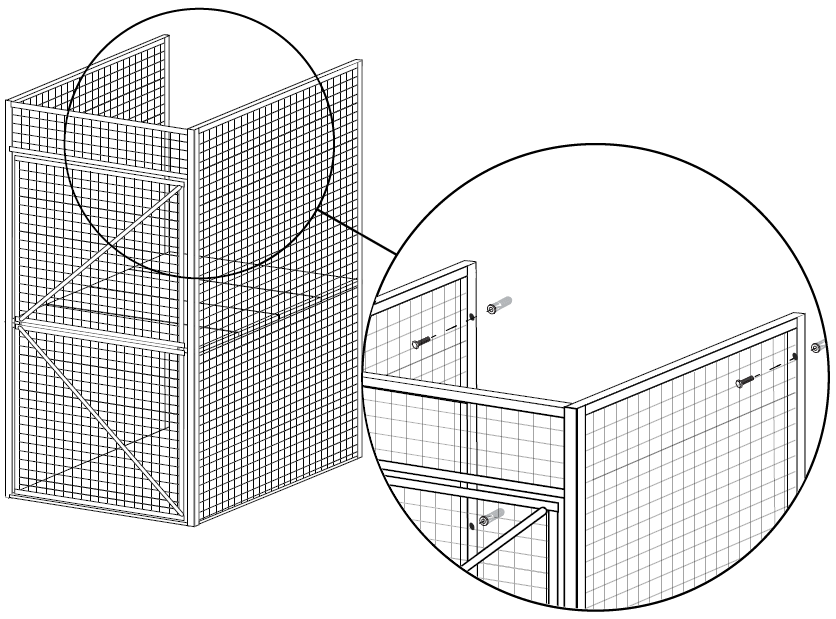
- Bolt add-on unit door frame to starter unit door frame by inserting three long hex head bolts through open holes in one door frame and into threaded hole in other door frame.
- Bolt side panel to door frame by inserting four short hex head bolts through side panel holes into threaded holes in door frame.
- Bolt shelf rail to inside of shared side panel flange using two longer carriage bolts and two nuts.
- Place first piece of four-piece shelf on top of rail switch flush side facing up. Bolt first piece to shelf rails using two short hex head bolts. Bolts will go through shelf rails and into threaded holes in shelves. Repeat for the next three shelf pieces.
- Tighten all bolts and nuts fully.

SECURING TO FLOOR OR WALL
ANCHORING TO CONCRETE FLOOR
- Verify that bulk storage locker is positioned in the desired location. Mark floor where holes will be drilled.
- Using a 5/16″ diameter masonry drill bit, drill a hole in all marked locations approximately 2.5″ deep.
- Clean out debris and dust from inside the holes.
- Insert anchor bolt and anchor sleeve through the holes in locker and into the drilled hole so that the top of the sleeve is flush with floor and threaded bolt sticks out of the floor. Slightly tap down the anchor bolt with a hammer if needed.
- Slide washer over each anchor bolt. Then tighten nut until anchor bolt is secure.
SECURING TO WALL
- Verify that bulk storage locker is positioned in the desired location. Mark wall where holes will go.
- Drill a hole in all marked locations approximately 1.5″ deep.
- Using a Phillips head screwdriver, mount locker to wall using (4) masonry screws on each side panel.
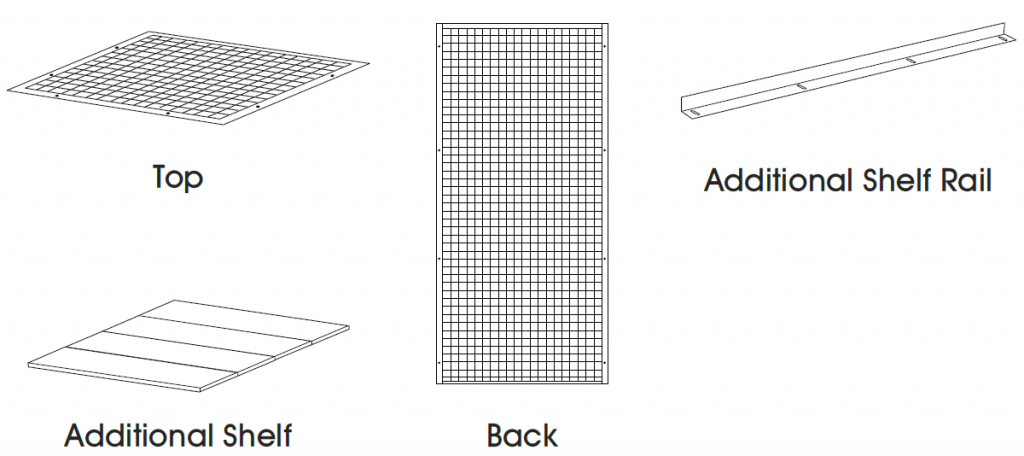
OPTIONAL ACCESSORIES
NOTE: The following products are optional accessories.
|
# |
DESCRIPTION |
QTY. |
|
1 |
Top |
1 |
|
2 |
Back |
1 |
|
3 |
Additional Shelf |
1 (4-Piece) |
|
4 |
Additional Shelf Rail |
2 |
| Short Hex Head Bolt (Not Shown) |
8 |
|
| Longer Carriage Bolt (Not Shown) |
4 |
|
| Shorter Carriage Bolt (Not Shown) |
19 |
|
| Nut (Not Shown) |
23 |
|
| L-Bracket (Not Shown) |
6 |
ASSEMBLY INSTRUCTIONS
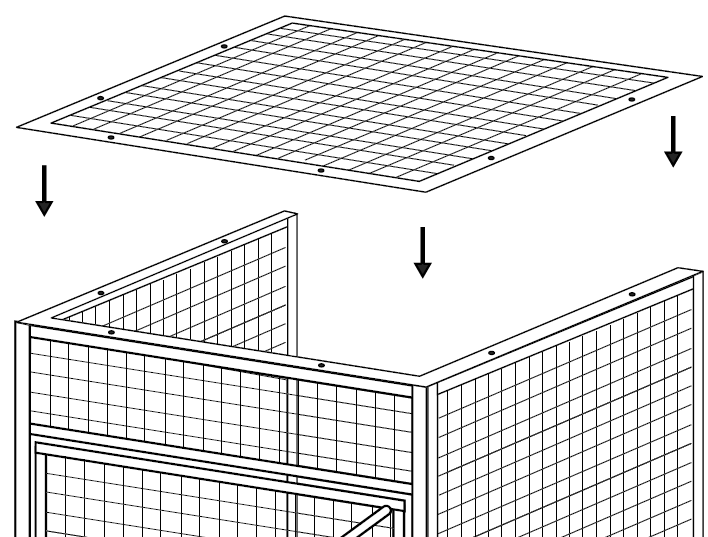
OPTIONAL TOP
- Bolt top to door frame and side panels using six shorter carriage bolts and six nuts, with nuts on the inside of unit.
OPTIONAL BACK
- Bolt back to side panels using eight shorter carriage bolts and eight nuts, with nuts on the inside of the unit.
NOTE: If attaching back with add-on units, use four L-brackets, four shorter carriage bolts and four nuts to connect the starter unit side panel to the add-on back panel.
OPTIONAL SHELF
- Bolt shelf rail at desired level to inside of side panel outer flange using two longer carriage bolts and two nuts. Shelf rail will have flush side facing up.
- Repeat step on opposite side panel.
- Place first piece of four-piece shelf on top of rails with flush side facing up. Bolt first piece to shelf rails using two short hex head bolts. Bolts will go through shelf rails and into threaded holes in shelves.
- Repeat for the next three shelf pieces.


1-800-295-5510uline.com
![]()
[xyz-ips snippet=”download-snippet”]