![]()
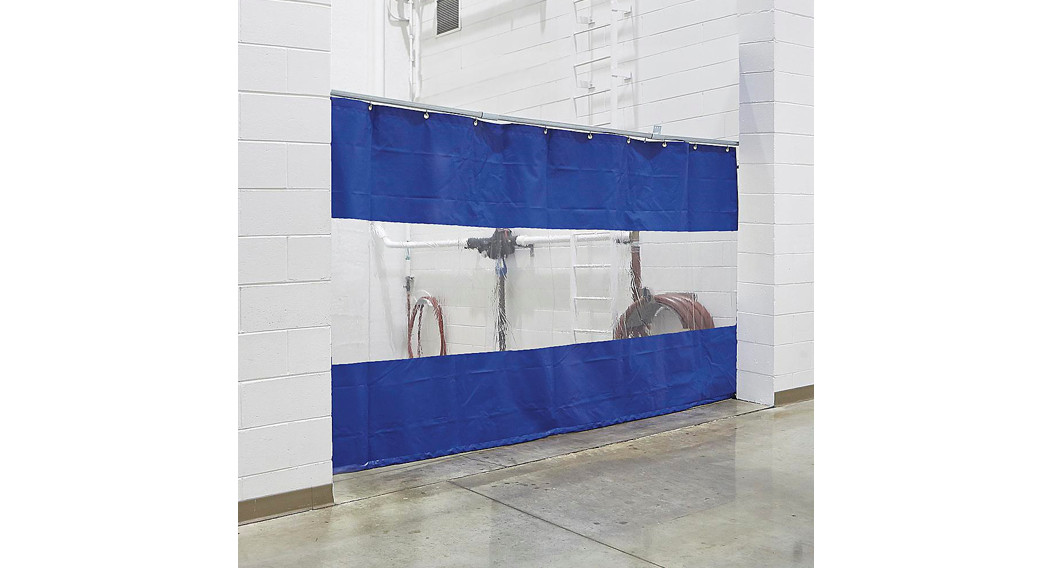
INDUSTRIAL CURTAIN WALLSH-4954, H-4955, H-6337H-6338, H-63391-800-295-5510uline.com
TOOL NEEDED
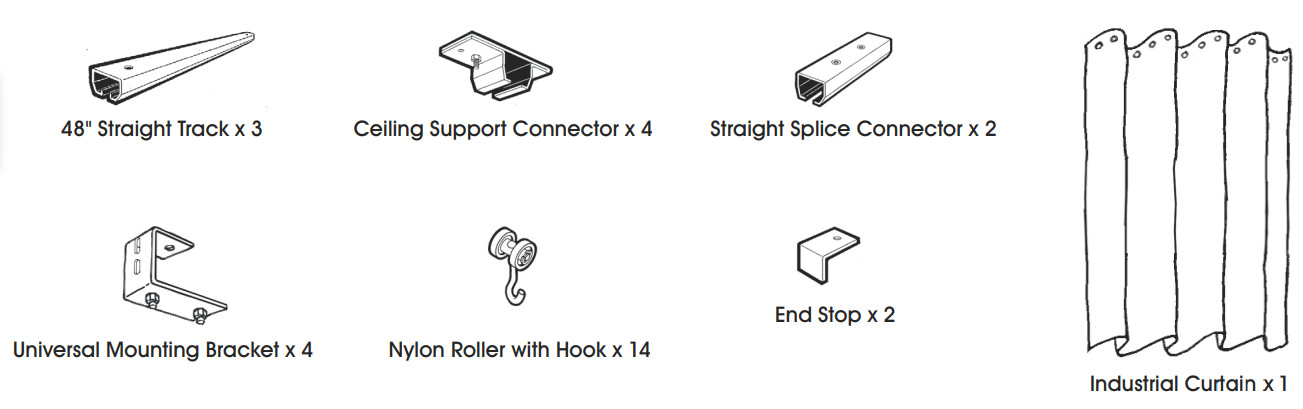
PARTS
GETTING STARTED
Before you begin, determine the method of mounting: ceiling, wall, or suspended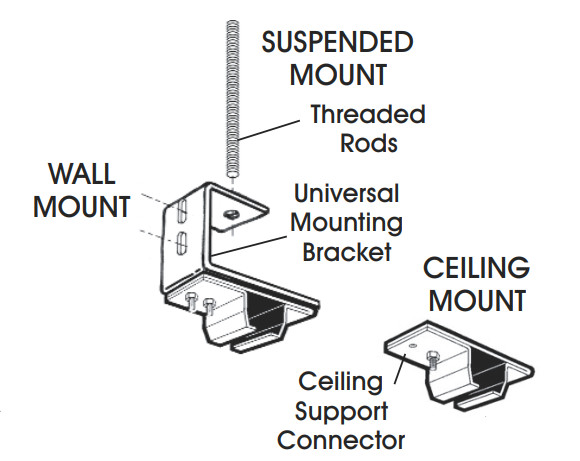
- The Universal Mounting Brackets (with the Ceiling Support Connector attached) can be used for either wall mounting or suspended mounting. Suspended mounting requires a 3/8″ threaded rod (not included).
- If you are ceiling mounting, use the Ceiling Support Connectors only.
![]() IMPORTANT! While installing the hardware, add 3″ to the height stated on the curtain tag.
IMPORTANT! While installing the hardware, add 3″ to the height stated on the curtain tag.
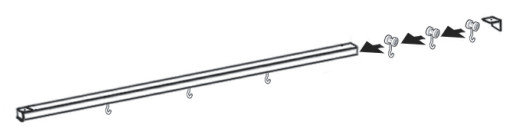
SINGLE TRACK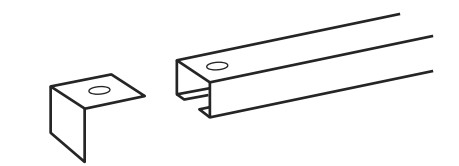
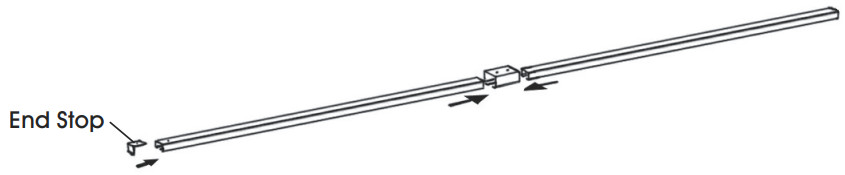
- Affix an End Stop to just one open end.
SPLICING MULTIPLE TRACKS TOGETHER
- Turn two Allen screws one and a half turns onto each Straight Splice Connector.
- Insert the two tracks and tighten the screws. Repeat this process until all pieces of track are spliced together.
- Affix an End Stop to just one open end.

![]() NOTE: Whether you are mounting a single piece of track or multiple pieces that you have spliced together, you should place the Universal Mounting Brackets approximately 6″ from each end and either side of a Straight Splice Connector.
NOTE: Whether you are mounting a single piece of track or multiple pieces that you have spliced together, you should place the Universal Mounting Brackets approximately 6″ from each end and either side of a Straight Splice Connector.
![]() IMPORTANT! Attach the Universal Mounting Brackets to the solid material that complies with the 6″ measurement.
IMPORTANT! Attach the Universal Mounting Brackets to the solid material that complies with the 6″ measurement.
MOUNTING
CEILING MOUNT
![]()
NOTE: The ceiling surface must be flat and level with the floor.
- The height is pre-determined by your ceiling height.IMPORTANT! Make sure the ceiling height is at least 3″ higher than your curtain height.
- Place a mark on the ceiling where both ends of the track will fall (A).
- Connect those marks with a straight line (B).
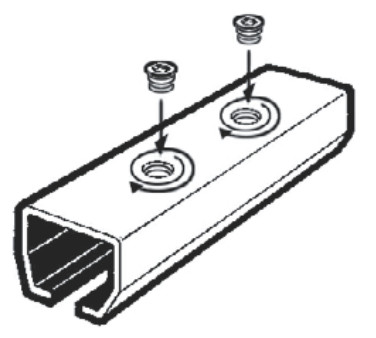
- Place the Ceiling Support Connector (C) on the ceiling. Mark the two mounting holes. Remove the bracket, drill the two holes and screw the bracket to the ceiling.

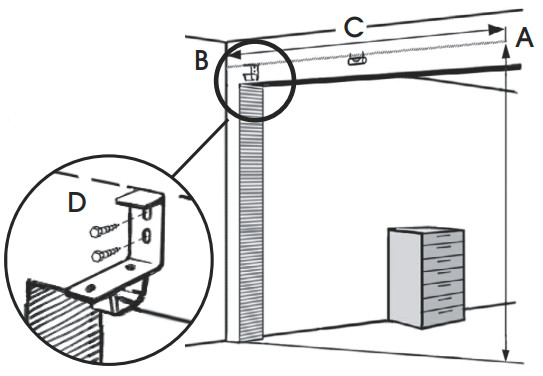
WALL MOUNT
- On the bulkhead, place a mark 5″ higher than the height of your curtain on one side (A)
- From that point, stretch a line level to the opposite side and place a mark (B). That distance should be the length of your Straight Track assembly. D
- Connect the marks with a straight level line (C).
- Place each Universal Mounting Bracket on the wall so the top edge of the bracket is even with the line (D). Mark the two mounting holes. Remove the bracket, drill the two holes and screw the bracket to the wall.
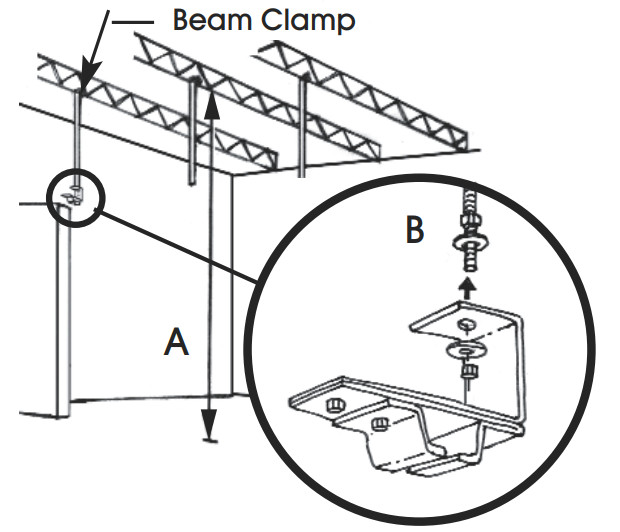
SUSPEND MOUNT
- Using this method, you will need beam clamps and threaded rods that are not included with your hardware.
- Measure the distance from the bottom of the roof beam or truss (A). Subtract from that amount the height of the curtain plus 3″. The threaded rods should be 2″ longer than that final measurement.IMPORTANT! Ensure all threaded rod ends are level with one another.
- Place a nut 1″ up from the bottom of the threaded rod (B). Next, place a washer over the rod and Universal Mounting Bracket. Then, place a washer and nut on the threaded rod. Tighten the assembly.
CURTAIN ASSEMBLY
INSERTING NYLON ROLLERS WITH HOOKS
- Place each roller into the open end of the track. The number of rollers must be equal to the number of grommets on the top edge of the curtain.
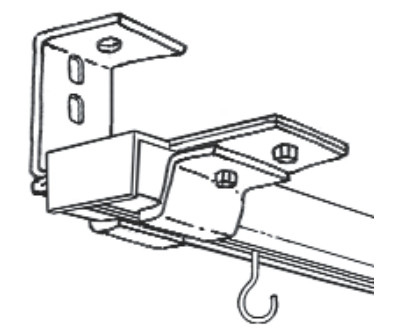
ATTACHING TRACK TO BRACKET/SUPPORT CONNECTOR
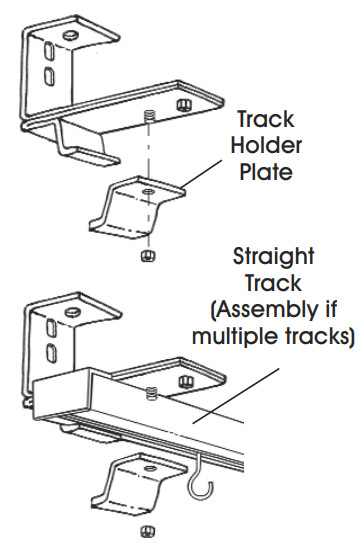
- First, remove the Track Holder Plate from each of the Ceiling Support Connectors.
- Next, place the Straight Track (assembly) into the Ceiling Support Connector.
- Finally, replace the Track Holder Plate to each of the Ceiling Support Connectors and tighten the locking nut so the track is secure.
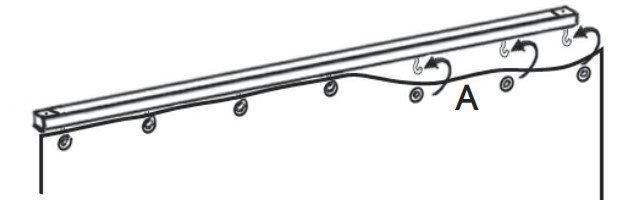
HANGING THE CURTAIN
- Place each curtain grommet over a roller hook (A).
![]() 1-800-295-5510uline.com
1-800-295-5510uline.com
[xyz-ips snippet=”download-snippet”]