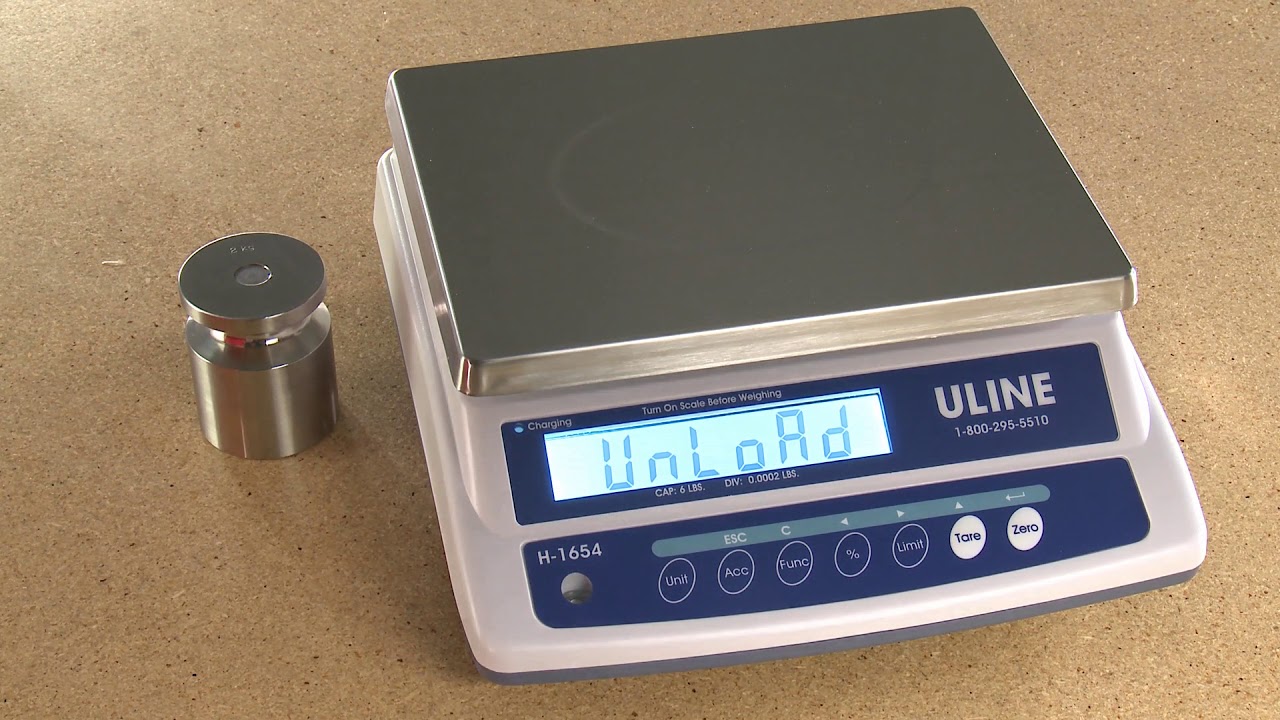
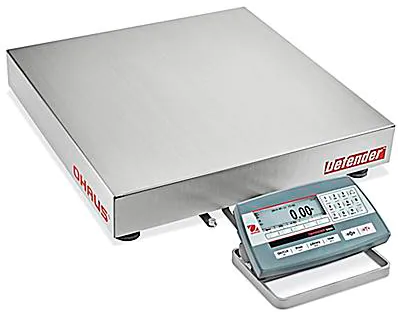
ULINE OHAUS Defender 5000 Digital Scale
OVERVIEW OF CONTROLS
CONTROL PANEL
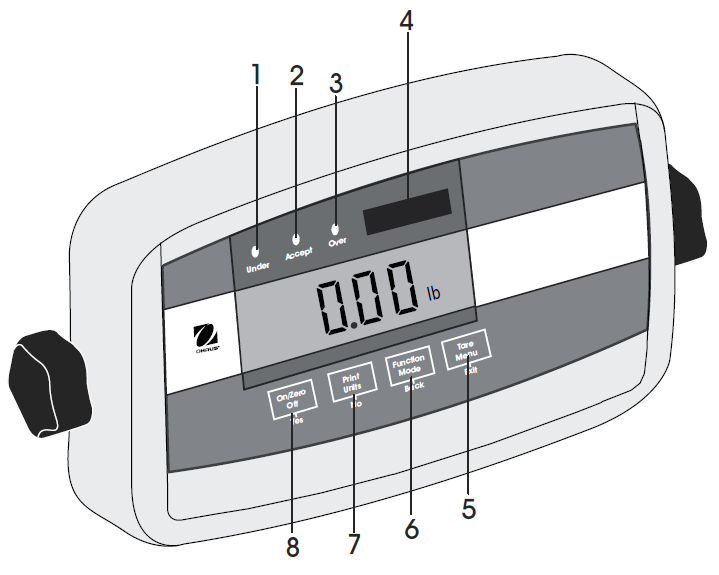
CONTROL PANEL PARTS
| # | DESCRIPTION |
| 1 | Under LED |
| 2 | Accept LED |
| 3 | Over LED |
| 4 | Capacity Label Window |
| 5 | TARE Menu Button |
| 6 | FUNCTION Mode Button |
| 7 | PRINT Units Button |
| 8 | ON/ZERO Off Button |
CONTROL FUNCTIONS
| BUTTON | On/Zero
Off Yes |
Print
Units No |
Function
Mode Back |
Tare
Menu Exit |
| PRIMARY FUNCTION
(Short Press) |
ON/ZERO
Turns the indicator ON. If indicator is ON, sets zero. |
PRINT
Sends the current value to the COM port if AUTOPRINT is set to off. |
FUNCTION
Initiates an application mode. Temporarily displays the active mode’s reference data. In weigh mode, temporarily displays 10x expanded resolution |
TARE
Performs a tare operation. |
| SECONDARY FUNCTION
(Long Press) |
OFF
Turns the indicator off. |
UNITS
Changes the weighing unit. |
MODE
Allows changing the application mode. Press and hold allows scrolling through modes. |
MENU
Enter the user menu. |
| MENU FUNCTION
(Short Press) |
YESAccepts the current setting on the display. | NO
Advances to the next menu or menu item.Rejects the current setting on the display and advances to the next available setting.Increments the value. |
BACKMoves back to previous menu item.Decrements the value. | EXITExits the user menu.Aborts the calibration in progress. |
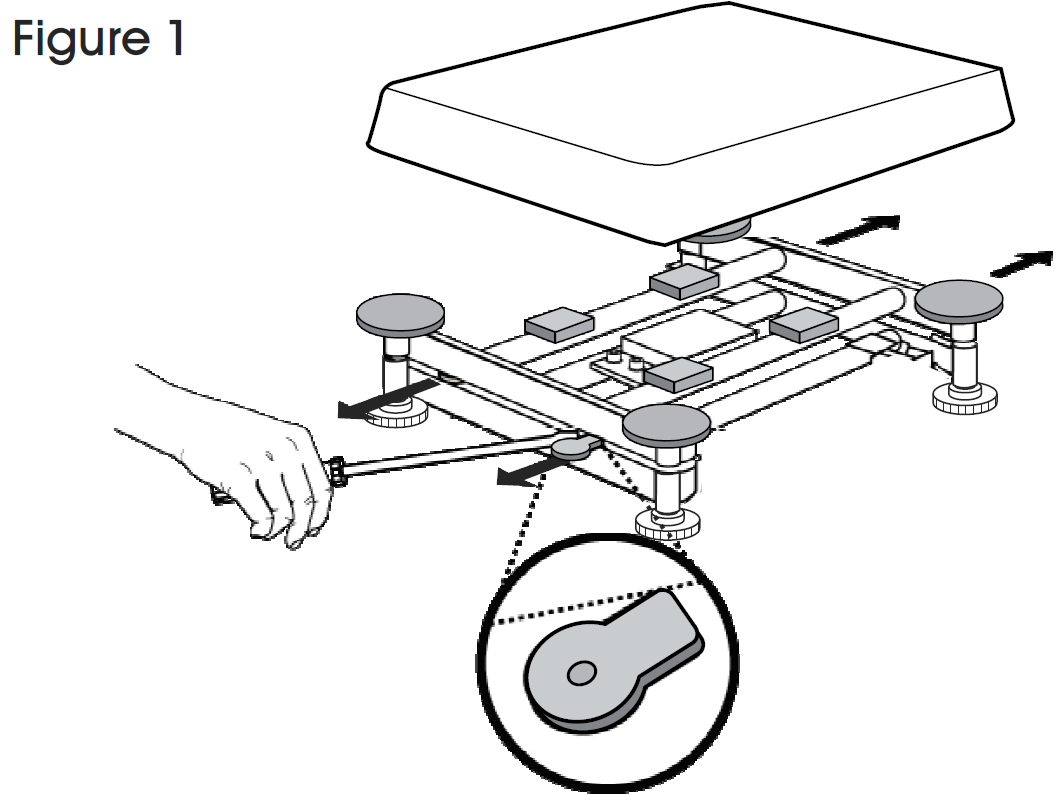
SETUP
Remove red shipping tags located under metal pan. (See Figure 1)
OPERATION
TURNING INDICATOR ON/OFF
- To turn the indicator on, press the ON/ZERO OFF button. The indicator performs a display test followed by a series of informational displays and then enters the active weighing mode.
- To turn the indicator off, press and hold the ON/ZERO OFF button until OFF is displayed.
MENU NAVIGATIONTO ENTER THE MENU MODE
- Press the TARE MENU button until MENU is displayed. When the button is released, the Legal for Trade status is displayed, followed by the first menu.YES Allows entry into the displayed menu. Views menu item setting. Accepts the displayed setting.NO/BACK Skips by the displayed menu. Rejects the displayed setting and advances to the next available item.EXIT Exits from menu directly to the current application.
- For menu items with numeric settings such as capacity, the current setting is displayed with all digits flashing. Press the NO button to begin editing.
- The first digit is displayed flashing.
- Press the NO button to increment the digit or press the YES button to accept the digit and move to the next digit.
- Repeat this process for all digits.
- Press the YES button when the last digit has been set.
- The new setting is displayed with all digits flashing. Press the YES button to accept the setting or press the NO button to resume editing.
- This method also applies to setting check weigh under and over targets.
- For end menu items, pressing the YES button advances to the next menu, while pressing the NO button returns to the top of the current menu.
CHANGE UNIT OF MEASURESET UNIT OF MEASURE AT STARTUP
Set the unit of measure displayed at startup to g, kg, lb., oz., lb:oz, t, c (custom unit) or auto (last unit in use when power was turned off).
- Once in the setup menu, press NO until the POWER ON UNIT setting is displayed.
- Press YES to enter the POWER ON UNIT setting.
- Press NO until the desired unit of measure is displayed.
- Press YES to accept the new unit of measure.
NOTE: Units oz, lb:oz and C (custom) will not be valid as Power On units when Range is set to Dual. The next available unit will be displayed instead.NOTE: Default set to auto.
ENABLE UNITS OF MEASURE
Units of measure must be enabled in the unit menu to select from the PRINT UNITS button.Once in the unit menu, you may turn units of measure on and off. (See Figure 1)
Reset: No, YesKilograms: Off, OnPounds: Off, OnGrams: Off, OnOunces: Off, OnPounds: Ounces Off, OnTonnes: Off, OnCustom: Off, On (-> Factor , Exponent,LSD)End Unit Exit UNIT menu
NOTE: Default settings are bold above.
- Press YES to accept the current setting (ON or OFF).
- Press NO to change the current setting (ON or OFF).
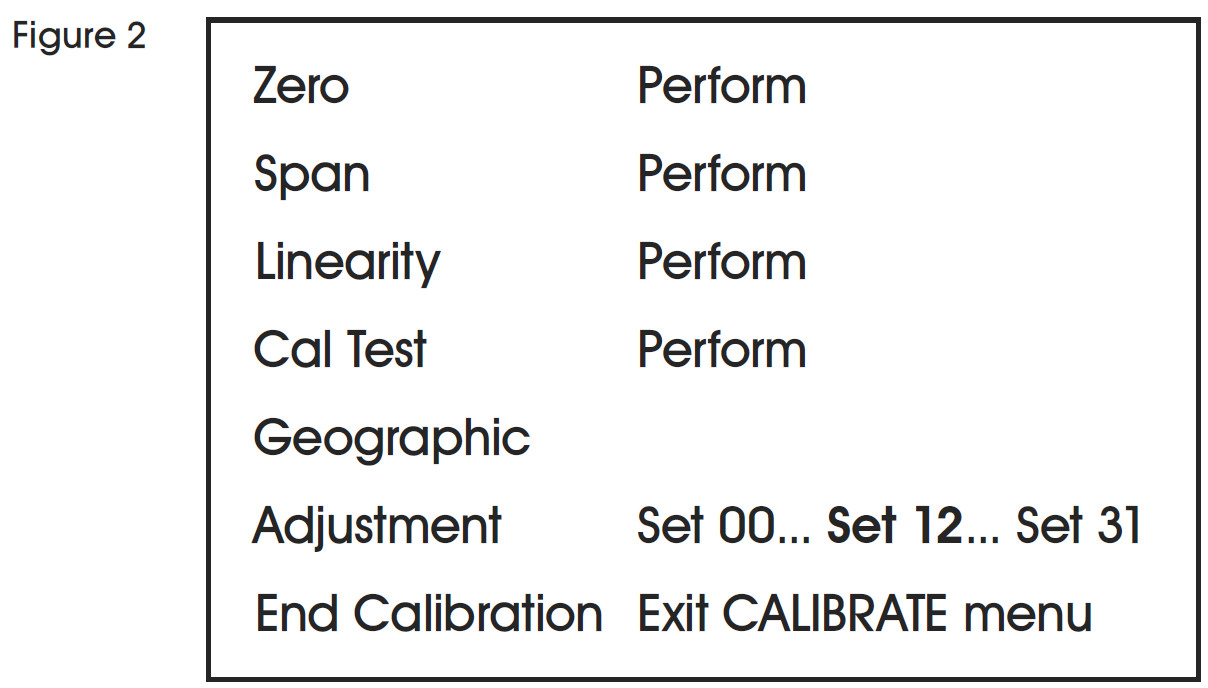
CALIBRATION MENU
Three calibration processes are available:zero calibration, span calibration and linearity calibration. (See Figure 2)
- Make sure that appropriate calibration masses are available before beginning calibration.
- Make sure that the scale base is level and stable during the entire calibration process.
- Calibration is unavailable with LFT set to ON.
- Allow the Indicator to warm up for approximately five minutes after stabilizing to room temperature.
- To abort calibration, press the EXIT button anytime during the calibration process.
- When any selection within the GMP menu is enabled, calibration results are automatically printed.
CALIBRATION VALUES
| MODEL # | SPAN CALIBRATION POINTS (kg.) | LINEARITY CALIBRATION POINTS (kg.) |
| H-2289 | 50 | 25, 50 |
| H-2290 | 100 | 50, 100 |
| H-2291 | 250 | 125, 250 |
LEGAL FOR TRADE
When the indicator is used in trade or a legally controlled application, it must be set up, verified and sealed in accordance with local weights and measures regulations. It is the responsibility of the purchaser to ensure that all pertinent legal requirements are met.SETTINGSBefore verification and sealing, perform the following steps:
- Verify that the menu settings meet the local weights and measures regulations.
- Perform a calibration.
- Set Legal for Trade to ON in the setup menu.
- Without exiting the menu, turn the indicator off.
- Disconnect power from the indicator and open the housing.
- Set the security switch to ON.
- Close the housing.
- Reconnect power and turn the indicator on.
NOTE: When Legal for Trade is set to ON and the security switch is set to ON, the following menu settings cannot be changed: Zero Calibration, Span Calibration, Linearity Calibration, GEO, Range, Capacity, Graduation, Power On Unit, Zero Range, Auto Tare, Retain Weight, Legal for Trade, Stable Range, Auto Zero Tracking, Gross Indicator, Modes, Units, Stable Only.
VERIFICATIONThe local weights and measures official or authorized service agent must perform the verification procedure.
SEALINGThe local weights and measures official or authorized service agent must apply a security seal to prevent tampering with the settings. (See Figures 3 and 4)
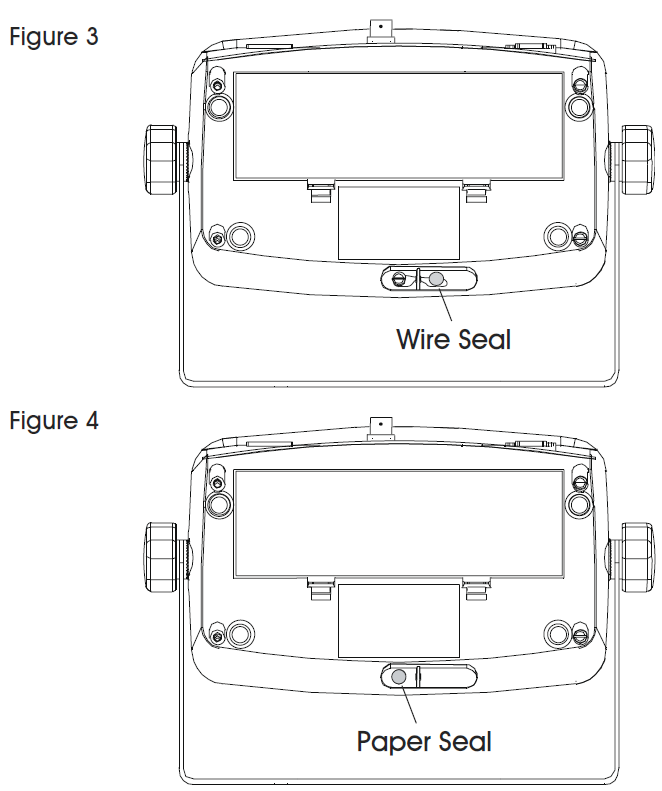
LOAD CELL SEALING COLLARWhen the scale base is attached to the indicator using a connector, it is necessary to seal the load cell cable to the indicator in some jurisdictions. The load cell sealing collar is available as an accessory. (See Figure 5)

MAINTENANCE
CAUTION! Disconnect the unit from the power supply before cleaning.
CLEANING
- The housing may be cleaned with a cloth dampened with a mild detergent if necessary.
- Do not use solvents, chemicals, alcohol, ammonia or abrasives to clean the housing or control panel.
TROUBLESHOOTING
| OPERATING ISSUE | CAUSES | RECOMMENDATIONS |
| Unit will not turn on. | Power cord not plugged in or properly connected.Power outlet not supplying electricity. Battery discharged.Other failure. | Check power cord connections. Make sure power cord is properly plugged into the power outlet.Check power source. Replace batteries.Service required. |
| Cannot zero the scale, or will not zero when turned on. | Load on scale exceeds allowable limits. Load on scale is not stable.
Load cell damage. |
Remove load on scale.
Wait for load to become stable. Service required. |
| Unable to calibrate. | Lock calibration menu set to On. LFT menu set to On.Incorrect value for calibration mass. | Set lock calibration menu to Off. Set LFT Menu to Off.Use correct calibration mass. |
| Cannot display weight in desired weighing unit. | Unit not set to On. | Enable units in the units menu. |
| Cannot change menu settings. | Menu has been locked. | Set selected menu to Off in the lock menu. Lockout switch on the circuit board may need to be set to the Off position. |
| Error 8.1 | Weight reading exceeds Power On Zero limit. | Remove load from scale. Recalibrate scale. |
| Error 8.2 | Weight reading below Power On Zero limit. | Add load to scale. Recalibrate scale. |
| Error 8.3 | Weight reading exceeds overload limit. | Reduce load on scale. |
| Error 8.4 | Weight reading below underload limit. | Add load to scale. Recalibrate scale. |
| Error 8.6 | Weight exceeds six digits. Display overflow. |
Reduce load on scale. |
| Error 9.5 | Calibration data not present. | Calibrate scale. |
| Battery symbol flashing. | Batteries are discharged. | Replace batteries. |
| CAL E | Calibration value outside allowable limits. | Use correct calibration weight. |
| NO.SW | Attempting to exit the menu with the LFT setting ON and the security switch OFF. | Refer to Settings in Legal for Trade section, page 8. Set the security switch to the ON position. |
| REF. WT Err | Reference weight too small. The weight on the platform is too small to define a valid reference weight. | Use a greater weight for sample. |
![]()
References
[xyz-ips snippet=”download-snippet”]