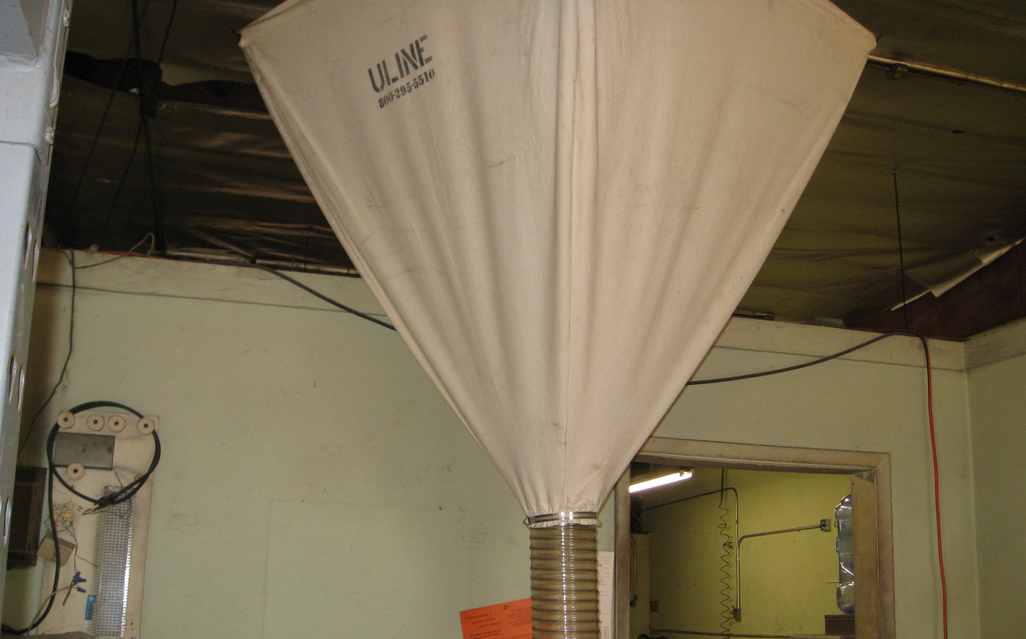
ULINE Peanut Dispensers
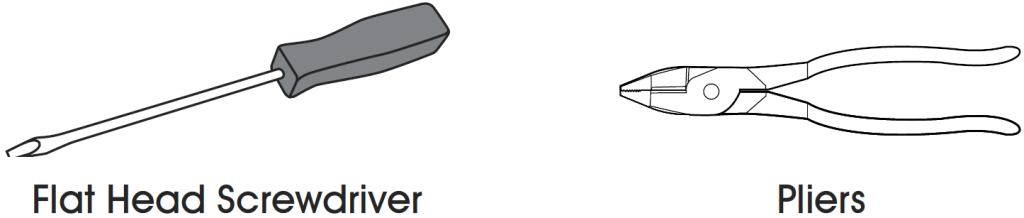
TOOLS NEEDED
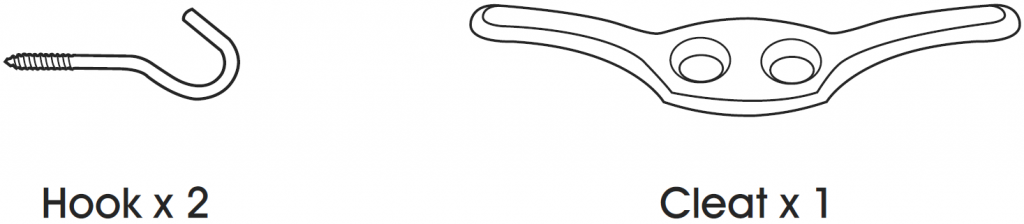
RECOMMENDED HARDWARE (NOT INCLUDED)
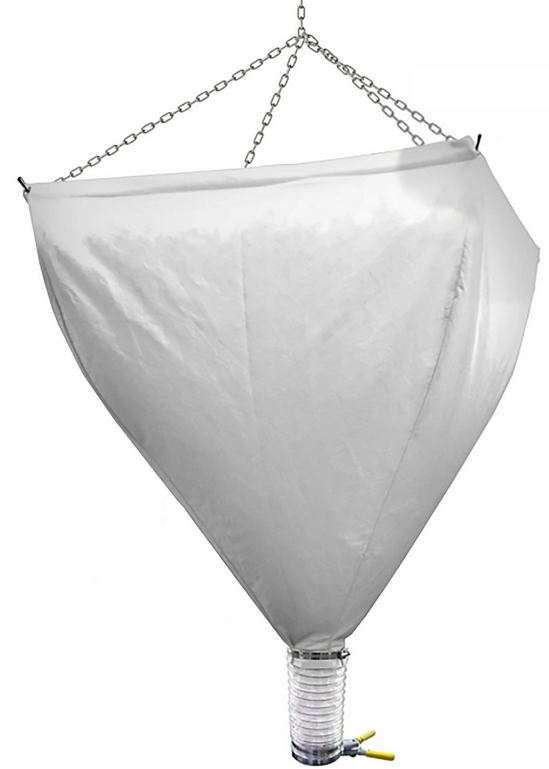
PARTS
|
PART |
QTY |
H-185 |
H-186 |
| Capacity |
———– |
20 CU. FT. |
40 CU. FT |
| Canvas Bag |
1 |
✓ |
✓ |
| Chain and Rope |
1 |
✓ |
✓ |
| Flex Tubing |
1 |
✓ |
✓ |
| Steel Rod |
2 |
✓ |
✓ |
| Valve Assembly |
1 |
✓ |
✓ |
| Clamp Ring |
1 |
✓ |
✓ |
| U-Bolt |
1 |
✓ |
✓ |
| Pulley |
2 |
✓ |
✓ |
INSTRUCTIONS
NOTE: Read instructions thoroughly. Remove all components from box and locate all parts. Remove pulley and U-bolt from rope.
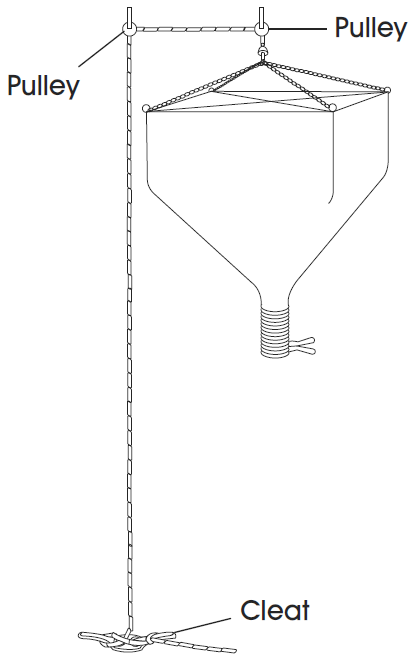
INSTALLING PULLEYS
- Attach pulleys to ceiling using hook or other secure method.
- Make sure one pulley is positioned directly above the center of dispenser and the other clears the side of bag so rope will not interfere when raising and lowering bag.
- Ensure rope tie-off method is in place (cleat, anchor, post, etc.).
INSTALLING VALVE ASSEMBLY
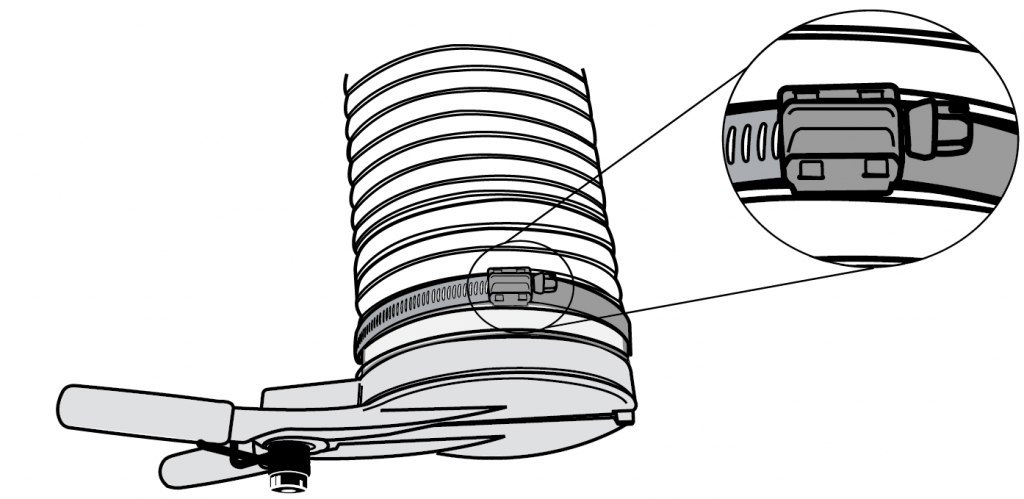
- Slide clamp ring over open side of tubing.
- Insert valve assembly into bottom of flex tubing. Ensure tubing covers entire flange.
- Turn yellow handles to desired position.
- Slide clamp ring down around tubing, covering flange, and tighten screw with flat head screwdriver.
SETTING UP CANVAS BAG
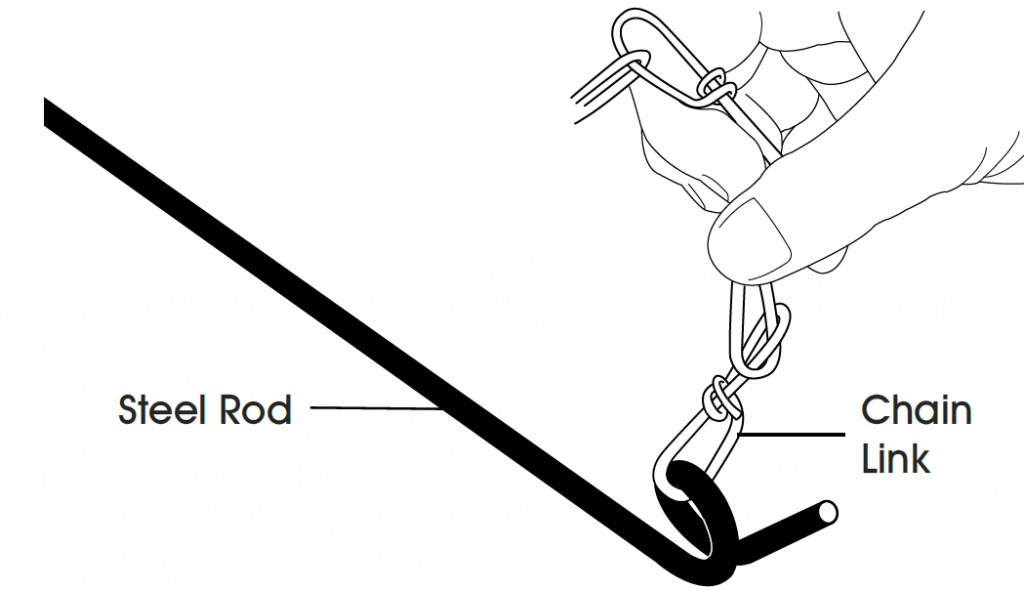
- Locate two steel rods with tail ends.
- Insert end of chain link into the loop of rod.
- Repeat step two with the other chain links.
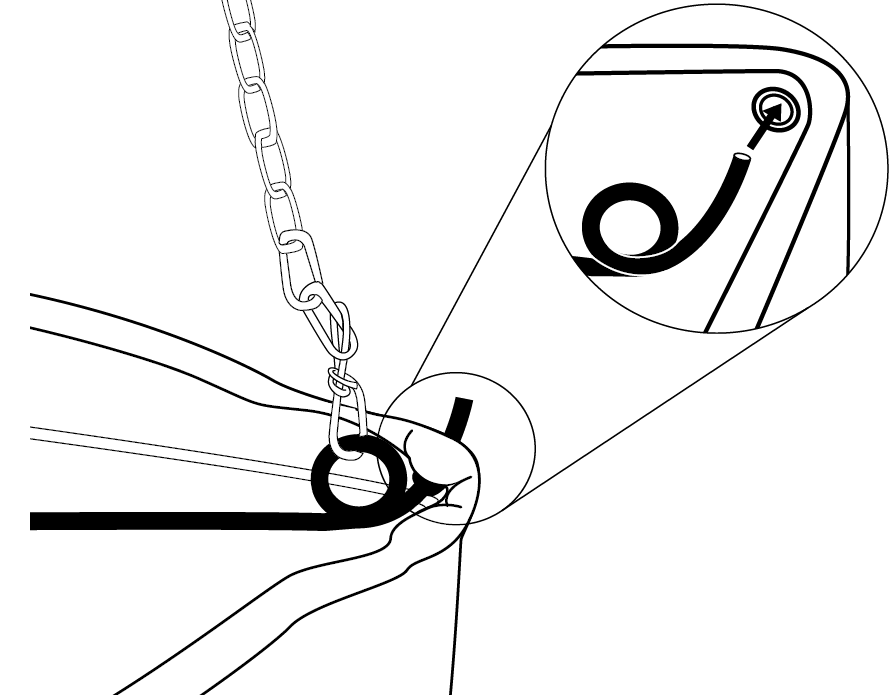
- Insert one tail end through grommet at corner of canvas bag. Do not try to fit grommet into the loop.
- Insert the other tail end through grommet on the opposite side of canvas bag.
- Repeat step four and five with the second rod creating an “X” across the bag.
- Locate U-bolt and remove the two nuts and plate from the bolt.
- Place U-bolt over the center of rods “X” formation.
- Re-insert plate then the two nuts on the U-bolt. Tighten nuts with pliers.
- Thread rope through both pulleys.
- Raise bag to desired height and tie off rope.

1-800-295-5510uline.com
![]()
[xyz-ips snippet=”download-snippet”]