ULINE Price Tag Gun Installation Guide
![]() IMPORTANT! Read all instructions and warnings before using these tools.
IMPORTANT! Read all instructions and warnings before using these tools.
INSTALLING AND REMOVING NEEDLES
TO INSTALL NEEDLE
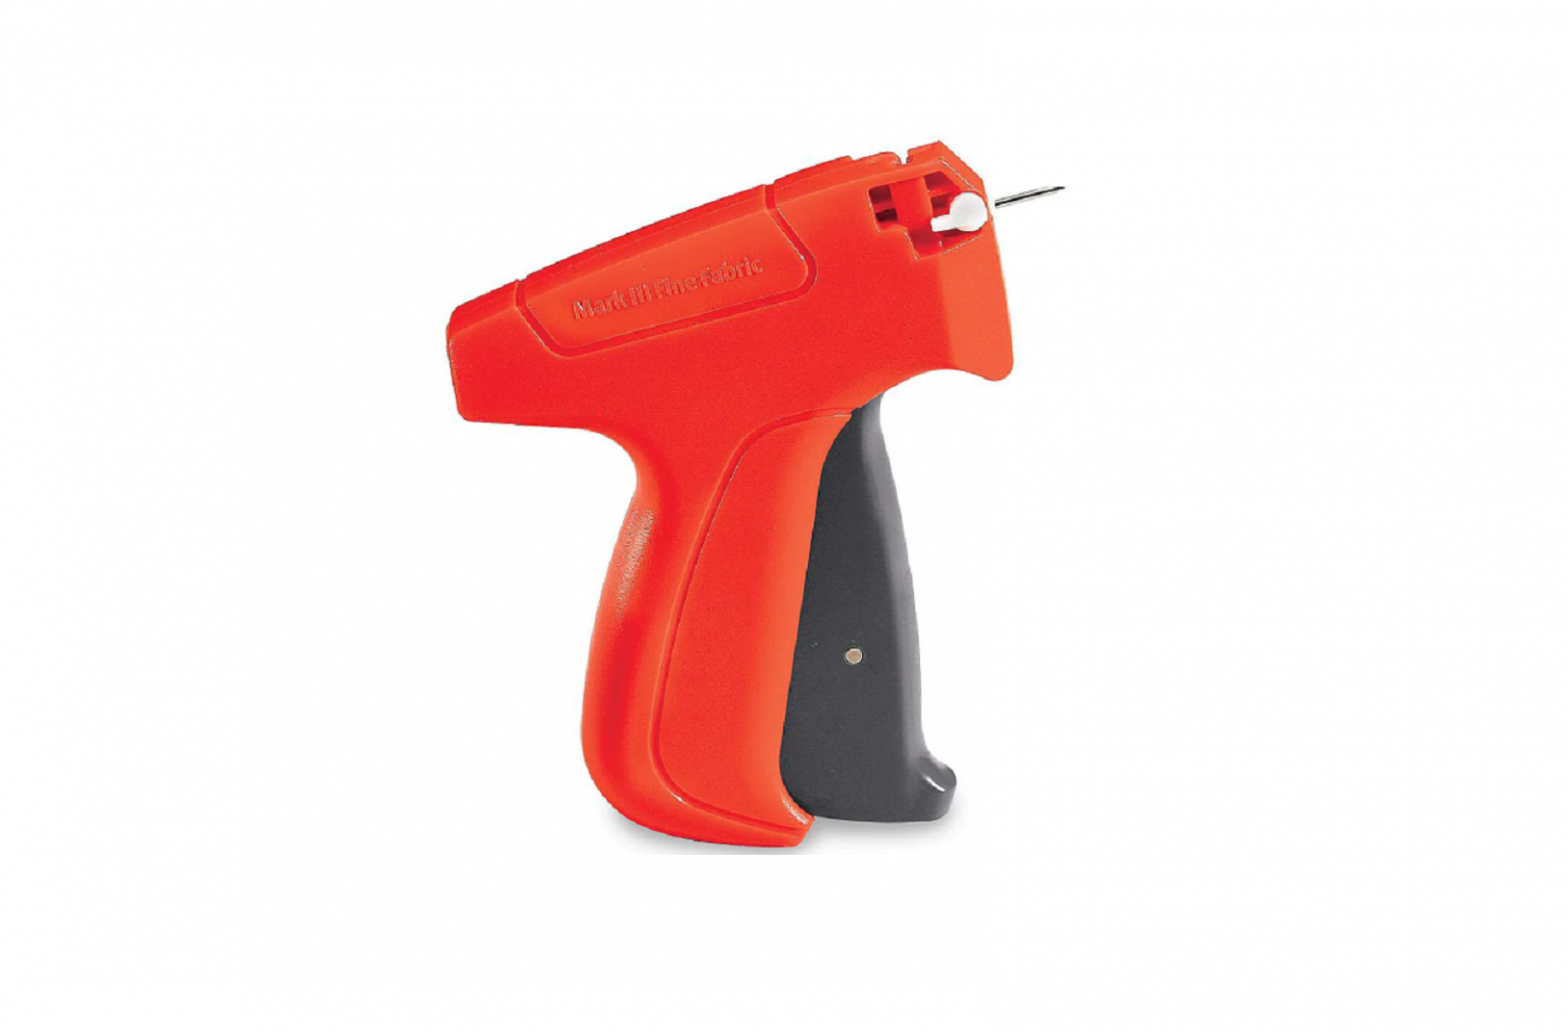
- Slide needle guard over needle. (See Figure 1)
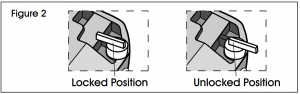
- Put needle lock lever in unlocked position (lever pointed to front of tool). (See Figure 2)
- Place tool so lock lever faces away from you.
- Insert needle by aligning side slot on needle with guide slot on tool.
- Turn needle lock lever to locked position (lever pointed to back of tool). (See Figure 2)
- Remove needle guard.


TO REMOVE NEEDLE
- Slide needle guard over needle.
- Put needle lock lever in unlocked position (lever pointed to front of tool). (See Figure 2)
- Slide the needle out of the tool.
- Dispose of needle in a Biohazard Sharps container. NOTE: For contaminated needles, see safety instructions on page 2.
LOADING AND ATTACHING FASTENERS
TO LOAD FASTENERS
- Insert the end of the round connecting bar on the fastener clip into the round guide slot at the top of the tool. (See Figure 1)
- Gently push the fastener clip into the guide as far as it will go. Tool is ready for use.
TO REMOVE A PARTIALLY USED CLIP
- Fully depress the trigger and remove the clip by pulling upwards. NOTE: Always depress the trigger when removing a clip of fasteners from the tool. Failure to do so may cause the tool to jam.
TO ATTACH FASTENERS
- Insert the needle through the hole in the tag.
- Insert the needle through the garment.
- Hold the material firmly against the front of the tool and squeeze the trigger.
- Release the trigger.
- Withdraw the needle and tool from the garment.
SAFETY INSTRUCTIONS
![]() WARNING! Needle sticks can transmit life-threatening diseases if shared. Use only your own tool and needle. Protective gloves recommended. Immediately discard any needle that sticks you (see below).
WARNING! Needle sticks can transmit life-threatening diseases if shared. Use only your own tool and needle. Protective gloves recommended. Immediately discard any needle that sticks you (see below).
TO DISCARD A CONTAMINATED NEEDLE
- Use an adhesive bandage to immediately remove contaminated needle and to avoid contaminating needle guard.
- Dispose of needle and bandage in an approved Biohazard Sharps container.
TO REDUCE THE CHANCE OF NEEDLE STICKS
- Use a protective glove while tagging.
- Put needle guard on needle when not in use and when installing or removing uncontaminated needles.
FOLLOWING THESE WARNINGS IS IMPORTANT
- Invisible traces of infected blood can remain on the needle for days after a needle stick.
- Someone else could use your tool by mistake.
- A contaminated needle can infect the next person who gets stuck, transmitting HIV. hepatitis or other blood biome diseases.
Customer service
- For more details. see OSHA 3127 and 29 CFR 1910.1030.
- Call thine Customer Service at 1400-295.5510 to, information on productive tagging gloves.
ULINEPhone: 1-800-295-5510Web: uline.com

[xyz-ips snippet=”download-snippet”]