
![]()
H-2561 H-2562RECTANGULAR PICNIC TABLE
1-800-295-5510uline.com

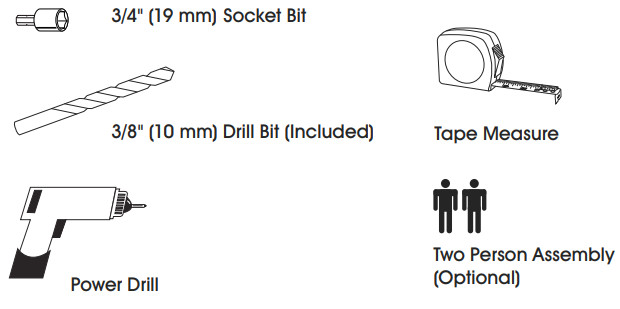
TOOLS NEEDED
 PARTS
PARTS
 PARTS
PARTS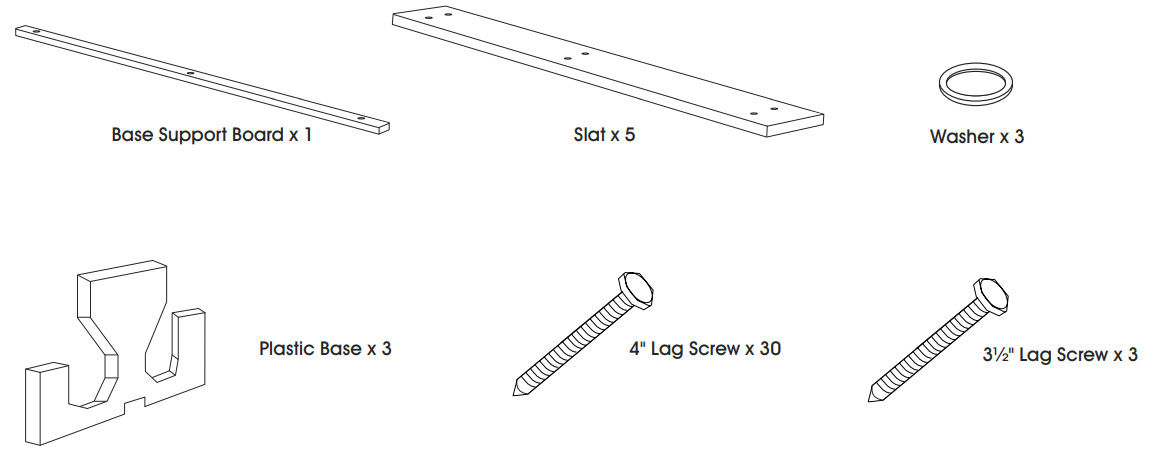
ASSEMBLY
![]() NOTE: It is important to keep lag screws loose throughout the assembly. Tighten during step 8.
NOTE: It is important to keep lag screws loose throughout the assembly. Tighten during step 8. WARNING! Do not lean on tabletop or seats when assembling.
- Verify all parts are present before beginning.
- Place the three plastic bases on a flat level surface using the base support board to keep them straight. You will attach this board in step 7. (See Figure 1)
ASSEMBLY CONTINUED
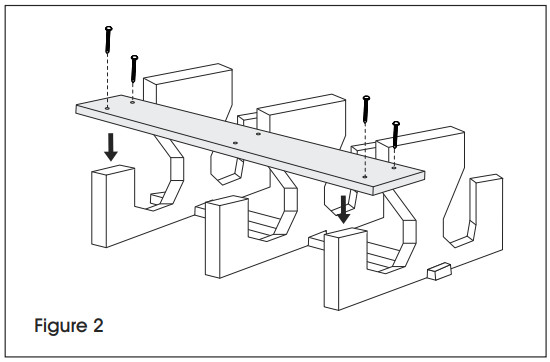
- Place one table slat on each side of the plastic base (seat area). Pre-drill the end holes on the slats using the power drill and 3/8″ drill bit. Loosely attach slats to the plastic base using 4″ lag screws, power drill and 3/4″ socket bit (will tighten later in step 8). (See Figure 2)
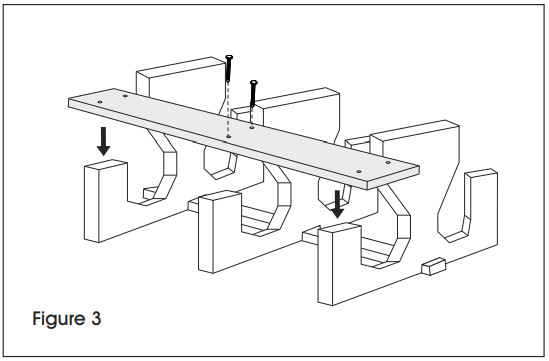
- Pre-drill center holes on the slats using the power drill and 3/8″ drill bit. Loosely attach slats to plastic bases using the 4″ lag screws, power drill and 3/4″ socket bit (will tighten later in step 8). ( See Figure 3)
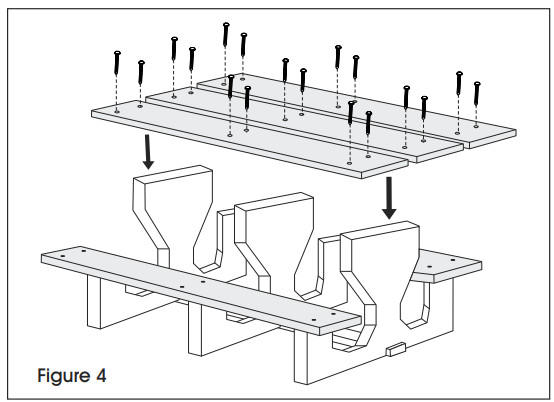
- Determine the spacing for the slats on the tabletop. Pre-drill holes on the slats using the power drill and 3/8″ socket bit. Loosely attach slats to the plastic base using 4″ lag screws, power drill and 3/4″ socket bit (will tighten later in step 8). (See Figure 4)
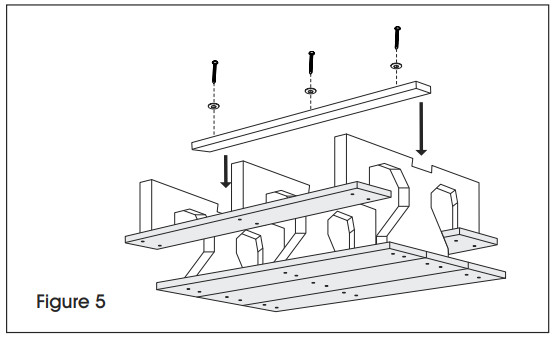
- Turn table upside down. CAUTION! Due to the weight of the table, seek assistance to turntable upside down.
- Attach base support board into the indent in the plastic base bottom using the 3½” lag screws, washer, power drill, and 3/4″ socket bit. (See Figure 5)
- Turntable right side up. Make sure the table is square and tighten all lag screws. NOTE: H-2565 Mounting hardware sold separately.

![]()
1-800-295-5510uline.com
0721 IH-2561
[xyz-ips snippet=”download-snippet”]