![]() H-8456, H-8457 H-8458STAINLESS STEEL OVER SHELF
H-8456, H-8457 H-8458STAINLESS STEEL OVER SHELF
1-800-295-5510uline.com

TOOLS NEEDED

PARTS

ASSEMBLY
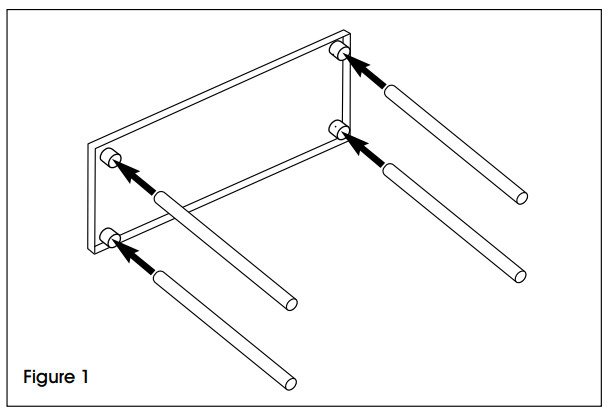
- With the center shelf on its side, push legs through the shelf collars to the desired height. To ensure the exact height, mark desired height on each leg with magic marker or grease pencil. (See Figure 1)
 NOTE: Each leg must be at the same height or shelf collars could fail.
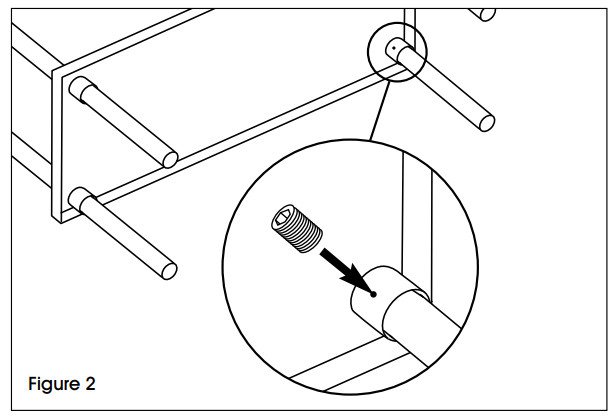
 - Secure legs to center shelf with set screws using 5/32″ Allen wrench. (See Figure 2)
ASSEMBLY CONTINUED
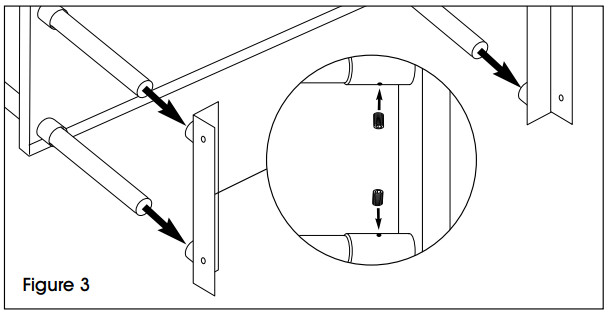
- Place the bottom of legs into shelf bracket collars. Secure legs to shelf brackets with set screws using a 5/32″ Allen wrench. (See Figure 3) NOTE: Opening of shelf collars should face the inside of assembly.
- Stand assembly upright onto shelf bracket collars. Place top shelf onto assembly by lining up top-shelf collars with top of legs and sliding into place. Secure legs to top shelf with set screws using 5/32″ Allen wrench. (See Figure 4)
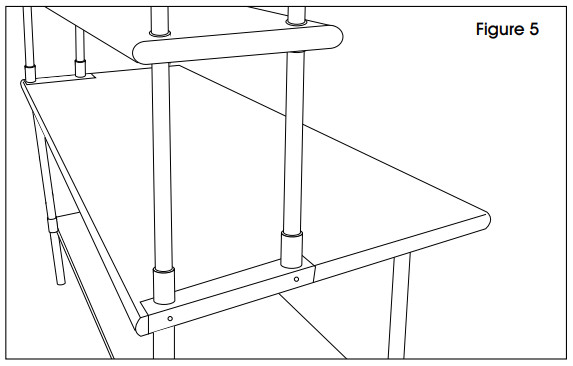
- Place over-shelf assembly on top of the worktable by lining up shelf brackets with the edge of the table at each end. Make sure both sides are positioned in the same area of the tabletop. (See Figure 5)
- Mounting collars have two holes on the sides for securing to the tabletop. Using collar holes as a template, drill through the side of the tabletop with a supplied Cobalt drill bit. (See Figure 6) NOTE: It may take a few seconds for the drill bit to work its way through the stainless material.
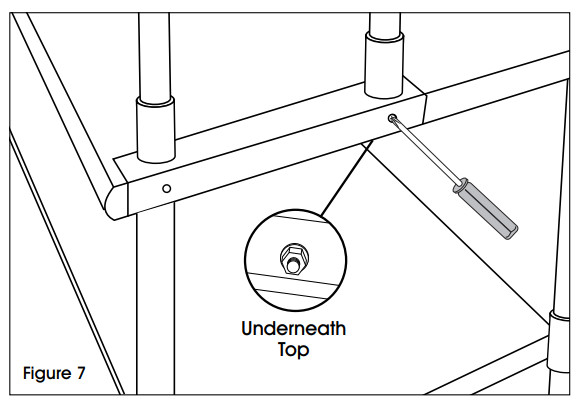
- If the drilled holes are accessible underneath the tabletop, then secure this part of the shelf bracket to tabletop with an M5 x 10 mm Phillips head bolt and M5 flange nut using a Phillips screwdriver and 8 mm wrench. (See Figure 7) NOTE: If holes are not accessible, secure with a sheet metal screw using a Phillips screwdriver. Flange nut will not be needed.


![]()
1-800-295-5510uline.com0721 IH-8456
[xyz-ips snippet=”download-snippet”]