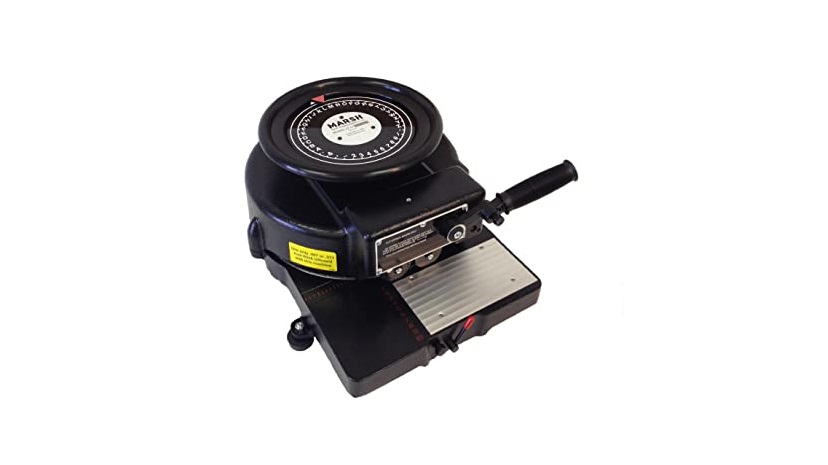
ULINE Stencil Machine User Guide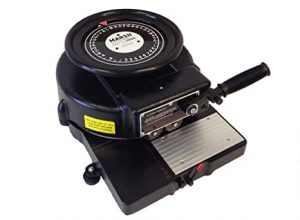
OPERATION
NOTE:No assembly is necessary after you unpack your machine.
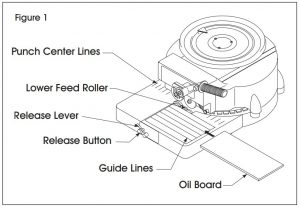
INSERTING THE OIL BOARD
- Move the release lever to the right. This drops the lower feed roller and allows space to insert the oil board.
- Position the oil board so the top edge covers the punch center lines and then align the bottom edge of the oil board with the appropriate (See Figure 1)NOTE: The left edge of the oil board may align with the left side of the guideline markings. If you need a wider left margin, you may align the left edge of the oil board with one of the punch center lines. (See Figure 1)
- When the oil board is in position, push the release The release lever snaps back to its original position and raises the lower feed rollers to secure the oil board.

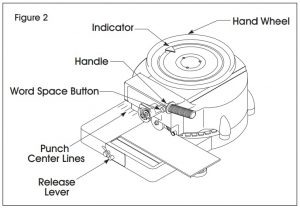
CUTTING THE OIL BOARD
To cut and space characters, follow the steps below and refer to Figure 2.
- Move the hand wheel and align the indicator with the desired character.
- When the indicator is aligned, push the handle down.
- To create a space between words, press the word space button on the handle as you push down. (See Figure 2)
- When a line of stenciling is complete, swing the release lever to the right to release the lower feed rollers.
- Align the oil board in the starting Advance the top of the oil board into the machine and align the bottom of the oil board with an appropriate guideline.
Contact us
1-800-295-5510

[xyz-ips snippet=”download-snippet”]