![]()
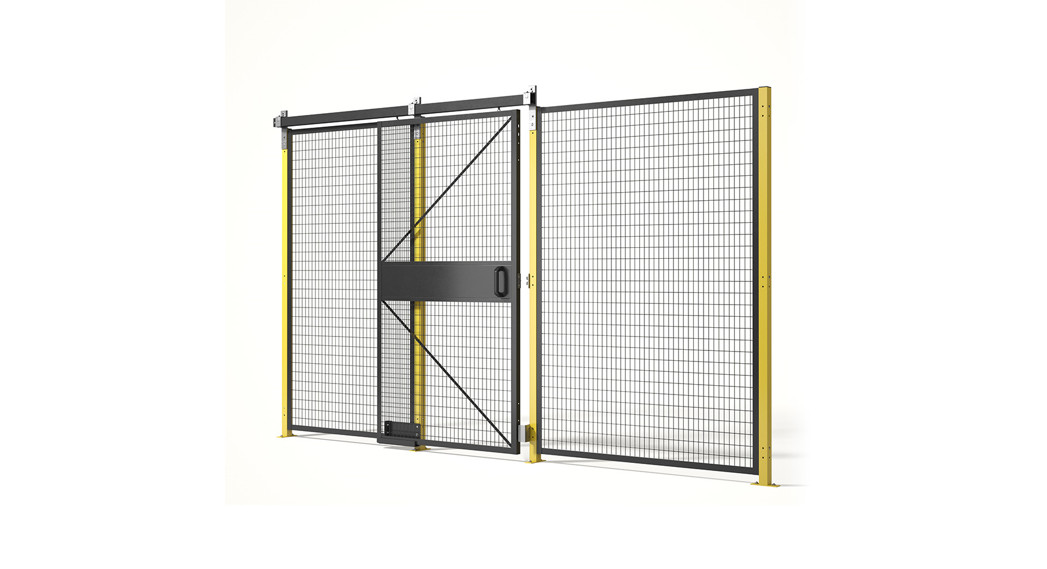
WIRE MACHINE GUARD
1-800-295-5510uline.com
TOOLS NEEDED

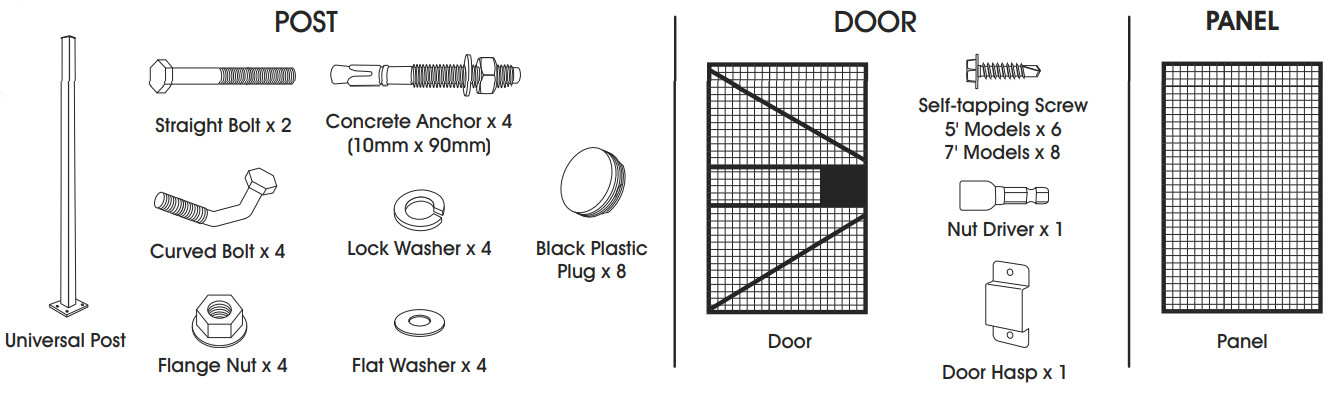
PARTS
INSTALLATION
Prior to installation, read instructions all the way through and determine guard placement. The included hardware allows for panels to be installed end to end, as a 90º corner or as a T-intersection.![]() NOTE: Be sure to include the additional width of the posts and mounting plate dimensions when determining placement.
NOTE: Be sure to include the additional width of the posts and mounting plate dimensions when determining placement.![]() NOTE: One side of the post features four drill holes for attaching the door. Make sure to position the post in the proper orientation if attaching a door to the other side.
NOTE: One side of the post features four drill holes for attaching the door. Make sure to position the post in the proper orientation if attaching a door to the other side.
MOUNTING THE POSTS
- Verify that the first post is positioned in the desired location. Mark the floor where the holes will be drilled.
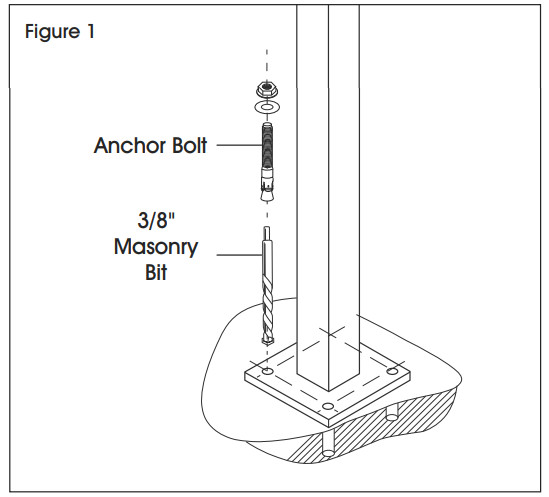
- Using a 3/8″ masonry drill bit, drill a hole approximately 3″ deep into the floor. (See Figure 1)
 Clean out debris and dust from inside the hole, and fully insert anchor bolt through the mounting plate and into the hole.PAGE 1 OF 6
 - Slightly tap down the anchor bolt with a hammer if needed. Slide a washer onto the anchor bolt. Using a 17mm wrench, tighten the hex nut until the anchor bolt is secure. Repeat for remaining anchors.
 Clean out debris and dust from inside the hole, and fully insert anchor bolt through the mounting plate and into the hole.PAGE 1 OF 6
INSTALLATION CONTINUED
ATTACHING PANELS TO POSTS![]() NOTE: For H-5611-7 8 x 7′ panel, use four included nuts and bolts to attach two-panel halves together.
NOTE: For H-5611-7 8 x 7′ panel, use four included nuts and bolts to attach two-panel halves together.
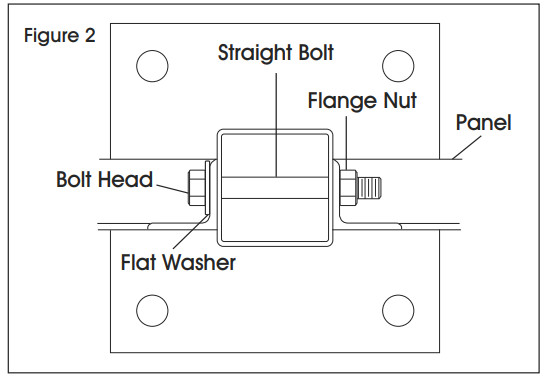
- For a straight run, end to end, use straight bolts and flat washers. (See Figure 2) Use a 13mm wrench to tighten. NOTE: Safe installation requires two people.
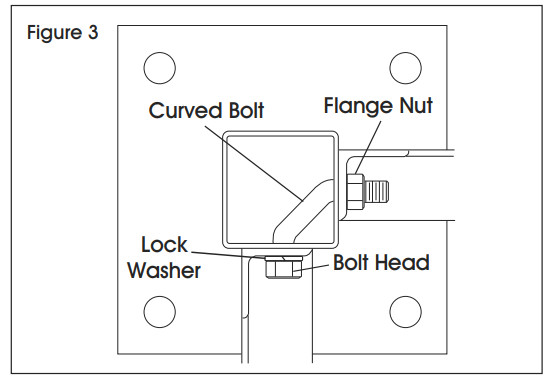
- For a 90º corner, use curved bolts and lock washers. (See Figure 3)
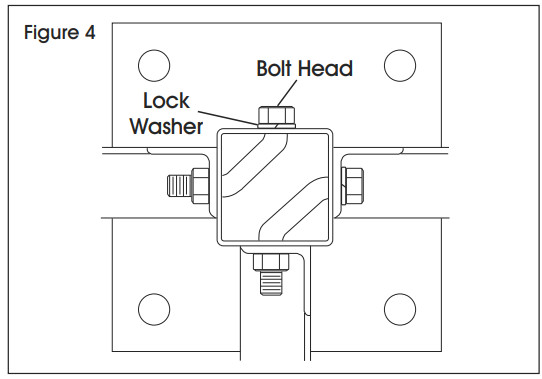
- For a T-intersection, use curved bolts and lock washers. (See Figure 4)
- Attach the opposite end of the panel to the second post.
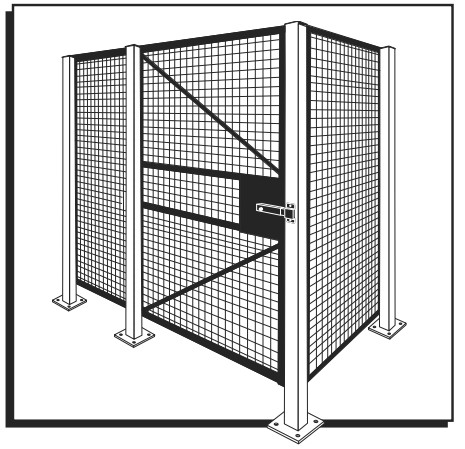
ATTACHING DOOR TO POSTS
- Mount door to post. Doors swing outward, away from the enclosure. Determine which side to anchor the door on.a. If anchoring on the existing post, proceed to part b. If anchoring on the opposite post, use the door width to determine the proper mounting distance and install the opposite post. Take care to measure post to post. Too large of a gap will prevent the door from functioning properly.b. Line up the hinges with the pre-drilled holes on the post. Attach the hinges using the provided self-tapping screws and nut driver. NOTE: Use a screw gun with an adjustable clutch, and take care not to over tighten and strip the threads. DO NOT USE IMPACT-TYPE GUNS.
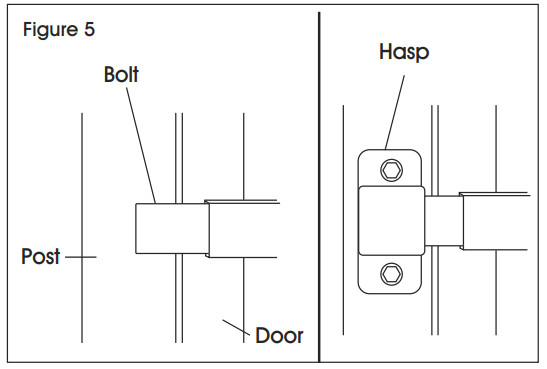
- Install hasp. Close the door and slide the bolt out and across the post. Position the hasp and screw it into the post using the self-tapping screws. (See Figure 5)
![]() NOTE: Holes for hasp are not pre-drilled. Apply pressure with self-tapping screws to puncture post.TO COMPLETE ASSEMBLY: Use black plastic plugs to cover any unused bolt holes in the posts.
NOTE: Holes for hasp are not pre-drilled. Apply pressure with self-tapping screws to puncture post.TO COMPLETE ASSEMBLY: Use black plastic plugs to cover any unused bolt holes in the posts.
![]()
1-800-295-5510uline.com
0721 IH-5607
[xyz-ips snippet=”download-snippet”]