URSA Mini Recorder User Guide
Introduction
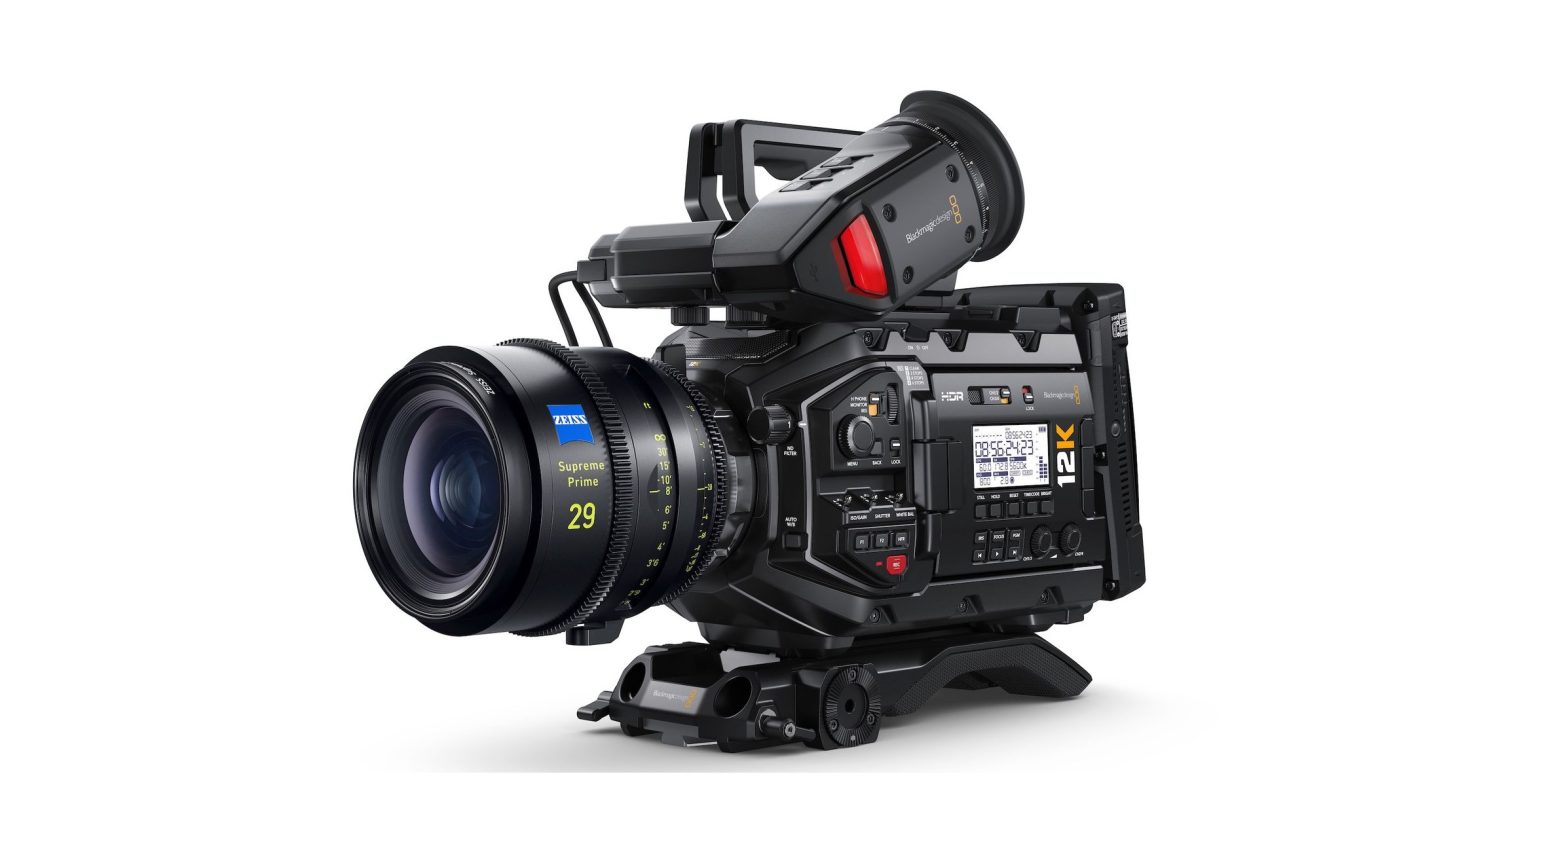
Blackmagic URSA Mini Recorder is an optional module which attaches to the rear of URSA Mini Pro 12K. This recorder allows you to record footage, including 12K Blackmagic RAW files, to high capacity and inexpensive solid state drives, or ‘SSDs’.
NOTE URSA Mini Recorder is designed for use with URSA Mini Pro 12K and is compatible with URSA Mini Pro 4.6K G2. It is not compatible with URSA Mini Pro 4.6K, URSA Mini 4.6K and URSA Mini 4K.
When attaching URSA Mini Recorder, you will need the following tools:
- 1 x phillips head screwdriver
- 1 x T10 torx screwdriver
- 1 x 2mm hex key driver
To attach the URSA Mini SSD Recorder to your URSA Mini you will need a large phillips head screwdriver , a T10 torx driver, and a 2mm hex key driver.
Mounting and connecting URSA Mini Recorder
URSA Mini Recorder mounts to the back of URSA Mini directly behind the camera body, using your camera’s rear USB-C data port to pass data to and from URSA Mini Recorder.
TIP: URSA Mini Recorder features a passthrough cable for your camera’s battery power supply, so you can attach V-mount or gold mount batteries to the rear of the camera behind the recorder.
To mount and connect URSA Mini Recorder:
- Power off URSA Mini Pro by moving the ‘power’ switch to ‘off’.
- Unmount any battery plates currently fitted to your camera. For more information on mounting and unmounting battery plates, see the section ‘mounting batteries’ in this manual.
- Attach URSA Mini Recorder’s mounting bracket using 6 x T10 torx screws.
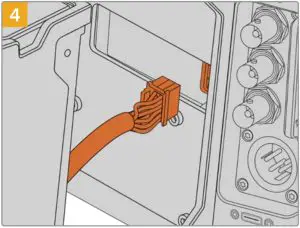
- Plug the molex connector on URSA Mini Recorder into the molex socket on your camera’s rear panel.

- Attach URSA Mini Recorder to the mounting bracket using 2 x T10 torx screws on the left and right side of the brackets.
- Connect the Mini Recorder’s USB-C cable to the USB-C data port on the rear of URSA Mini Pro 12K. Tighten the locking connectors with your fingers, or use a 2mm hex key driver. To use with URSA Mini Pro 4.6K G2, use a longer USB-C cable and connect it to the USB-C port above the CFast slots.
- If you want to use a battery plate with URSA Mini Recorder, use a 2mm hex key driver to remove the four M3 screws holding the molex socket cover panel in place. Once the molex socket is uncovered, attach a battery plate using the steps outlined in the section ‘mounting batteries’ in this manual.
Using URSA Mini Recorder
When URSA Mini Recorder is connected and an SSD is loaded, the recorder takes over from URSA Mini’s number ‘2’ storage slot. You’ll see an ‘SSD’ indicator over slot 2 on your camera’s storage manager when URSA Mini Recorder is in use.
 When an SSD is inserted into URSA Mini Recorder, your camera’s storage manager will display ‘SSD Recorder’ over storage slot 2.
This means that recording, playback and storage management is exactly the same for SSDs as it is for CFast or SD cards. For general information on storage management, as well as specific instructions for choosing SSDs, see the ‘storage media’ section of this manual.
Status LEDs
URSA Mini Recorder has one status light on the left side for ‘SSD.’ The brightness of this indicator can be set to ‘low,’ ‘medium,’ ‘high’ or ‘off’ in your camera’s ‘setup’ menu.
SSD
The ‘SSD’ indicator shows the status of the SSD currently inserted. This LED provides the following status indicators:
- GreenYour URSA Mini Recorder will show a short green light when you insert an SSD into it. This is shown while it is verifying the SSD. When the indicator turns off your SSD Recorder is ready to record. The status light will also be green while footage is being played back from the SSD.
- RedYour URSA Mini Recorder will show a red light while it is recording to SSD. When the space on your SSD is running low the red light will begin to flash slowly.A fast flashing red light indicates that SSD is dropping frames. If this happens please check that you are using a disk from our recommended list of SSDs and that you are recording at a data rate that is compatible with your media.
- Orange:If a problem has occurred while mounting the SSD the status light will go Orange. This may be the result of an improperly formatted or incompatible SSD. See the ‘storage media’ section in this manual for a list of compatible SSDs and formatting instructions.
report this adTIP: If the ‘SSD’ LED indicates a drive mounting error it may need to be ‘initialized’ on a mac or PC using disk utility or disk management.
[xyz-ips snippet=”download-snippet”]